How Can We Help?
Creating aNinja Triggers
Creating aNinja Triggers allow you to programmatically trigger actions based on specific events and conditions.
Creating aNinja Triggers
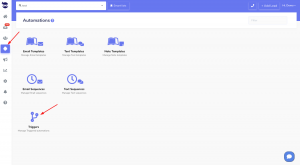
- On the left sidebar, click on Automations > Triggers.
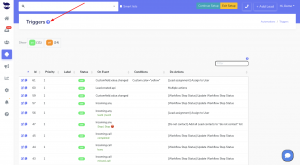
- Go ahead and click on the help (?) icon next to Triggers. This redirects you to a short youtube video to get an overview of the triggers.
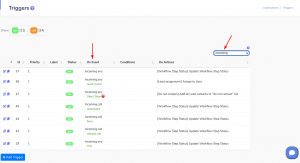
- You can also filter your triggers by typing your search in the search bar. e.g.
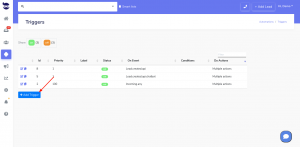
- Now, click on Add Trigger
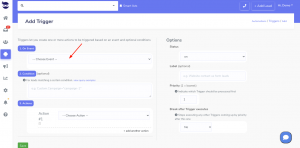
- Choose the Trigger Event from the drop-down
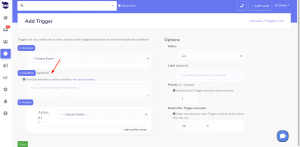
- Choose whether to add a Trigger Condition (optional)
- The condition could be e.g. a custom field = Source = Facebook (Custom.Source=”Facebook”). This way, you narrow your search and target more specifically the leads that match the event of the trigger and this condition.
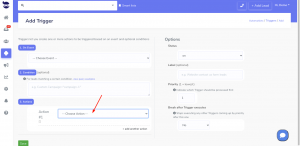
- Finally, select the Trigger Actions you actually want to kick off when that event with those specific conditions takes place.
-
- You can add multiple actions to be executed when the event takes place.
Trigger’s events
Choose the Trigger Event from the drop-down:
- Incoming call
- Define the incoming call type
- Incoming email or SMS
- Body content matching
- Specify the type of matching
- Lead created via API
- Lead created via Chatbot
- Outgoing SMS with an error code
- Select the error code
- Workflow step status changes
- Select the step
Trigger’s actions
You can add multiple actions to be executed when the event takes place.
- [Delay] Set delay duration in minutes for triggering event actions
- [Do not contact] Add all lead contacts to “do not contact” list.
- [Do not contact] Remove all lead contacts to “do not contact” list.
- [Email] Send lead info to an email address (from: no-reply@aninja.com)
- [Lead Assignment] Assign to User
- [Lead Assignment] Assign to Users from Team (using Round Robin)
- [Lead Assignment] Assign to Users from Team (using Weighted Round Robin)
- [Lead merge] Merge new lead into existing duplicate
- [Sequence > Email] Start Email Sequence
- [Sequence > Text] Start Text Sequence
- [Sequences > Stop] Stop all sequences & Conversations (Email & Text)
- [Webhooks] Post Lead Details to URL
- [Workflow Step Status] Update Workflow Step Status
Trigger’s Options
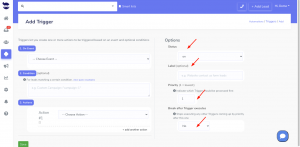
Set the Options to:
- ON/OFF to
- Activate/deactivate the trigger.
- Indicate the priority of execution (in case there were other triggers in action).
- 1 is the lowest priority
- Break after Trigger Executes
- Stops executing any other triggers coming up by priority after this one
- Don’t forget to Save
Examples of Tiggers
Example 1:
- On an event that is “Incoming email or SMS“
- Choose to execute an action to “Stop Sequences and Conversations (emails & texts)“
As a result, the lead that replied to you by text or email will stop receiving the rest of the sequence he is enrolled in.
Example 2:
- On an event that is “Incoming email or SMS”
- Add a body content matching Stop | Unsubscribe
- Choose to execute a first action to “Add all lead contacts to the “do not contact” list”
- Choose to execute a second action to “Stop Sequences and Conversations (emails & texts)“
Subsequently, the lead that replied to you by text (this option is only available for texts presently), with stop or unsubscribe will be moved to the “do not contact” list.
As a matter of fact, the lead will still be included in the future sequences, but their texts get blocked from our side so it doesn’t get actually sent.
You can check them by clicking on the blocked leads count in ‘Bulk Sequences’ widget.
Example 3:
- On an event that is “Lead created via API“
- Choose to execute an action to “Start Email Sequence”
- ==> Choose which Email Sequence to use (e.g. “Welcome”)
- ==> Choose which Email Account to use (e.g. “demo@gmail.com”)
So now, when a lead is created via API, he will receive the first step of the “Welcome” sequence, based on the delay you’ve set in the sequence, launched from the demo@gmail.com account.
Example 4:
- On an event that is “Change in the Workflow step”
- Choose to execute an action to “add a lead’s contact to the “do not contact” list”
- ==> When changed to: “Sales / Opp Status / Deal Closing”.
Afterward, when you change a lead’s workflow step to Sales / Opp Status / Deal Closing, he will be added to the “do not contact” list.
Example 5:
- On an event that is “Lead created via Chatbot“
- Choose to execute an action to “Assign to user”
- ==> Select a user (e.g. John Doe)
As a result, when a lead is created into your account through Chatbot, he is automatically assigned to John Doe.
Example 6:
- On an event that is “Incoming Call“
- Type of call ==> “Missed Call”
- Choose to execute an action to “Assign to user”
- ==> Select a user (e.g. John Doe)
- Add a second action “Start Text Sequence”
- ==> Choose which Text Sequence to use (e.g. “Thank you for reaching out”)
As a result, when you miss a call from a lead, they’re automatically assigned to John Doe, AND, they receive a thank you text.
