How Can We Help?
Mapping fields for Leads Bulk Import
aNinja offers different ways to create leads in your account. Importing leads in a CSV file is one of them.
Before the import, you want to sanitize the contacts file to ensure proper mapping.
The correct mapping of leads’ data to aNinja fields saves your data in the right place which makes searching for it easy.
You can also save bulk import mappings and reload it when you have a similar file to import (same order and number of headers).
Mapping leads data to aNinja fields
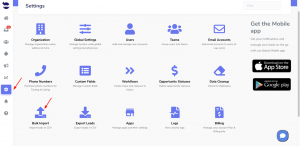
- For the bulk import, go to Settings > Bulk Import
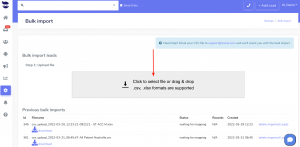
- Select the contact’s file.
- If in your CSV file there are records with no contact names, you receive an alert so you go back to the file and add the names. Then try to upload it again.

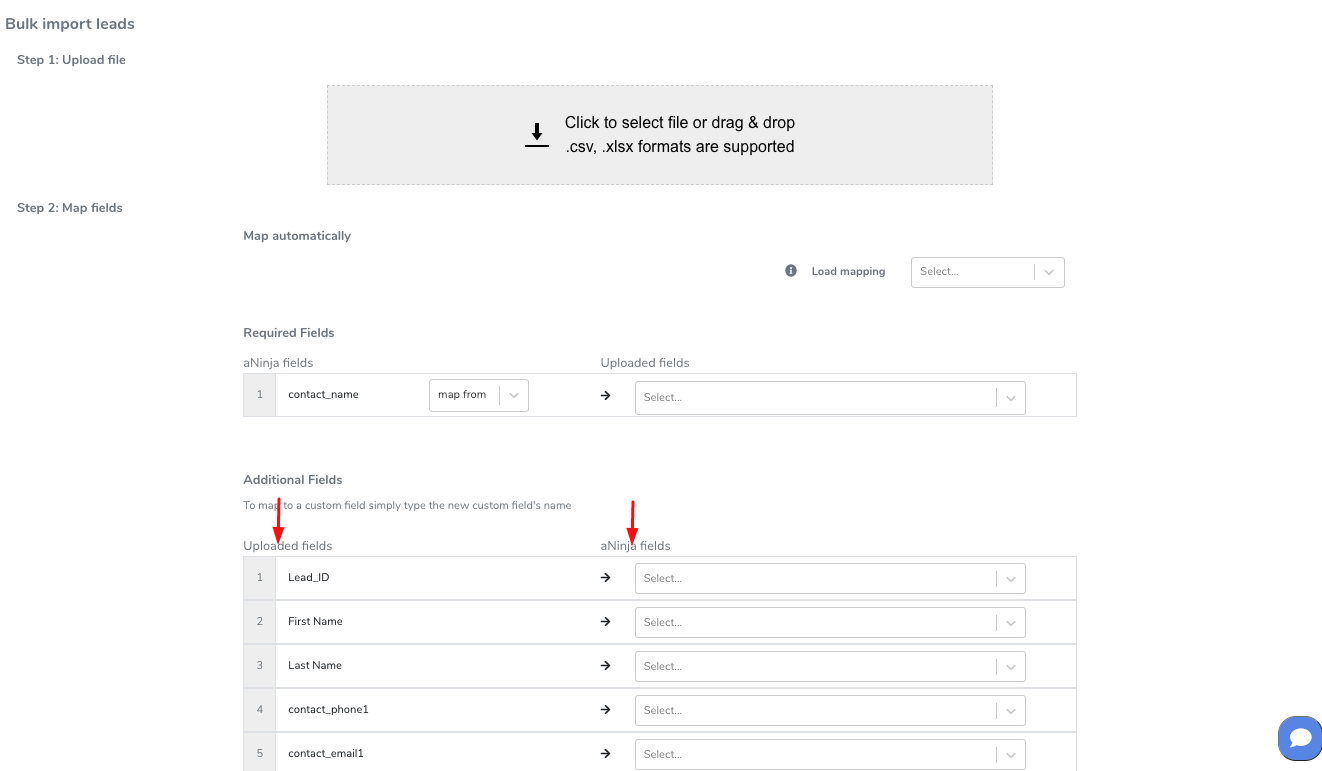
- Now, map the data to aNinja fields:

- The contact name is the only required field.
- You can either map it to one field or join 2 fields in case the first name and last name are saved in 2 separate columns in your CSV file.
- It’s important to map the data in your contacts file with the correct aNinja fields to be able to find them in the right place in the lead view.
You can even create custom fields if they’re not already there.

Standard fields
- Contact_name: is a required field and it’s essential to complete the import.
- Primary contact’s email: contact_email1. You can also add a second email (contact_email2).
- Primary contact’s phone: contact_phone1.You can also add a second phone number (contact_phone2).
- Here we recommend choosing the mobile number to be the primary contact phone as the system grabs the primary phone number to be used when texting.
Custom fields
You can create custom fields immediately when doing the mapping if they were not listed among the fields. Just prefix the field with “Custom.” e.g. Custom.Source
Saving field mappings
It’s optional. You can save the fields mapping and reload it when you have a similar file to import (same order and number of headers).
It’s useful if you regularly do bulk imports into aNinja and have many fields to map.
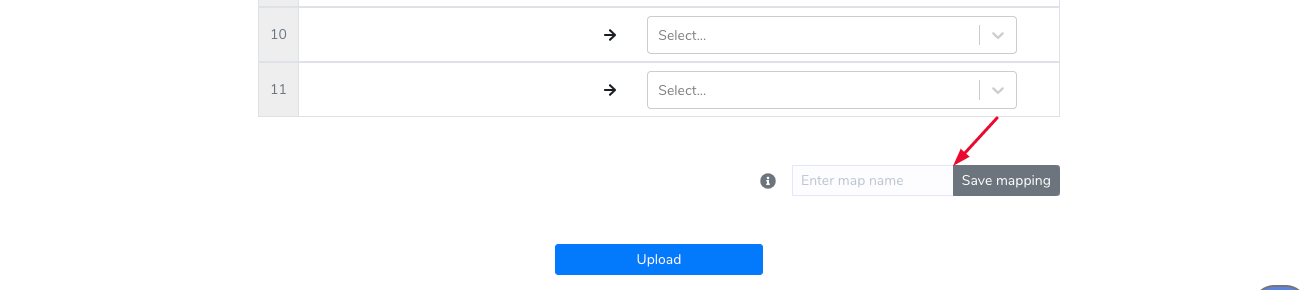
Don’t forget to click Upload to import the data.
Where does the imported data appear
After the import, you can search your aNinja CRM for the imported leads: Lead Contacts, Custom fields, and Addresses. Type your search on the top navigation bar.
- Lead’s contacts appear under Contacts in the lead view.
- Opportunities also appear in the opportunity section in the lead view.
- The company’s info appears on the top left of the lead view, in the Company section.
- Custom fields appear under Custom fields in the lead view.
Have any specific questions on the best ways to import your data? Please, email our Support team at support@aninja.com.