Adding aNinja Form to Squarespace Website

After creating your form in aNinja, adding it to your Squarespace Website becomes easy with the use of the aNinja Form Embed Code.

Find your aNinja Form Embed Code in your aNinja install before getting started.

Adding aNinja Form to Squarespace Website

You can do this yourself or give this code to your developer.

  • In the “Home Menu“, click “Pages
  • Locate the contact us page on the top toolbar.
  • Scroll down to the section where you want to add the contact form and click Edit
  • Then hit the + sign
  • And choose Code

  • Replace “hello world” by your Form Embed code.
  • You might not be able to see the form in the edit mode – it says “Script disabled”.
  • Just go to your website to see and test the form.

Where does the imported data appear

After the integration, you can search your aNinja CRM for the imported leads. You can also search for any custom field, opportunities, and any other info that you have imported.

  • Lead contacts appear in the leads contact section in the lead view
  • Opportunities also appear in the opportunity section in the lead view
  • The company’s info appears on the top left of the lead view, in the Company section.
  • Custom fields appear in the custom field section of the lead view.
  • Lead Search is a field that also appears in the bottom left of the lead view. Specifically, these are info/links on the lead or the organization found in Google search.

Send us your request to support@aninja.com and we will happily assist.

Using Bootstrap design for aNinja forms

Bootstrap is a CSS library that you use to create modern websites and web apps. It’s open-source and free to use, yet features numerous HTML and CSS templates for UI interface elements such as buttons and forms. Bootstrap also supports JavaScript extensions. It is used for developing responsive websites.

In aNinja, Bootstrap is used to give aNinja forms a nice-looking design when embed on the website.

However, when embedding aNinja’s forms on your website, it might overwrite the Bootstrap used there.

The Form embed code for the Website

After creating your aNinja form, it generates a Javascript code that you need to embed your aNinja form on your website. It looks like this:

<script id=”aninja-form-1″ data-aninjaform=”true” data-skip_bootstrap=”false” charset=”utf-8″ type=”text/javascript” src=”https://aninja.com/forms/widgets/w1.js?v=”></script><script>aNinja.forms.create({ant:”demo”,form_id:”1″});</script>

We’ve added a data attribute inside this code that enables you to either include or skip Bootstrap design in the form.

Setting the Bootstrap design

  • If you set the Bootstrap design to False, then it excludes aNinja’s Bootstrap design in the form. This allows the website embedding the script to use the Bootstrap design used there, and it doesn’t get overridden. However, if there’s no Bootstrap design used in the website, then the form design will be off, as there won’t be any styling.
  • If you set the Bootstrap design to True, then it uses aNinja’s Bootstrap design and overwrites the one used on the website.
  • Now that you’ve decided whether to include or skip Bootstrap design; just copy the Javascript code and paste it on your website to post your aNinja form there.

If you need any assistance with this, just leave us an email at support@aninja.com. Our Support team will happily assist you!

Basic aNinja terms

Here’s a simple explanation of the basic terms and keywords that we use in aNinja. After all, we want you to get the correct meaning of the words we use.

Know what aNinja terms stand for

All around aNinja, and in the knowledge base articles you encounter keywords. And it’s very important for you to know what they stand for. We divided these keywords into 4 sections:

Features
  • Automations: These are Templates, Sequences, and Triggers.  You automate them to be launched automatically at a certain event without your intervention.
  • aNinja Forms: These are the contact forms that you create on aNinja. When you embed them on your website, they collect leads. And automatically the system injects them into your account.
  • Dashboard: It is a set of widgets that give you a quick overview and deep view into your aNinja system.
  • Widget: It’s a graphical display. Precisely, it brings you the report on the workflow of your latest activities and interactions that you make in aNinja.
  • Chatbot: It’s a computer program that can be embedded on your website. It simulates human conversation through text chat. Therefore, aNinja Chatbot answers your website visitors’ simple questions. Moreover, you can customize the questions in the Chatbot Playbook.
  • Chatbot Playbook: It determines how the chatbot answers the user’s questions. More precisely, it’s an automated message workflow that runs on simple logic in order to help the users get the answers they need.
The Lead related
  • Custom Fields: These are info that you can add to the lead. Therefore, it augments the lead data (creation time, payment plan, phone number, platform, tenant code, and much more…).
  • Lead activities: These are basically the activities that you perform on a certain lead:
    • Tasks, Assigning lead, Opportunities, Custom Fields, Email and Texts sequences, Merging, and Deleting.
  • Lead interactions: These are the interactions that you perform on a certain lead:
    • Emails, Texts, Calls, and Notes.
  • Lead View: It is where you can see all activities and interactions that you made with a lead.
  • Leads View: It’s where you can see all the leads you have in your account. Or the result of a Smartlist or a search typed in the top navigation bar.
  • Workflow: It consists of a series of sequential steps that allows you to monitor the lead/customer’s progress in the pipeline.
System search
  • Smartlist: or Smart View. Simply, it is a list of leads that the system pulls from your CRM following criteria specified in a query.
  • Query: It’s the essential component for building a Smartlist. Precisely, it’s a specific request for lead retrieval among your CRM.
aNinja Keys & codes

Have any specific questions about the aNinja terms? Please leave us an email at support@aninja.com. We’re more than happy to offer you clarifications.

Find your aNinja Forms Embed Code

Find your aNinja Forms Embed Code. You need this code to embed the forms that you’ve created in aNinja on the website.

Find your aNinja Forms Embed Code

  • On the left sidebar, click on Marketing > Forms
  • Select and copy the Embed Code For WebsiteFind your aNinja Forms Embed Code
  • We’ve added a data attribute inside this code that allows you to manage the Bootstrap design in the form. Set it to True or False to either skip or include the Bootstrap design in the form.
  • Paste this Javascript code on your website to add the aNinja form.
  • If you need assistance with embedding your aNinja form on your website, just leave us an email at support@aninja.com. Our Support team will happily assist you!


Embedding aNinja Form on Godaddy page

Embedding aNinja Form on Godaddy page creates a lead into your aNinja account with every form submission.

In this article, we’re going to show you how you can embed the aNinja form on your Godaddy page.

Embedding aNinja Lead Form on Godaddy page

  • Choose the website you want to edit in your GoDaddy account.
  • Choose the Page (or add a new page) where you want to add an aNinja Lead Form in the right-side panel of the Godaddy Website builder.
  • Click “Add Section” to add a new section to your Godaddy page, and choose “HTML” in the section types.
  • Paste the aNinja Lead Form code in the “Custom code” box in the Godaddy section sidebar.
  • Hit Preview then publish.
  • Your integration between aNinja Lead forms and GoDaddy is now complete.

Where does the imported data appear

After the integration, you can search your aNinja CRM for the imported leads. You can also search for any custom field, opportunities, and any other info that is collected from the forms.

  • Lead’s contacts appear in the leads contact section in the lead view
  • Opportunities also appear in the opportunity section in the lead view
  • The company’s info appears on the top left of the lead view, in the Company section.
  • Custom fields appear in the custom field section of the lead view
  • Lead Search is a field that also appears in the bottom left of the lead view. Specifically, these are info/links on the lead or the organization found in Google search.

Need help? Leave us an email at support@aninja.com. We’re more than happy to assist you.

Creating aNinja Forms

For integrating forms data into aNinja, you can:

  • Use aNinja forms: These are created inside aNinja. You simply drop the Javascript code on your site and they render and automatically push the lead data into aNinja.
  • Use your existing forms (in this case we can adapt some Javascript code to push the lead into aNinja on form submission).
  • If your site is a WordPress or similar, we also have plugins for those cases (Gravity forms, Contact Form 7, Hubspot Form, and WPForms).

With aNinja, you have the ability to create custom forms and personalize the content to your liking. Once these forms are integrated into your website, every submission will result in a lead being automatically added to your aNinja account.

Creating aNinja Forms

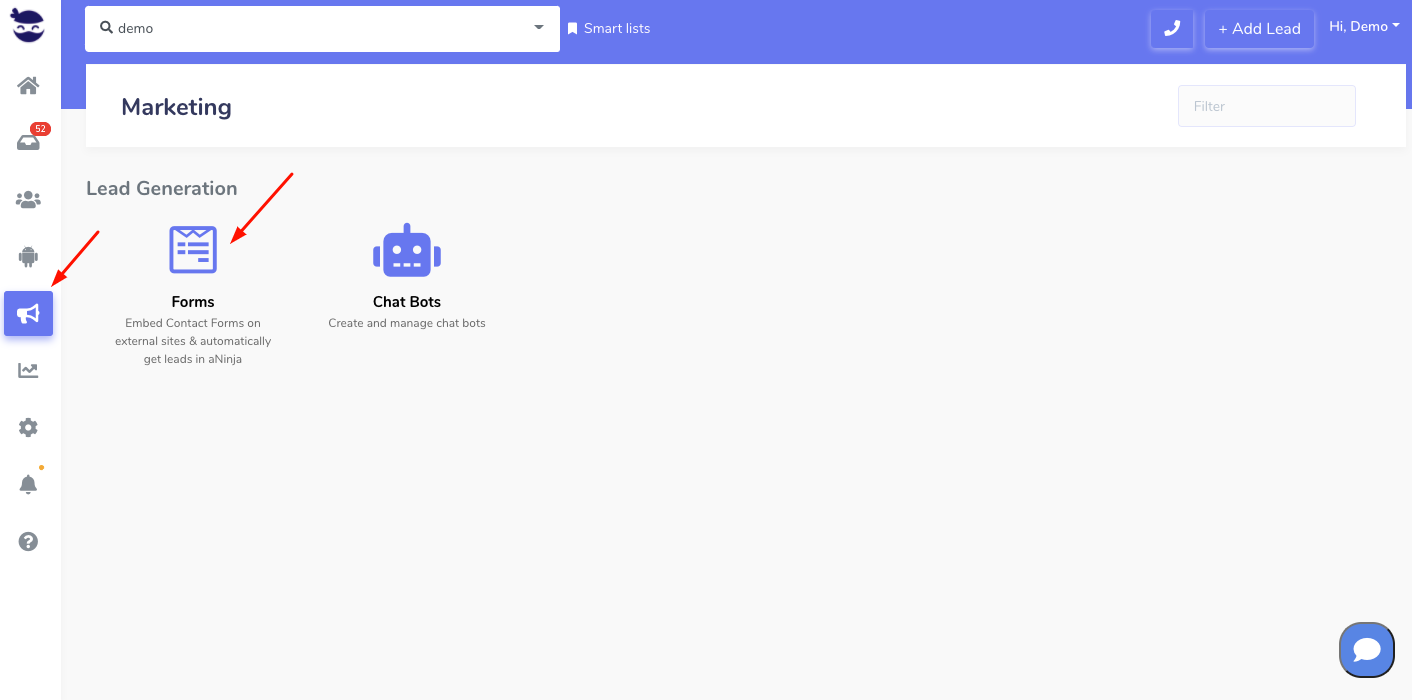
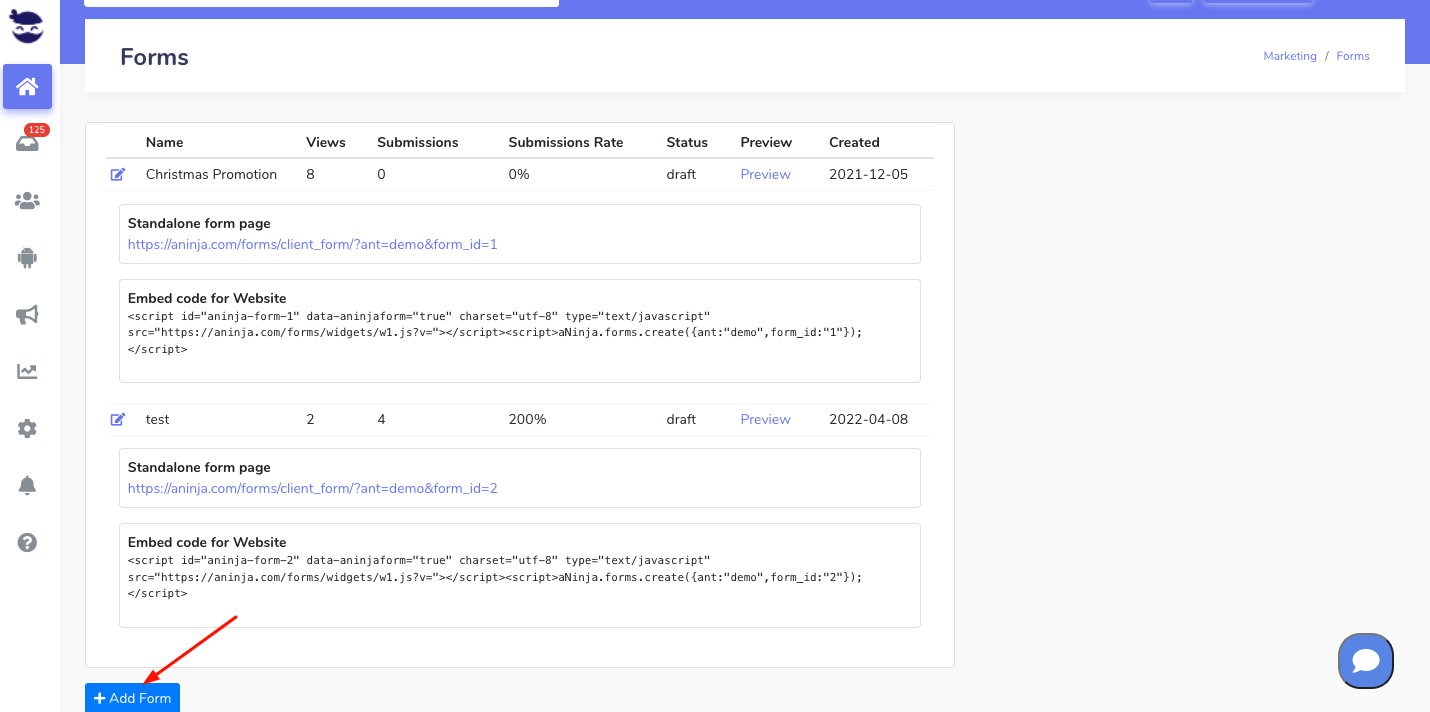
  • On the left sidebar, go to Marketing > Forms
  • Click on Add Form
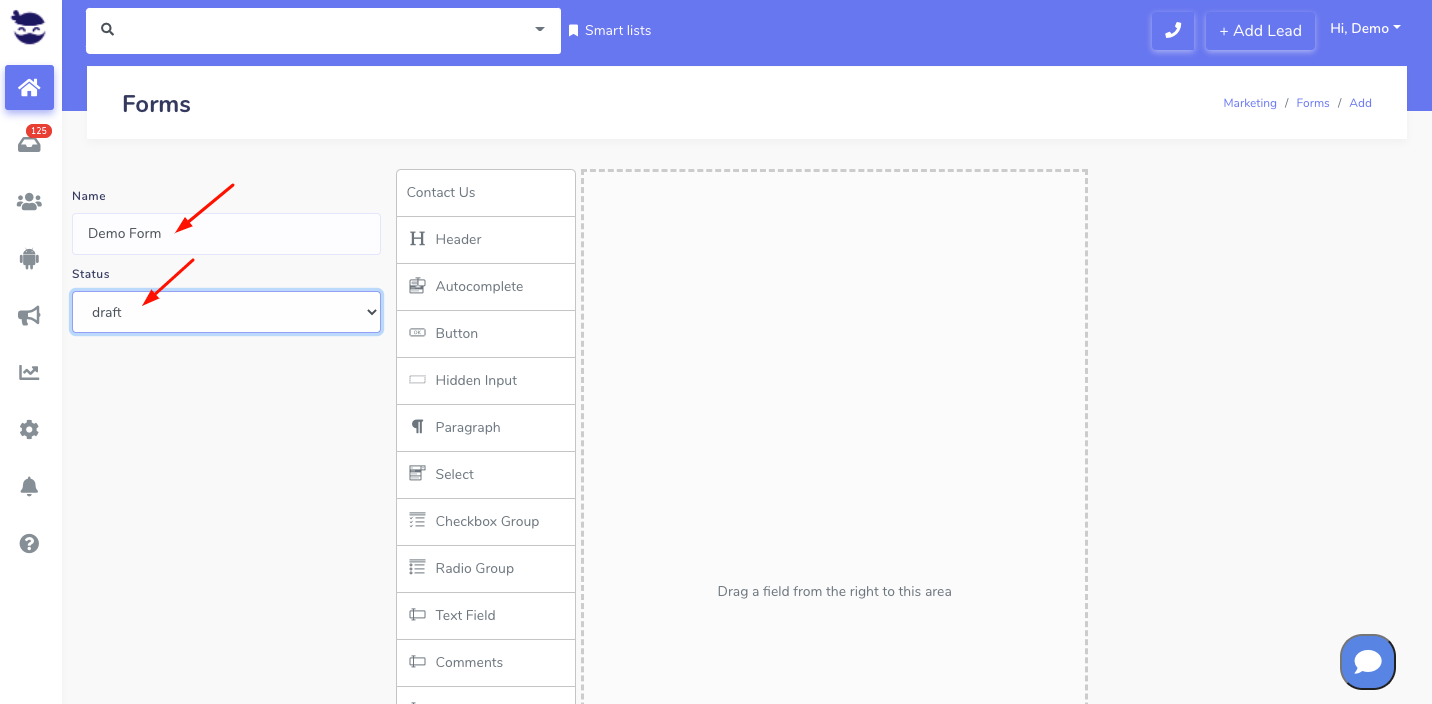
  • Label your form and select its status (draft, live, or archived)
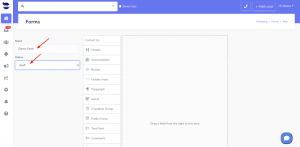
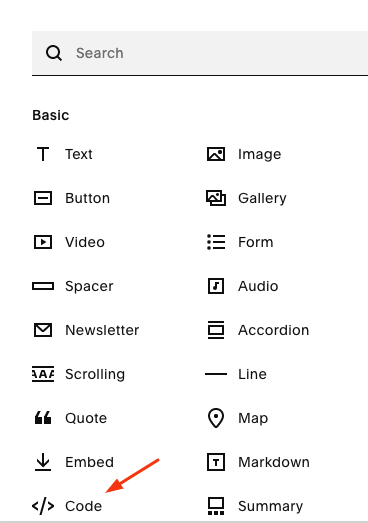
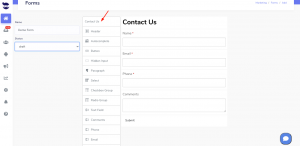
  • You can either select the Contact Us template or just drag fields from the list to create your own form.aNinja Forms
  • Incorporate a “hidden input” into your website’s form that remains concealed from users as they fill it out. And a custom field with the form name will be injected along with the lead data. This helps you identify leads generated from this specific form through the use of Smartlists.
    • A hidden input has a name and a value.
      • name: e.g. Custom_Form
      • value: e.g. aNinja contact form (or any title relating to the form).
    • If you’re intending to use multiple forms on your website, to each form you can assign a different name and value for the hidden input. Then you map it to aNinja’s Custom field. So every form submission creates a lead that has this input’s name and value among his custom fields.
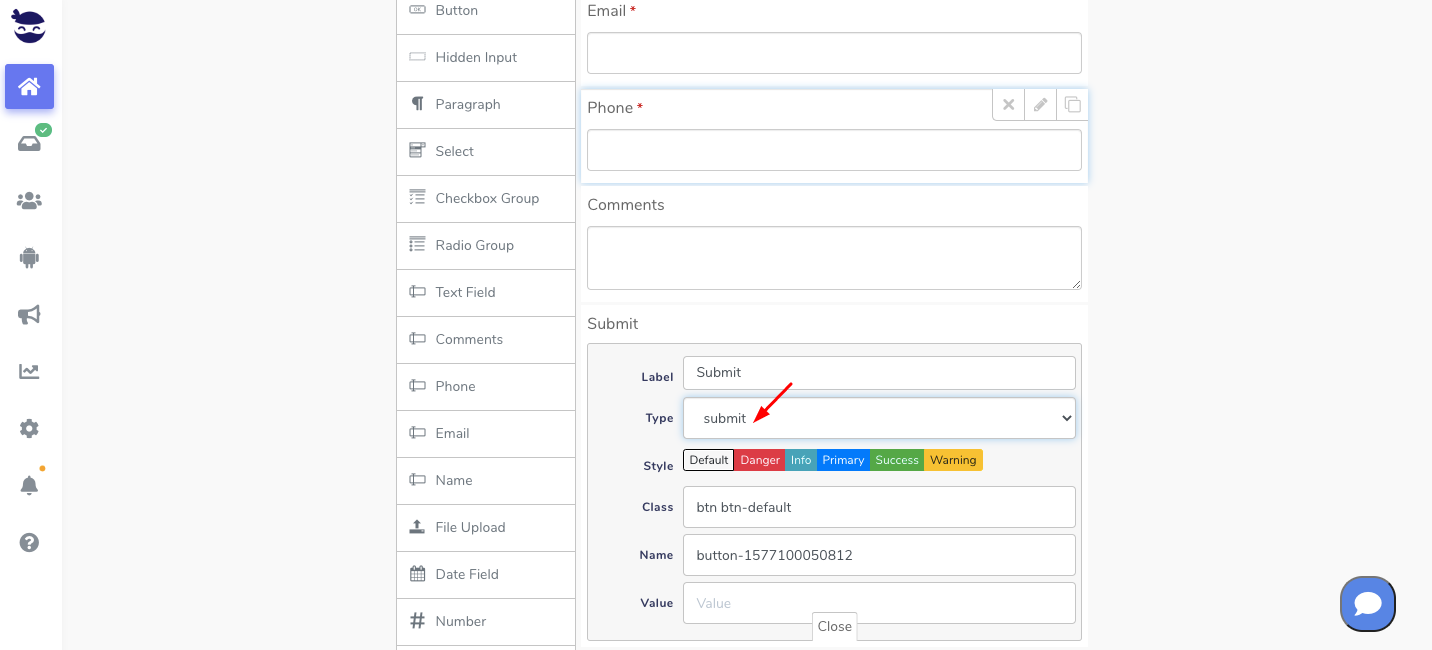
  • Insert a “Button” of type “Submit” at the bottom of your contact form for the form submission.

  • Lastly, click Save.
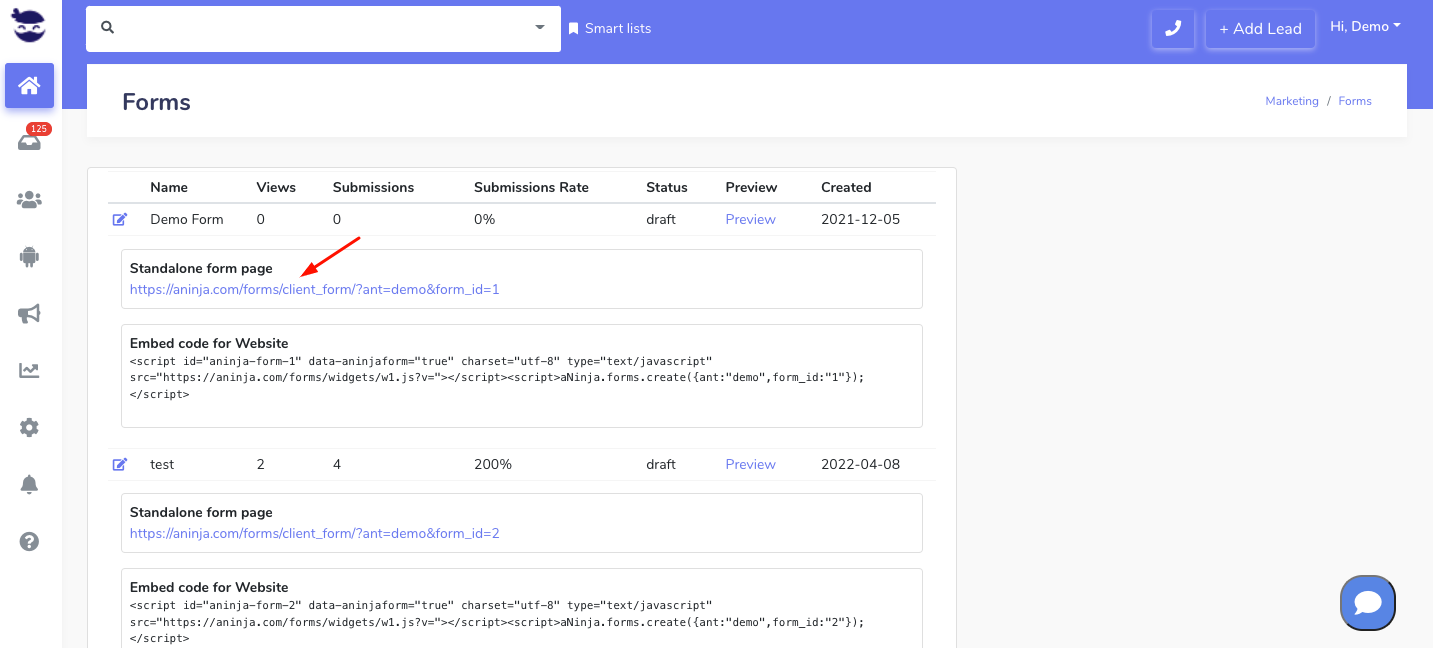
  • You can preview with Standalone link (optional)

Embed the form on your website

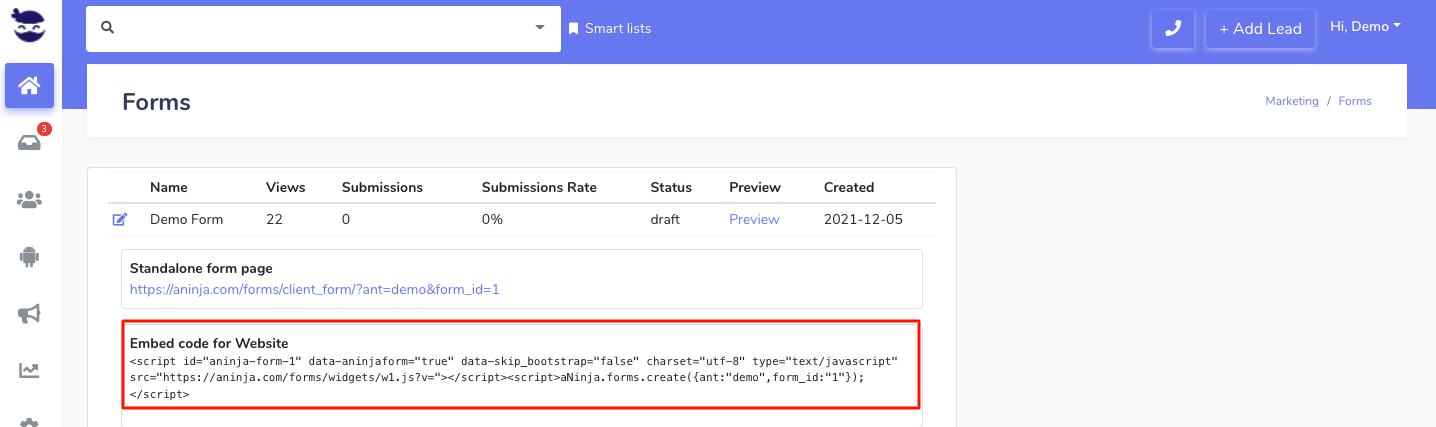
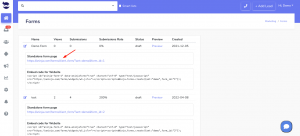
  • Go to Marketing > Forms
  • Copy the embed form code, to be able to embed the code snippet on your website.
  • We’ve added a data attribute inside this code that allows you to manage the Bootstrap design in the form. Set it to True or False to either skip or include the Bootstrap design in the form.
    • If it is set to True, then it skips aNinja’s design and uses the Bootstrap used in your website.
    • If set to False, then it uses aNinja’s Bootstrap design for the form.

Fields to include in the form

It’s very important to add “Input names” in the form fields and map them to aNinja fields (check the fields mapping section below).

The input names basically are:

  • Name: that’s a required field and it will be mapped to the aNinja field: contact_name
  • Phone: to be mapped to the aNinja field contact_phone1
  • Email: to be mapped to the aNinja field contact_email1
  • If in your form you’ve added other fields (e.g. Source), these are considered Custom Fields. When mapping them to the aNinja fields, just add this prefix Custom_ (Custom + Underscore). (e.g. Custom_Source).

Fields mapping

The following are standard fields you can map to, in addition to any custom fields created in your application that you can see under Settings > Custom fields.

Where does the imported data appear

After the form submission, a lead is automatically injected into your aNinja account.

You can search your aNinja CRM for the imported leads. You can also search for any custom field, opportunities, and any other info that you have included in your form.

  • Lead’s contacts appear in the lead contact section in the lead view.
  • Opportunities also appear in the opportunity section in the lead view.
  • The company’s info appears on the top left of the lead view, in the Company section.
  • Custom fields appear in the custom field section of the lead view.
  • Lead Search is a field that also appears in the bottom left of the lead view. Specifically, these are info/links on the lead or the organization found in Google search.