In this article, we’re going to show you how the Eventbrite aNinja Integration can be done through Webhooks.
Using Webhooks
A webhook (also called a web callback or HTTP push) is a way for the Eventbrite API to provide aNinja with information. Webhooks delivers information to your aNinja account in real-time, meaning you get an immediate notification.
Currently, the webhooks provided by Eventbrite track six objects: Event, Order, Attendee, Organizer, Ticket Class and Venue. You should use these webhooks to ensure that aNinja remains compliant and compatible with Eventbrite. Make sure to follow the Eventbrite Engineering Blog to receive updates about our webhook implementation.
To implement webhooks, you need to:
- Make sure you have the necessary prerequisites.
- Create a webhook.
- Test the webhook.
Webhooks for the Event object
The following Event actions have webhooks:
- Publish
- Unpublish
- Create
- Update
Webhooks for the Order Object
The following Order actions have webhooks:
Webhooks for the Attendee Object
The following Attendee actions have webhooks:
- Update
- Check_in
- Check_out
Webhooks for the Organizer Object
The following Organizer actions have webhooks:
Webhooks for the Ticket Class Object
The following Ticket Class actions have webhooks:
Webhooks for the Venue Object
The following Venue actions have webhooks:
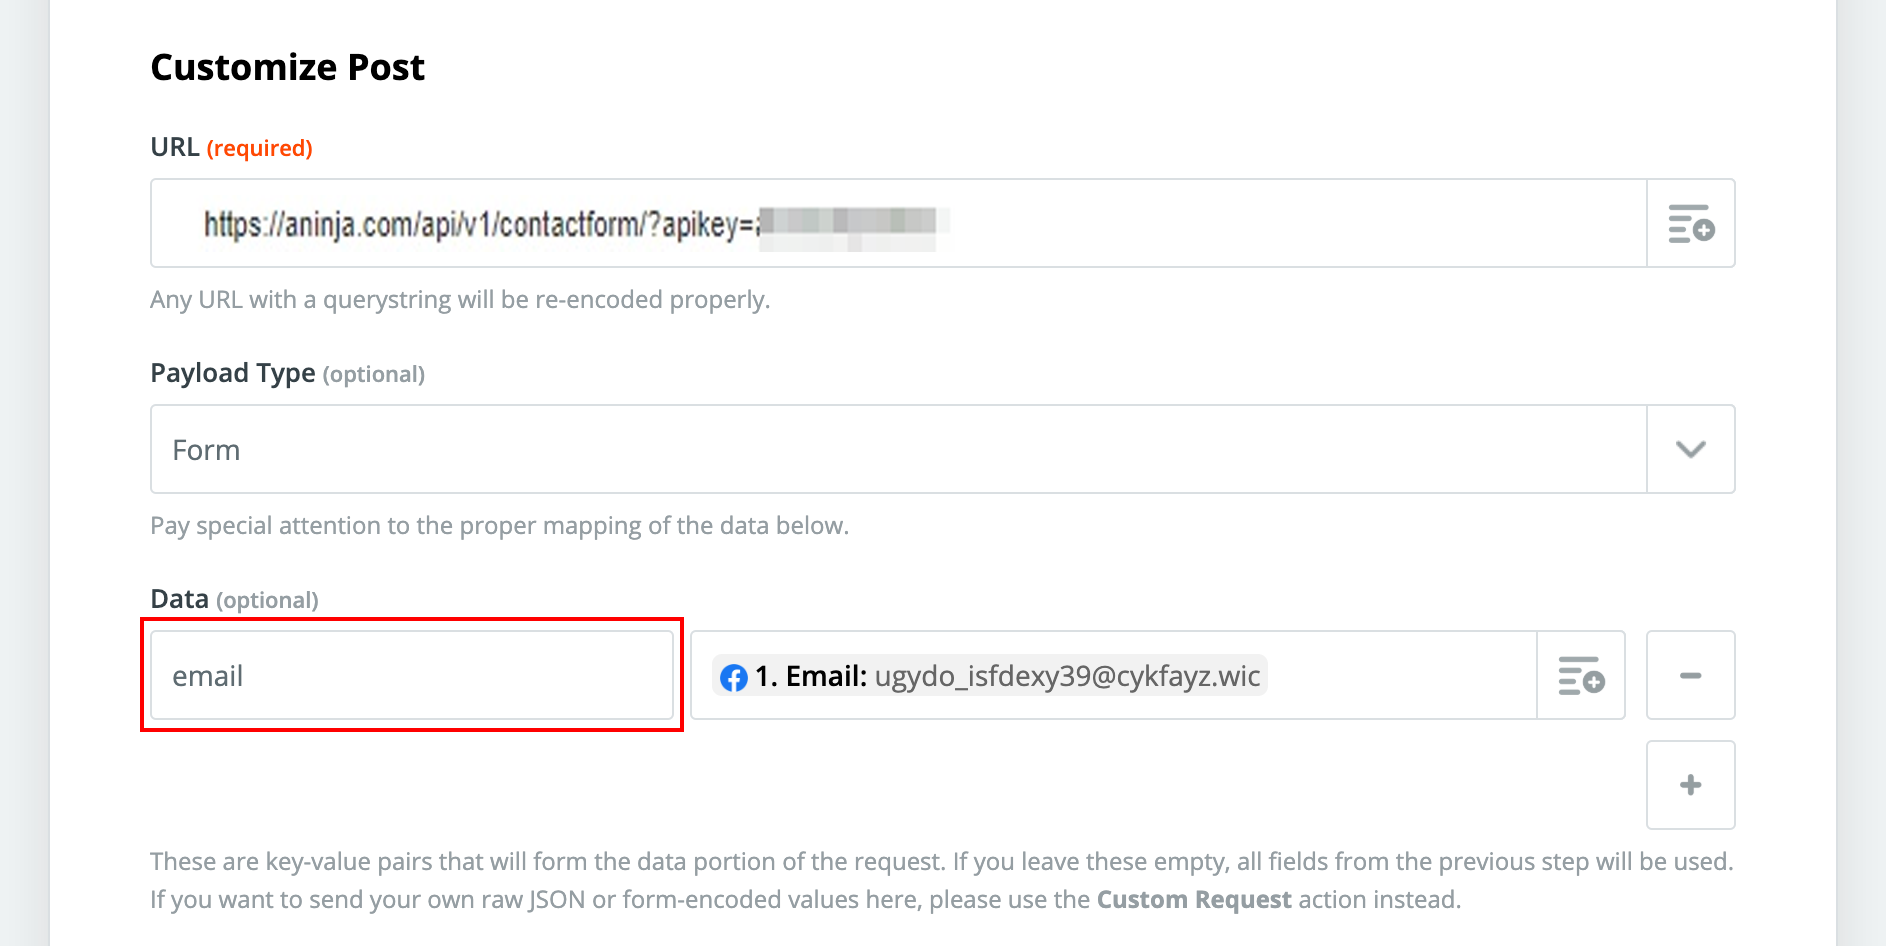
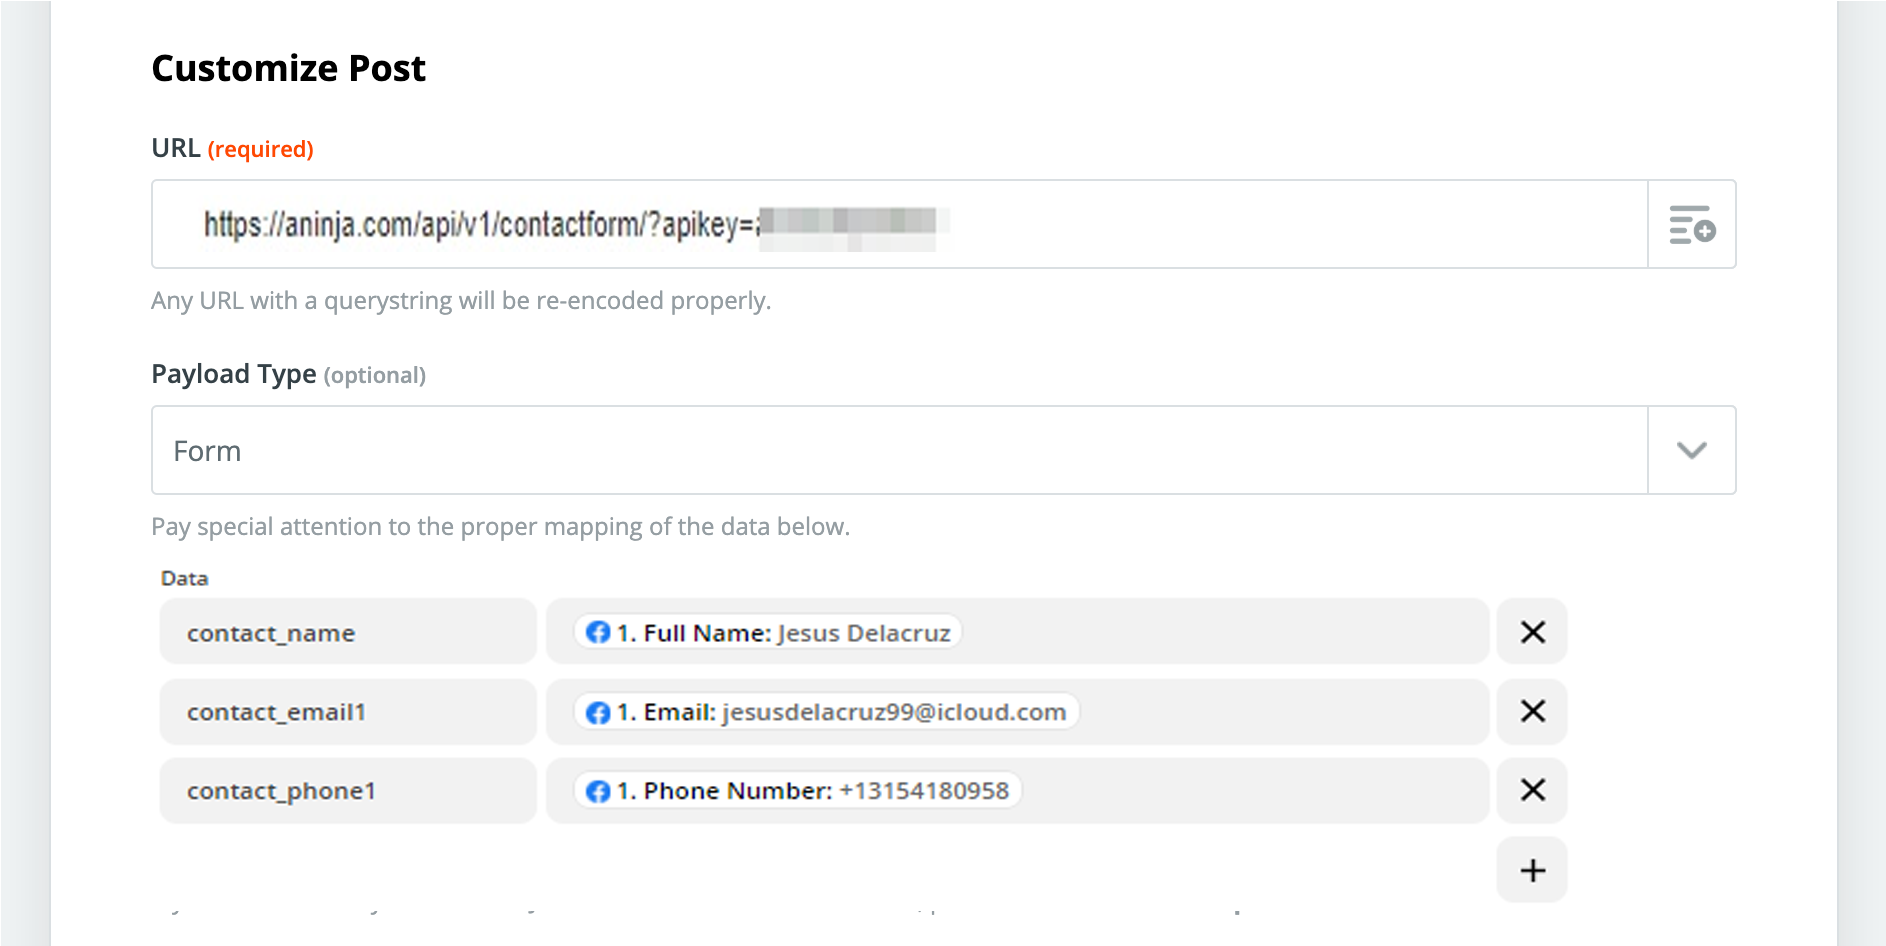
The Composition of Webhooks
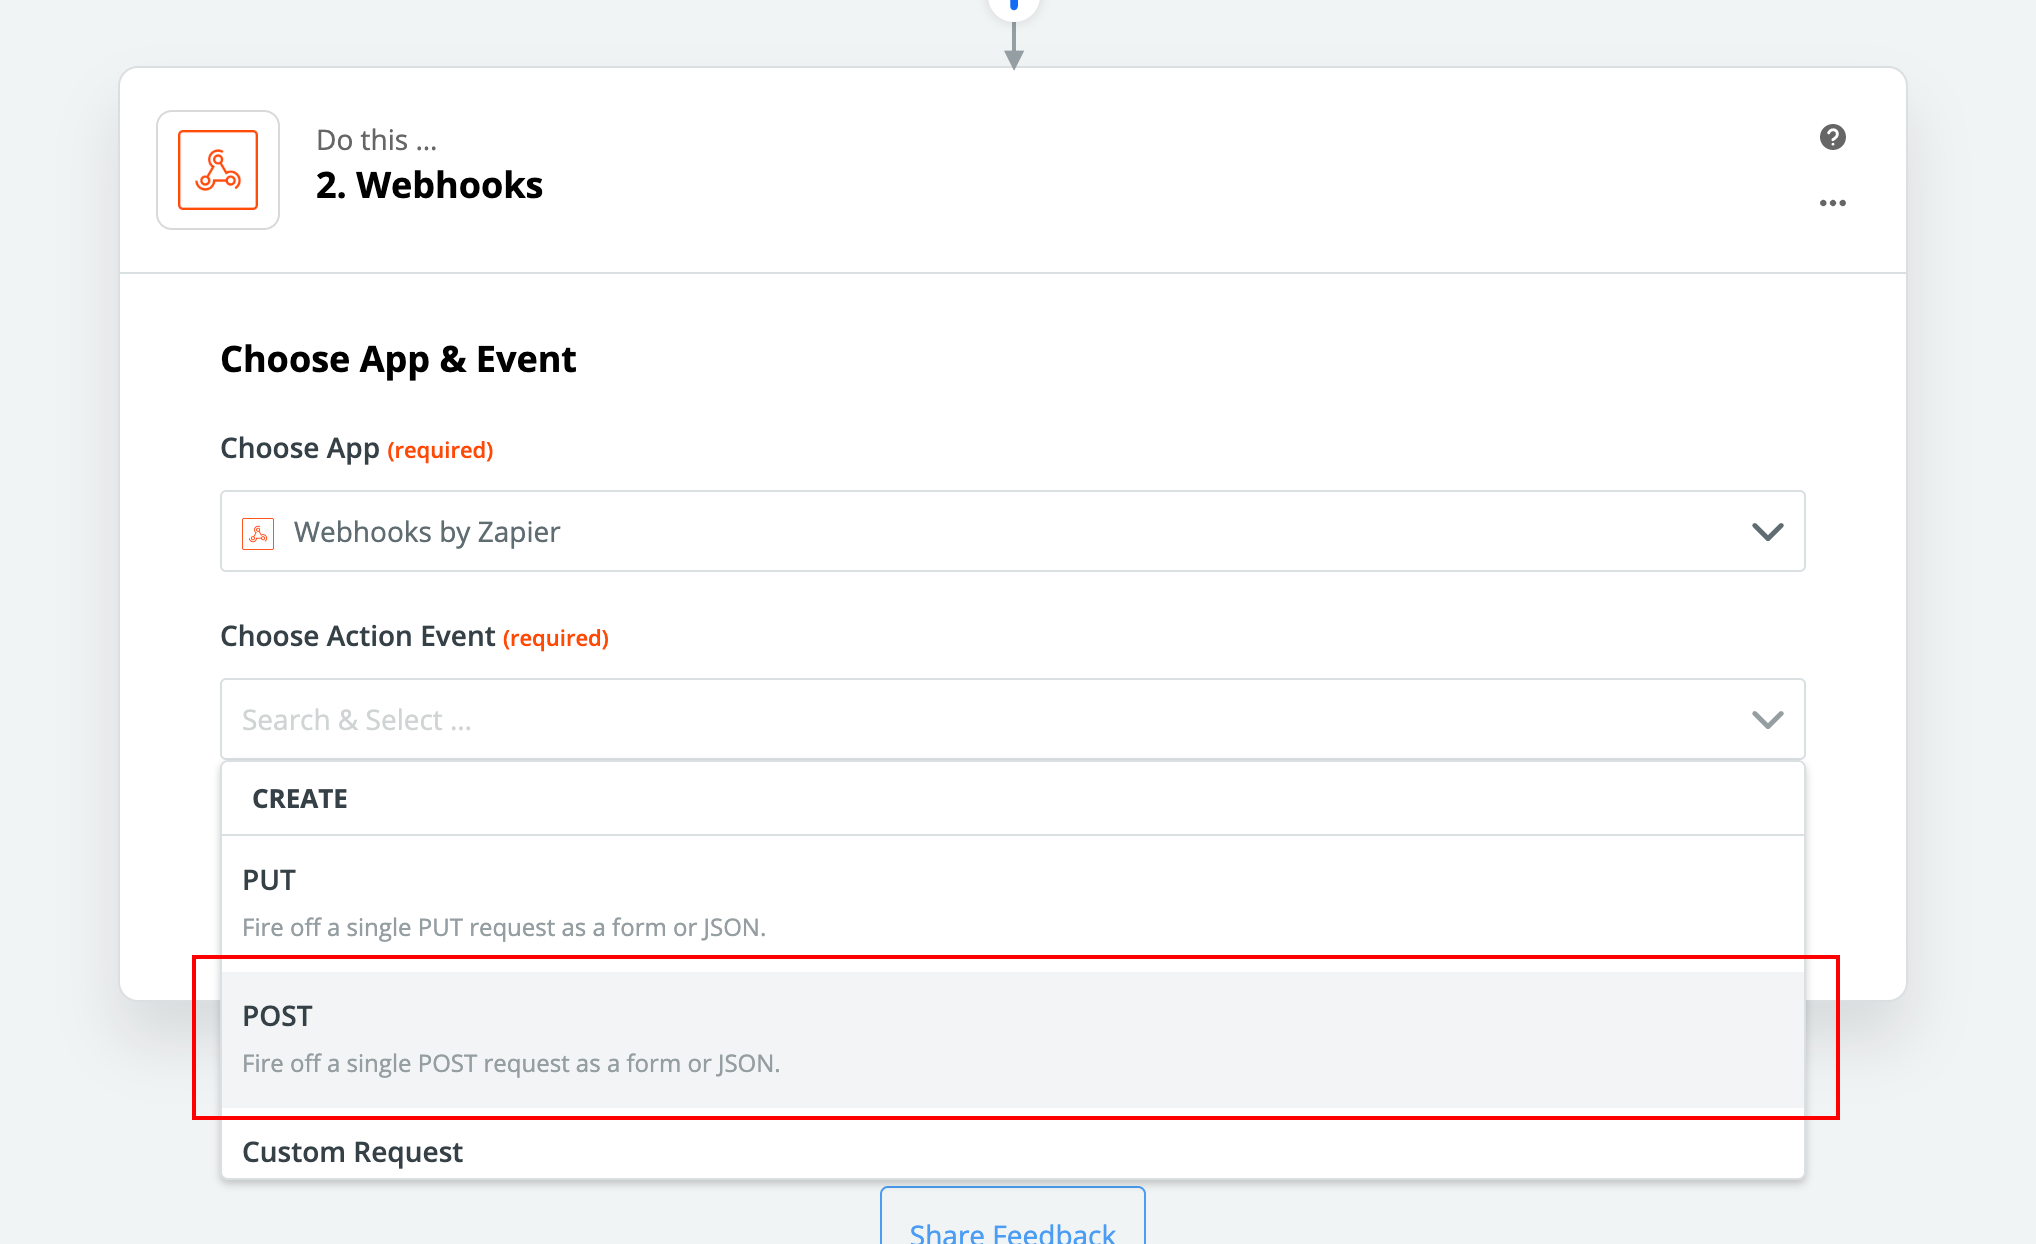
Webhooks are constructed as an HTTP request with the following composition:
- Sent via the POST method
- Application/JSON mime type defined in the headers
- Valid JSON payload (i.e. the part of transmitted data that is the actual intended message).
| Attribute |
Description |
| api_url |
Object whose creation or update triggered the webhook |
| config.endpoint_url |
Target URL specified when the webhook was created. |
Example webhook JSON payload:
{
    "api_url": "https://www.eventbriteapi.com/v3/orders/1234567890/",
    "config": {
        "endpoint_url": "https://myawesomeapp.com/webhook"
    }
}
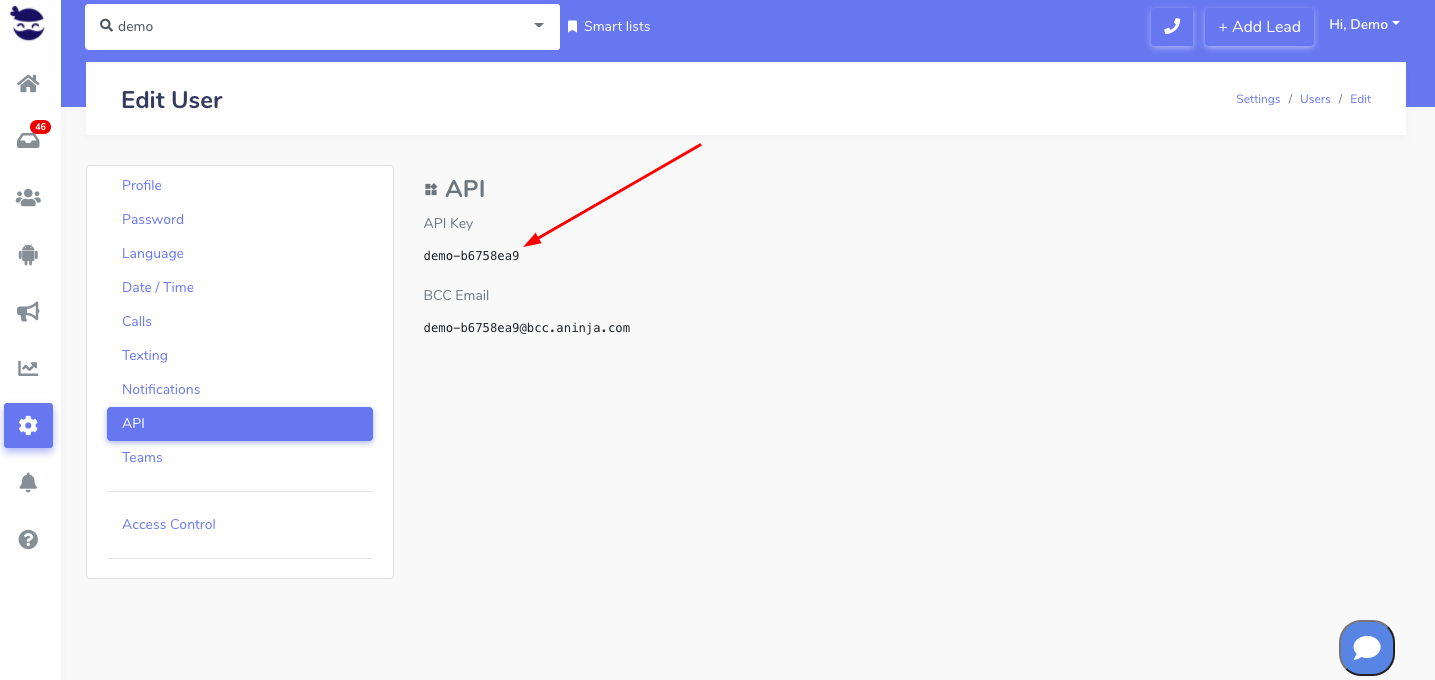
1- Prerequisites to Using Webhooks
In order to use webhooks, you need the following:
- At least one Event.
- An Eventbrite API User Key.
- A registered integrated application (e.g. aNinja)
- A public, online website that can receive webhooks. This can be built in Django, Flask, Rails, Node.js, PHP or any tool for the creation of web pages.
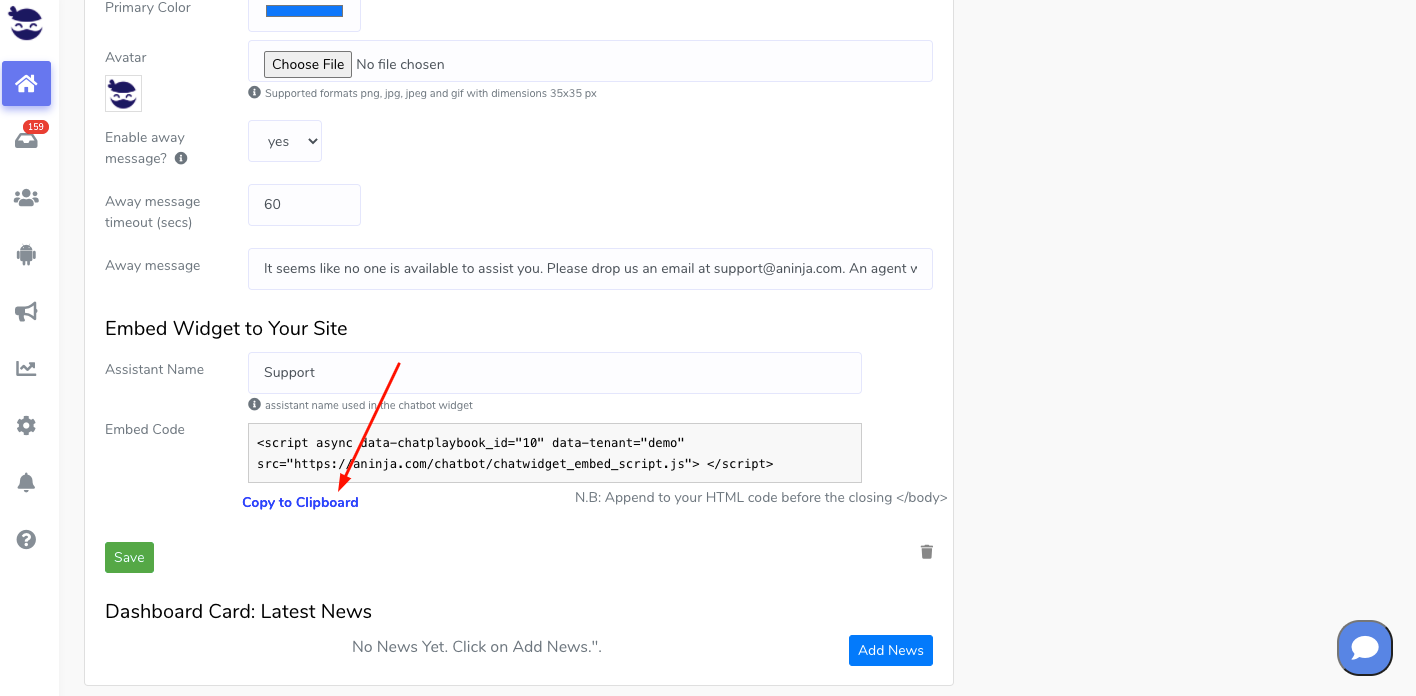
2- Creating a Webhook
To create a webhook:
- Go to the Webhooks Add
- Choose an Event.
- Enter the URL
http://httpbin.org/post, then select the object for which you want to create a webhook.
- Click Add Webhook.
After that, you are directed to the newly created webhook detail page.
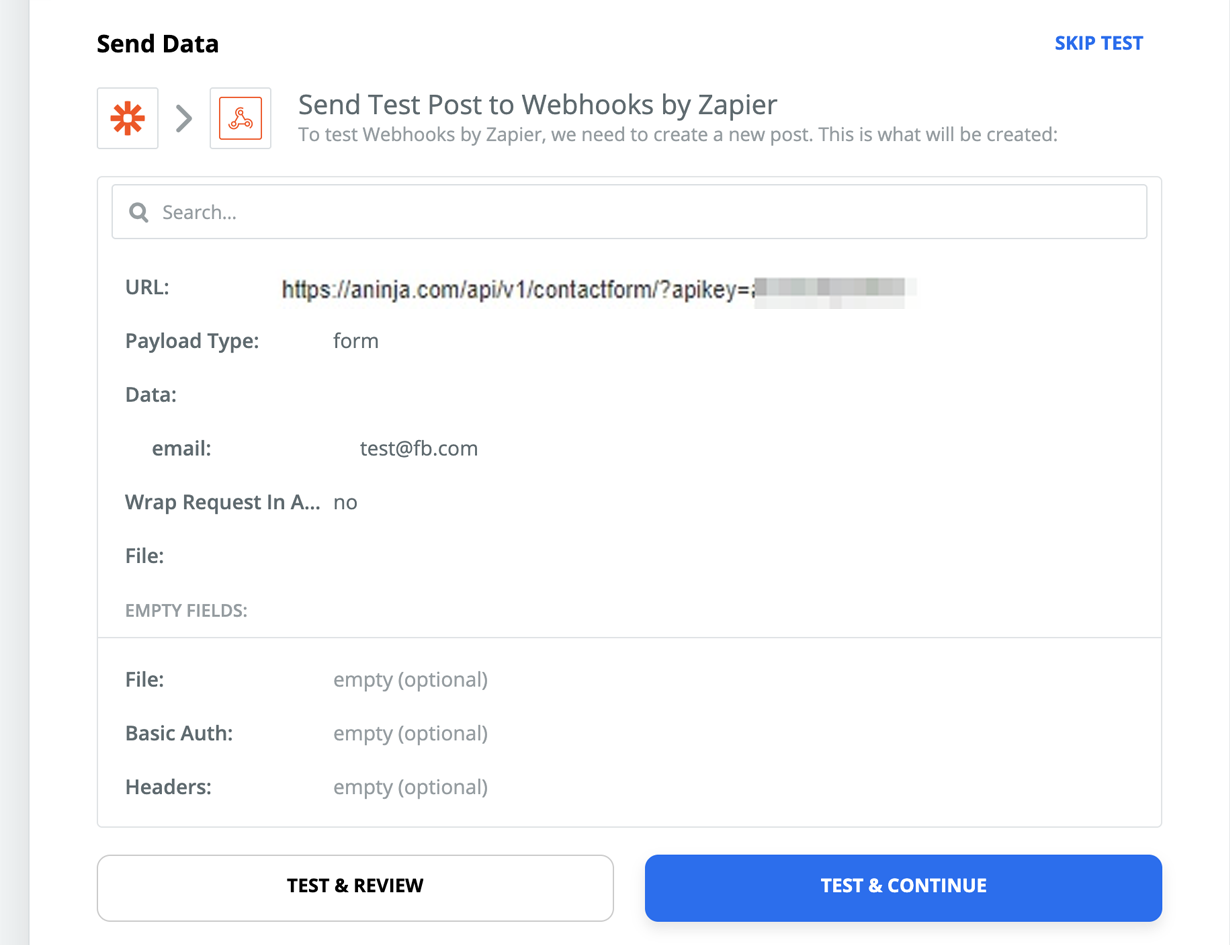
Testing a Webhook
You should test that your webhook is correctly implemented. To do so:
- On the webhook detail page, click Test. As a result, a test delivery request is generated.
The small, green ‘200 OK’ button corresponds to the HTTP status definition for a standard successful HTTP request. So, any webhook delivery request that returns a number beginning with 2 (two) is considered a success.
- Click ‘200 OK’. It expands, displaying the following information:
The Request Headers and Request Payload are what the Eventbrite webhooks system sent to the endpoint URL (i.e. aNinja). The Request Payload is valid JSON, which you can parse and use.
Conversely, the Response Headers and Response Body comprise the data sent back by the your receiving app. The delivery response is stored for 15 days.
Where does the imported data appear?
After the integration, you can search your aNinja CRM for the imported leads. You can also search for any custom field, opportunities, and any other info that are collected from the forms.
- Lead’s contact appears in the leads contact section in the lead view
- Opportunities also appear in the opportunity section in the lead view
- The company’s info appears on the top left of the lead view, in the Company section.
- Custom fields appear in the custom field section of the lead view
- Lead Search is a field that also appears in the bottom left of the lead view. Specifically, these are info/links on the lead or the organization found in Google search.


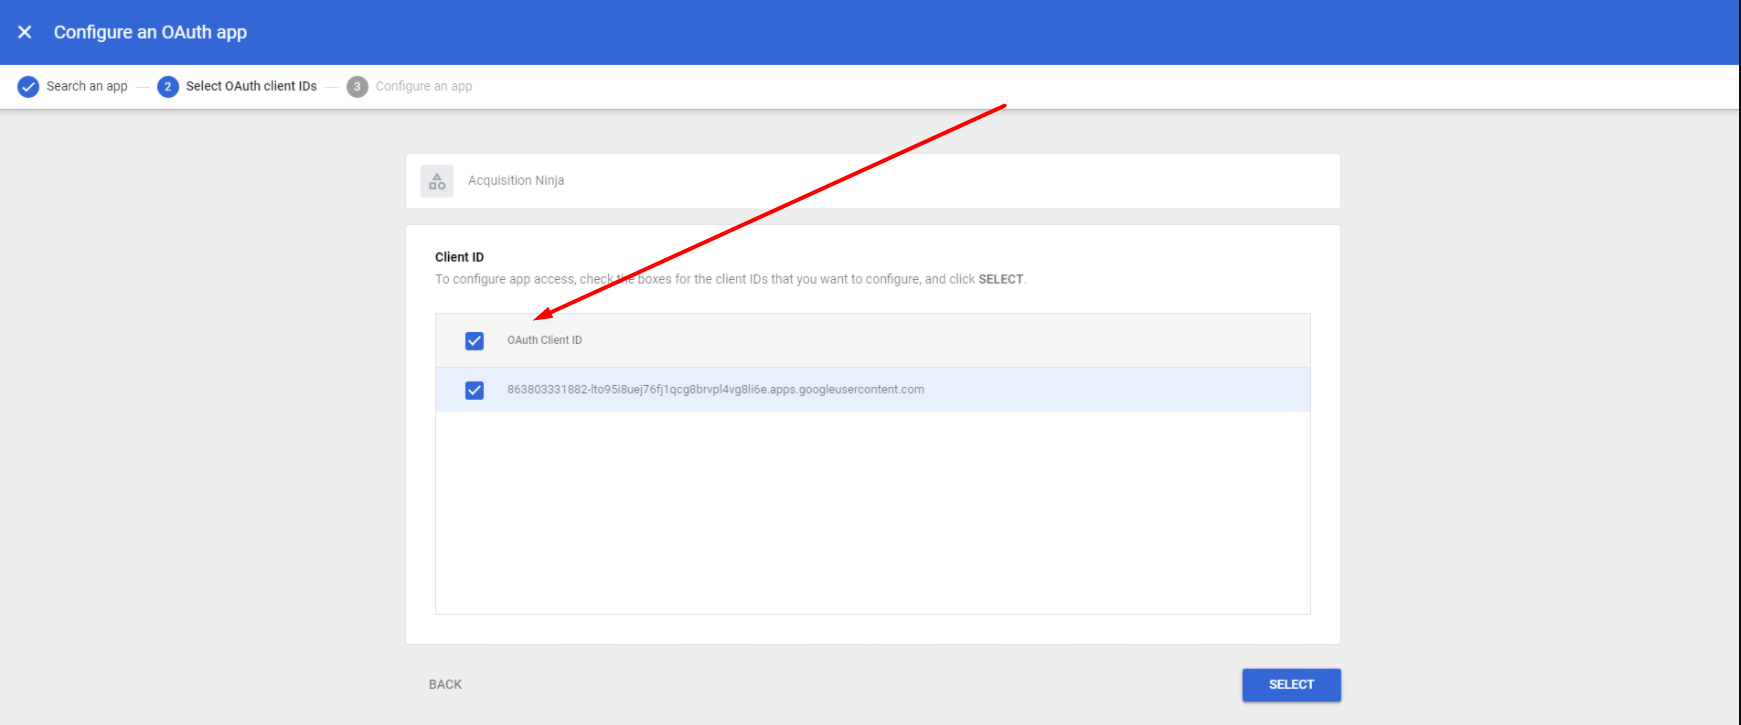
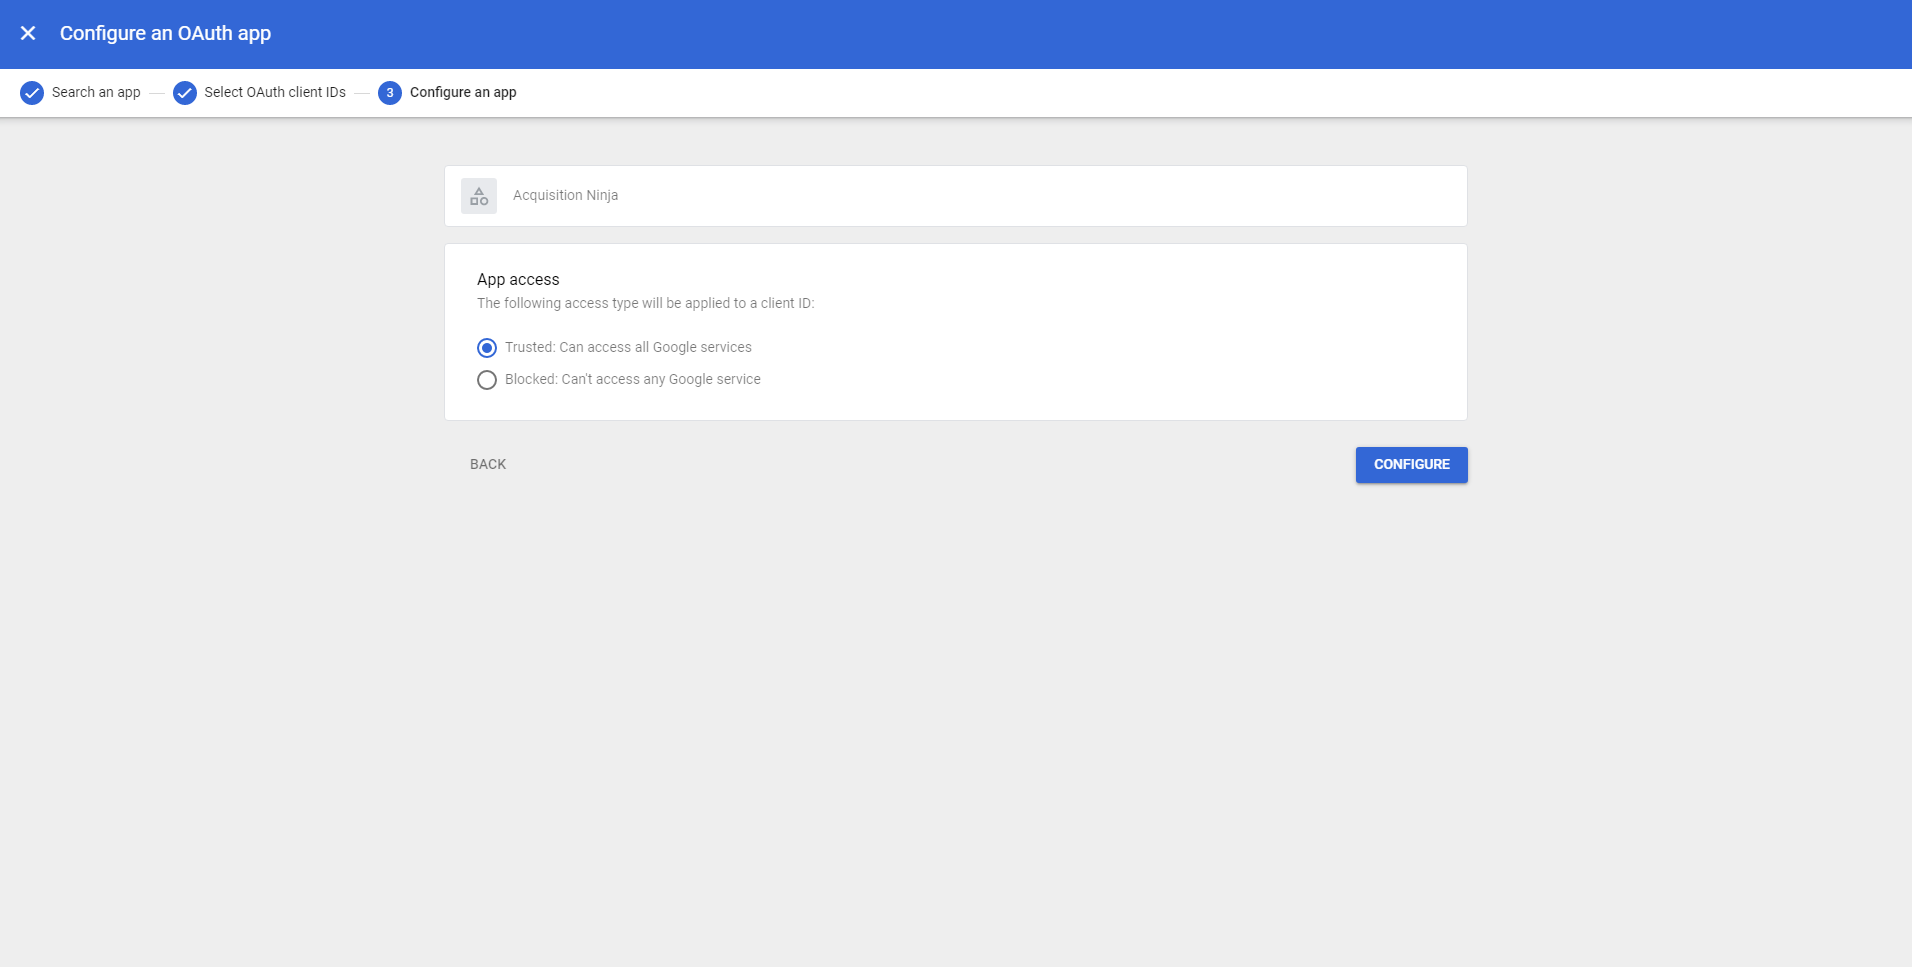
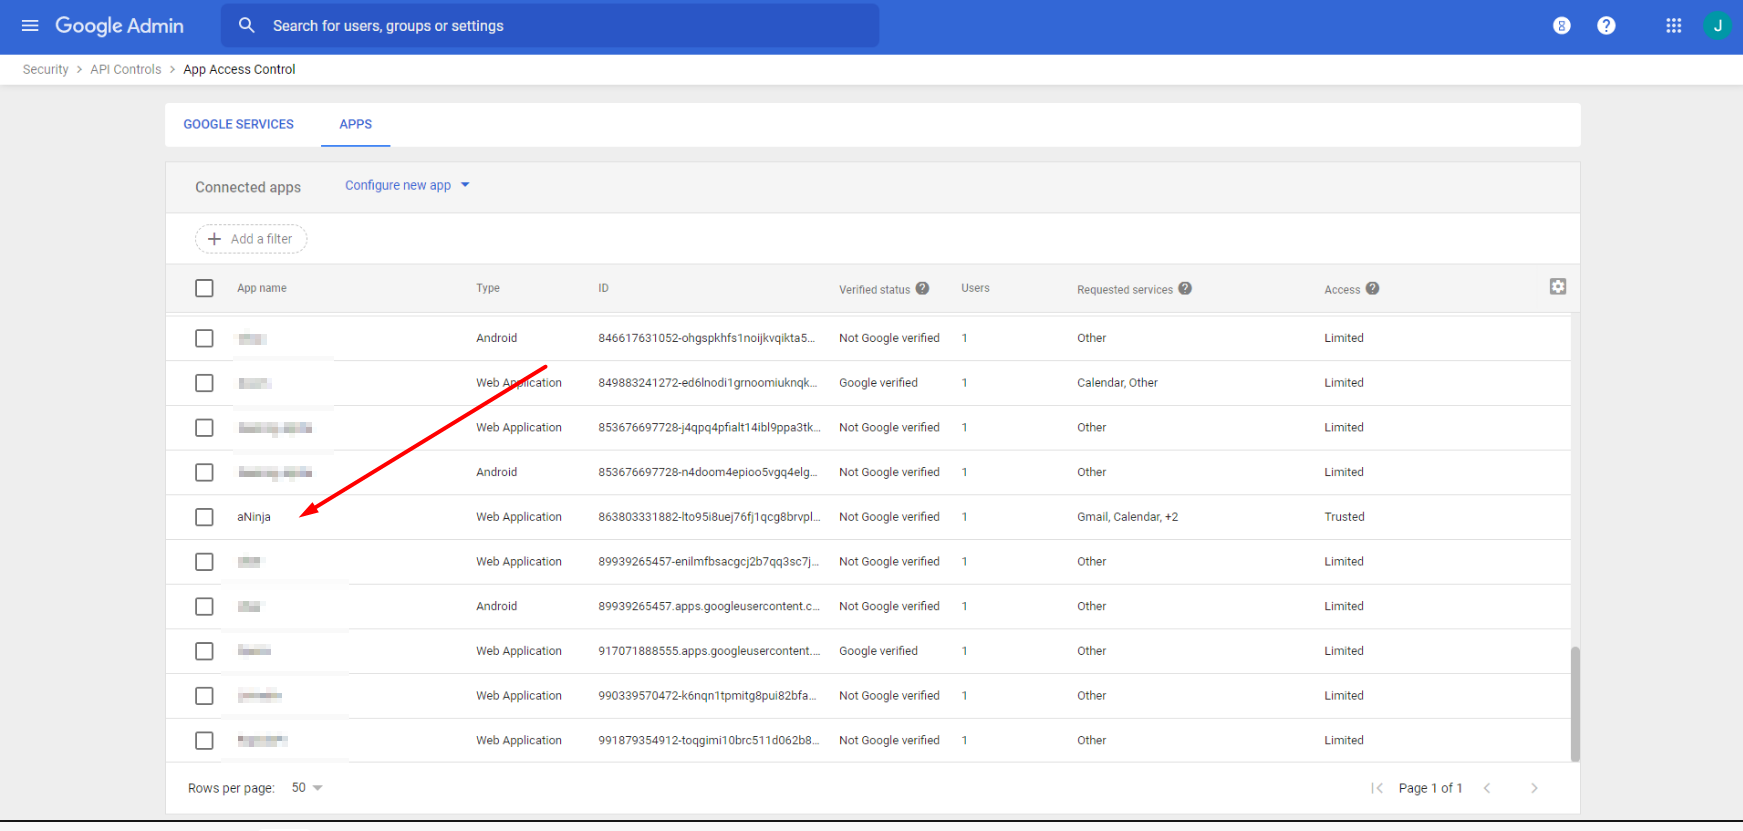
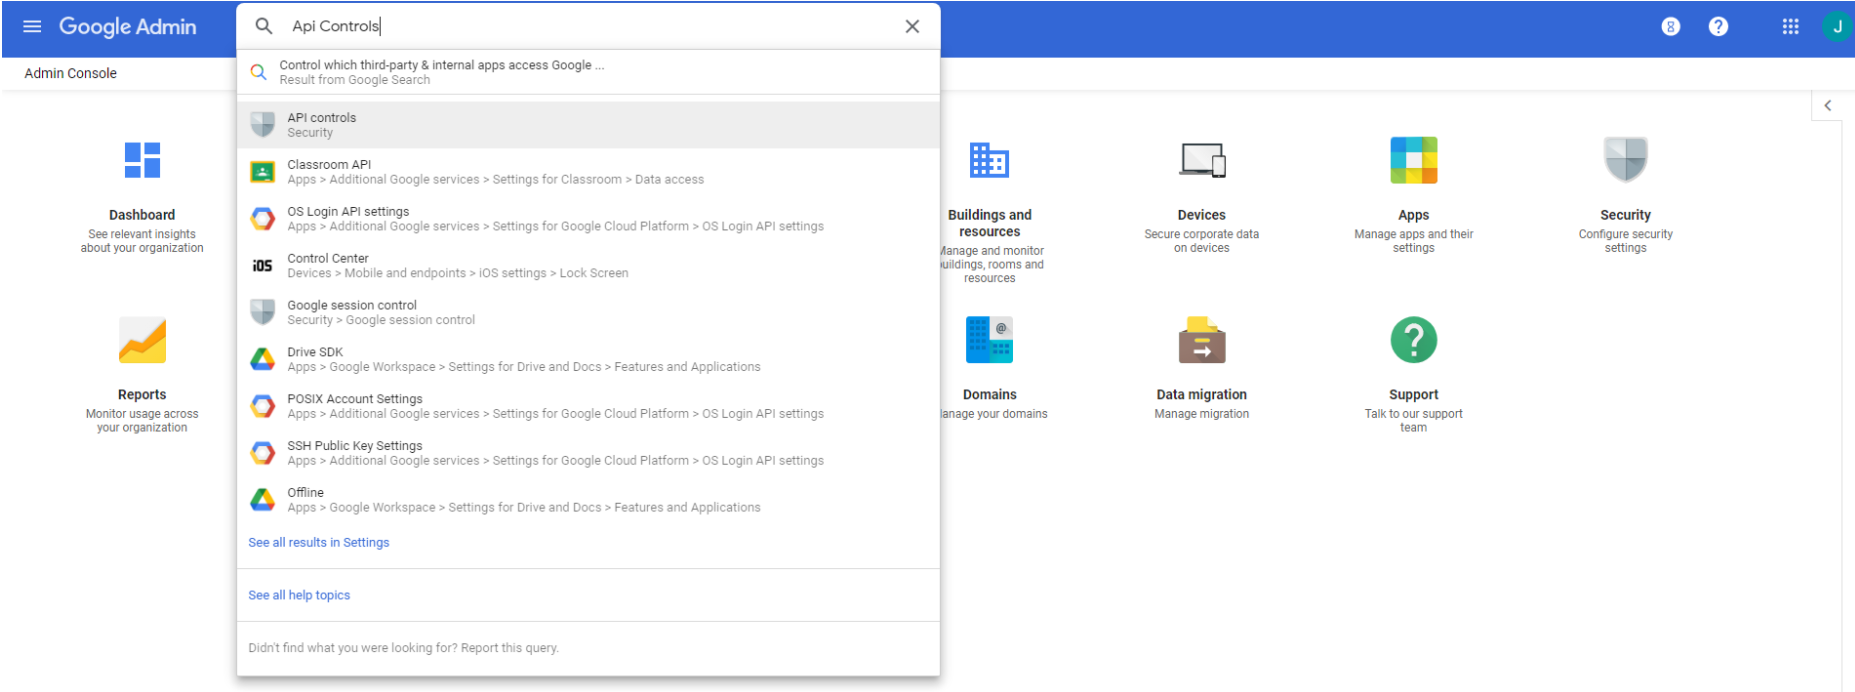 Click on Manage Third Party Access
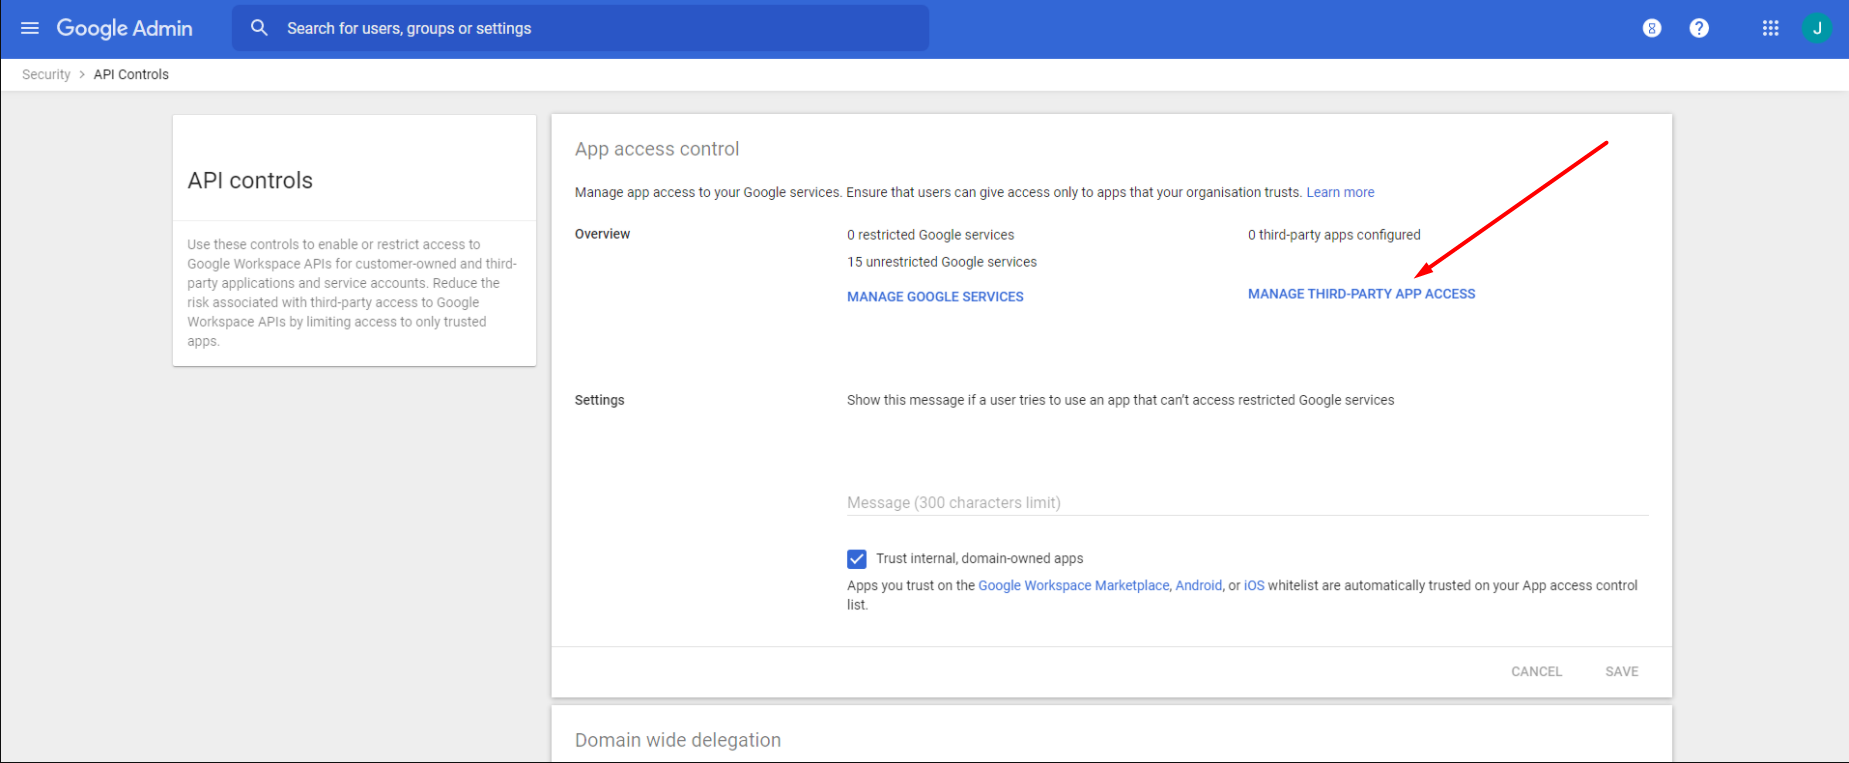
