Bulk texting a smartlist of leads for the first time

Bulk text helps you send customized SMS for your marketing / service campaigns. It helps provide actionable alerting, on-call management, and much more. With aNinja, you can create a smartlist with the leads that you’ve not yet contacted: Bulk texting a smartlist of leads for the first time.

Bulk texting a smartlist of leads for the first time

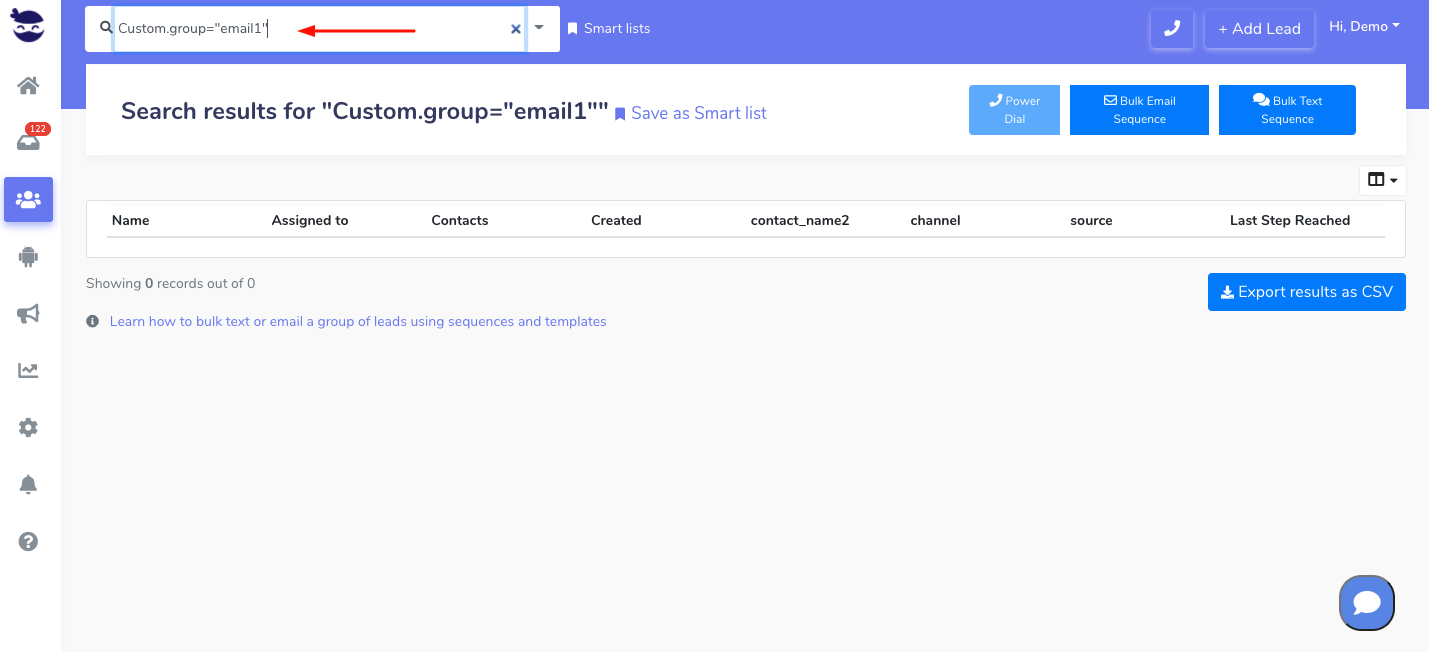
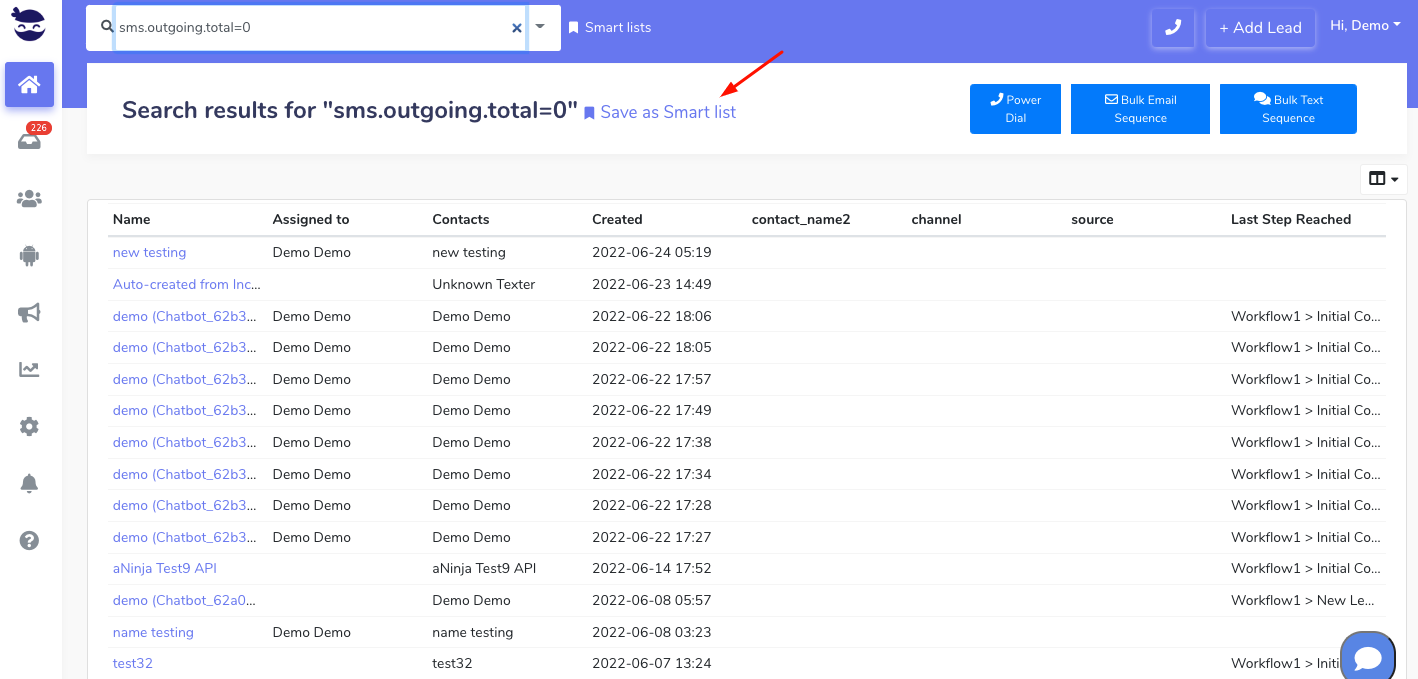
  • If you’d like to create a Smartlist of leads that have never received a text from your aNinja account before, you can use the following query:

sms.outgoing.total=0

Bulk texting a smartlist of leads for the first time

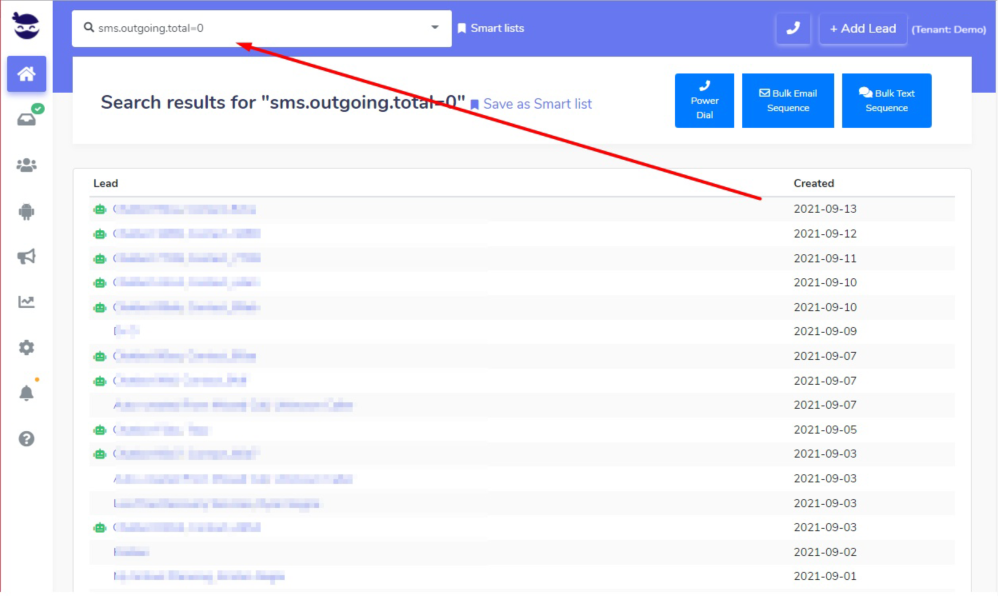
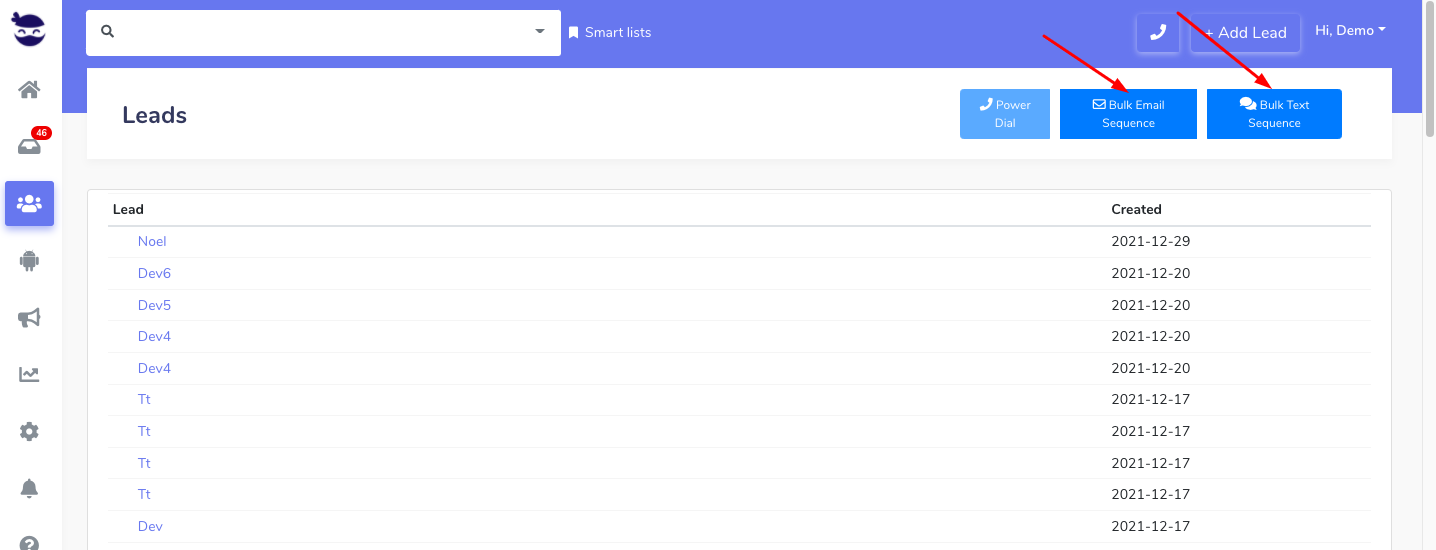
The results of the Smartlist will show in the Leads view. Go ahead and click on Bulk Text Sequence to start launching your text sequences to this list.

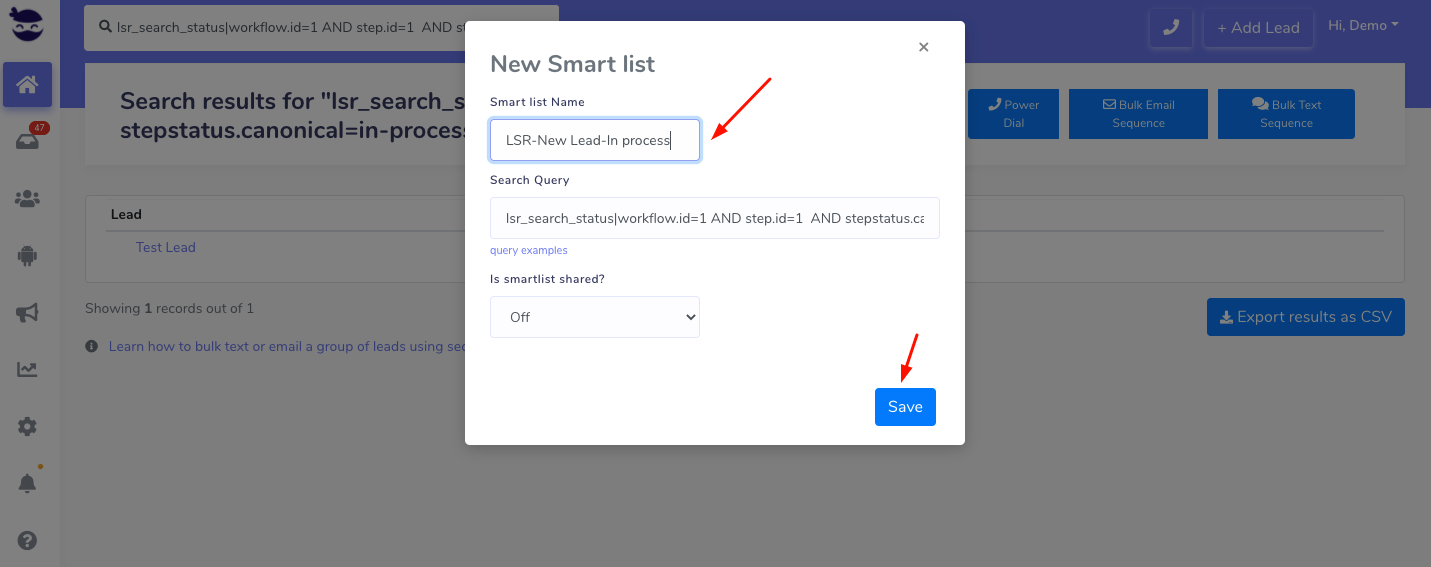
Saving your Smartlist

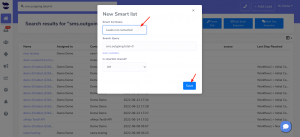
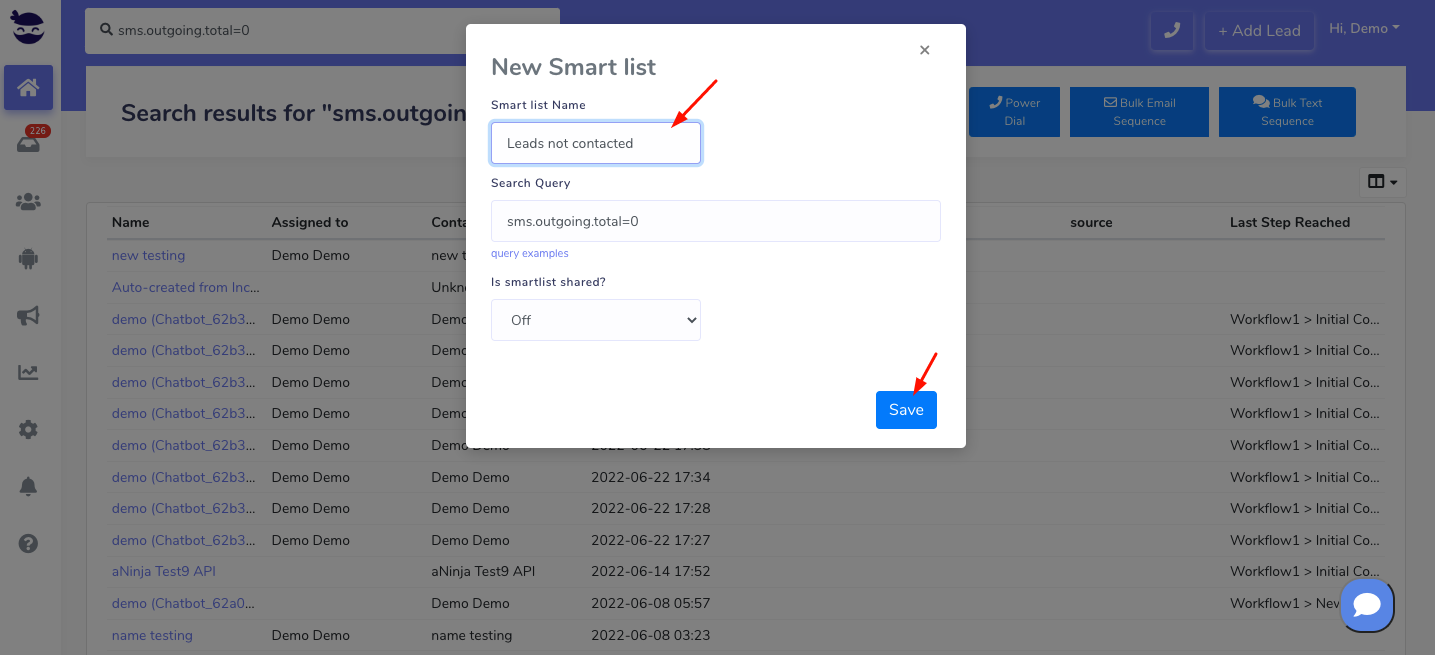
You can save that query into a Smartlist for future use.

  • Click on Save as Smart list
  • Name your Smartlist (e.g. Leads not contacted)
  • And Click on Save

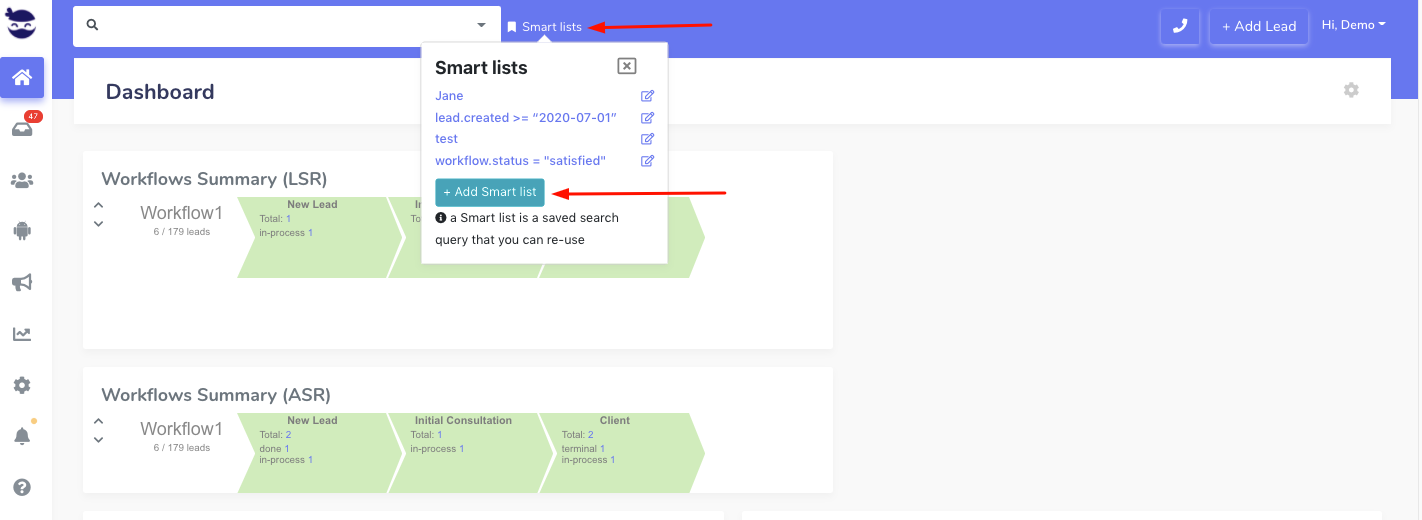
Find your saved Smartlist

Next to the top navigation bar, Click on Smart lists and locate your smartlist

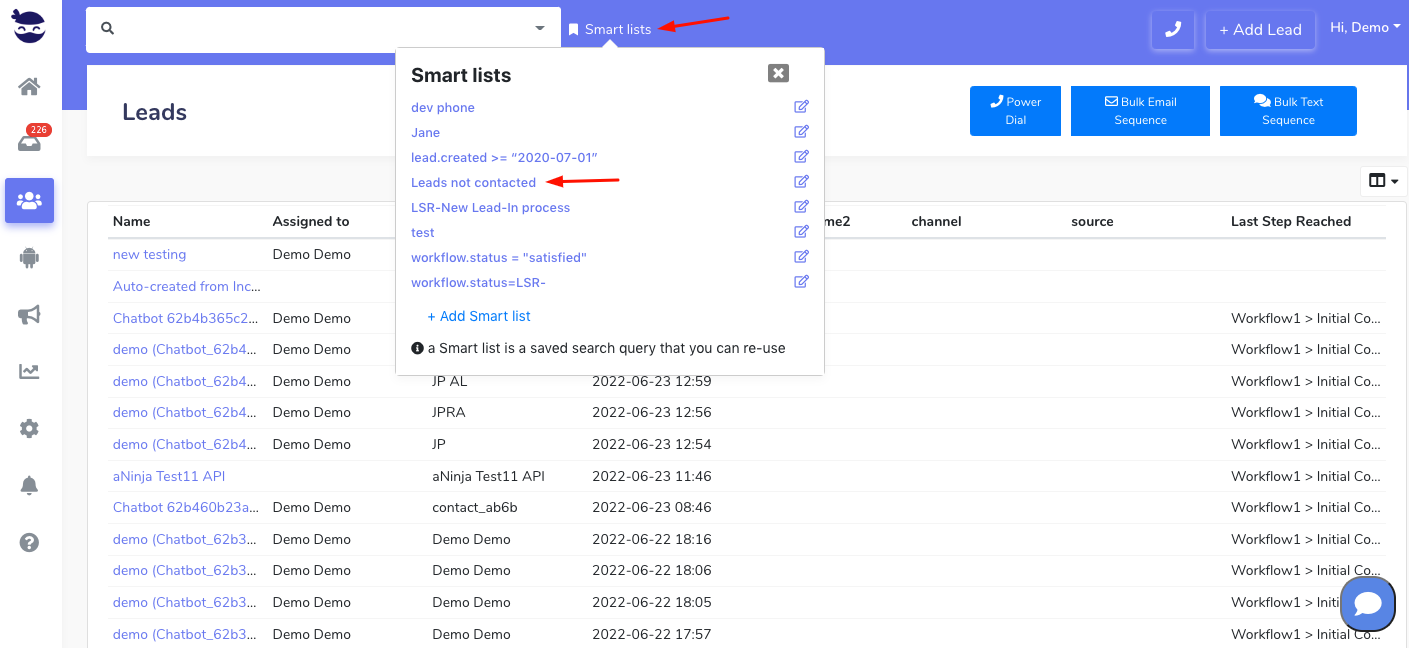
It brings you the results in the Leads view. You can choose to send Bulk Email Sequences or Bulk Text Sequences, or even power dial this list of leads.

aNinja Smartlist

aNinja Smartlist is a saved query that you can reuse as a list in your Dashboard while navigating through leads. As well, you can target this list of leads in email or text sequences.

Basically, this allows you to easily bulk email / bulk text in sequence. Or simply create Smart Views for the actions required and run through them as your daily to-do list.

Moreover, if you add new leads to your account and they match the query filtering parameters, they will automatically show up on the Smartlist results.

But, if a bulk sequence is already triggered or launched, it will not add new leads to it. Neither changing lead info after creating a sequence does affect the bulk sequence.

Creating aNinja Smartlist

  • From the top navigation bar, click on SmartList
  • Then on + Smartlist
  • Here, you can view the query examples
    • For example, to search for leads added after July 20, use this search query:
      lead.created >= “2020-07-01”
  • Search queries can be saved for future use “Save as Smartlist

Note!

Don’t forget to save the results of your query(ies) as a Smartlist before leaving the page to avoid losing them.

Smartlist of multiple queries

Smartlists can be built with one or multiple queries. This way, you can narrow your search for specific leads.

Accessing saved Smartlists

  • From the top navigation bar, click on Smartlists.
  • You can see a list of all the saved Smartlists.
  • Click on a Smartlist and the system brings up the data for you in the leads view.
What can you do with a Smartlist:

Save the Do Not Contact list as Smartlist

Creating a Smartlist from Bulk Import list

aNinja Smartlist multiple queries

Bulk texting a smartlist of leads for the first time


Launch a bulk email or text sequence for a specific group of leads

Create a custom field that specifies a group of leads – create a Smartlist using this custom field – and Launch a bulk email or text sequence for this group of leads.

Using the custom fields feature, you can pick the right leads delegated for a special campaign. The custom field could be a location, creation time, source, or any identification you want to add to a lead.

Whether you choose to reach out to your leads by email or by text, you can send them in Sequence.

You can also launch an email or text sequence on a specific event using aNinja triggers feature.

Launching a bulk email or text sequence for a specific group of leads

1- Create a new custom field
2- Segment your leads

Group or segment your leads based on their specific characteristics by assigning them a custom field, to personalize the messages and make them relevant to each specific segment/group.

3- Create a Smartlist using Custom fields

Add the Custom field to the Smartlist search query which dedicated to retrieve leads based on their characteristics. e.g. Custom.Group=”email1″. This brings all the leads having this custom field to the leads view.

4- Launch the sequence
  • Select the Buk Email Sequence or Bulk Text Sequence from the top right of the page, and hit Launch Bulk Sequence to Launch a bulk email or text sequence for this specific group of leads.Launch a bulk email or text sequence for a specific group of leads
  • An alert pops up to show the number of leads included in this sequence and that have no phone numbers or no email addresses. Click on the number in the alert to see those leads.

aNinja Workflows

aNinja WorkflowsWith aNinja workflows, you can organize your work and the steps you want the salespersons to carry out to reach the highest productivity of your team. It’s all that it takes to turn a lead into a customer.

aNinja is designed to make your sales communication quick, easy and effective. You can easily build out unique sales workflows using our dynamic Smartlists and email sequences.

What is a Workflow

A Workflow consists of a series of sequential steps. You need to carry them out one after another with proper approvals at each stage from the beginning to the end.

That includes everything from prospecting to closing the sale. Sales cycles vary between companies and industries, but they usually have a similar sequence of steps.

And while most business owners can intellectually understand why workflow is important, it’s hard to truly wrap your brain around it until you have actually seen it in action.

Benefits of workflows

  • Monitor the lead/client progress in the sales/customer pipeline.
  • Better align leads/clients with the most appropriate staff members.
  • Since the workflow keeps a record of what occurs in the system, an audit trail shows who, what, when, and what actions were performed.
  • Excellent communication with leads/clients makes day-to-day operations smoother overall.

Adding a workflow

These are the steps to add aNinja Workflows:

  • On the left sidebar, click on Settings > Workflows
  • Click Add Workflow
  • Name the Workflow
  • Keep/Rename the Step Status and hit Save

You can add multiple steps to the workflow.