Saving bulk import mappings

You can save bulk import mappings and reload the mapping when you want to import a similar file.

Saving then reusing the bulk import mapping is useful if you regularly do bulk imports into aNinja and have many fields to map.

First let’s start by listing the steps to follow for a successful bulk import of data.

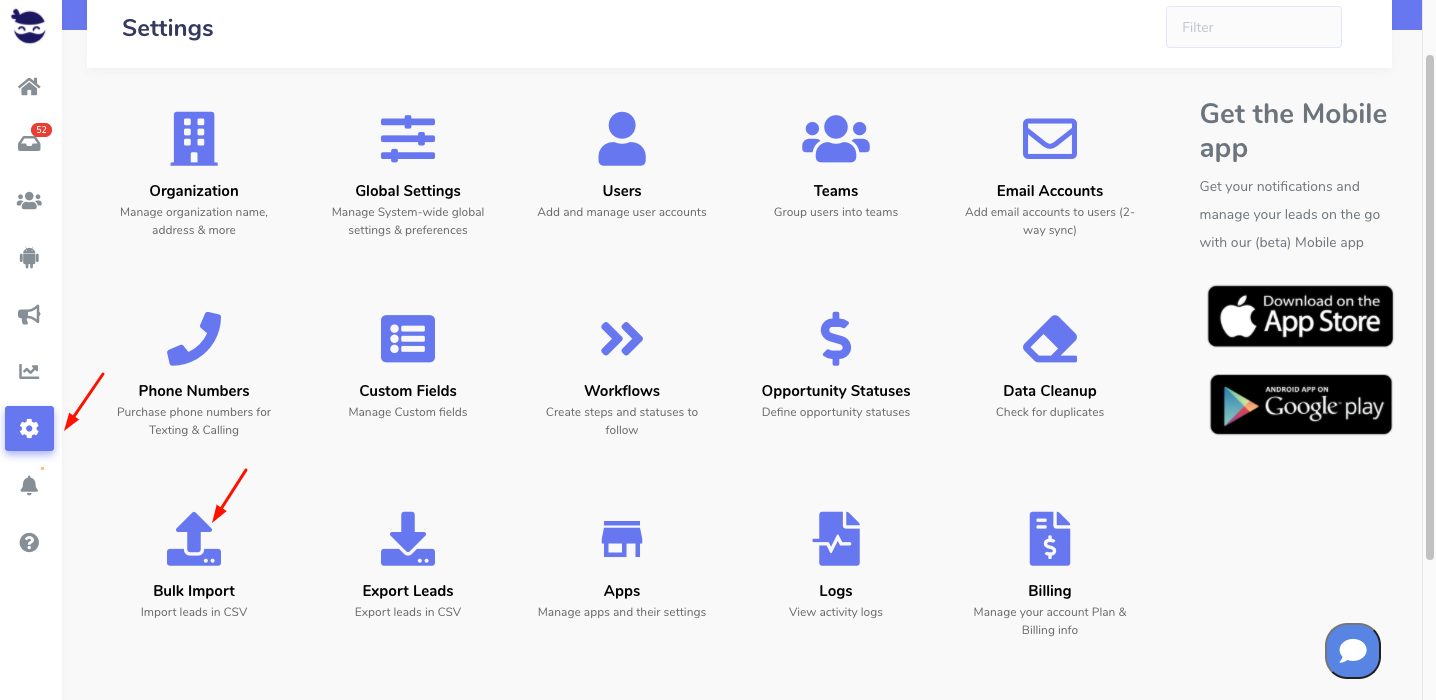
How to do a Bulk Import of data

Here are the steps to follow for a successful bulk import:

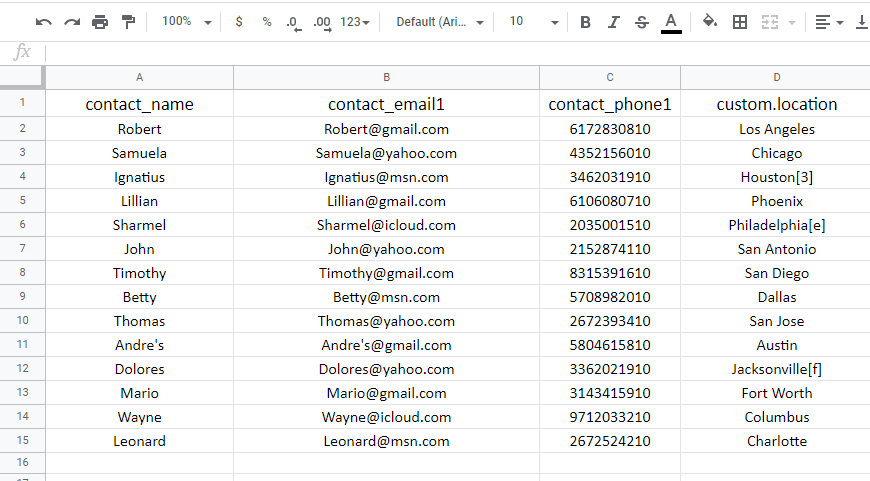
1- Sanitizing the contacts file before the Import

You want to sanitize your contacts file and make sure the data is properly formatted and structured to avoid errors when importing it.

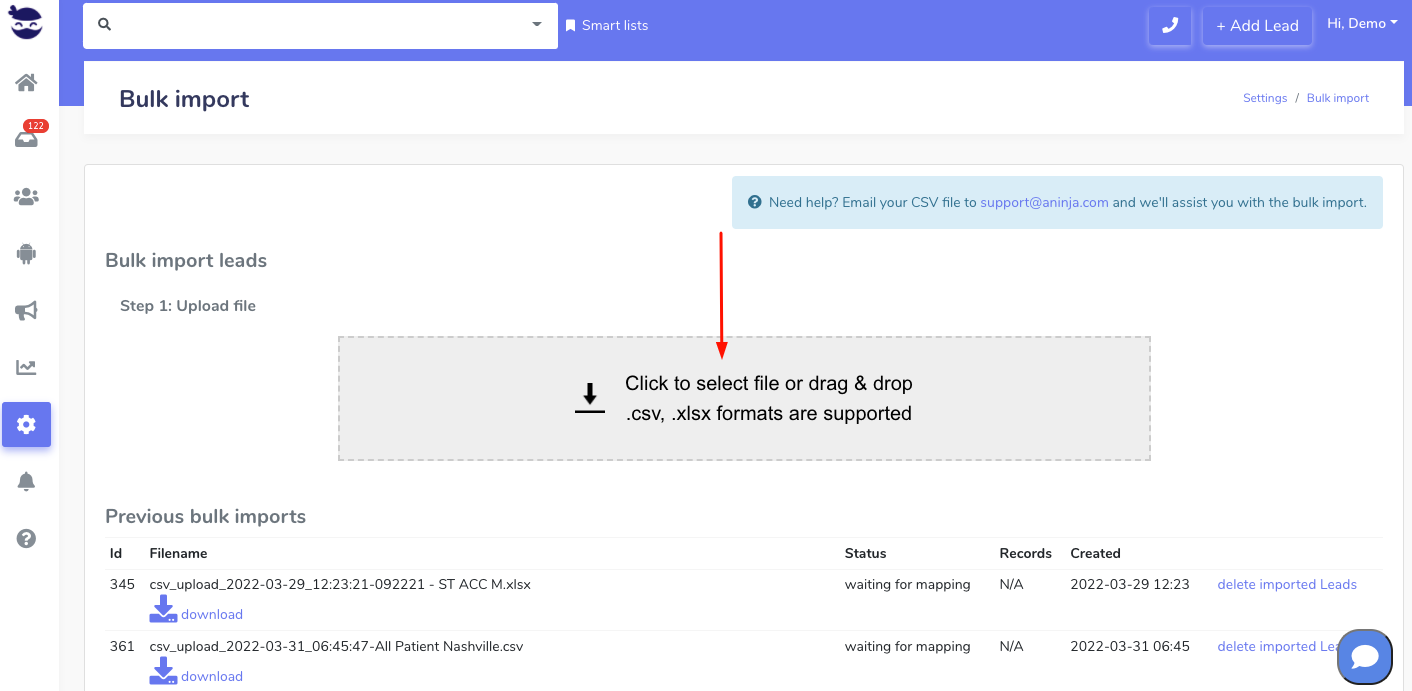
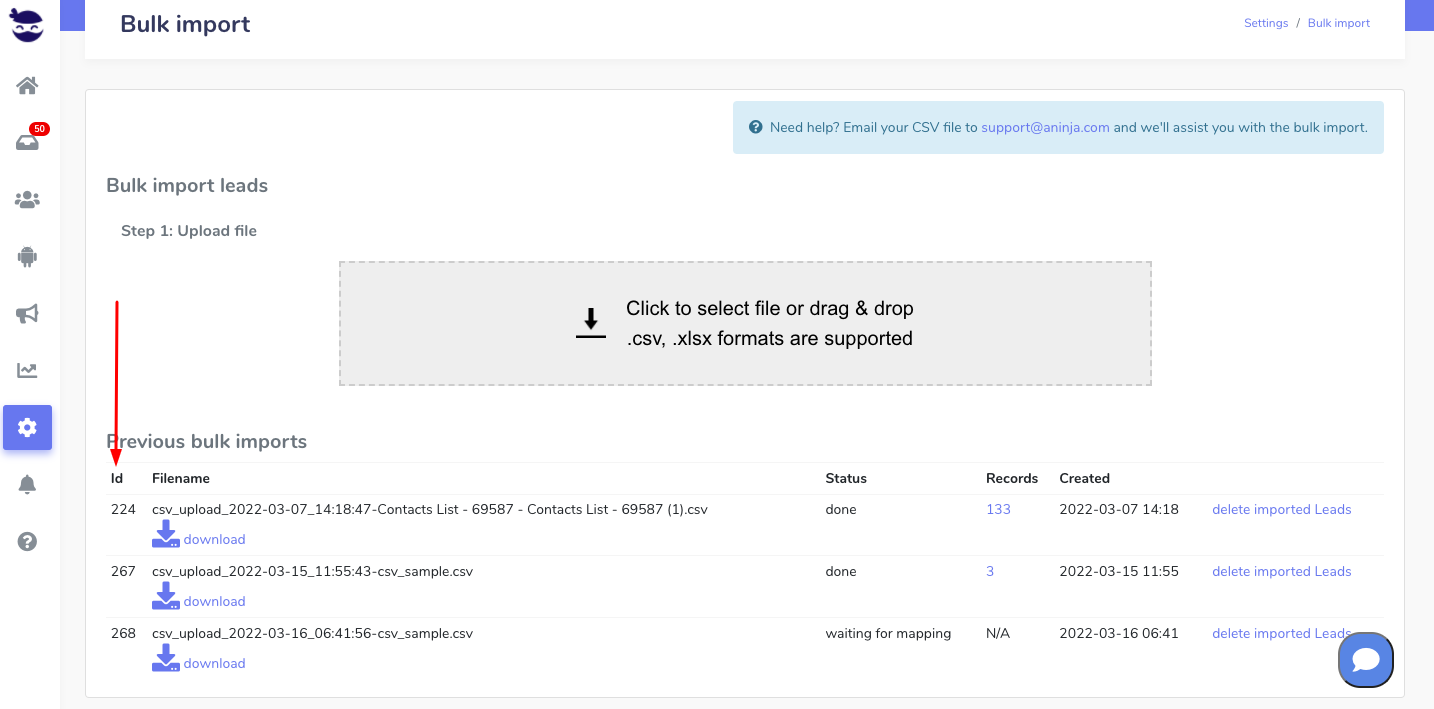
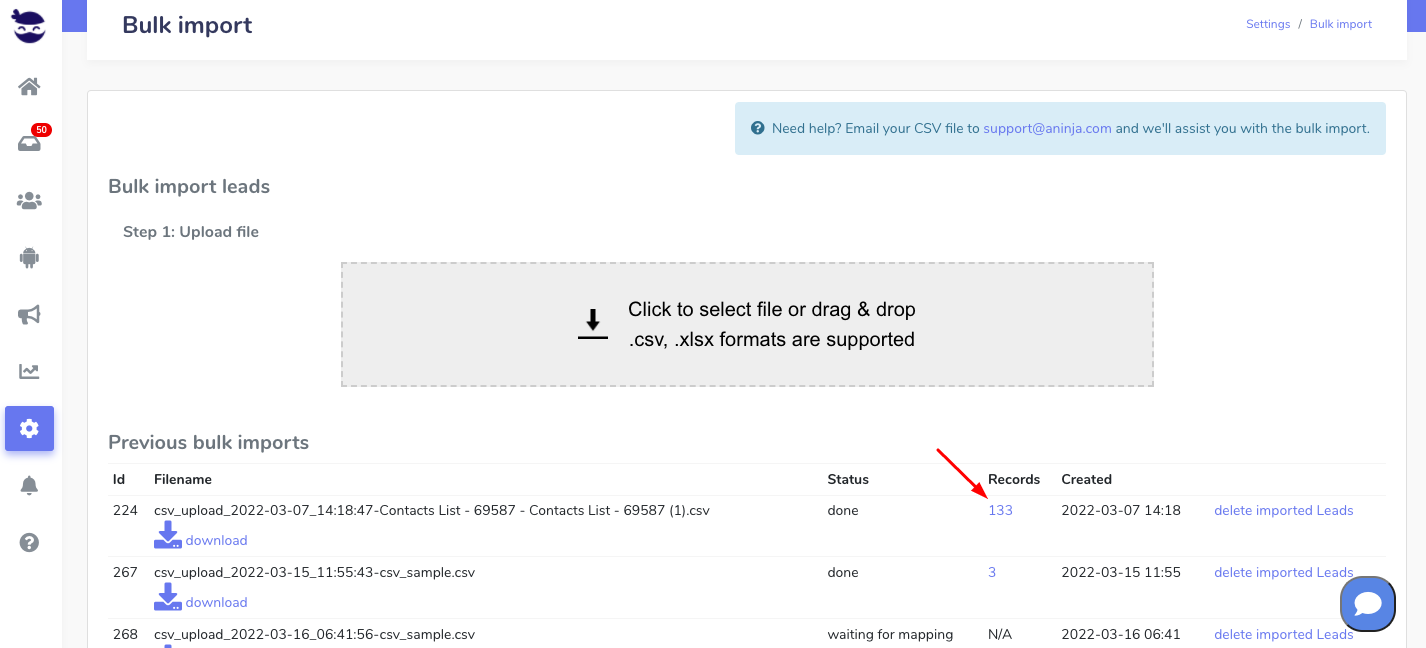
2- Bulk Import using a CSV or Excel file

Importing the file is like storing the data which allows for easy querying and manipulation of the data.

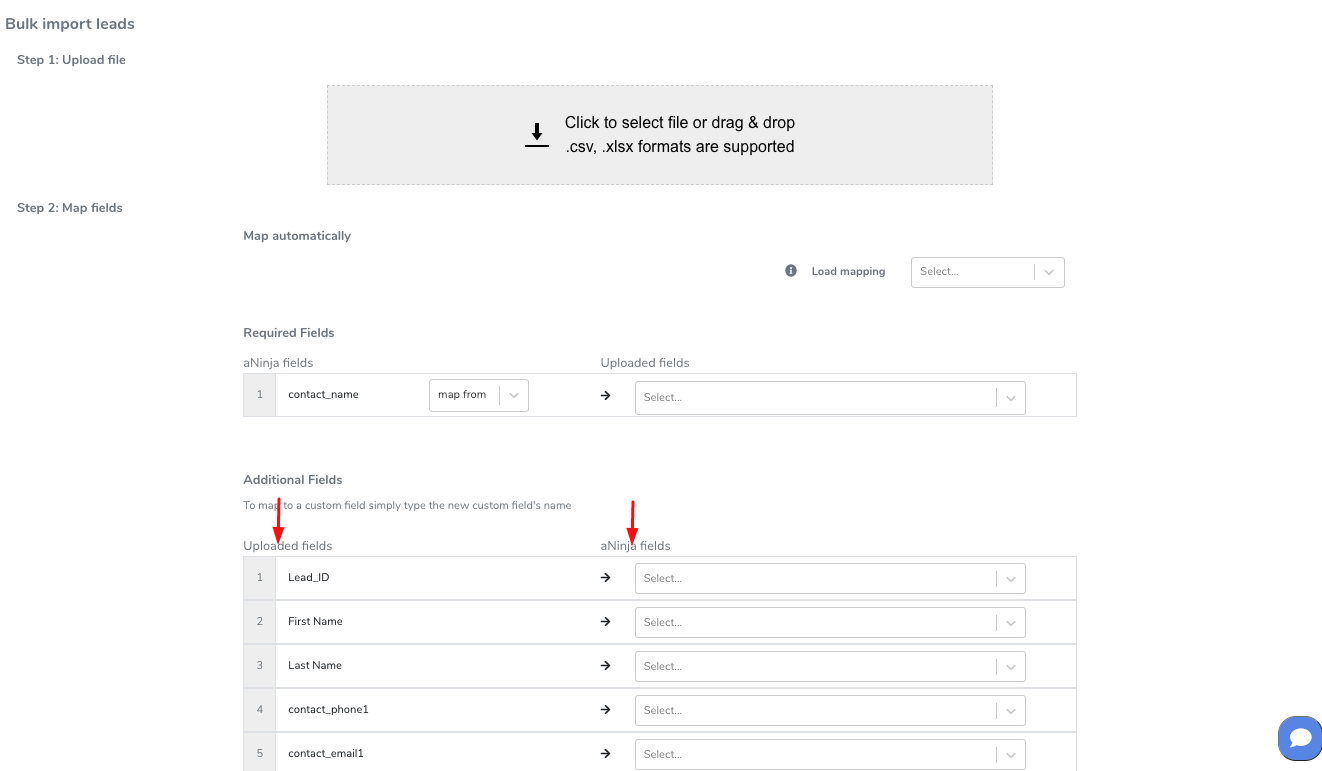
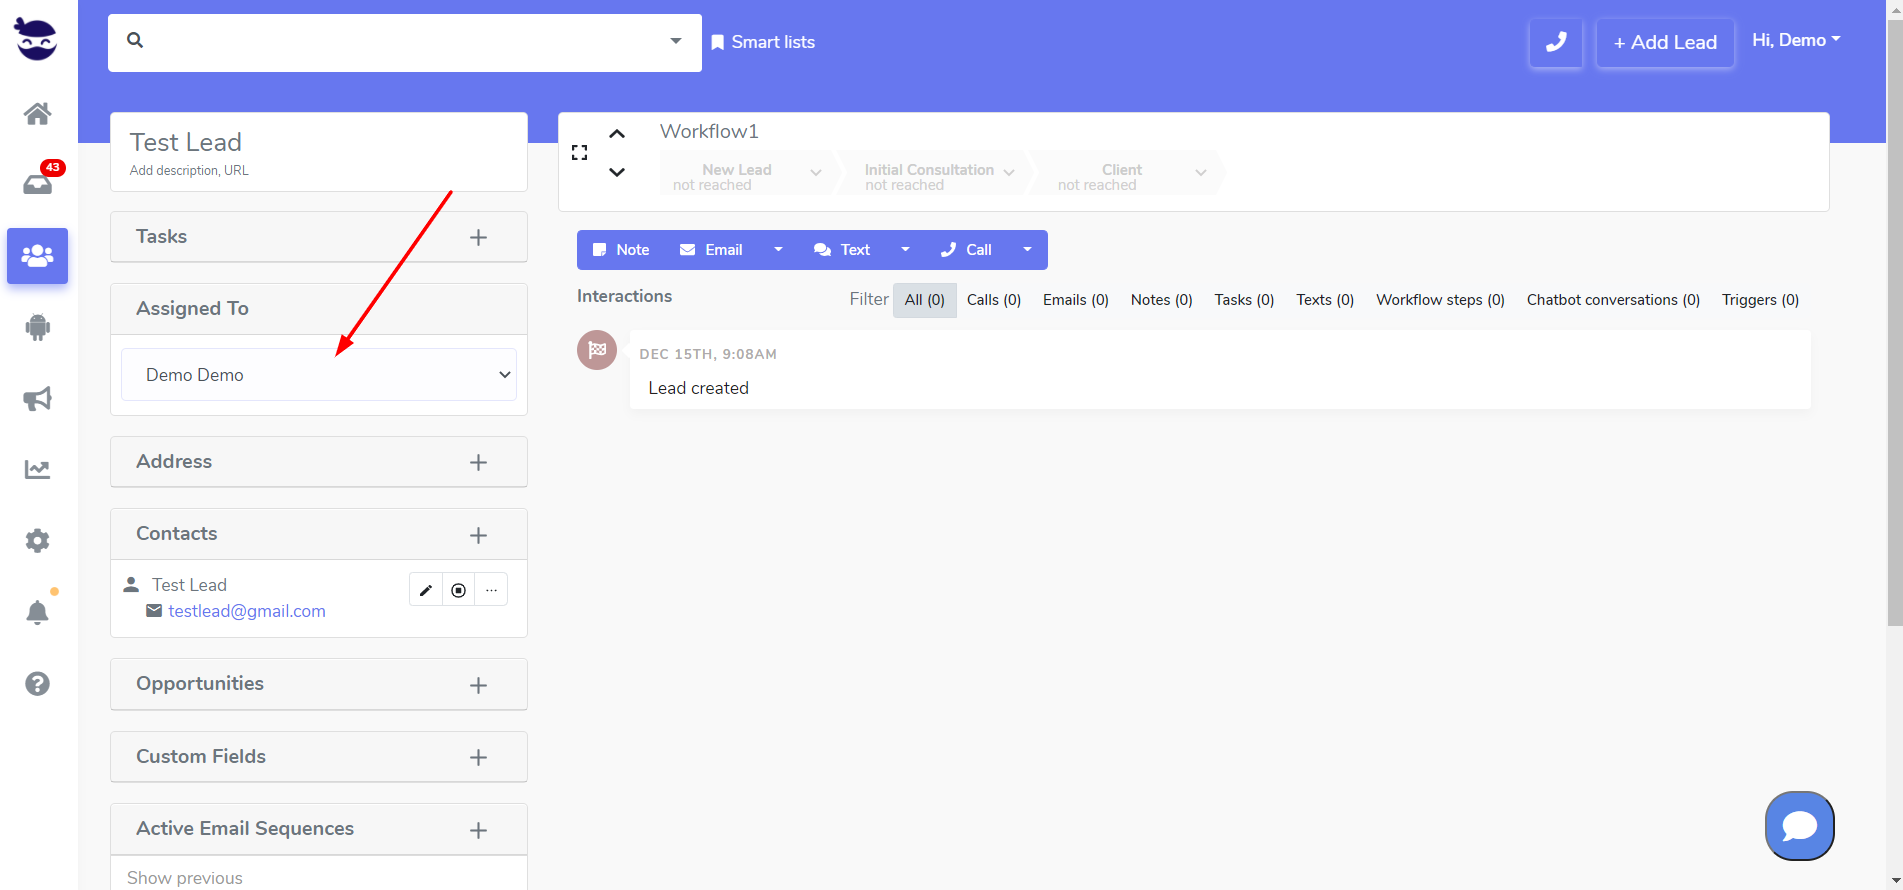
3- Mapping leads data to aNinja

The correct mapping allows the data to be stored in the right places and easily retrieved when needed.

Saving the fields mappings

Save bulk import mappings to skip manually mapping the fields each time you have a file with similar format to import.

Before uploading a file, you can save your mapped fields and reuse them later for automatic mapping.

All you have to do is give your mapping a name and click on Save mapping.

Saving bulk import mappings

Note!

Make sure that the contact names are not empty in the file, as it is the only required field for the import.

Don’t forget to click on upload to complete the import of data.

Loading a saved mapping

The file you’re trying to upload must have the same headers as the saved mapping and are listed in the same order.

Click on the mapping name from the load mapping drop down.

The system automatically does the mapping.

If it was successful, it displays this message:

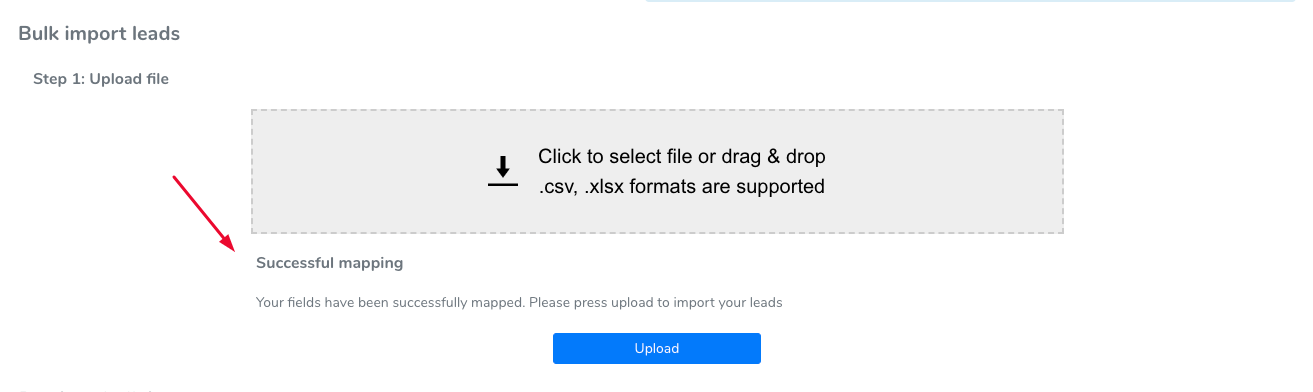
Go ahead and click Upload to complete the import of the fields.

If the mapping failed, you receive this alert:

This means that the file you’re trying to upload doesn’t have the same number or order of headers as the saved mapping.

Here, you can:

  • Either, choose another mapping if you’ve already saved that format
  • Or, you want to do the mapping manually and save it for future use.


Mapping fields for a successful data import

It’s important to understand the data types for successful fields mapping during the import of data.

Whether you’re importing your contacts in a CSV file, or through API (Forms, Ad campaigns, etc…); saving your data in the right place allows you to easily manipulate it and create Smartlists, search for leads, and launch automation.

Data Types

Mapping fields for a successful data import:

aNinja has both Standard fields which are the built-in default fields and Custom fields, which you customize to your needs.

All the imported data is located in the Lead view.

Standard Fields

aNinja standard fields are found under the categories: Lead’s Contacts, Company, and Address.

The Contact name is the only required field and it’s essential to complete the import.

Custom Fields

Prefix your field’s name with “Custom.” so it is saved as a custom field on the lead page.

When importing leads in bulk in a CSV file to aNinja, if you can’t see the fields you need, you can create them manually upon import.

Or, before the bulk import, go to Settings > Custom FieldsWhen doing a bulk import, aNinja anticipates which Custom fields you might want to create and marks them as ‘New’. Mapping to a field marked ‘New’ automatically creates a new Custom Field within aNinja.

Types of Custom Fields

When you create a custom field in Settings > Custom fields, you can designate its type:

Text – For text input
Link – For fields with any link/URL
Date – Date in YYYY-MM-DD format
Dropdown – Fields with multiple options dropdown

Then, you can use it on the lead page and assign it a value to be able to group/search for specific leads when needed.

Where does the imported data appear

After the import, you can search your aNinja CRM for the imported leads. You can also search for any custom field and any other info that you have imported.

In the lead view, the left side is where the lead’s data appears:


Creating a Smartlist from Bulk Import list

After importing contacts in a CSV or Excel file, you can directly  start by creating a Smartlist from the Bulk Import list.

Creating a Smartlist from Bulk Import list

  • In Settings > Bulk Import, locate the list that you’ve just imported in Previous Bulk Imports.
  • Under Records, click on the blue number (which is the number of leads in this list). This redirects you to the leads view where you can see all those leads.
  • On the top navigation bar, you can see the query that was used to execute this process. Something like e.g.: lead.bulkimport_id=12. 12 represents the serial number of the bulk import.
  • Copy this query.
  • Click on Smartlist > Add Smart List
  • Give a name to the Smartlist
  • Paste the query in “Search query”.
  • Save it for later re-use.

Launching sequences for this particular list

Exporting Contacts from Mailchimp

You can export your contacts from Mailchimp and import them into your aNinja account to augment your lead database.

You can export an entire audience, a segment, or a group.

Configure contact table

  • Click Audience > All contacts
  • Click the Toggle Columns drop-down menu.
  • Uncheck the boxes next to the fields you want to hide or check the boxes next to the fields you want to view.
    Cursor checks box in toggle columns drop-down menu.
  • To reorder columns, click and drag the three dots next to any name field and drag it to your preferred location.
    Cursor clicks three dots next to name field.
  • Click Save.

View or export an audience

To view or export your entire audience, follow these steps.

  • Click Audience > All contacts.
  • If you have more than one audience, click the Current audience drop-down and choose the one you want to work with.
  • Click Export Audience.
    • You will receive the exported audience by email. You can download the file to your computer.
  • Or from Mailchimp, after the export loads, click Export as CSV to download the file to your computer.

View or export a segment

To view or export a saved segment, follow these steps.

  • Click Audience > All contacts.
  • If you have more than one audience, click the Current audience drop-down and choose the one you want to work with.
  • Click View Segment, and choose the segment you want to export.
  • Click Export Segment.
    click export segment

    • You will receive the exported segment by email. You can download the file to your computer.
  • Or in Mailchimp, after the export loads, click Export as CSV to download the file to your computer.

View or export tagged contacts

To view or export tagged contacts, follow these steps.

  • Click Audience > All contacts.
  • If you have more than one audience, click the Current audience drop-down and choose the one you want to work with.
  • Click the Filter by Tags drop-down menu and choose the tag you want to work with.
  • It generates a segment of all the contacts in your audience with that tag applied to them.
  • From the segment view, click the Filtered By Tags drop-down menu to choose more tags. When you’re done, click Export Segment.
    • You will receive the exported segment by email. You can download the file to your computer.
  • Or in Mailchimp, after the export loads, click Export as CSV to download the file to your computer.

View or export a group

  • Click Audience > Audience dashboard.
  • If you have more than one audience, click the Current audience drop-down and choose the one you want to work with.
  • Click the Manage Audience drop-down and choose Manage contacts.
  • Click Groups.
  • Then, hit View Groups to expand the group you want to view.
  • Click the # contacts link to view the individual contacts in each group.
  • Click Export Segment.
    • You will receive the exported segment by email. You can download the file to your computer.
  • Or in Mailchimp, after the export loads, click Export as CSV to download the file to your computer.

Open your export file

Your export may include a ZIP file that contains separate CSV files for each type of contact (subscribed, unsubscribed, non-subscribed, and cleaned). Unarchive the ZIP file to access the CSV files and open each file individually in your preferred spreadsheet application ( Microsoft ExcelGoogle Sheets, or OpenOffice Calc.)


Mapping fields for Leads Bulk Import

aNinja offers different ways to create leads in your account. Importing leads in a CSV file is one of them.

Before the import, you want to sanitize the contacts file to ensure proper mapping.

The correct mapping of leads’ data to aNinja fields saves your data in the right place which makes searching for it easy.

You can also save bulk import mappings and reload it when you have a similar file to import (same order and number of headers).

Mapping leads data to aNinja fields

  • For the bulk import, go to Settings > Bulk Import
  • Select the contact’s file.
    • If in your CSV file there are records with no contact names, you receive an alert so you go back to the file and add the names. Then try to upload it again.
  • Now, map the data to aNinja fields:

  • The contact name is the only required field.
    • You can either map it to one field or join 2 fields in case the first name and last name are saved in 2 separate columns in your CSV file.
  • It’s important to map the data in your contacts file with the correct aNinja fields to be able to find them in the right place in the lead view.

You can even create custom fields if they’re not already there.

Standard fields
  • Contact_name: is a required field and it’s essential to complete the import.
  • Primary contact’s email: contact_email1. You can also add a second email (contact_email2).
  • Primary contact’s phone: contact_phone1.You can also add a second phone number (contact_phone2).
    • Here we recommend choosing the mobile number to be the primary contact phone as the system grabs the primary phone number to be used when texting.

Custom fields

You can create custom fields immediately when doing the mapping if they were not listed among the fields. Just prefix the field with “Custom.” e.g. Custom.Source

Saving field mappings

It’s optional. You can save the fields mapping and reload it when you have a similar file to import (same order and number of headers).

It’s useful if you regularly do bulk imports into aNinja and have many fields to map.

Don’t forget to click Upload to import the data.

Where does the imported data appear

After the import, you can search your aNinja CRM for the imported leads: Lead Contacts, Custom fields, and Addresses. Type your search on the top navigation bar.

  • Lead’s contacts appear under Contacts in the lead view.
  • Opportunities also appear in the opportunity section in the lead view.
  • The company’s info appears on the top left of the lead view, in the Company section.
  • Custom fields appear under Custom fields in the lead view.

Have any specific questions on the best ways to import your data? Please, email our Support team at support@aninja.com.

Sanitizing or cleaning the contacts file before import

Saving the right data in aNinja allows for easy searching, powerful Smartlists, and the ability to automate your emails and texts.

Here are the essential steps to take and the common mistakes to avoid when importing your Leads into aNinja.

Sanitizing or cleaning the contacts file before import

To successfully import your contacts file, you want to remove unnecessary fields and characters.

  • Have your data saved in an Excel or Google sheet file as a dataset* and work on sanitizing it there.
    • Start your table at cell A1.
    • Always reserve the first row for the headers.
    • Make the contact name in the first column (A) of your sheet.

*dataset:

  • Remove unnecessary columns and rows. You don’t want to bloat your CRM with data that you’re not going to use.
  • Remove duplications. You don’t want to be sending the same email or text sequence to the same leads. That would be annoying for the leads and extra charges for you.
  • Trim spaces. Though we don’t save contact items with empty or just spaces values, your data would look tidier using the proper spacing.
  • Remove weird and unnecessary characters to avoid receiving errors when uploading the file.
  • Remove hyperlinks from the email or the URL addresses. Save them as text.
  • Convert the phone numbers to Numbers.
  • Delete the empty columns and rows. They might contain hidden data.
  • Rename your file headers according to aNinja fields. This helps you choose the correspondent aNinja field to map.
    • For the custom field values, simply prefix them with “Custom.” in the header.
      e.g. Custom.Location for a header of a column with the location.

Headers are in the first row (1):

Check the mapping rules to name your headers according to aNinja’s fields.

  • Lastly, save your file as CSV or Excel as aNinja supports these 2 formats.
    • A CSV file has commas in between the values of each column. If there is no comma separating the values of the columns, the CSV file is not valid. And you’ll not be able to import your file to aNinja. So, you want to check the export options that generated this file to make sure the comma is there to have a valid CSV.

Now your file is clean and ready to import to aNinja.

Have any specific questions about sanitizing or cleaning the contacts file before import? Feel free to leave us an email at support@aninja.com. We will happily assist you.

Segmenting leads in the bulk import using Custom fields

Segmenting the leads you are importing means separating them into different lists that can be more manageable. One way to do it is using custom fields.

aNinja was designed to allow sending a large number of texts and emails. However, before sending your outbound, you might want to check the daily email sending limits allowed by your email provider.

You might also want to check the text sending limits that you registered for in your billing plan with aNinja.

That’s why aNinja recommends you segment your contacts before importing them to avoid any issues.

Segmenting leads before the import

One way to do it is using Custom fields.

Inside your CSV editor / Excel / Google sheets, etc.. and before uploading:

  • Add a column to your bulk import, and name it Custom.batch
  • Fill the cells of this column with e.g. 1 for the first 1000, 2 for the second batch of 1000, etc…

Importing the segmented CSV file

  • Import that CSV to aNinja and map the Custom.batch column to an aNinja Custom.batch field.
  • Now, all the contacts in the CSV file are saved in your aNinja account, with the number of the batch as a custom field.

Identifying the leads by batch number

  • In the top navigation bar, search for e.g. Custom.batch=2
  • You will get the leads that have 2 in the custom field,  shortlisted in the leads view.

Now you can send them Bulk texts sequences, Bulk email sequences, and even powerdial them.

Lastly, save that query as a Smartlist for a faster access in the future.

Where does the imported data appear

After the import, you can search your aNinja CRM for the imported leads. You can also search for any custom field, opportunities, and any other info that you have imported.

  • Lead’s contacts appear in the leads contact section in the lead view
  • Opportunities also appear in the opportunity section in the lead view
  • The company’s info appears on the top left of the lead view, in the Company section.
  • Custom fields appear in the custom field section of the lead view
  • Lead Search is a field that also appears in the bottom left of the lead view. Specifically, these are info/links on the lead or the organization found in Google search.

Launch a text or email sequence to a bulk import list

Here are the steps to bulk import a CSV list of leads and launch a text or email sequence targetting those leads.

Locating the bulk import list

  • After the import is complete, you can view the file imported in Settings > Bulk Import > Previous Bulk Imports.
  • Each file has an ID number that identifies it.

Launch a text or email sequence to a bulk import list

Launching a text or email sequence to a bulk import list

There are 2 ways to launch a text or email sequence to a bulk import list:

  1. Go to Settings > Bulk Import 
    • In the Previous Bulk Import section, locate the list you want.
    • Then, click on the number under Records.
    • As a result, this opens the leads view where you can see all the leads saved in that list.
    • Also, in the top navigation bar, you can see the query that was used to bring you the data. It looks like:

lead.bulkimport_id=THE BULK ID

    • Save the results as a Smartlist for future use.

2- In the top navigation bar

    • You can search for the bulk list using this query: lead.bulkimport_id=TYPE HERE THE BULK ID

Now, hit the “Bulk Email Sequence” or “Bulk Text Sequence” button to target those leads with your text or email sequence.

Need help? Leave us an email at support@aninja.com. We will happily assist you!

Assigning a bulk import list

Assigning a lead to a user allows you to efficiently follow up with your lead and close them quickly. Especially if you have distributed the tasks between your team members to better close leads. How about assigning a bulk import list to a specific user!

Assigning a bulk import list to a user

  • When preparing the leads file, add a column in your CSV sheet called User_id.
    • You can find the user_id in Settings > Users > next to the user name.
  • And set the column values to the User ID of the user you want to assign the leads to.

Mapping the user ID to aNinja field

When importing your CSV file, you want to map the user ID in your CSV file to user_id in aNinja fields.

Where does the user ID appear?

After the import, the user ID you’ve added to your contacts list will show in the lead view of the imported leads > in the Assigned to section.Assigning a bulk import list

Note: As long you have “Users can only see Leads assigned to them” enabled under Settings > Global Settings, then users (unless admin) can only see leads assigned to them.

Need help in assigning a bulk import list? Leave us an email at support@aninja.com and include the CSV file. Let us know the user you’d like to assign.

Assigning a lead to a user

Assigning a lead to a user is the first task that you can do when a lead pops up into aNinja to turn them into a customer faster.

And in the sales/marketing process, multiple users may take charge of a lead, depending on their role.

Moreover, users with admin roles can manage the delegation of leads to different users.

When a lead is assigned to a user, if another user is sending them an email, it will pull out with the name of the user whom the lead is assigned to.

Assigning a lead to a user

Lead assignment can be done through:

  • The lead view
    • This requires admin access if the option “Users can only see Leads assigned to them” is enabled in Settings > Global SettingsAssigning a lead to a user
  • Triggers using [Lead assignment] actions

User ID

Each user is granted a private user-id as soon as they are invited to join aNinja, regardless of their role.

You can find the user-id in Settings > Users.

Using a Smartlist, you can utilize this user-id to filter leads assigned to specific users. You can also enable this Smartlist as a Dashboard Widget.

Similarly, you can narrow down your Opportunity report to see a snapshot of the users’ sales activities over a certain timeframe.