History of Interactions and Activities of a lead

aNinja brings you the history of all interactions and activities made for a lead in the lead view.

What’s the history of interactions and activities

Once the creation of a lead in your aNinja account, the system saves all the interactions and activities that you make to this lead, in the history section.

Moreover, they are listed in ascending order. So, the users and team members are kept in the loop of the actions performed on this lead.

In the history section you can view:

  • Calls made and durations.
  • Emails sent & received with this lead.
  • Notes that are left by any team member so any other user stays updated on any relevant info.
  • Texts sent to this lead.
  • Tasks assigned and their statuses.
  • Workflow steps changes.
  • Chatbot conversations initiated by this lead.
  • Triggers

Accessing the lead history

From the lead view, in the middle right of the page, you can see all the interactions and activities of the lead.The history of all interactions and activities for a leadYou can also filter activities and interactions that appear in the history section from “All Interactions” dropdown:

Including: Calls, Chatbot Conversations, Emails, Email Sequences,  Notes, Text Sequences, and Tasks.

Find your aNinja Chatbot embed code

Now that you’ve created the chatbot playbook, you want to embed it on your website so it starts assisting your website visitors, and collecting leads. Find your aNinja Chatbot embed code that is required to embed your aNinja chatbot on your website.

Find your Chatbot Embed Code

Creating Leads in aNinja

In aNinja, creating leads can be done in several ways.

A growing database of leads means more potential engagement. So import your leads from different sources and keep them engaged with newsletters and product or service updates.

Creating leads in aNinja

In aNinja, you can create leads in multiple ways:

  1. Manually one at a time.
  2. Importing Leads in Bulk using CSV file.
  3. Third-party Integration using aNinja API (including Chatbot conversations, form submissions, and website integration).
  4. Importing leads from your Phone Contacts.
  5. Importing leads from your Gmail account.
  6. Creating leads using BCC email address.
  7. Generating a lead from incoming SMS.

1- Creating Leads manually

  • First, log in to your aNinja account.
  • Then, on the top right, click on + add lead

2- Importing leads from a CSV file

Another way to add leads to your aNinja account is importing contacts in a CSV or XLSX file directly to your aNinja account.

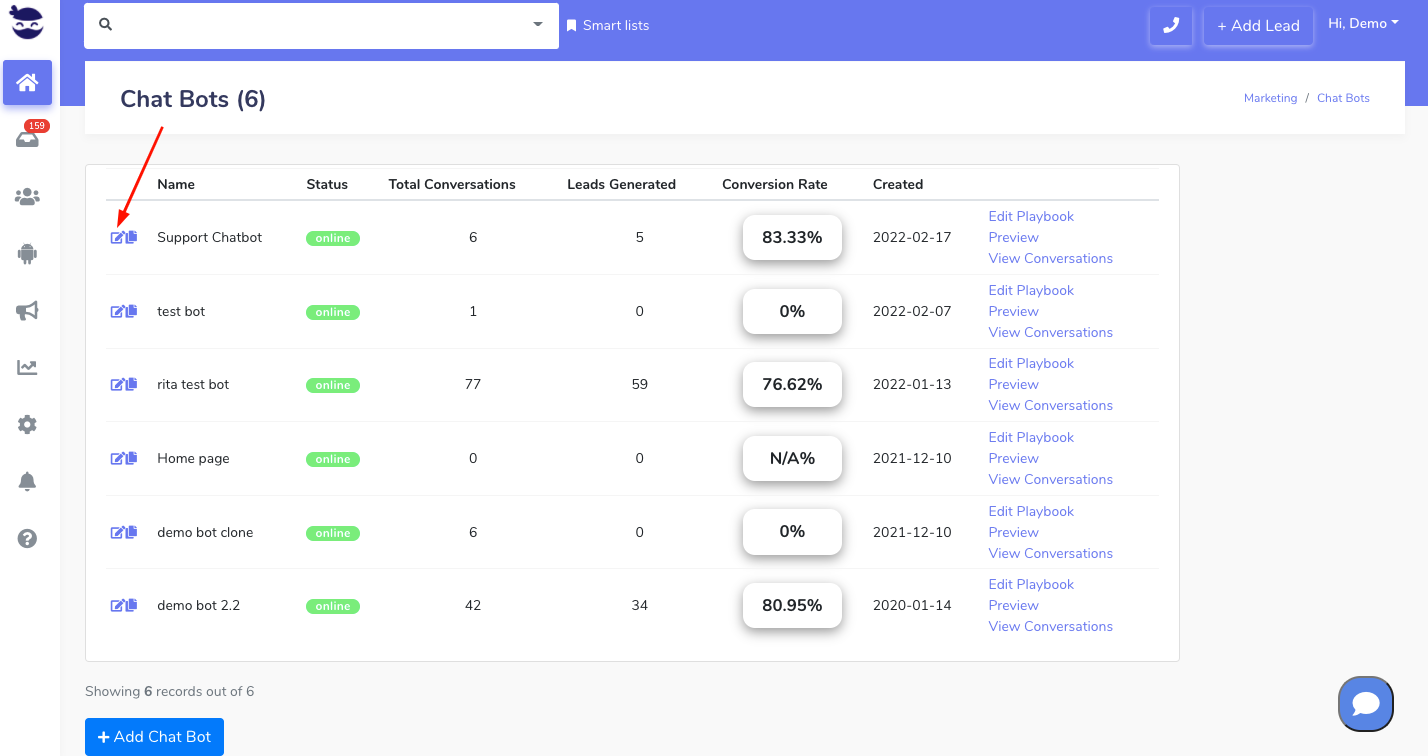
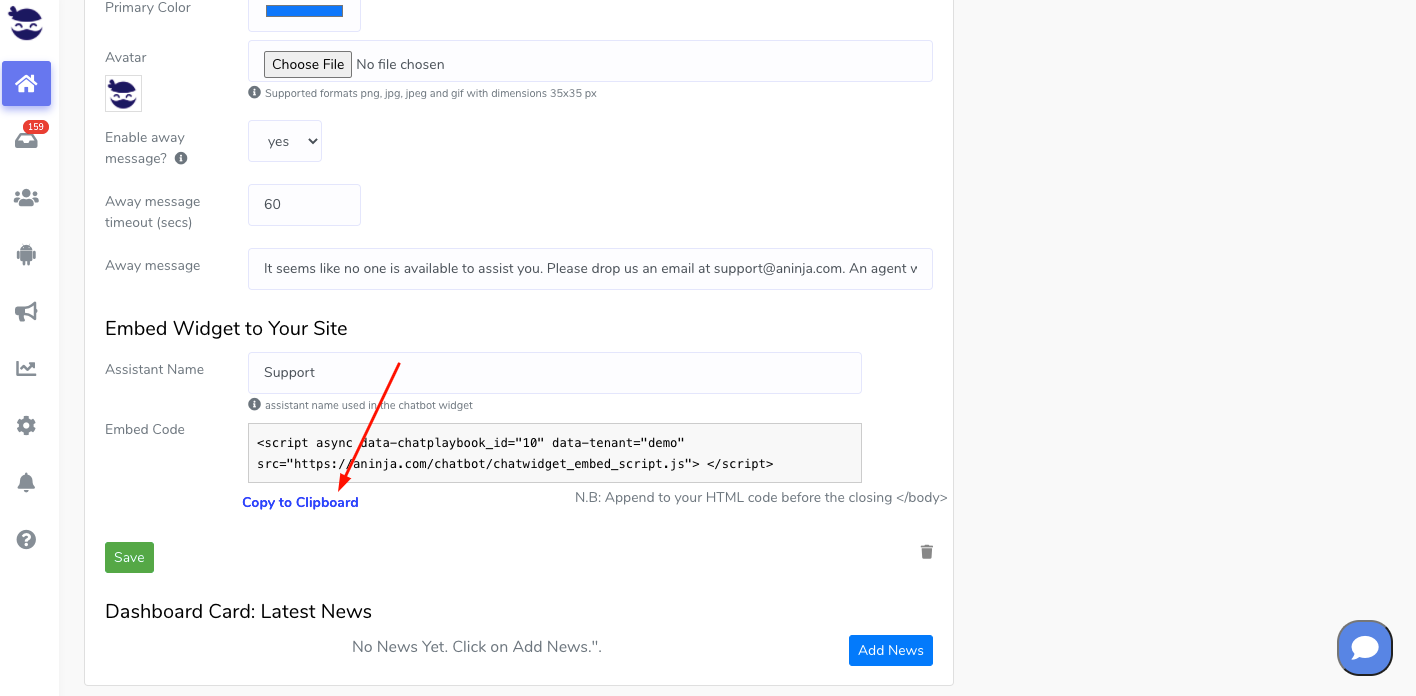
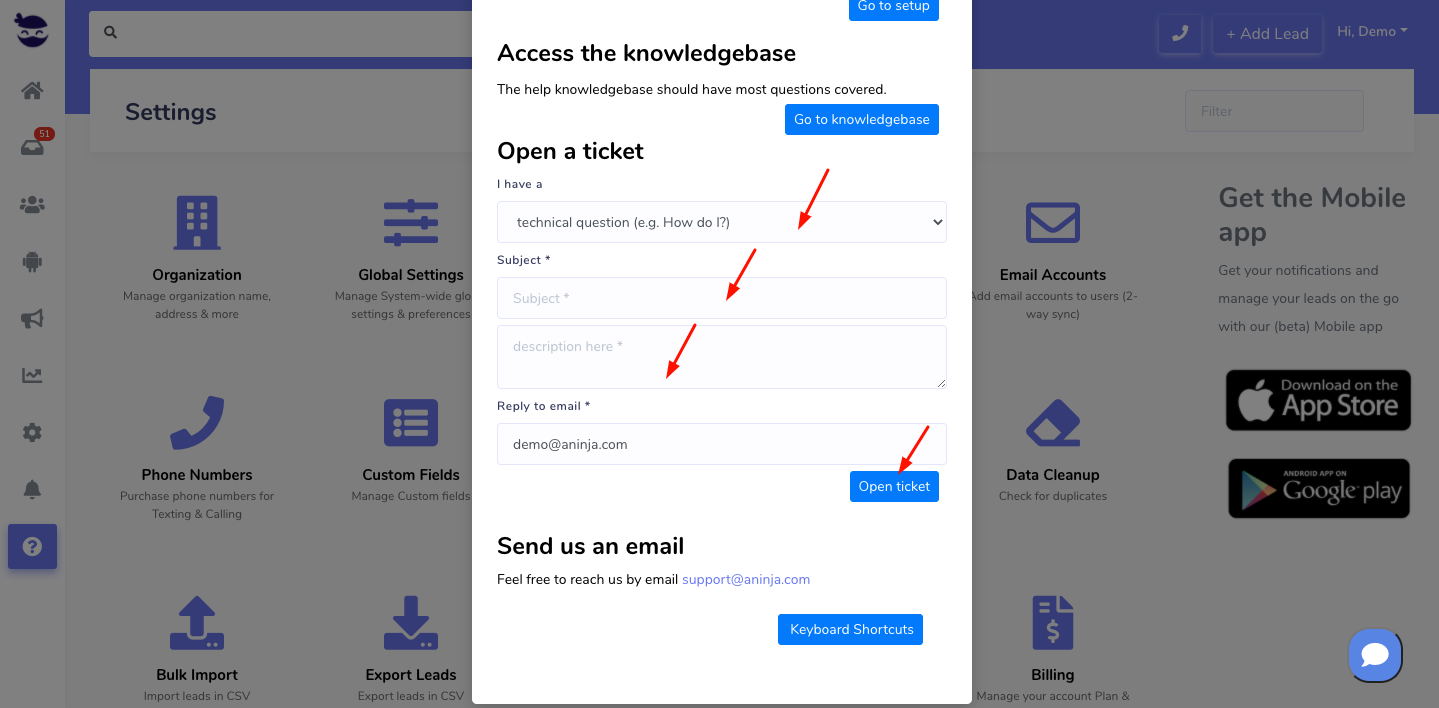
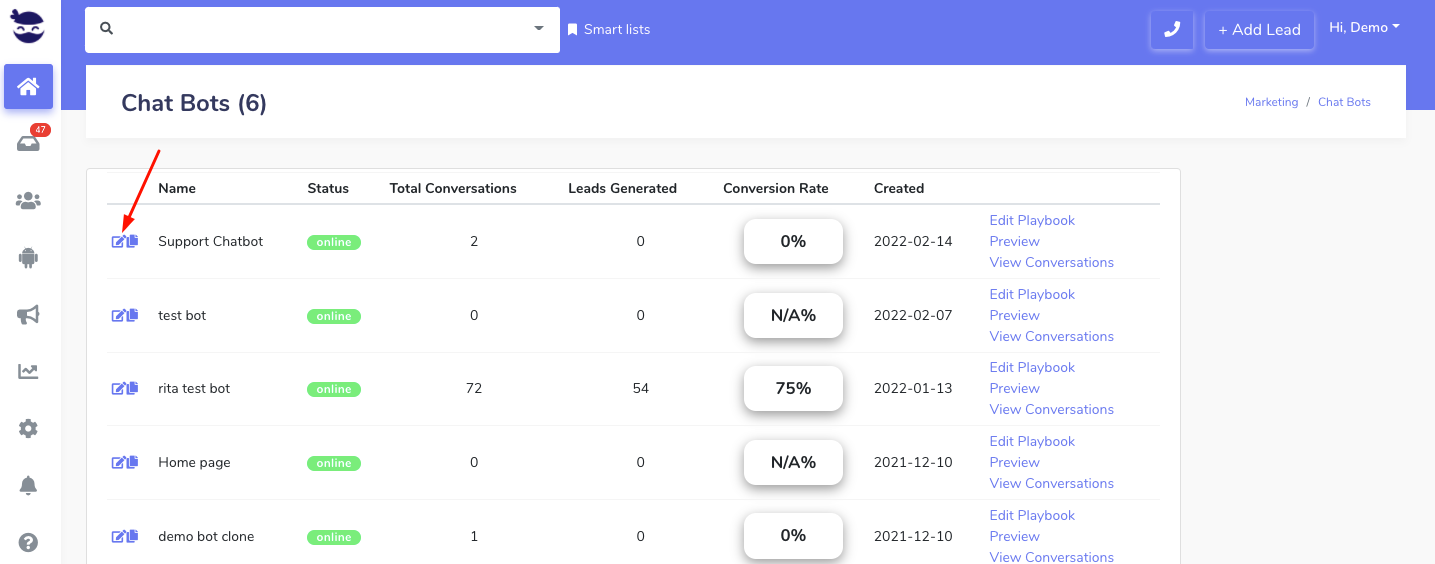
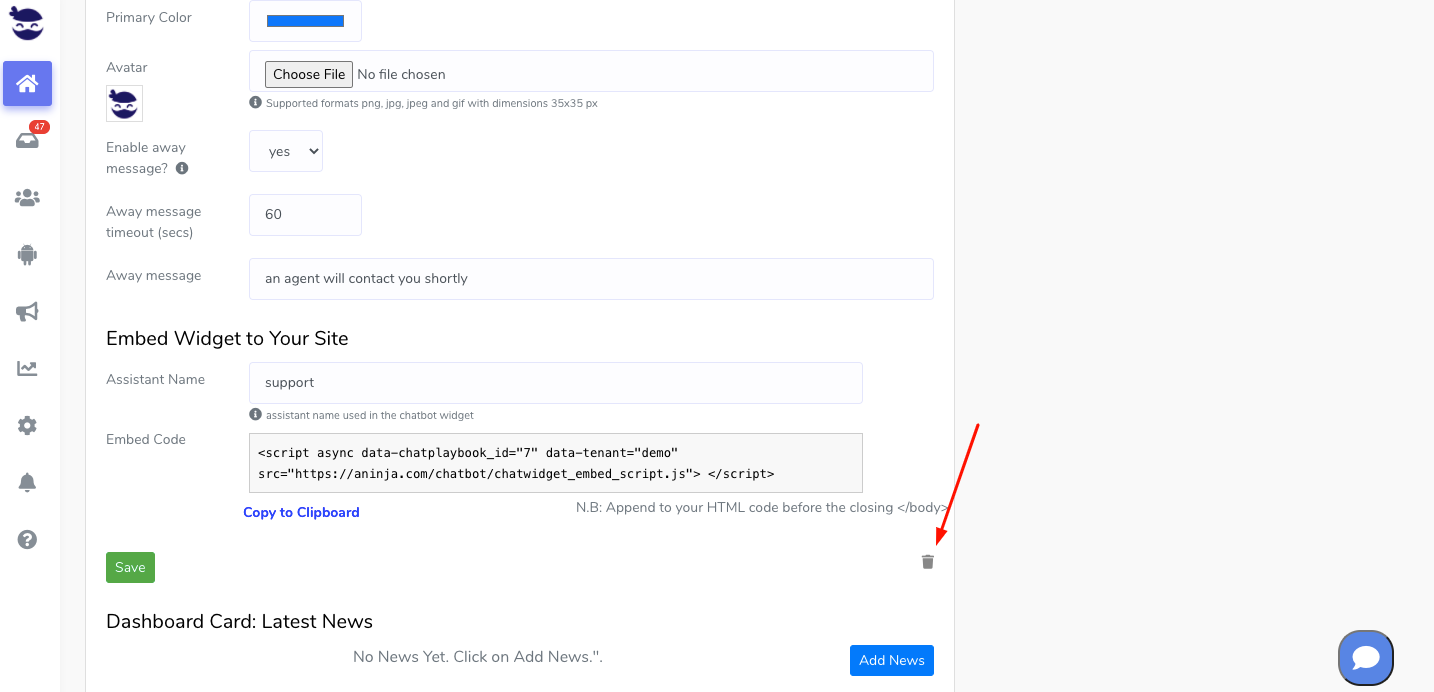
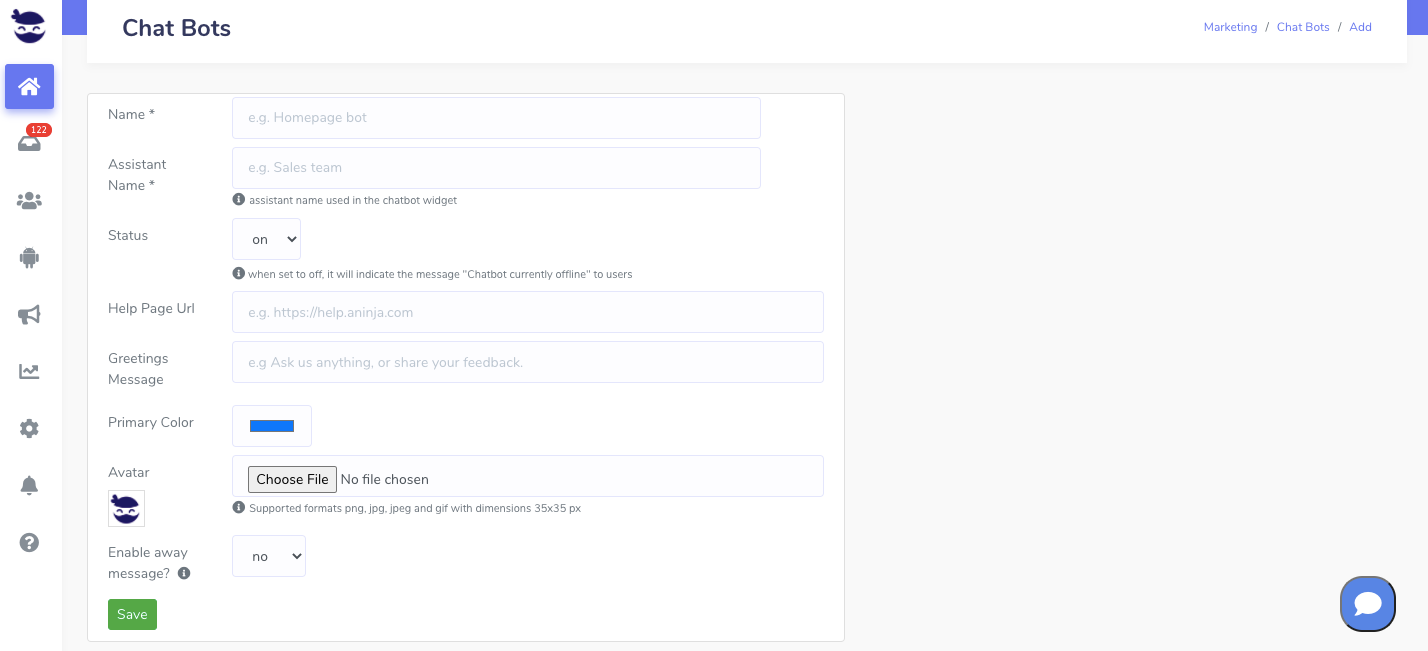
3- Third-party integration using aNinja API

In simple words, API is a set of functions that allow applications to interact with each other by exchanging data.

Basically, you can forward leads from your different marketplaces into your aNinja app using API.

  • Here, you need your aNinja API key for the integration.
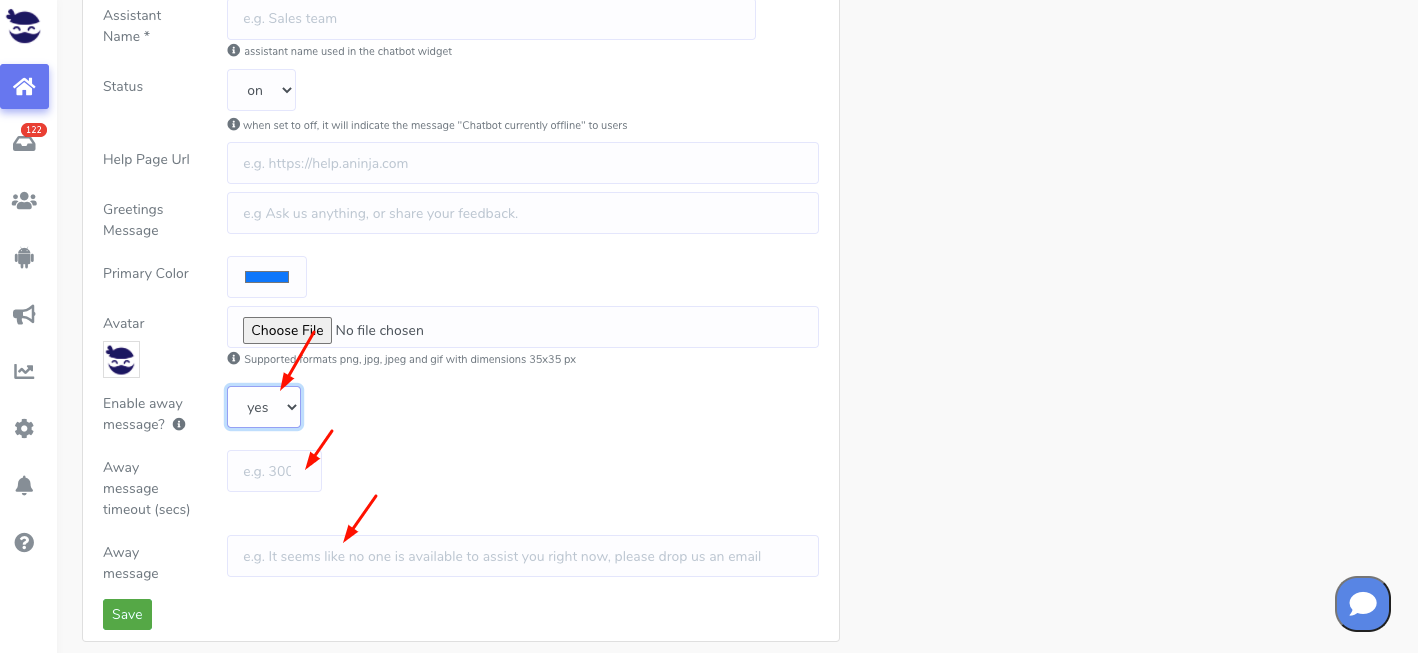
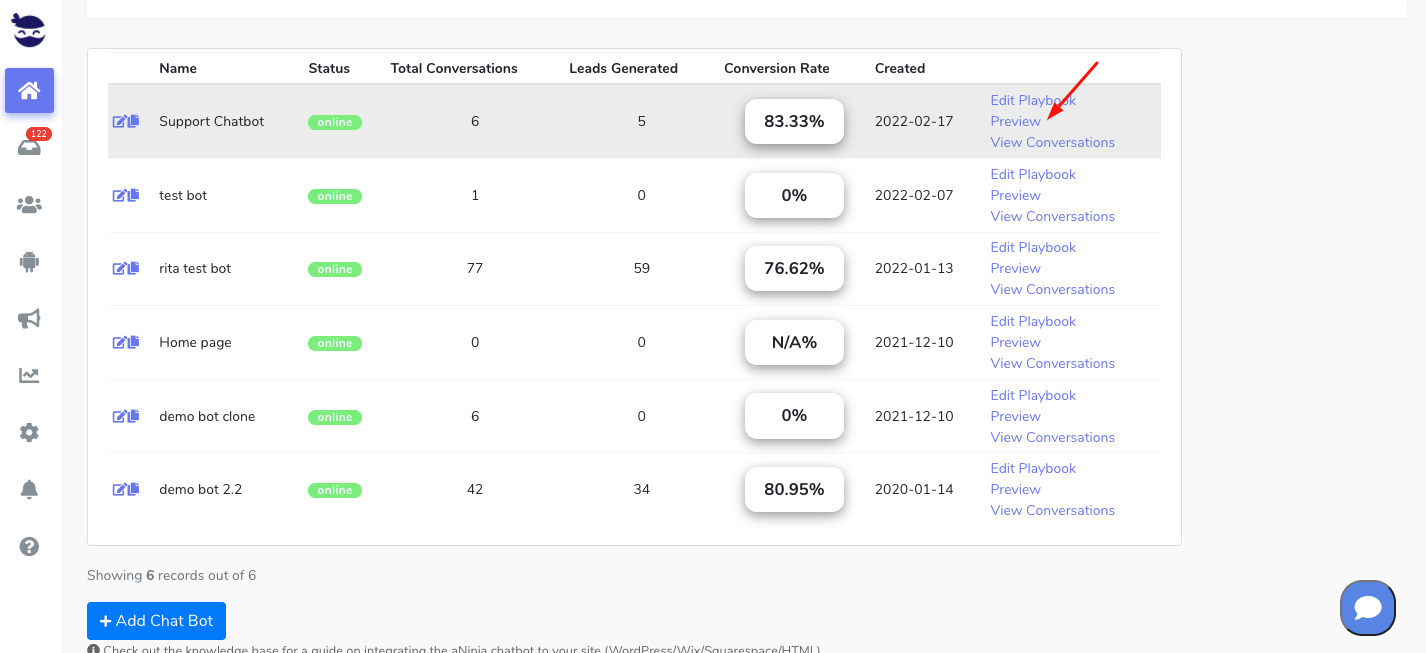
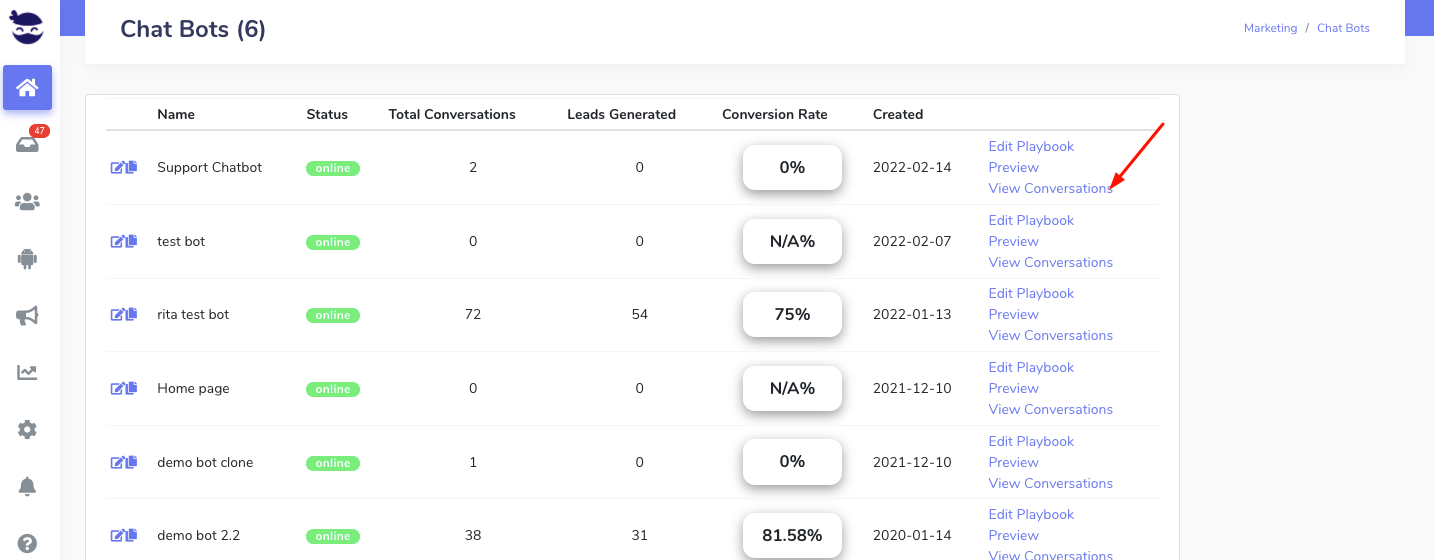
  • After the integration, you start receiving leads in your aNinja account from the different integration channels, including Chatbot conversations, Form submissions, and website integration.

4- Importing contacts from your Gmail account

Importing contacts from your Gmail account is another way to expand your leads database.

5- Importing your Phone contacts

You can also get your phone contacts to your aNinja account.

6- Creating new leads using BCC email

By BCC’ing your private BCC email address, the system automatically creates new leads from the recipients.

After all, you want to get all your leads into one place to target them with your sales and marketing strategies.

7- Generating a lead from incoming SMS

This is a basic function in aNinja that generates a lead from an incoming SMS, if the phone number is not already saved in the system.

However, this practice is not available for incoming emails. So if the sender’s email is not saved in your system, you will not be able to see the email in aNinja. But it still shows in your email client (Gmail, Outlook, etc…).

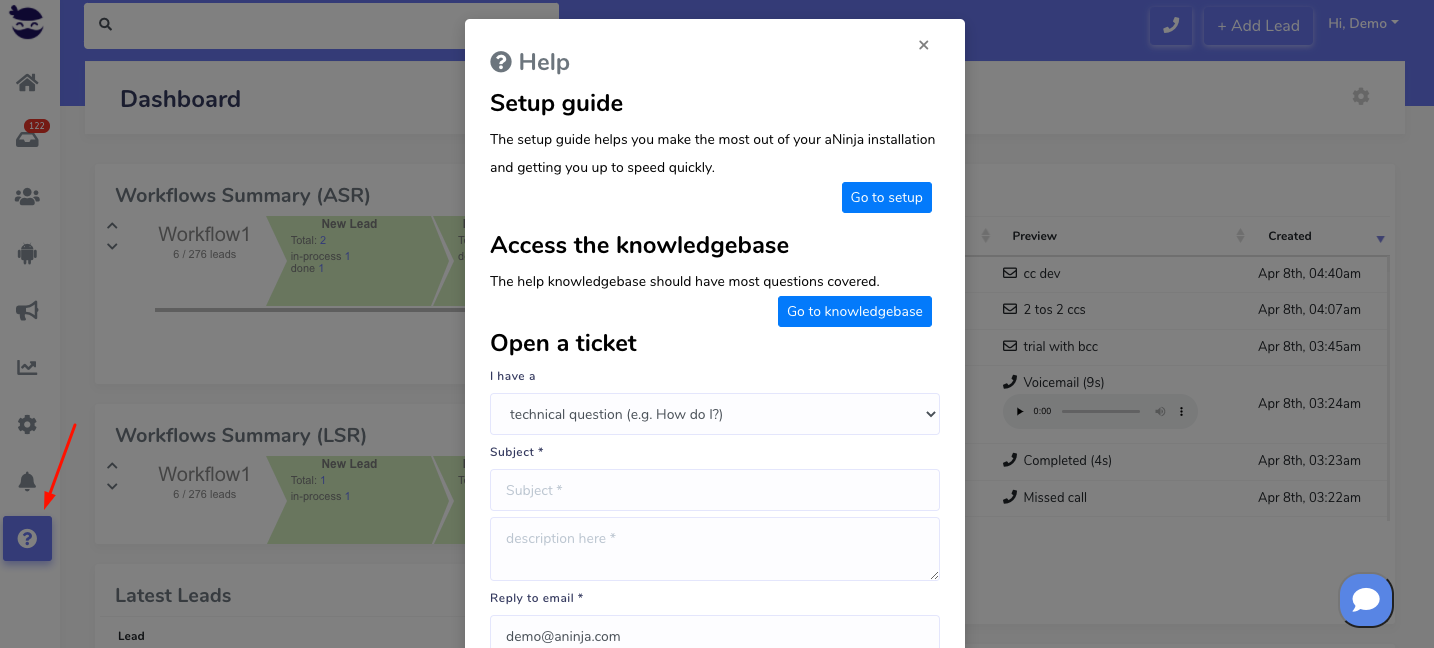
Search for more help articles in aNinja Knowledge base.

Or reach us at support@aninja.com. Our support team will happily assist you.
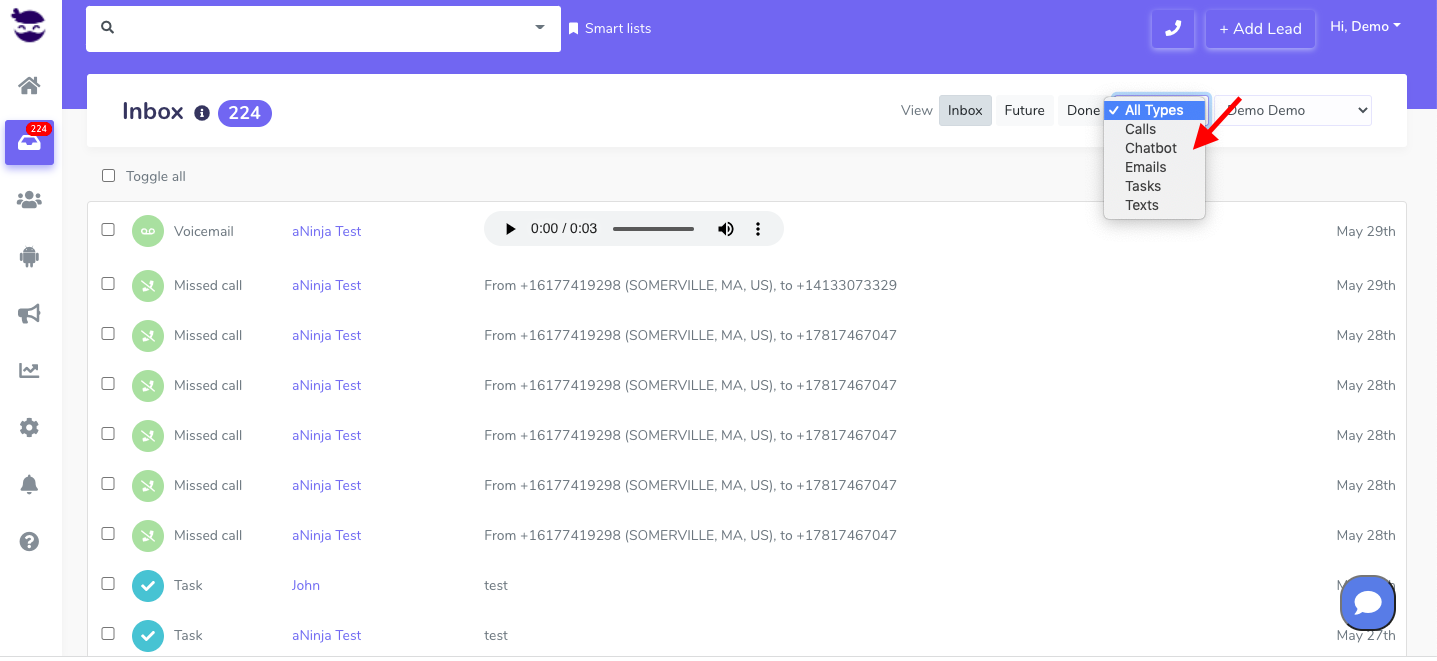
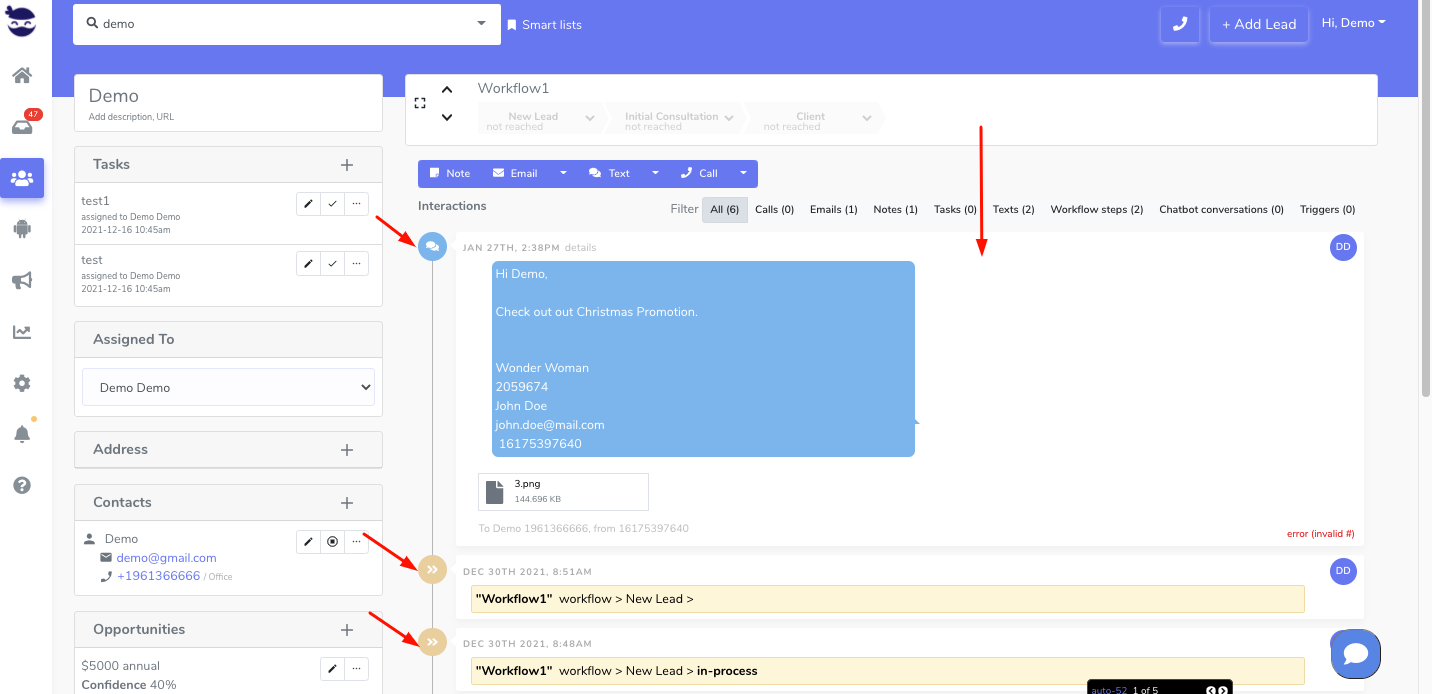
Adding aNinja Chatbot to your Website

Before adding aNinja Chatbot to your Website, you want to create the playbook steps in your install and find the embed code.

Adding aNinja Chatbot embed code to your Website

  • Find your aNinja Chatbot embed codeAdding aNinja Chatbot to your Website
  • Add the Javascript embed code to your website for the aNinja chatbot to start loading on the page.
  • This Javascript snippet will automatically load the chatbot widget onto your site when your website pages load.

Where to add the Chatbot embed code

  • Typically you want to add this code in the HTML section before the closing body tag of your HTML code or layout.
  • If you’re not familiar with basic HTML at all, feel free to contact us for additional support at support@aninja.com.

Chatbot embed on websites

Additionally, you can also look at the Websites-specific information:

WordPress Websites

Wix Websites

Squarespace Websites

Ueni websites

Godaddy Websites

What’s next

  • Once you’ve successfully added the chatbot embed code script to your website, your defined chatbot playbook should start loading on page visits!
  • You’ll also be able to see stats on how the chatbot is performing in your aNinja install.

Where do the Chatbot Conversations appear in aNinja

Now that you’ve added your Chatbot to your website, as a result, after every chatbot conversation, a new lead is created into your aNinja account with the lead data captured in the conversation.

If the lead closed the chatbot conversation before your reply, your message will appear in a bubble next to the chatbot on the website:

You can see these conversations:

  • In your inbox. Just select “Chatbot” from the All types drop down.
  • And in your Dashboard widget “Chatbot Conversations”. If you can’t see this widget, just enable it from the little gear on the top right of the dashboard.

Chatbot behavior

The chatbot pop-up gets triggered only for the first user visit to your site. It doesn’t automatically re-pop up on their subsequent visits, mainly because it gets annoying for repeat users. However, they can see that it’s in the bottom right section.

We can customize the below Chatbot behaviors:

  • Exposing the Chatbot initial greeting on every visit
  • Hiding the initial greeting message on page load
  • Delay showing the Chatbot widget for a number of seconds
  • Customizing widget container style to fit on the load page

Send us your request to support@aninja.com and we will implement the changes for you.


Contact aNinja Support

You can contact aNinja support, from the Chatbot / Chat icon, or from the Help icon on your aNinja app.

You can always reach out to aNinja support team by email: support@aninja.com.


Contact Support using the Chatbot

  • Simply click on the Chat Icon at the bottom right of your aNinja app.

  • Type your message and hit enter.
  • The chatbot can answer a few simple questions.
  • If a support agent is available, he can join the conversation.
  • Otherwise, a ticket with your request will be opened and the first available support agent will reach you within 24 hours.

Contact Support using the Help icon

Contact aNinja Support

  • Fill in the fields to open a ticket with your question.
    • Choose the type of your question.
    • Fill in the subject of the ticket (required field).
    • And type the description of the problem (required field).

  • Click Open ticket
  • And a ticket with your question will be created in our ticketing system.
  • Our agents will contact you within 24 hours.

Contact aNinja Support by email

You can always send us your questions by email to support@aninja.com.

Our agents will contact you within 24 hours.

Removing aNinja chatbot from your website

The aNinja Chatbot loads on your site because you (or your web developer) added a piece of code on your website that loads it.

Removing aNinja chatbot from your website requires deleting the chatbot from your aNinja install and removing the embed code from your Website.

Find the code in aNinja

<script async data-chatplaybook_id=”1″ data-tenant=”YOUR_TENANT_CODE” src=”https://aninja.com/chatbot/chatwidget_embed_script.js”> </script>

  • Or you can find the chatbot embed code on your website.

Removing aNinja chatbot from your website

  • If you no longer want Chatbot on your website, you should simply remove the piece of code.
  • If you still have access to your aNinja account, you can find the code by looking here:
    • On the left sidebar > Marketing > Chatbot
    • Click on the edit pen next to the chatbot name
    • Once you’ve removed that code from your website, simply hit delete to also delete the chatbot and its playbook in aNinja.Removing aNinja chatbot from a website

Adding aNinja Chatbot to your WordPress website

No matter whether you’re a growing company or a market leader, aNinja Chatbot helps you communicate better with customers and push your business forward. Adding aNinja Chatbot to your WordPress Website can be done by using a simple Javascript code.

Adding aNinja Chatbot to your WordPress website

For the WordPress websites:

If you can’t see the Headers and Footers plugin in Settings, you just want to install the “insert-headers-and-footers” plugin directory that allows the plugin to appear in Settings.

Where do the Chatbot Conversations appear in aNinja

Now that you’ve added your Chatbot to your website, as a result, after every chatbot conversation, a new lead is created into your aNinja account with the info captured in the conversation.

If the lead closed the chatbot conversation before your reply, your message will appear in a bubble next to the chatbot on the website:

You can see these conversations:

  • In your inbox. Just select “Chatbot” from the All types dropdown.
  • And in your Dashboard widget “Chatbot Conversations”. If you can’t see this widget, just enable it from the little gear on the top right of the dashboard.

Chatbot behavior

The chatbot pop-up gets triggered only for the first user visit to your site. It doesn’t automatically re-pop up on their subsequent visits, mainly because it gets annoying for repeat users. However, they can see that it’s in the bottom right section.

We can customize the following Chatbot behaviors:

  • Exposing the Chatbot initial greeting on every visit
  • Hiding the initial greeting message on page load
  • Delay showing the Chatbot widget for a number of seconds
  • Customizing widget container style to fit on the load page

Send us your request to support@aninja.com and we will implement the changes for you.

Creating a Chatbot in your aNinja account

aNinja Chatbot

Chatbot is a chatting widget that you embed on your website to answer your website visitors questions. Creating a Chatbot in your aNinja account and embedding it on your website also allows you to collect leads and inject them into your aNinja account.

What’s a Chatbot

A Chatbot is a live chat program that can be embedded in your website to answer the website visitor’s simple questions. The system injects a lead into your aNinja account with every chatbot conversation.

Creating aNinja Chatbot

  • Log in to your aNinja account
  • On the left sidebar, click on Marketing icon.
  • Click on Chat Bots
  • Then, choose Add Chat Bot
  • Click Add a Chatbot
  • Here, enter the business name and the virtual chatbot name.
  • If you choose to set your Chatbot off, it will indicate the message “Chatbot currently offline” to users.
  • Once you enable here the “Help Page Url”, it will expose the Knowledge base button in the chatbot for active users. This typically opens up in an iframe inside the chatbot the website of a knowledge base.

  • You can also type and enable an “Away message” and set the timeout to automatically send a message if no reply was sent back to the client.
  • Lastly, hit Save
  • Chatbot has now been added!
  • Then, you can see this info about your chatbot:
    • Name
    • Status (online/offline)
    • Total Conversations
    • Leads Generated
    • Conversations Rate
    • Created Date
    • Actions you can perform on this Chatbot:
      • Edit Playbook: This option allows you to create the steps of the Playbook.
      • Preview: This option allows you to see how your chatbot runs and test it before it goes live on the website.
      • View Conversations: You can view all the conversations initiated in this chatbot and join them too.

Editing a Chatbot

Now that you’ve created the Chatbot, you can still edit the information at any time.

  • Click on the edit pen next to the chatbot you want to edit.
  • Do the adjustments you want.
  • And click Save.

Cloning a Chatbot

You can create multiple scenarios of chatbots to run on different events on your website.

  • Click the clone icon next to the Chatbot name.
  • This creates a copy of the Chatbot and its playbook.
  • Go ahead and edit it and do the wished changes.

Deleting a Chatbot

Once you delete a chatbot, it’s no longer retrieved.

To delete a chatbot:

  • Click on the edit pen next to the chatbot you want to delete.
  • And hit the recycle bin icon.

  • Lastly, click OK on the pop-up message “Are you sure you want to delete this step?”.
  • Your chatbot and its playbook are now deleted.

Viewing the Chatbot Conversations

After every chatbot conversation, a new lead is created into your aNinja account with the info captured in the conversation.

If the lead closed the chatbot conversation before your reply, your message will appear in a bubble next to the chatbot on the website:

You can see these conversations:

  • In your Inbox. Just select “Chatbot” from the All types drop down.
  • And in your Dashboard widget “Chatbot Conversations”. If you can’t see this widget, just enable it from the little gear on the top right of the dashboard.
  • You also receive a notification by email.

Joining a Chatbot Conversation

You can join the chatbot conversation and directly engage with the user.

  • Joining the Chatbot conversation from the email:
    • Open the email and click on the link “View / Join the conversation“.
    • It opens your aNinja account > the lead view where you can join the conversation.
  • Joining the Chatbot conversation from the Dashboard Widget “Chatbot Conversations”:
    • Click on the lead name “chatbot xxxx“. And you’re redirected to the lead view where you can join the conversation.

Chatbot behavior

The chatbot pop-up gets triggered only for the first user visit to your site. It doesn’t automatically re-pop up on their subsequent visits, mainly because it gets annoying for repeat users. However, they can see that it’s in the bottom right section.

We can customize the following Chatbot behaviors:

  • Exposing the Chatbot initial greeting on every visit
  • Hiding the initial greeting message on page load
  • Delay showing the Chatbot widget for a number of seconds
  • Customizing widget container style to fit on the load page

Send us your request to support@aninja.com and we will implement the changes for you.