Adding aNinja Chatbot to your Godaddy Website

Adding aNinja Chatbot to Godaddy Website can be done by using a simple Javascript code. Which is the aNinja Chatbot Embed Code.

Find your aNinja Chatbot Embed Code in your aNinja install before getting started.

Adding aNinja Chatbot to Godaddy Website

  • Log in to your GoDaddy account
  • Then, go to the Product page.
  • Scroll down to Websites + Marketing and select Manage next to your website to open your site.
  • Select Edit Website or Edit Site to open your website builder.
  • Then, select the page of your website where you would like the widget to appear.
    • Or alternatively, you can add a new page for the widget. Click the + button or Add.

User-added image

  • Search for the HTML section and select Add.
  • Then, click Embed custom code on the page.

User-added image

  • Click inside the new section to open up the HTML editor.

User-added image


  • Here, in the “Custom Code” box, paste the aNinja Chatbot Embed Code along with the following Chatbot widget code’s attribute:

data-platform="godaddy" e.g. <script async data-chatplaybook_id="<CHATPLAYBOOK_ID>" data-tenant="<TENANT>" data-platform="godaddy" src="https://aninja.com/chatbot/chatwidget_embed_script.js"> </script>

  • When you’re finished, click the Done at the top of the HTML panel. And your changes are automatically saved.
  • Click on Preview to see the results.
  • Lastly, make any additional changes, and when you’re ready click Publish.
  • Now, you should be able to see the chatbot on your website.

Where do the Chatbot Conversations appear in aNinja

Integrating your Chatbot with your website creates a new lead in your aNinja account after each conversation, with the lead data captured in the conversation.

You can see these conversations:

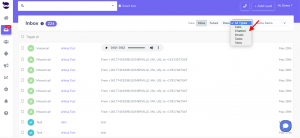
  • In your Inbox. Just select “Chatbot” from the All types drop down.
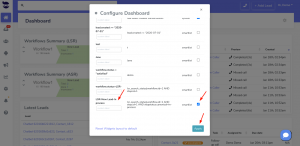
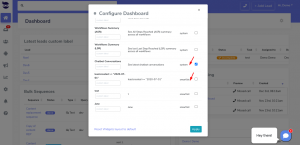
  • And in your Dashboard widget “Chatbot Conversations”. If you can’t see this widget, just enable it from the little gear on the top right of the dashboard.

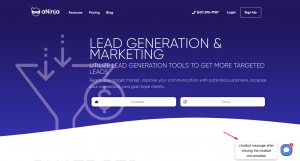
If the lead closed the chatbot conversation before your reply, your message will appear in a bubble next to the chatbot on the website:

Chatbot behavior

The chatbot pop-up gets triggered only for the first user visit to your site. It doesn’t automatically re-pop up on their subsequent visits, mainly because it gets annoying for repeat users. However, they can see that it’s in the bottom right section.

We can customize the below Chatbot behaviors:

  • Exposing the Chatbot initial greeting on every visit
  • Hiding the initial greeting message on page load
  • Delay showing the Chatbot widget for a number of seconds
  • Customizing widget container style to fit on the load page

Send us your request to support@aninja.com and we will implement the changes for you.
Creating a Widget for every workflow step

To better identify the leads in the step they have reached in the workflow, consider creating a widget for every workflow step.

Creating a widget for every workflow step

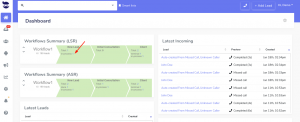
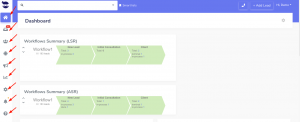
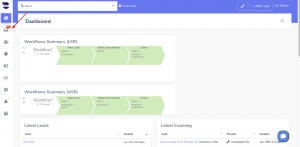
On the Dashboard Widgets “Workflow summaries LSR” and “Workflow Summary ASR”, you can see the leads that reached every step of the workflow.

  • From the Dashboard widget “Workflow Summary LSR” / ASR, click on the dynamic number in blue next to the workflow step.Creating a Widget for every workflow step
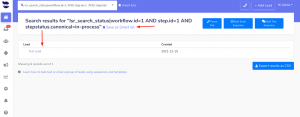
  • It shows you the leads that have reached that step.
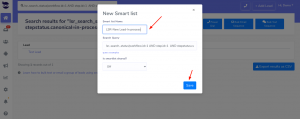
  • Go ahead and save this query / Smartlist.
  • Name it with both the workflow name and the step name. Therefore, you will be able to recognize the leads in it. Example: LSR/New Leads/In-process.

See the Workflow step in a Widget

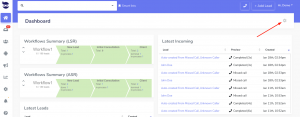
  • Go to your dashboard and click on the little gear on the top right.
  • Enable the Smartlist that you’ve just created to show as a widget on the Dashboard.
  • Repeat the above for all the steps in your workflows. As a result, you can have a widget for every step of your workflows shown on the Dashboard.

Message Statuses for the Bulk Text Sequences

Bulk text sequences message statuses” refer to the status updates associated with the delivery and processing of text messages sent as part of a bulk SMS campaign.

These statuses can provide valuable information about the status and count of messages and the success of the campaign.

Where can I see the bulk text sequence message statuses

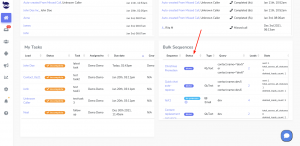
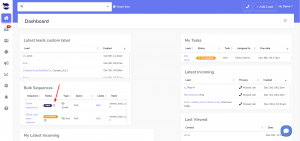
  • You can see the Bulk text sequence message statuses in the Dashboard Widget “Bulk Sequences”.
  • However, if you can’t see this widget on your dashboard, just enable it from the little gear on the top right of the Dashboard.
  • For an overview of the dashboard, go ahead and click on the help (?) icon next to Dashboard.Bulk Text Sequence Message Statuses

Bulk text sequence message statuses

Bulk text sequence statuses indicate the status of the bulk sequence:

  • Being processed: The system is preparing your Bulk text for delivery.
  • Canceled: This indicates a Bulk text that you have canceled.
  • Done: The system has successfully delivered the Bulk text to all the recipients with a confirmation from the destination carriers.
  • In progress: The Bulk text is on the way and it started to reach the recipients gradually.

The bulk sequence sets itself to completed once all the messages have gone out.

In some cases, some messages get stuck in the “Outbox” because the carrier doesn’t return with a reply. The status of those messages changes to “Delivery unknown” in a few days.

Usually, the standard protocol is to give the carrier a window of 48 hours after the last SMS was sent successfully, before closing the bulk sequence (status done).

Count of messages

The stats column displays the count of messages in different stats, which includes:

  • Error: The texts did go out through our Carrier, but they were not delivered to the lead.
    • You can check the description of the error message in the lead view.
      • In the Bulk Sequence widget, click on the blue number next to “error”; then click on the name of the lead. In the history of interactions, you can see an info bubble next to the error under the text. Hover over it to see the message.
  • In-queue: The messages are in-queue and waiting to be sent out.
  • Outbox: The messages have been sent through aNinja, and the system is awaiting confirmation of success from the destination Carriers.
    • Click on the info bubble next to “outbox”: “Awaiting response from destination carrier”
    • Some destination carriers don’t return a confirmation message.
    • In this case, the status of the sequence remains “in progress” even though the messages went through aNinja.
    • And it will change to “Delivery Unknown” in a few days if we didn’t receive from the Carriers.
  • Sent: The messages were successfully sent out and the destination carriers confirmed delivery success.
  • Deleted_leads_count: This indicates the leads that were part of the initial request but have been deleted since the request was made.

Error type: Unknown error

If a message you sent is not delivered to the end device and returns a 30008 error code, this means that the delivery of your message failed for unknown reasons.

When our carrier receives a very generic error from the destination carrier that he has no further details about, he then associates the message with the error code 30008; letting you know that he truly doesn’t know what caused this error from the provider.

Possible reasons:

  • The phone/device you were sending to is not turned on or can’t receive messages.
  • Or, the phone is roaming or off-network. They cannot guarantee message delivery on roaming phones.
  • Or, the issue is likely device-related. Test sending to other phones who have the same mobile carrier.

We can still contact our Carrier to connect with the destination carriers to ask about the reasons/explanations for the unknown error.

Important!

As per the US country guidelines: https://www.twilio.com/guidelines/us/sms

Gambling content being sent in the US is not allowed.

For reference, here is the documentation for sending MMS: https://support.twilio.com/hc/en-us/articles/223179808-Sending-and-receiving-MMS-messages.

The Left Sidebar

The left sidebar is the control center for navigating your aNinja app. You can access any feature by clicking on its icon.

aNinja features on the left sidebarThe left sidebar

Assigning a lead to a user

Assigning a lead to a user is the first task that you can do when a lead pops up into aNinja to turn them into a customer faster.

And in the sales/marketing process, multiple users may take charge of a lead, depending on their role.

Moreover, users with admin roles can manage the delegation of leads to different users.

When a lead is assigned to a user, if another user is sending them an email, it will pull out with the name of the user whom the lead is assigned to.

Assigning a lead to a user

Lead assignment can be done through:

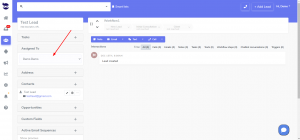
  • The lead view
    • This requires admin access if the option “Users can only see Leads assigned to them” is enabled in Settings > Global SettingsAssigning a lead to a user
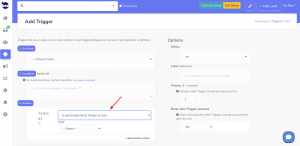
  • Triggers using [Lead assignment] actions

User ID

Each user is granted a private user-id as soon as they are invited to join aNinja, regardless of their role.

You can find the user-id in Settings > Users.

Using a Smartlist, you can utilize this user-id to filter leads assigned to specific users. You can also enable this Smartlist as a Dashboard Widget.

Similarly, you can narrow down your Opportunity report to see a snapshot of the users’ sales activities over a certain timeframe.


Launching Bulk Email sequences

Launching bulk email sequences typically refers to the process of sending a large number of emails to a one or a group of recipients all at once, using an automated messaging system.

You can also launch an email sequence to a bulk import list.

The emails are typically pre-written (email templates) and scheduled in sequences in advance. aNinja takes care of sending the messages at the designated time or interval.

Launching bulk email sequences to all leads

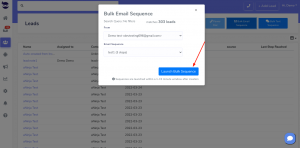
Launching bulk email sequence

  • You’ve just started an email sequence for all your leads.

Launching email sequences to a group of leads

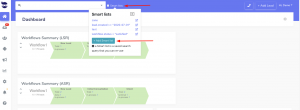
  • Choose a saved Smartlist or create a new one.

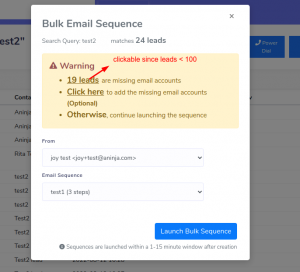
Launching bulk email sequence

An alert pops up to show the number of leads included in this sequence and that have no email addresses. Click on the number to see those leads.

Checking the status of email sequences

After launching your email sequence, you can check for its status in the Dashboard Widget “Bulk Sequences”.

Stopping an email sequence

From the Dashboard Widget “Bulk Sequences” you can also stop the email sequence if the sequence delay setup is of 1 or more days.

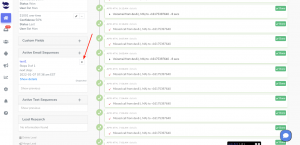
You can stop a sequence for a single lead from the “Active Email Sequence” in their lead view.


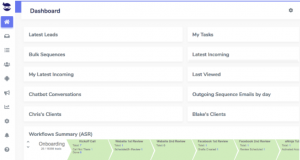
Dashboard Widgets

Dashboard widgets bring you the report on the workflow of your  latest activities and interactions that you make in aNinja.Dashboard widgets

Resizing & Moving Widgets

You can change the size of the widgets (shrink / expand), and relocate them on the dashboard however suits you. They will maintain the size and location next time you visit your dashboard.

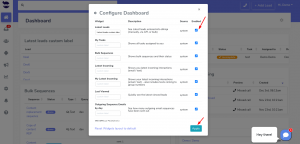
Enabling & Disabling Widgets

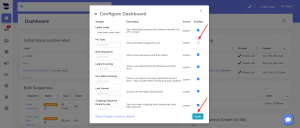
You can manage which widgets to enable or disable by clicking on the top right gear icon in the dashboard view. This shows you a list of available widgets and you can choose to toggle them on or off.

Types of Widgets

Widgets are of 2 types:

System Widgets

These widgets are created by the system. They bring you reports on the workflow of your activities and more.

  • Latest leads: See the latest leads entered into aNinja (manually, via API, or bulk)
  • My Tasks: Shows all tasks assigned to you
  • Bulk Sequences: Shows bulk email sequences & bulk text sequences and their status
  • Latest Incoming: Shows you the latest incoming interactions (email / text)
  • My latest Incoming: Shows your latest incoming interactions (email / text) – also includes texts coming to group numbers
  • Last Viewed: Quickly see the latest viewed leads
  • Outgoing Sequence Emails by day: See how many outgoing email sequences have been sent out
  • Workflows Summary (ASR): See All Steps Reached (ASR) summary across all workflows
  • Workflows Summary (LSR): See last Last Step Reached (LSR) summary across all workflows
  • Chatbot Conversations: See latest chatbot conversations
  • These are the result of the Smartlists you have created.
  • Enable each Smartlist from the gear on the top right of the dashboard, and you will see it on the dashboard as a widget.

Voicemails

The private or ring group phone numbers in aNinja have voicemail support. Voicemails, also known as voice messages, are recordings that the caller leaves when his call is not answered. And they are accessible in your aNinja Inbox, and in the “Last Incoming” dashboard widget.

aNinja has a default voicemail greeting, that you can additionally customize.

How to access the voicemails in aNinja

Voice mails appear in 2 places:

  • You can listen to the voicemails in the Inbox.Voicemails
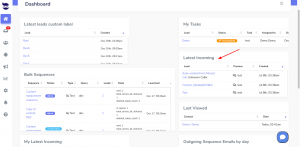
  • See the voicemail in the Latest Incoming” dashboard widget.

How to customize your voicemail greeting

You can customize the voicemail greeting note that callers listen to when the call is not answered. You record the greeting and upload it in Settings > Phone Numbers.

Stopping an email or text sequence

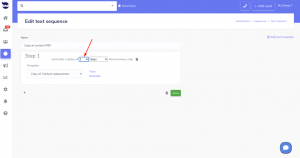
Stopping an email or text sequence can only be done if the sequence delay setup is of 1 or more days.

How to stop a lead / email / text sequence

Two ways to stop an email or text sequence

1. Stopping the sequence from the lead view
  • Go to the lead view
  • Refresh the page.
  • Click on X in “Active Email (or Text) Sequence”
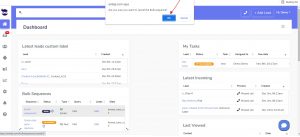
  • Click on OK to confirm.
  • “Success!” message will pop up once done.
2. Stopping the sequence from the widget “Bulk Sequences” in the Dashboard

Using Tasks

You can keep track of your to-do list items using the Tasks in aNinja.


Accessing the Lead tasks

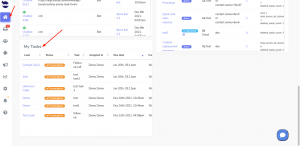
You can view the tasks in the “Inbox” and in “My Tasks” dashboard widget:

  • On the left sidebar, click on the Inbox
  • And, My Tasks Widget in the dashboard.
    • If you can’t see the widget on the dashboard, just enable it from the little gear on the top right of the page.

Creating a Task

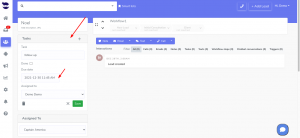
  • When on the Lead View, hit the “Add Task” button.
  • Pick the calendar date to receive a reminder by email on the due date.

using tasks

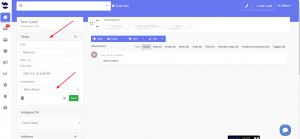
Assigning a Task to a user in your Team

  • When on the Lead View, in the Tasks on the left side, choose the user you want to assign the task.

Deleting a Task

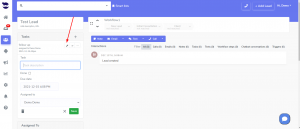
  • When on the Lead view, choose the task you want to delete, and hit the edit pen to open it.edit task
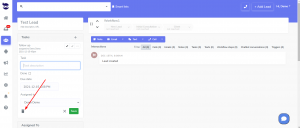
  • Hit the recycle bin buttondelete a task
  • Click Yes to confirm