Updating templates and signatures in in-queue messages ensures that the messages being sent to customers are up-to-date.
Outdated templates and signatures can lead to confusion and inaccuracies.
Overview
To launch bulk text sequences, you want to start by creating templates and sequences. Then you set the launching date.
Once a text sequence is created, the system retrieves
- the corresponding template(s),
- the phone number used to initiate the sequence,
- and the lead info available at the time of creation.
Modifications made to the template(s) or the signature of the phone number used to launch this text sequence can be reflected in the sequence, post-launching.
However, any changes made to the lead info are not currently being updated in the queued-up texts.
How to include template updates in the sequence
When editing a template’s content, you can choose to update all in-queue texts that are using this template.
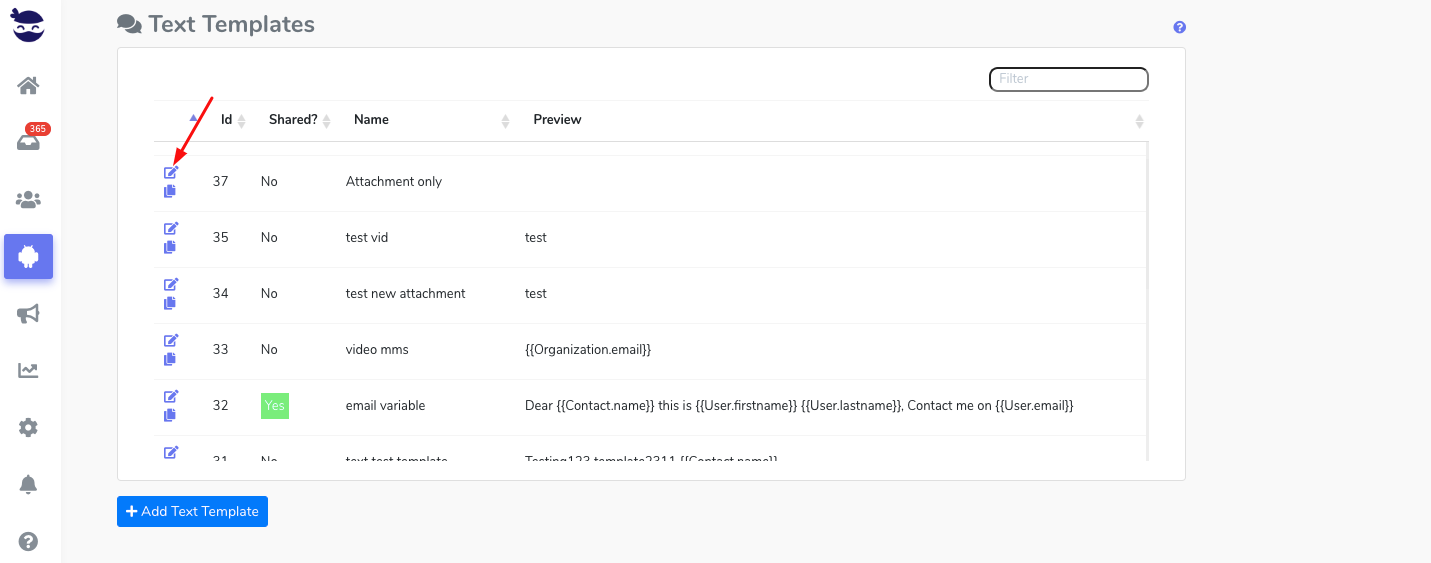
- Go to Settings > Automations > Text or Email Templates
![]()
- Click on the pencil next to the template to go to the edit view
- Make your changes.
- And click Save.
- Afterward, go back to the edit view once again to click on Update in-queue texts or emails.
- Otherwise, the template’s updates will be saved but changes will not reflected in in-queue texts and emails.
- In case there are no messages in queue using this template, the update in-queue button is disabled.
Note: The update might take several minutes depending on the size of the in-queue messages.

How to include Signature updates in the sequence
Update Text signatures in-queue
When editing a signature saved in a phone number, you can choose to update all in-queue text templates that were sent from this number.
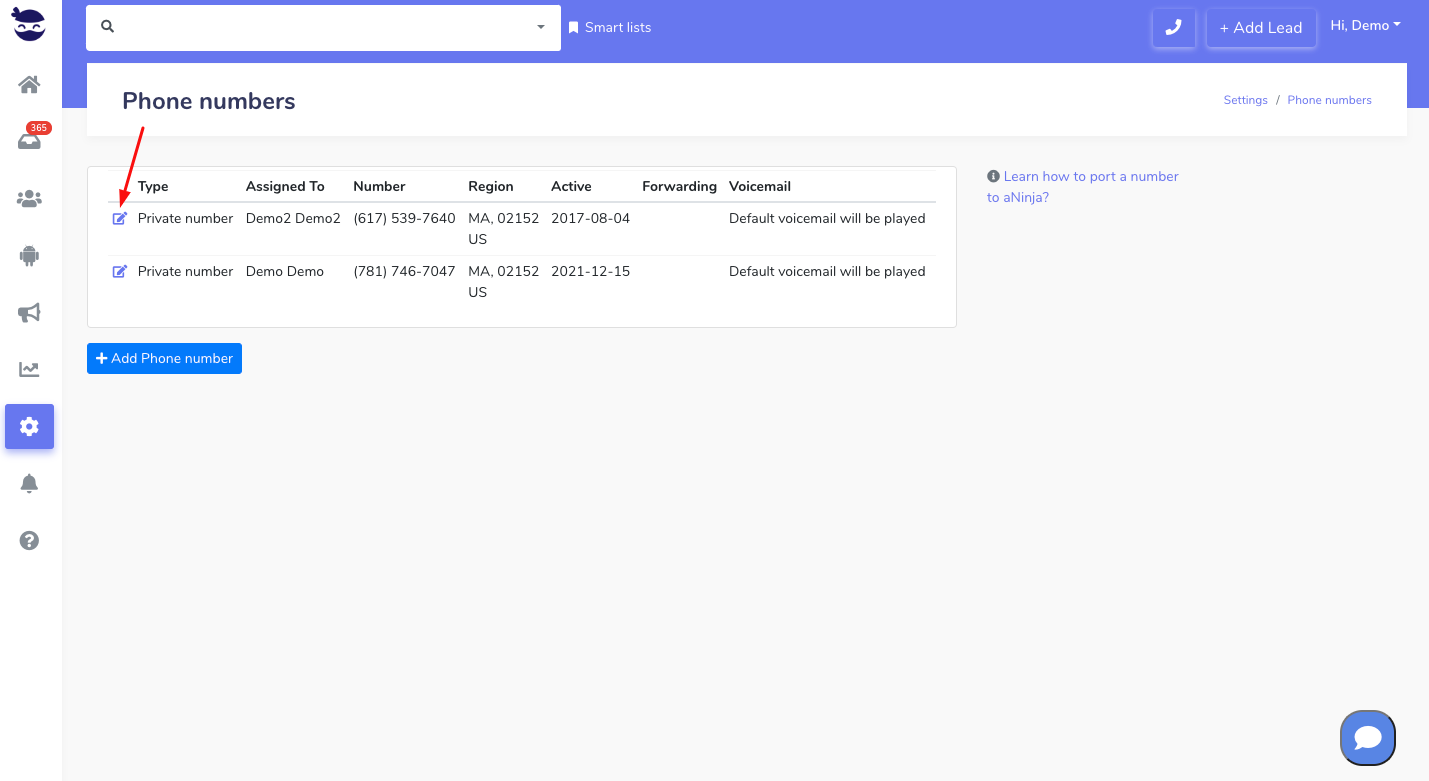
- Go to Settings > Phone Numbers
- Click on the pencil next to the phone number to go to the edit view
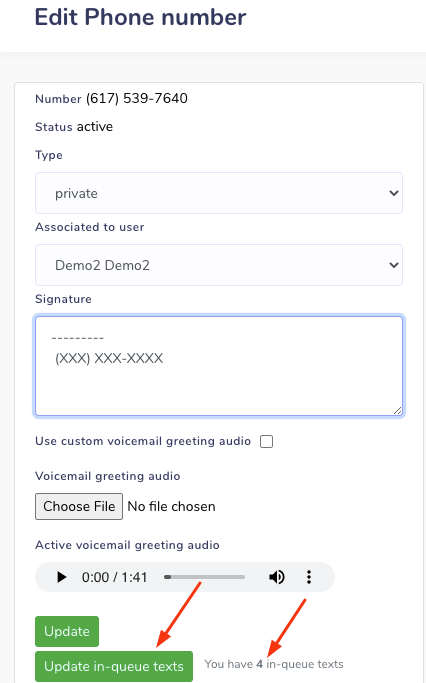
- Type in the new signature,
- And click Update.
- Then, you should go back to the edit view once again to click on Update in-queue texts.
- Otherwise, the signature updates will be saved but changes will not reflected in the in-queue texts.
- You can also see the number of in-queue texts that are using this phone number.
- In case there are no messages in queue using this template, the update in-queue button is disabled.
Note: The update might take several minutes depending on the size of the in-queue texts
Update Email Signatures in-queue
When editing a signature saved in a email account, you can choose to update all in-queue email templates that were sent from this email account.
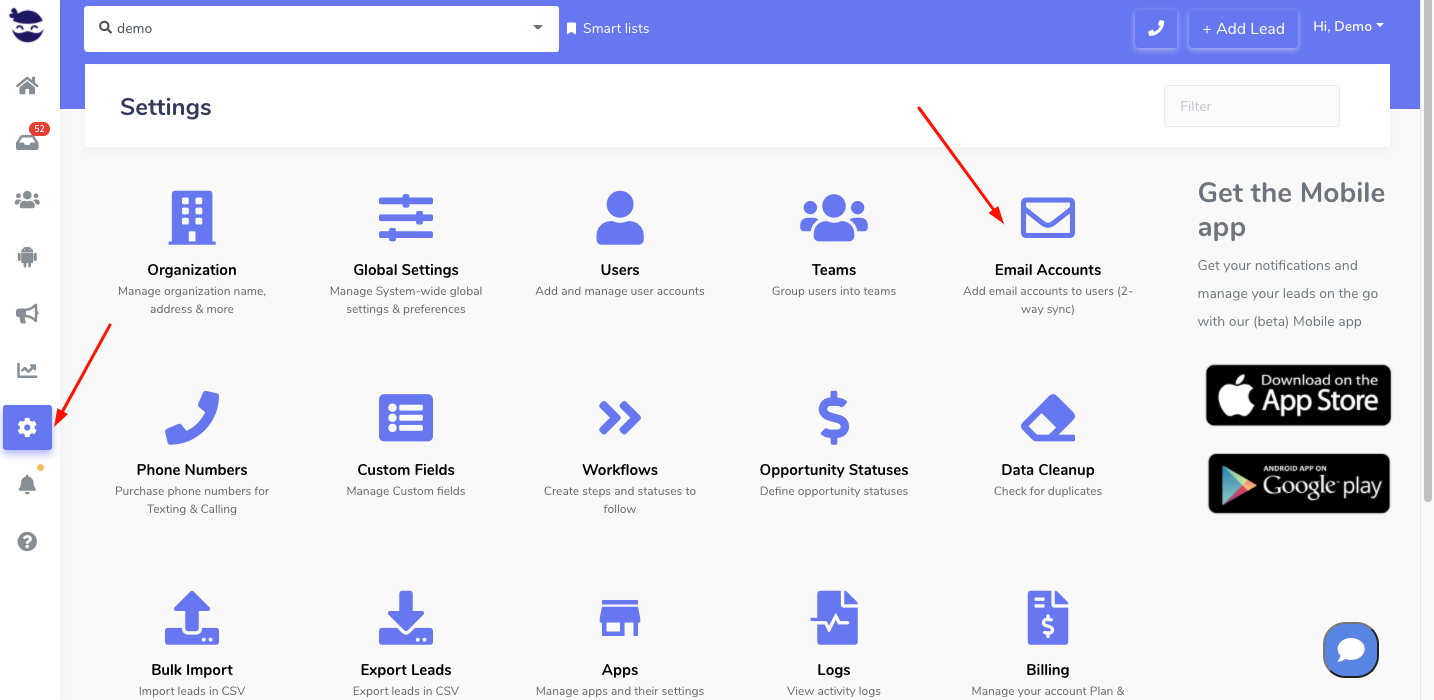
- Go to Settings > Email Accounts
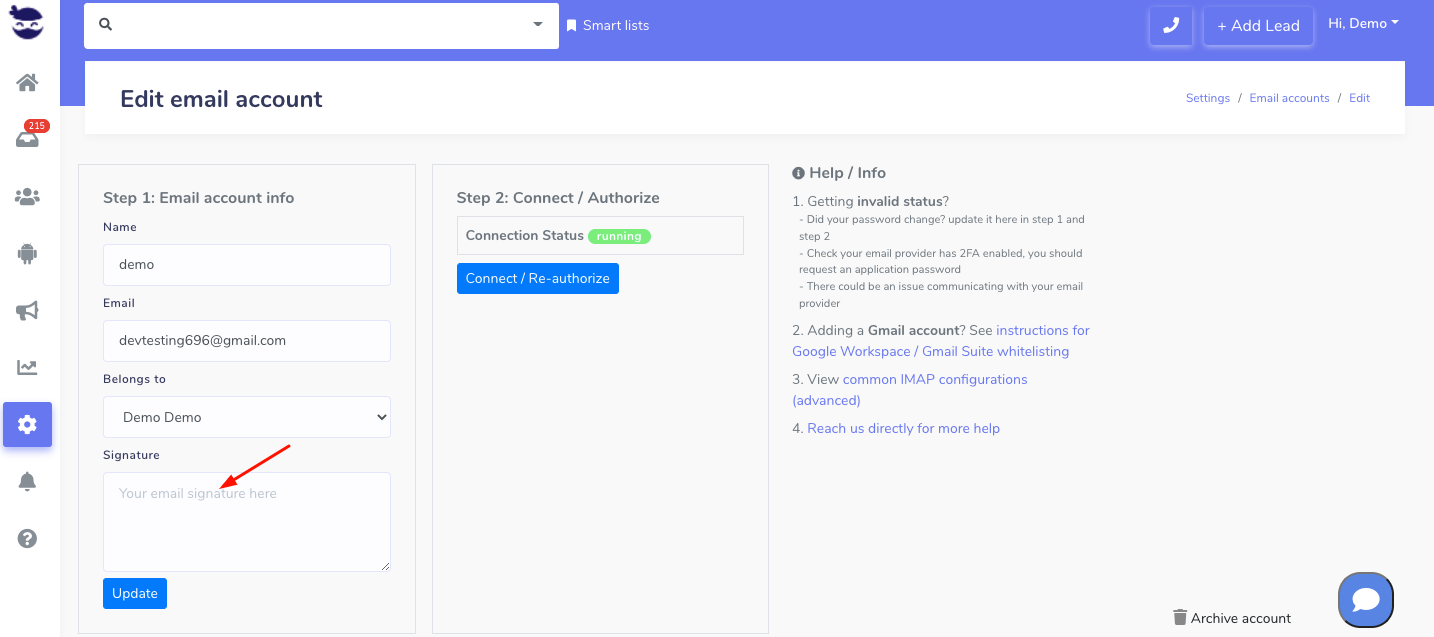
- Click on the pencil next to the email to go to the edit view

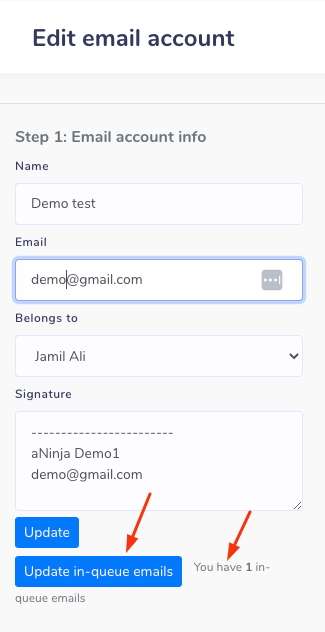
- Type in the new signature,
- And click Update.
- Then, you should go back to the edit view once again to click on Update in-queue emails.
- Otherwise, the signature updates will be saved but changes will not reflected in the in-queue emails.
- You can also see the number of in-queue emails that are using this email account.
Note: The update might take several minutes depending on the size of the in-queue texts