aNinja keys & codes

In aNinja, you have private keys and codes that you use for your integrations.

It’s important to know your aNinja keys & codes, know how to use them, and where to find them in your aNinja install.

aNinja Keys & Codes

Find your aNinja Forms Embed Code

Find your aNinja Forms Embed Code. You need this code to embed the forms that you’ve created in aNinja on the website.

Find your aNinja Forms Embed Code

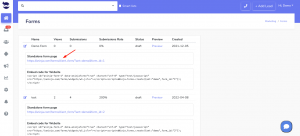
  • On the left sidebar, click on Marketing > Forms
  • Select and copy the Embed Code For WebsiteFind your aNinja Forms Embed Code
  • We’ve added a data attribute inside this code that allows you to manage the Bootstrap design in the form. Set it to True or False to either skip or include the Bootstrap design in the form.
  • Paste this Javascript code on your website to add the aNinja form.
  • If you need assistance with embedding your aNinja form on your website, just leave us an email at support@aninja.com. Our Support team will happily assist you!


Creating Leads in aNinja

In aNinja, creating leads can be done in several ways.

A growing database of leads means more potential engagement. So import your leads from different sources and keep them engaged with newsletters and product or service updates.

Creating leads in aNinja

In aNinja, you can create leads in multiple ways:

  1. Manually one at a time.
  2. Importing Leads in Bulk using CSV file.
  3. Third-party Integration using aNinja API (including Chatbot conversations, form submissions, and website integration).
  4. Importing leads from your Phone Contacts.
  5. Importing leads from your Gmail account.
  6. Creating leads using BCC email address.
  7. Generating a lead from incoming SMS.

1- Creating Leads manually

  • First, log in to your aNinja account.
  • Then, on the top right, click on + add lead

2- Importing leads from a CSV file

Another way to add leads to your aNinja account is importing contacts in a CSV or XLSX file directly to your aNinja account.

3- Third-party integration using aNinja API

In simple words, API is a set of functions that allow applications to interact with each other by exchanging data.

Basically, you can forward leads from your different marketplaces into your aNinja app using API.

  • Here, you need your aNinja API key for the integration.
  • After the integration, you start receiving leads in your aNinja account from the different integration channels, including Chatbot conversations, Form submissions, and website integration.

4- Importing contacts from your Gmail account

Importing contacts from your Gmail account is another way to expand your leads database.

5- Importing your Phone contacts

You can also get your phone contacts to your aNinja account.

6- Creating new leads using BCC email

By BCC’ing your private BCC email address, the system automatically creates new leads from the recipients.

After all, you want to get all your leads into one place to target them with your sales and marketing strategies.

7- Generating a lead from incoming SMS

This is a basic function in aNinja that generates a lead from an incoming SMS, if the phone number is not already saved in the system.

However, this practice is not available for incoming emails. So if the sender’s email is not saved in your system, you will not be able to see the email in aNinja. But it still shows in your email client (Gmail, Outlook, etc…).

Search for more help articles in aNinja Knowledge base.

Or reach us at support@aninja.com. Our support team will happily assist you.

aNinja Leads Forms Integration Channels

One of aNinja’s key features is its Leads Integration Channels which allow you to connect a variety of apps and tools to aNinja, enabling you to streamline your workflow and boost productivity.

By connecting your apps and tools to aNinja, you can streamline your workflow. Ultimately, the integration ensures that your customer data is up-to-date and consistent across all your platforms.

aNinja Leads Integration Channels

aNinja offers integration options with the following channels; but not limited to them. We are continuously extending our reach to connect with additional channels along the way.

Click on the links below to access the knowledge base articles. You’ll find step-by-step instructions on how to integrate the relevant components.

And before getting started with the integration, please make sure you have your aNinja aNinja API key.

Where does the imported data appear

After the integration, you can search your aNinja CRM for the imported leads. Also, you can search for any custom field, opportunities, and any other info that you have imported.

  • Lead’s contacts appears in the leads contact section in the lead view
  • Opportunities also appear in the opportunity section in the lead view
  • The company’s info appears on the top left of the lead view, in the Company section.
  • Custom fields appear in the custom field section of the lead view
  • Lastly, Lead Search is a field that also appears in the bottom left of the lead view. Specifically, these are info/links on the lead or the organization found in Google search.

Need any help? Please reach us at support@aninja.com and we will happily assist you!

aNinja API

aNinja API allows you to integrate your different marketplaces into your aNinja account using your private aNinja API key.

What is an API

An API (Application Programming Interface) is a set of functions that allows applications to access data and interact with external software components, operating systems, or microservices.
To simplify, an API delivers a user’s response to a system and eventually, sends the system’s response back to a user. For example:

  1. When you click “add to cart”;
  2. Then, an API tells the site you added a product to your cart;
  3. Afterward, the website puts the product in your cart
  4. As a result, your cart is updated.

Real-world examples of APIs

Looking for real-world examples of APIs? Every time you visit a page online, you’re interacting with API. Here are some real-world examples so you know how you can interact with aNinja API.

Conclusion

Think you might be ready to try APIs for yourself? Then you can explore APIs, send requests, see what data is returned, and much, much more.
http://developer.aninja.com/

Lastly, have any questions or clarifications on the aNinja API? Leave us a message at support@aninja.com. We will happily assist you.

Creating aNinja Forms

For integrating forms data into aNinja, you can:

  • Use aNinja forms: These are created inside aNinja. You simply drop the Javascript code on your site and they render and automatically push the lead data into aNinja.
  • Use your existing forms (in this case we can adapt some Javascript code to push the lead into aNinja on form submission).
  • If your site is a WordPress or similar, we also have plugins for those cases (Gravity forms, Contact Form 7, Hubspot Form, and WPForms).

With aNinja, you have the ability to create custom forms and personalize the content to your liking. Once these forms are integrated into your website, every submission will result in a lead being automatically added to your aNinja account.

Creating aNinja Forms

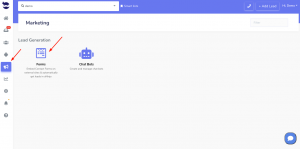
  • On the left sidebar, go to Marketing > Forms
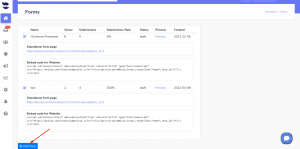
  • Click on Add Form
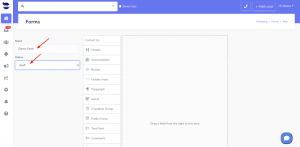
  • Label your form and select its status (draft, live, or archived)
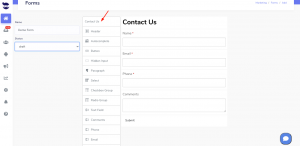
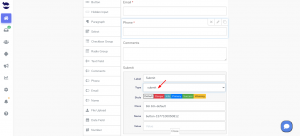
  • You can either select the Contact Us template or just drag fields from the list to create your own form.aNinja Forms
  • Incorporate a “hidden input” into your website’s form that remains concealed from users as they fill it out. And a custom field with the form name will be injected along with the lead data. This helps you identify leads generated from this specific form through the use of Smartlists.
    • A hidden input has a name and a value.
      • name: e.g. Custom_Form
      • value: e.g. aNinja contact form (or any title relating to the form).
    • If you’re intending to use multiple forms on your website, to each form you can assign a different name and value for the hidden input. Then you map it to aNinja’s Custom field. So every form submission creates a lead that has this input’s name and value among his custom fields.
  • Insert a “Button” of type “Submit” at the bottom of your contact form for the form submission.

  • Lastly, click Save.
  • You can preview with Standalone link (optional)

Embed the form on your website

  • Go to Marketing > Forms
  • Copy the embed form code, to be able to embed the code snippet on your website.
  • We’ve added a data attribute inside this code that allows you to manage the Bootstrap design in the form. Set it to True or False to either skip or include the Bootstrap design in the form.
    • If it is set to True, then it skips aNinja’s design and uses the Bootstrap used in your website.
    • If set to False, then it uses aNinja’s Bootstrap design for the form.

Fields to include in the form

It’s very important to add “Input names” in the form fields and map them to aNinja fields (check the fields mapping section below).

The input names basically are:

  • Name: that’s a required field and it will be mapped to the aNinja field: contact_name
  • Phone: to be mapped to the aNinja field contact_phone1
  • Email: to be mapped to the aNinja field contact_email1
  • If in your form you’ve added other fields (e.g. Source), these are considered Custom Fields. When mapping them to the aNinja fields, just add this prefix Custom_ (Custom + Underscore). (e.g. Custom_Source).

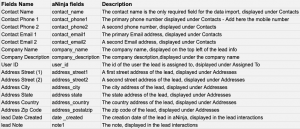
Fields mapping

The following are standard fields you can map to, in addition to any custom fields created in your application that you can see under Settings > Custom fields.

Where does the imported data appear

After the form submission, a lead is automatically injected into your aNinja account.

You can search your aNinja CRM for the imported leads. You can also search for any custom field, opportunities, and any other info that you have included in your form.

  • Lead’s contacts appear in the lead contact section in the lead view.
  • Opportunities also appear in the opportunity section in the lead view.
  • The company’s info appears on the top left of the lead view, in the Company section.
  • Custom fields appear in the custom field section of the lead view.
  • Lead Search is a field that also appears in the bottom left of the lead view. Specifically, these are info/links on the lead or the organization found in Google search.

Integrating Contact Form 7 with aNinja

In this article, we show you how integrating Contact Form 7 with aNinja can be easily done.

Integrating Contact Form 7 with aNinja

  • Go to Plugins
  • Install and then activate the following plugin “Forms: 3rd-Party Integration
    https://wordpress.org/plugins/forms-3rdparty-integration/
  • Under Contact go to 3rd party Services. And click on Add Another Service
  • Here, we need to get your aNinja API Key
  • Under Submission URL field put:
    • https://aninja.com/api/v1/contactform/?apikey=YOUR_API_KEY
      • Example: https://aninja.com/api/v1/contactform/?apikey=sample123-6yauyue5e
  • Fill in the Service Name and Submission URL as shown below
  • Then, select the Contact Form to integrate them
  • Here, map the form fields as shown
    • Check the Fields mapping section below to properly map your form fields with aNinja fields.
  • Lastly, click Save
  • Afterward, your integration between your selected contact form 7 forms and aNinja is complete. As a result, all form submissions will be injected into aNinja as new leads.

Fields mapping

Map the data on the aNinja fields and Form fields.

These are the default aNinja fields:

For the Custom Fields, just prefix the field name with “Custom.” e.g. Custom.Source

Where does the data appear

After the integration, you can search your aNinja CRM for the imported leads. You can also search for any custom field, opportunities, and any other info that you have imported.

  • Lead’s contacts appear in the leads contact section in the lead view
  • Opportunities also appear in the opportunity section in the lead view
  • The company’s info appears on the top left of the lead view, in the Company section.
  • Custom fields appear in the custom field section of the lead view
  • Lead Search is a field that also appears in the bottom left of the lead view. Specifically, these are info/links on the lead or the organization found in Google search.

Integrating Gravity Forms with aNinja

Gravity Forms is an easy to use form-building plugin. When integrating Gravity Forms with aNinja, the collected information will be pushed to your aNinja account creating a new lead with every form submission.

Integrating Gravity forms with aNinja

  • Go to Add-Ons under Forms
  • Click on Webhooks under the form Settings
  • Click on Add New under Webhooks Feeds
  •  Here, we need to get your aNinja API key
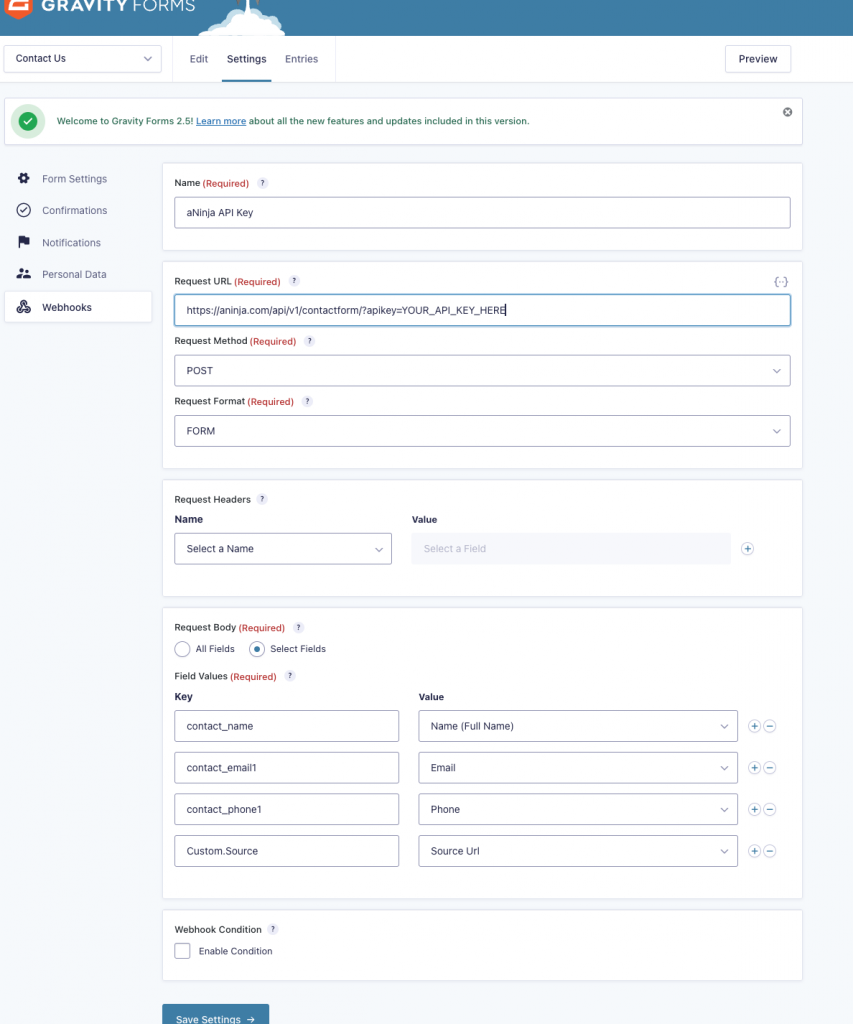
  • Fill in the field values as provided in the screenshot below. Check the Fields mapping section below to map your form fields to the appropriate aNinja fields

  • In Feed Settings, under Request URL field put:

https://aninja.com/api/v1/contactform/?apikey=YOUR_API_KEY

    • Example:  https://aninja.com/api/v1/contactform/?apikey=sample123-6yauyue5e
  • Click Update Settings
  • Your integration between Gravity forms and aNinja is now complete. And all form submissions will be injected into aNinja as new leads.

Fields mapping

Map the Data on the aNinja fields and Form fields

These are the default aNinja fields:

For the Custom Fields, just prefix the field name with “Custom.” e.g. Custom.Source

Where does the collected data appear

After the integration, you can search your aNinja CRM for the collected leads. You can also search for any custom field, opportunities, and any other info that you have collected from the form.

  • Lead’s contacts appear in the leads contact section in the lead view
  • Opportunities also appear in the opportunity section in the lead view
  • The company’s info appears on the top left of the lead view, in the Company section.
  • Custom fields appear in the custom field section of the lead view
  • Lead Search is a field that also appears in the bottom left of the lead view. Specifically, these are info/links on the lead or the organization found in Google search.

Lastly, have any specific questions? Please leave us an email at support@aninja.com. We will happily assist you!