Increase the deliverability of your text messages

One of the biggest challenges in using text messaging for business purposes is to increase the deliverability of messages.

Here are some tips to ensure the deliverability of your text messages, all in complying by the Acceptable Use Policy rules.

Increase the deliverability of your text messages

Here are some common things you can do that your messages are delivered and read:

  1. Get permission from your recipients. You can include an opt-in message on your website, social media channels, or even in-store.
  2. Keep your message short and to the point. Avoid using jargon or complicated language.
  3. Personalize your messages using aNinja’s template variables. Use the recipient’s name or other relevant information to make your message more personal.
  4. Use recognizable sender name: Ensure that your messages clearly identify who is sending the message. Avoid using shortcodes or numbers as your sender name, as this can appear spammy.
  5. Send your messages at an appropriate time, taking into account the recipient’s time zone and daily schedule. Define the sending time in aNinja’ settings.
  6. Inform your recipients how they can opt-out of receiving any future emails.
    1. Ultimately, add an unsubscribe link to your tests. Basically, the initial message needs to include the following language: Reply STOP, STOPALL, UNSUBSCRIBE, CANCEL, END, or QUIT.
  7. Also, honor opt-out requests: send an automated reply through aNinja triggers.
  8. Additionally, you can segment your recipient list to improve the relevance of your messages. Send targeted messages to specific groups of recipients based on their interests or behaviors.
  9. High key messaging metrics: A high delivery error rate. It indicates you may be attempting to contact numbers that are no longer in service, or are unreachable such as landlines; and/or external carrier filters are refusing to deliver your messages.
  10. Also, you can provide us with your business address; there is an additional verification process (A2P) that we can set up that helps reduce the chances of the carrier systems flagging your text as spam; as long as you follow the above. Reach us at support@aninja.com.
Text Content

Review your text template content to adhere to the messaging policy:

    1. Include Sender identification
    2. And an opt-out language
    3. Also, try and use multi-step sequences to engage customers.
    4. Avoid using spam trigger words such as “free”, “guarantee”, “limited time offer”, and “act now”. Instead, use clear and concise language that accurately conveys your message.
    5. And, don’t overuse abbreviations and emojis. They can be a red flag for spam filters.
    6. Lastly, avoid anything that is illegal or Forbidden:
      • Prescription Medication. Offers for prescription medication that cannot legally be sold over-the-counter are prohibited in the United States.
      • Illegal substances such as Cannabis, CBD, Puff
      • Sex, Hate, Alcohol, Firearms, Tobaco, and Vaping-related.
      • Gambling.
      • Fraudulent messages.
      • Malicious content, such as malware or viruses.
      • Any content that is designed to intentionally evade filters.

aNinja is forced to comply and temporarily block your text sending capability if it is being flagged as spammy by upstream carriers. Make sure to comply with all the above practices to avoid the carriers filters flagging your texts as spam.

Text template examples

These templates should serve as a starting point, and you should customize them to fit your business needs and communication style and increase deliverability of your messages.

Promotional message:

“Hello {{Contact.name}}, we’re offering a limited-time discount of 20% on all our products. Use code XXXX at checkout. Offer ends [date]. Reply STOP to opt-out.”

New product launch:

“Hey {{Contact.name}}, we’re excited to announce the launch of our new [product]. Get yours now and receive a 10% discount using code NEW10 at checkout. Reply STOP to opt-out.”

Limited-time offer:

“Hello {{Contact.name}}, our [product/service] is now available at a discounted price of [price]. This offer ends [date]. Don’t miss out! Reply STOP to opt-out.”

Flash sale

“Hi {{Contact.name}}, for the next 24 hours only, we’re offering a 15% discount on all our products. Use code FLASH15 at checkout. Hurry, this sale ends soon! Reply STOP to opt-out.”

Referral program

“Hey {{Contact.name}}, refer a friend and receive a $20 credit towards your next purchase. Your friend will receive a 10% discount on their first order. Share the love! Reply STOP to opt-out.”

Seasonal promotion

“Hello {{Contact.name}}, get into the holiday spirit with our festive [product/service]. Enjoy a 20% discount using code HOLIDAY20 at checkout. Happy holidays! Reply STOP to opt-out.”
 

Relevant articles:

A few things you want to consider before sending out texts

Avoid your messages being marked as spam

Failed leads API injection

The “Failed Leads API injection” feature allows you to track leads that were not successfully injected into your CRM.
When a lead is rejected, the system automatically generates an entry in the logs; it provides detailed information about the failed injection; and includes the reason why the injection failed.

Why does leads injection fails

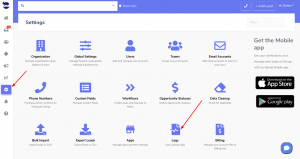
There are multiple reasons for a lead coming via API to fail being injected in aNinja. Here are the reasons that we log in Settings > logs. Leads injection could fail due to:

  • Duplicate Emails
  • Missing required fields (contact_name)
Failed leads API injection due to duplicate Emails

In Settings > Global Settings, if the following rule is enabled,

“Do not add new Leads via api if Lead with similar email already exists (avoids duplicates)”

when a lead is added via API, the system first checks if the lead already exists in the CRM.

It compares the email address of the new lead with the existing leads in the system.

If the system identifies an existing lead with a similar email address, it does not add the new lead to avoid duplication. Subsequently, it generates an entry in Logs, providing the reason of the failed lead injection.

Failed lead API injection due to missing required field

The contact name is the only required field for a successful lead creation. And the system creates the lead in reference to the contact name and saves the lead data.

If the lead data coming through API is missing the contact name, it does not create a new lead; and it generates an entry in Logs with the reason of failed lead injection.

Accessing the Failed leads API injection Logs

  • Click on “Failed leads API injection” from the toolbar

Failed leads API injection due to duplicate emailsIn this table, you can view:

  • ID: A sequential number
  • Reason: The reason for which the lead failed to inject
  • Data: The source of the lead that failed to inject
  • Created: The date & time this record was created – failed to inject.

By providing clear and detailed information about rejected leads, you can quickly identify the failed leads injection and address the issue.

Trigger “Duplicate Leads Merge” action

Trigger “Duplicate Leads Merge” action is useful when leads created via API create duplicates in your account;  you can then automatically merge them through Triggers.

Definitely, you want to keep a clean and consolidated data. This allows you to generate more accurate and meaningful reports and analytics, which can help in making informed business decisions.

Setting the Trigger “duplicate leads merge action”

Trigger actions get executed based on a certain event that you specify in the triggers feature:

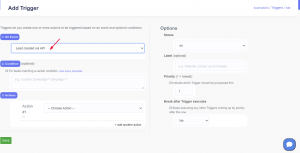
  • Select the event that will cause the trigger to fire.
    • e.g. Lead created via API

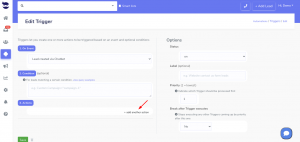
  • Under Actions, click “+ add another action”
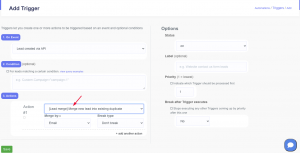
  • Select from the actions drop-down:

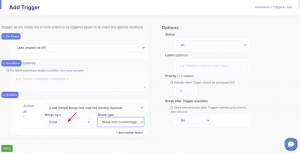
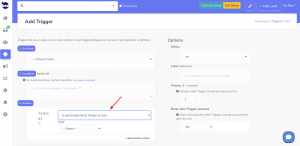
[Lead merge] Merge new lead into existing duplicate

Trigger duplicate leads merge action

  • And indicate the merge method (email/phone).

  • This automatically merges new leads by ‘phone’ or ’email’ if ‘Lead created via API’ option was selected as the desired event.

Good to know:

If a lead with the same email was sent via API but doesn’t appear in aNinja, you should check if the “Do not add new leads via API if lead with similar email already exists” rule is disabled. This rule prevents duplicate leads from being created, and therefore, the merging logic will not take effect.

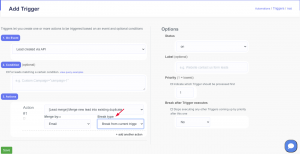
  • You can also indicate if this action should stop executing all subsequent actions/triggers in case the new lead has been merged. This is helpful if you don’t want a specific sequence to fire off for already existing leads.

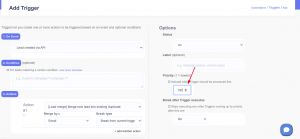
  • With that being said, it would be better if you set the trigger using this action with a high priority number so that it gets fired first.

Block identical automated text messages

In aNinja, you can choose to block identical automated text messages if they are resent within 24 hours; as it could be unpleasant for your leads to receive the same message repeatedly in a short period.

This option is enabled by default. You can disable it at any time.

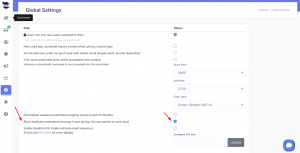
Block identical automated text messages

“Block duplicate automated messages if sent during 24 hours period to same lead”

  • This setting blocks your duplicate text sequences if they are launched within a period of 24 hours of the first sequence.
  • If you disable this rule, your identical text messages will be sent anyhow.

Assigning a bulk import list

Assigning a lead to a user allows you to efficiently follow up with your lead and close them quickly. Especially if you have distributed the tasks between your team members to better close leads. How about assigning a bulk import list to a specific user!

Assigning a bulk import list to a user

  • When preparing the leads file, add a column in your CSV sheet called User_id.
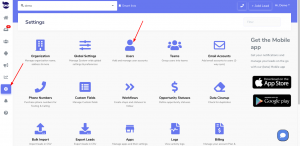
    • You can find the user_id in Settings > Users > next to the user name.
  • And set the column values to the User ID of the user you want to assign the leads to.

Mapping the user ID to aNinja field

When importing your CSV file, you want to map the user ID in your CSV file to user_id in aNinja fields.

Where does the user ID appear?

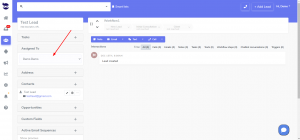
After the import, the user ID you’ve added to your contacts list will show in the lead view of the imported leads > in the Assigned to section.Assigning a bulk import list

Note: As long you have “Users can only see Leads assigned to them” enabled under Settings > Global Settings, then users (unless admin) can only see leads assigned to them.

Need help in assigning a bulk import list? Leave us an email at support@aninja.com and include the CSV file. Let us know the user you’d like to assign.

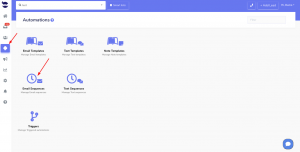
Creating Text & Email Sequences


By creating Text & Email Sequences, you can automate scheduled sequences of texts or emails.

Creating Text Sequences

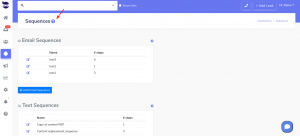
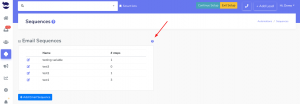
    • Go ahead and click on the help (?) icon next to Sequences. It redirects to a short youtube video to get an overview of Sequences.

Creating Text & Email Sequences

    • You can also watch a guide video that explains specifically on Text sequences.

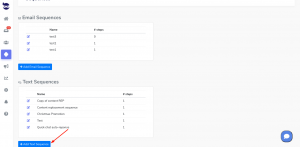
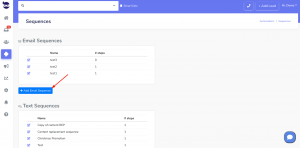
  • Here, click on Add Text Sequence

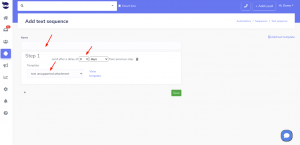
  • Give a name to your text sequence.
  • And add each step to your text sequence:
    • Select when you want the sequence step to be sent out:
      • If you want to send out the step as soon as you launch the sequence, choose “Immediate”. This fires the step within the acceptable text time window that’s set in Global Settings.
      • If you want to send out the step with disregard to the acceptable text time window, choose “Immediate (skip global settings validations). This fires the step immediately after the sequence is launched.
      • Otherwise, define the number of days after which you want the step to be sent out.
    • And choose which text template you want to use in this step.

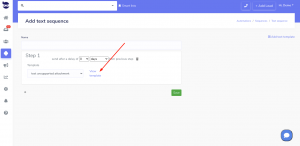
  • Lastly, you can change the text template. Just click on the link View template.

Creating Email Sequences

    • Go ahead and click on the help (?) icon next to Sequences. It redirects to a short youtube video to get an overview of Sequences.

Creating Text & Email Sequences

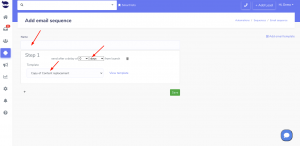
  • Give a name to your email sequence.
  • And add each step to your email sequence:
    • Select when you want the sequence step to be sent out:
      • If you want to send out the step as soon as you launch the sequence, choose to send after a delay of “0”-zero days from launch.
      • Otherwise, define the number of days after which you want the step to be sent out.
    • And choose which email template you want to use.

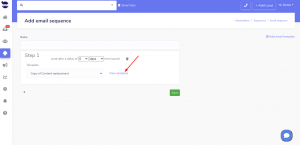
  • Lastly, you can change the email template. Just click on the link View template.

In conclusion, creating text & email sequences allows you to use them in your triggers and target your leads in order to turn them to customers!

Setting rules in Global Settings

Admin and owner users can set the rules to manage systematically the global settings in aNinja web app and the rules for the rest of the users.

Accessing the Global Settings

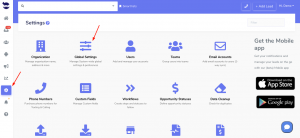
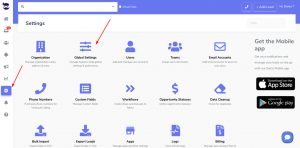
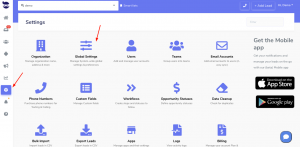
On the left sidebar, click on Settings > Global Settings.

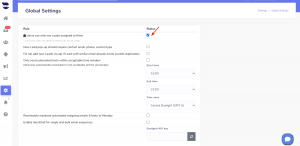
What is the global setting for aNinja app

  • Users can only see leads assigned to them
    • However, admin users can see all the leads

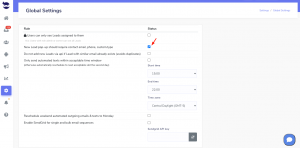
  • New Lead pop-up should require contact email, phone, custom.type
    • If you have no use for all this info, don’t toggle this option, it will crowd your database
    • However, this info augments your lead data so you have wider data that helps you filter your leads and narrow the search for a more precise grouping.

  • Do not add new Leads via API if Lead with similar email already exists (avoids duplicates)
    • It’s up to you to choose whether to allow injecting leads with a similar email that already exists in your CRM or not.
    • However, in case of duplications, you still can clean-up your data.

  • Include “aNinja Incoming call” on aNinja call forwarding
    • The receiving number receives a “forwarding message alert” when he answers calls coming from the forwarded number.

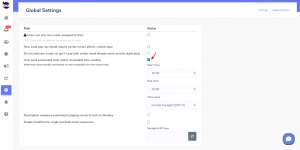
  • Only send automated texts within acceptable time window

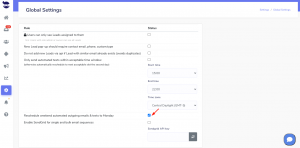
  • Reschedule weekend automated outgoing emails & texts to Monday
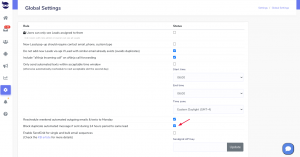
  • Block duplicate automated message if sent during 24 hours period to same lead

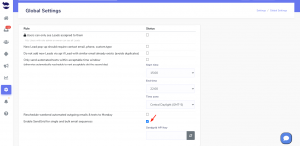
  • Enable SendGrid for single or bulk email sequences

Have any specific questions about Setting rules in Global Settings?  Just leave us an email at support@aninja.com. We will happily assist you.

Getting started tips

In this article, we bring you tips that will help you getting started with aNinja quickly and efficiently.

Getting started tips

We recommend you follow this sequence of steps to make your use of aNinja easier and more efficient. Click on the links for the detailed articles.

We also recommend you check the aNinja Onboarding article to get an overview of the aNinja features.

Connect your email and phone number
Additional Apps
  • If you want to use Zendesk for your ticketing
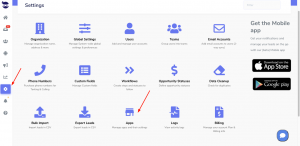
    • On the left sidebar, click on Settings > Apps
    • Install Zendesk in your aNinja account
  • If you want to use Calendly as your Calendar
Add and manage Users & Teams
aNinja Keys
Settings
  • Set your rules in Global settings
    • On the left sidebar, click on Settings > Global Settings.
    • Choose what works better for you from these settings
    • Here, you can directly enable SendGrid which allows you to send a large number of email sequences with no limitations.
Leads
Create your automations
  • Create Templates (email / text / note templates)
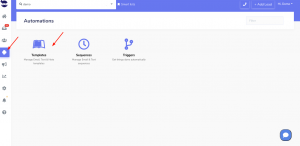
    • On the left sidebar, click on Automation > Templates
    • Templates are samples of emails and texts that you send to leads without re-typing the content every time.
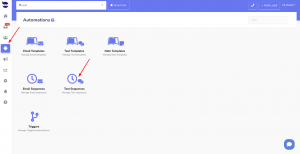
  • Create Sequences
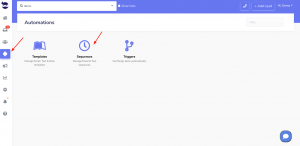
    • On the left sidebar, click on Automation > Sequences
    • Now that you’ve created your templates, you can use them to launch email sequences and text sequences to your leads. So Sequences allow you to use the email and text templates you’ve created, and send them to leads, in sequence, in a different interval of time.
  • Create Triggers
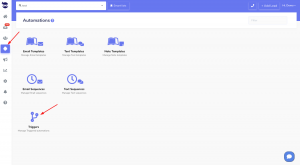
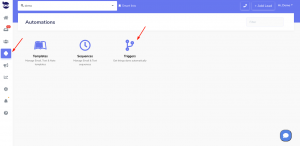
    • On the left sidebar, click on Automation > Triggers
    • After you’ve created the templates and sequences, you can set your triggers. Triggers are email and text templates delegated to be sent to the leads based on an event or condition.
  • Add an unsubscribe link to your outbounds for security.
  • Create a transactional email
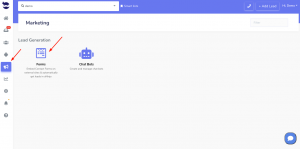
Manage your Marketing Features

Search for more help articles in the aNinja Knowledge base

Have any specific questions about the getting started tips? Leave us an email at support@aninja.com. Our support team is more than happy to assist you!

Assigning a lead to a user

Assigning a lead to a user is the first task that you can do when a lead pops up into aNinja to turn them into a customer faster.

And in the sales/marketing process, multiple users may take charge of a lead, depending on their role.

Moreover, users with admin roles can manage the delegation of leads to different users.

When a lead is assigned to a user, if another user is sending them an email, it will pull out with the name of the user whom the lead is assigned to.

Assigning a lead to a user

Lead assignment can be done through:

  • The lead view
    • This requires admin access if the option “Users can only see Leads assigned to them” is enabled in Settings > Global SettingsAssigning a lead to a user
  • Triggers using [Lead assignment] actions

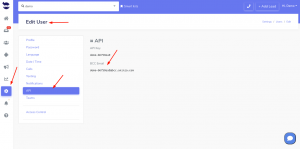
User ID

Each user is granted a private user-id as soon as they are invited to join aNinja, regardless of their role.

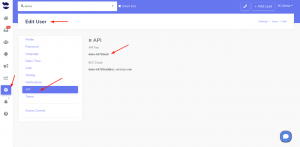
You can find the user-id in Settings > Users.

Using a Smartlist, you can utilize this user-id to filter leads assigned to specific users. You can also enable this Smartlist as a Dashboard Widget.

Similarly, you can narrow down your Opportunity report to see a snapshot of the users’ sales activities over a certain timeframe.


Troubles in sending Bulk Email Sequences

If you overpass the daily limit of your email provider, you will face troubles in sending bulk email sequences

Ech email provider imposes a daily email sending limit.

Having troubles sending your email sequences

You might need to check the following:

Still unable to re-launch your email sequences

For a large number of daily emails, we highly recommend you process your run through our transactional email processor SendGrid. You can enable it directly from your aNinja account > Settings > Global Settings.

Or send us an email at support@aninja.com. We’re happy to assist you.