Updating Templates and Signatures in in-queue messages

Updating templates and signatures in in-queue messages ensures that the messages being sent to customers are up-to-date.

Outdated templates and signatures can lead to confusion and inaccuracies.

Overview

To launch bulk text sequences, you want to start by creating templates and sequences. Then you set the launching date.

Once a text sequence is created, the system retrieves

  • the corresponding template(s),
  • the phone number used to initiate the sequence,
  • and the lead info available at the time of creation.

Modifications made to the template(s) or the signature of the phone number used to launch this text sequence can be reflected in the sequence, post-launching.

However, any changes made to the lead info are not currently being updated in the queued-up texts.

How to include template updates in the sequence

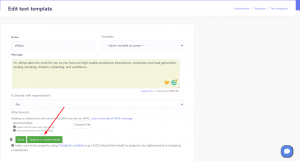
When editing a template’s content, you can choose to update all in-queue texts that are using this template.

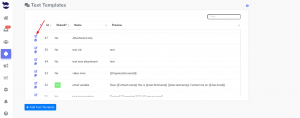
  • Go to Settings > Automations > Text or Email Templates

  • Click on the pencil next to the template to go to the edit view

  • Make your changes.
  • And click Save.
  • Afterward, go back to the edit view once again to click on Update in-queue texts or emails.
  • Otherwise, the template’s updates will be saved but changes will not reflected in in-queue texts and emails.
  • In case there are no messages in queue using this template, the update in-queue button is disabled.

Note: The update might take several minutes depending on the size of the in-queue messages.

How to include Signature updates in the sequence

Update Text signatures in-queue

When editing a signature saved in a phone number, you can choose to update all in-queue text templates that were sent from this number.

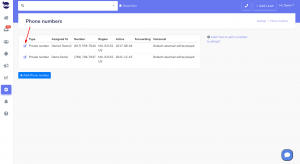
  • Go to Settings > Phone Numbers
  • Click on the pencil next to the phone number to go to the edit view

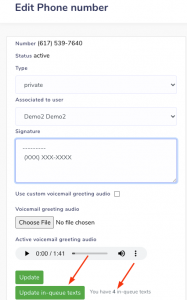
  • Type in the new signature,
  • And click Update.
  • Then, you should go back to the edit view once again to click on Update in-queue texts.
  • Otherwise, the signature updates will be saved but changes will not reflected in the in-queue texts.
  • You can also see the number of in-queue texts that are using this phone number.
  • In case there are no messages in queue using this template, the update in-queue button is disabled.

Note: The update might take several minutes depending on the size of the in-queue texts

Update Email Signatures in-queue

When editing a signature saved in a email account, you can choose to update all in-queue email templates that were sent from this email account.

  • Go to Settings > Email Accounts
  • Click on the pencil next to the email to go to the edit view

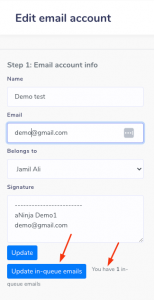
  • Type in the new signature,
  • And click Update.
  • Then, you should go back to the edit view once again to click on Update in-queue emails.
  • Otherwise, the signature updates will be saved but changes will not reflected in the in-queue emails.
  • You can also see the number of in-queue emails that are using this email account.

Note: The update might take several minutes depending on the size of the in-queue texts
Forward Lead info through Trigger “Email” Action

You can set a trigger action to forward the lead info captured on a specific event, to an email that you define in the trigger action.

On an event like “Chatbot Conversations”, we recommend you to delay the transfer of lead info a duration of 5 minutes maximum, to give the user the time to enter the requested info.

Lead info forwarded through trigger email action

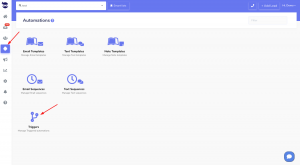
On the left sidebar, click Automations > Triggers

  • Click on +Add trigger
  • Choose the trigger event
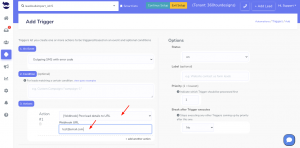
  • In the trigger action, select

“[Email] Send lead info to an email address (from: no-reply@aninja.com)”

  • And type the email under Email address

When a lead is injected into your account after the trigger event has occurred, his info will be transferred to the email address you define in the trigger action.

If we take the example of the “Chatbot conversation” event;

After the period you’ve set in your trigger, the below fields captured in the conversation, will be transferred to the email defined in the “Trigger Email Action”:

  • contact name
  • phone number
  • email address
  • and the latest 100 chatbot messages with that lead.

In case the user didn’t enter a capture info (e.g. phone number), or it was entered after the delay period you set in the trigger (5 minutes), it will not show in the message you receive by email.

  • After the delay duration is finished, you will receive the below information to the email you defined in the trigger action:

New event from lead (Chatbot 63088754a3b74).

Contact name:
aNinja test

Email address:
test@aninja.com

Phone number:
+1 xxx-xxx-xxxx

Latest messages:
– [Bot] Hey, Happy to assist!
– [Bot] What’s your name?
– [contact_3b74] aNinja test
– [Bot] What can we do for you?
– [aNinja test] Send me information
– [Bot] Okay, what is the best email to send information to?
– [aNinja test] test@aninja.com
– [Bot] Info is on the way! What’s the best number to reach you at?
– [aNinja test] 1xxxxxxxxxx
– [Bot] Thank you! A team member will be in touch shortly.


Trigger Email action after a Delay duration

In this article, we’re going to show you how to set the trigger action to send lead info to an email address, after a delay that you define when a certain event has occurred.

Through aNinja Triggers, you can define which actions to programmatically trigger based on a specific event and condition. 

Setting the trigger Email action after a Delay

The trigger actions get executed based on a certain event that you select when you’re in the triggers feature:

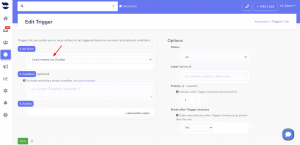
  • Select the event that will cause the trigger to fire.
    • e.g. Lead created via Chatbot

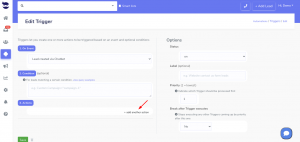
  • Under Actions, click “+ add another action”

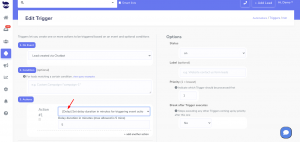
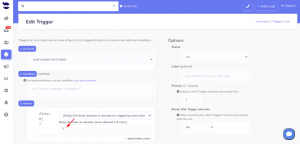
  • To set a delay before executing the trigger action, select from the action drop-down:

[Delay] Set delay duration in minutes for triggering event actions

  • And set the duration in minutes to a maximum of 5 minutes.

Trigger Email action after a Delay

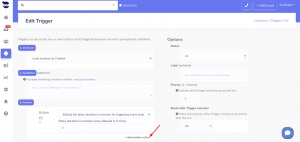
  • Click “+add another action

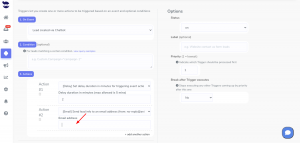
  • To set the trigger to send the lead info to an email, select from the actions drop-down:

[Email] Send lead info to an email address (from: no-reply@aninja.com)

  • And indicate the email address to send to.

  • The delay action is useful in the case for example of a lead created via chatbot, to wait a few minutes as they’re still filling the chatbot info (email, phone, etc.) so that the data is available when the lead’s info is forwarded to the email.

Updating lead info after creating a sequence

After creating a sequence, you may need to update lead info to ensure that the sequence is effective in nurturing and converting leads.

Although updating the lead info is a common practice, lead info changes are not currently being reflected in the sequence post-launching. This means that any updates made to the lead info after launching the sequence will not be applied to the queued-up text messages.

Overview

To send bulk email sequences or bulk text sequences, first, you create the templates and sequences. Then you set the launch date.

Immediately, the system retrieves the data from the lead info and templates.

It then saves them in the sequence till the time is due to launch the sequence.

Modifications made to the template(s) or the signature of the phone number used to launch the sequence are now accurately reflected in the sequence.

However, any updates made to the lead info after the sequence has been created will not be applied to the queued-up text messages.

Preparing the email and text sequences

When you create an email sequence or a text sequence, the system queues up all the emails and texts as soon as the bulk email or text is created.

That means it builds up the emails/texts to be sent from the template and lead information at the time and queues those up for future sending.

How to include the lead updates in the sequence

To reflect any lead info changes in the text sequence, you need to cancel the current sequence and re-create a new one with the updated lead info.

Leads View v/s the Lead View

Leads View v/s the Lead View

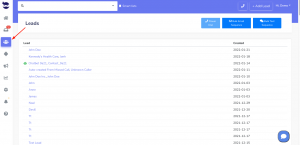
In the leads view, you can see all or a group of leads that you have in your CRM. The lead view shows the info you have on a specific lead.

The Leads View

The Lead View

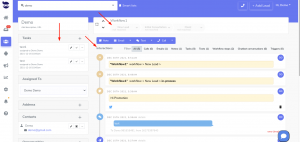
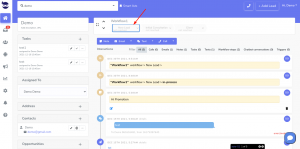
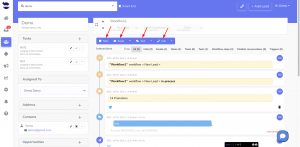
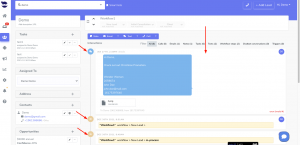
In the Lead View you will see the personal info of a specific lead with the history of interactions and activities you have made with this lead since his creation in your aNinja account and his status in the workflow.

Search for a lead to see his lead view info.

Top Navigation Bar

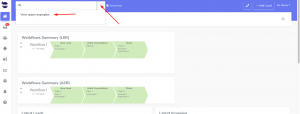
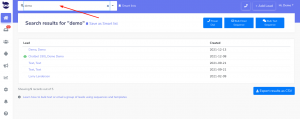
The top navigation bar is the search tool on the top left of your aNinja app.

Type in any info you have on a lead and the results are brought to you in the Leads View.
The top navigation bar

Top Navigation Bar’s activities

From the top navigation bar you can:

    • Type in a query and aNinja system brings you the results in the Leads view. e.g.

custom.source=Leadsbridge

    • If you open an uploaded file, you can see the query related to this file e.g.

lead.bulkimport_id=8

The Lead View

aNinja was designed to show you all the lead activities and interactions in one place: the Lead View.

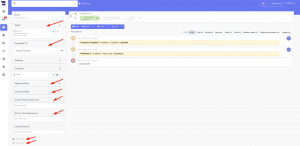
The lead view is divided into 4 sections:

Accessing the lead view

You can access the it from 2 places:

  • On the top navigation bar, type the name of the lead or any info related to the lead (email, phone, URL, or custom fields). aNinja will find them for you. Click on the name. Then the system opens the lead view.
  • From the left sidebar, click on Leads. It will show you the list of all the leads you have in aNinja. Find your lead among them and click on the name. Then, the system opens the lead view.