Launching Text Sequences

Launching text sequences typically refers to the process of sending a certain number of text messages to one or a group of recipients all at once, using an automated messaging system.

Those messages are typically pre-written (text templates) and scheduled in sequences in advance. And, ultimately, aNinja takes care of launching  those text sequences at the designated time or interval.

However, it is important to ensure that the messages comply with applicable laws and regulations, to avoid your messages being marked as SPAM.

Text sequences can be sent individually to a single lead, in Bulk to a group of leads, or to all the leads at once.

Creating text sequences

  • First, prepare the text template(s) that you want to include in the sequence.
  • Then, go to Settings > Automations > Text Sequences

Launching a Text Sequence to a single lead

Launching a Text sequence to a single lead is done from the lead view

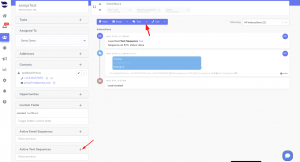
  • ( + ) Active Text Sequence,
  • Or from the Toolbar > Text dropdown > Text Sequences

Launching a bulk text sequence

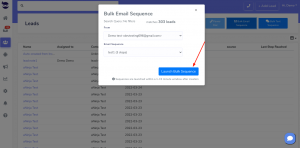
After creating templates and sequences, you can launch bulk sequences to your leads.

Follow links in the article above to get full instructions.

Or, browse aNinja Knowledge Base for more articles.
Creating a Smartlist from Bulk Import list

After importing contacts in a CSV or Excel file, you can directly  start by creating a Smartlist from the Bulk Import list.

Creating a Smartlist from Bulk Import list

  • In Settings > Bulk Import, locate the list that you’ve just imported in Previous Bulk Imports.
  • Under Records, click on the blue number (which is the number of leads in this list). This redirects you to the leads view where you can see all those leads.
  • On the top navigation bar, you can see the query that was used to execute this process. Something like e.g.: lead.bulkimport_id=12. 12 represents the serial number of the bulk import.
  • Copy this query.
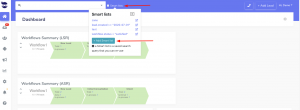
  • Click on Smartlist > Add Smart List
  • Give a name to the Smartlist
  • Paste the query in “Search query”.
  • Save it for later re-use.

Launching sequences for this particular list

Basic aNinja terms

Here’s a simple explanation of the basic terms and keywords that we use in aNinja. After all, we want you to get the correct meaning of the words we use.

Know what aNinja terms stand for

All around aNinja, and in the knowledge base articles you encounter keywords. And it’s very important for you to know what they stand for. We divided these keywords into 4 sections:

Features
  • Automations: These are Templates, Sequences, and Triggers.  You automate them to be launched automatically at a certain event without your intervention.
  • aNinja Forms: These are the contact forms that you create on aNinja. When you embed them on your website, they collect leads. And automatically the system injects them into your account.
  • Dashboard: It is a set of widgets that give you a quick overview and deep view into your aNinja system.
  • Widget: It’s a graphical display. Precisely, it brings you the report on the workflow of your latest activities and interactions that you make in aNinja.
  • Chatbot: It’s a computer program that can be embedded on your website. It simulates human conversation through text chat. Therefore, aNinja Chatbot answers your website visitors’ simple questions. Moreover, you can customize the questions in the Chatbot Playbook.
  • Chatbot Playbook: It determines how the chatbot answers the user’s questions. More precisely, it’s an automated message workflow that runs on simple logic in order to help the users get the answers they need.
The Lead related
  • Custom Fields: These are info that you can add to the lead. Therefore, it augments the lead data (creation time, payment plan, phone number, platform, tenant code, and much more…).
  • Lead activities: These are basically the activities that you perform on a certain lead:
    • Tasks, Assigning lead, Opportunities, Custom Fields, Email and Texts sequences, Merging, and Deleting.
  • Lead interactions: These are the interactions that you perform on a certain lead:
    • Emails, Texts, Calls, and Notes.
  • Lead View: It is where you can see all activities and interactions that you made with a lead.
  • Leads View: It’s where you can see all the leads you have in your account. Or the result of a Smartlist or a search typed in the top navigation bar.
  • Workflow: It consists of a series of sequential steps that allows you to monitor the lead/customer’s progress in the pipeline.
System search
  • Smartlist: or Smart View. Simply, it is a list of leads that the system pulls from your CRM following criteria specified in a query.
  • Query: It’s the essential component for building a Smartlist. Precisely, it’s a specific request for lead retrieval among your CRM.
aNinja Keys & codes

Have any specific questions about the aNinja terms? Please leave us an email at support@aninja.com. We’re more than happy to offer you clarifications.

Leads View v/s the Lead View

Leads View v/s the Lead View

In the leads view, you can see all or a group of leads that you have in your CRM. The lead view shows the info you have on a specific lead.

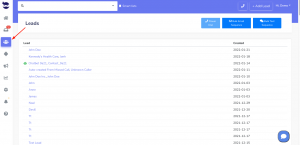
The Leads View

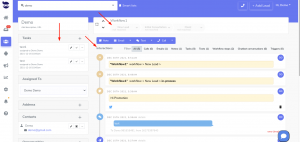
The Lead View

In the Lead View you will see the personal info of a specific lead with the history of interactions and activities you have made with this lead since his creation in your aNinja account and his status in the workflow.

Search for a lead to see his lead view info.

Power Dialing leads

Power dialing leads is a very useful feature for salespersons. When they want to call all or a group of leads sequentially. The system automatically brings the phone number of the next lead in line.

Power Dialing

The Power Dial feature is used to call a group of leads automatically, one after the other, without the worry of going to each profile and hit the dial manually.

Note! Before you start power dial session, you want to clean duplicate leads in your calling list. Otherwise, you will end up calling the same lead multiple times. Which is not really pleasant for the leads and it adds additional charges to your phone bill.

To start power dialing leads,

  • Type your search in the top navigation bar
    • e.g. lead.created >= “2023-04-20”
  • Or, select a Smartlist
In the Leads View
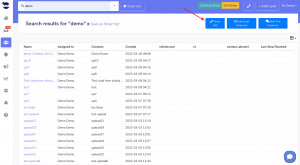
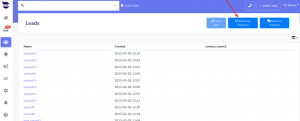
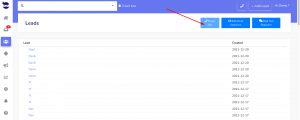
  • On the top right of the leads view page, hit the Power Dial Button. 

  • By using this option, you can sequentially call leads on the page without the need to manually enter each lead’s profile and make the call.
  • As soon as you hit the Power Dial button, the system queues the leads in the order they show in the leads view, and starts calling the first one in line.
  • Then, the system opens the Lead View of the lead that you’re currently calling. This enables you to use the note, email, and text features from the blue toolbar.
Power dial pop-up
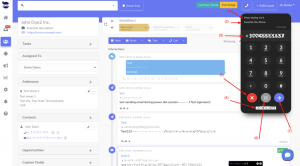
  • The Power dial pop-up appears and you can see:
    • The number of the lead you’re calling now / out of the total of leads in the queue: (Power dialing 1/6). (1)*
    • The name of your search (e.g. Smartlist: Dev Phone) (2)*
    • The primary phone number saved in the contacts and that’s currently being dialed (3)*
    • Your phone number that’s being used. (4)* If you’re a user with Admin role, you can choose a number from the dropdown (5)*
    • A stop icon: which ends the Power dial session (6)*
    • A pause icon: which ends the current call and pauses the power dial session (7)*
    • An arrow icon: which allows you to step to the next lead in queue and it’ll automatically start calling them (8)*


  • The red blinking light next to the phone icon on the top of the page indicates that the power dial session is ON.
How does the power dial behaves
  • The system automatically calls the primary phone number of the lead.
    • If you need to call a different number for the same lead, you can pause the current call and click on the other phone number in the lead’s contact. The system starts dialing it immediately.
    • This does not end the power dial session.
    • And to move on to the next lead, just click on the arrow.
    • If the primary phone number is marked as Do No Contact, the system uses the first valid number in the lead’s contacts, otherwise it steps to the next lead in line
  • The system automatically skips leads with empty phone numbers.
  • There’s no option to skip calling a lead manually.
  • When the current call is ended (either by the lead or by you clicking on the pause or the arrow), the system starts calling the lead next in line immediately and opens their lead view.
During the call, and without ending the power dial session, you can
  • Minimize the dial pop-up by clicking on the phone icon. This does not end the power dial session. Then click on the phone icon again to show the pop-up.
  • Navigate through the leads:
    • Go back to the lead view of the lead you just ended the call with, leave notes or send an email or text.
    • Check the lead view of the lead next in line, read any notes related to them, check their current status in the workflow, and review any previous interactions you may have had with them. This will help you remember who this lead is before making the call.
      • Just click on the arrows on the bottom right of the page.
  • Open other aNinja features, go check your inbox for example. When the current call ends, you will be redirected to the lead view of the lead next in line.
  • Navigate through the browser, open tabs to search for more info about this lead or their company, check their website, open your calendar, and so on.

Troubleshooting

During the call, if you’re having problems hearing or be heard, this is what you can do to identify the issue:

  • If you directly place a single call (not via power dial), does that work?
    • Yes? Then the issue could be with the power dial feature. Contact support@aninja.com  and let them know that.

If nothing of the above succeeded, contact support@aninja.com they’ll check logs and consult the telephone provider if need be to resolve this issue.

Lead’s Contacts

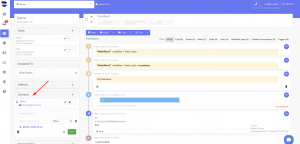
The lead’s contact section in the Lead View, shows all the contacts saved under your lead (employees of the same company, relatives, etc…). It’s a good component for filtering based on contact info. The lead’s contacts are email, phone number, and URL.

You can mark a contact as “do not contact“. They will stop receiving your bulk sequences. You can still send them emails / texts from the lead view.

Relocate the contact in the lead’s contacts if you have multiple ones. Drag it to the top. The first one in order will be considered the primary contact.

Lead's contacts

Incorrect email address or phone number

It is important that the lead contact are correct so your outbound emails and texts reach your leads successfully.

Moreover, if you’re intending to use the phone number for texting, save the mobile number as the primary number (first number in the contact). Otherwise, your text will not reach the lead.

However, you will be notified that your outbound was not sent due to the incorrect email address or phone number.

Using the contact info for leads search

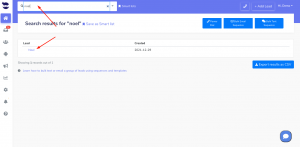
Just type the contact info on the top navigation bar, and aNinja will search all your CRM to find the lead(s) related to your search.

The results will show in the Leads View. For future use, go ahead and save the results as Smartlist. You can share your Smartlist with other users too.

Bulk Activities

Now, you can perform the below activities on the results in the Leads View:

Top Navigation Bar

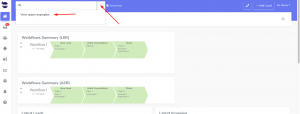
The top navigation bar is the search tool on the top left of your aNinja app.

Type in any info you have on a lead and the results are brought to you in the Leads View.
The top navigation bar

Top Navigation Bar’s activities

From the top navigation bar you can:

    • Type in a query and aNinja system brings you the results in the Leads view. e.g.

custom.source=Leadsbridge

    • If you open an uploaded file, you can see the query related to this file e.g.

lead.bulkimport_id=8

Launching Bulk Email sequences

Launching bulk email sequences typically refers to the process of sending a large number of emails to a one or a group of recipients all at once, using an automated messaging system.

You can also launch an email sequence to a bulk import list.

The emails are typically pre-written (email templates) and scheduled in sequences in advance. aNinja takes care of sending the messages at the designated time or interval.

Launching bulk email sequences to all leads

Launching bulk email sequence

  • You’ve just started an email sequence for all your leads.

Launching email sequences to a group of leads

  • Choose a saved Smartlist or create a new one.

Launching bulk email sequence

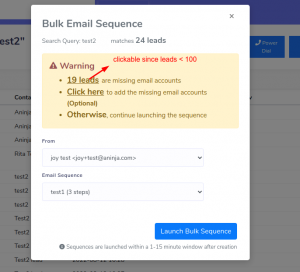
An alert pops up to show the number of leads included in this sequence and that have no email addresses. Click on the number to see those leads.

Checking the status of email sequences

After launching your email sequence, you can check for its status in the Dashboard Widget “Bulk Sequences”.

Stopping an email sequence

From the Dashboard Widget “Bulk Sequences” you can also stop the email sequence if the sequence delay setup is of 1 or more days.

You can stop a sequence for a single lead from the “Active Email Sequence” in their lead view.


Launching Email Sequences

With aNinja, you can start launching Email sequences, which refers to the process of sending a certain number of emails (one or more) to one or a group of recipients all at once, using aNinja’s automated messaging system.

Email sequences can be used for various purposes, such as sending marketing messages to a list of subscribers, providing updates to customers or team members, or sending reminders or notifications for appointments or events.

Those messages are typically pre-written (email templates) and scheduled in sequences in advance. And, ultimately, aNinja takes care of launching those email sequences at the designated time or interval.

However, it is important to ensure that the messages comply with applicable laws and regulations, to avoid your messages being marked as SPAM.

Email sequences can be created to be sent individually to a single lead, in Bulk to a group of leads, to a Bulk Import list, or to all the leads at once.

Creating email sequences

  • First, prepare the email template(s) that you want to include in the sequence.
  • Afterward, go to Settings > Automations > Sequences
  • Create an email Sequence with at least one step. Choose to send “Immediately” if you want your sequence to launch with no delay.
  • Lastly, you can choose to either send your email sequence to a single lead or in bulk.

Launching an Email Sequence to a single lead

Launching an email sequence to a single lead is done from the lead view

  • ( + ) Active Email Sequence,
  • Or from the Toolbar > Email dropdown > Email Sequences

Launching a bulk email sequence

After creating templates and sequences, you can launch bulk sequences to your leads.


Launching email sequences to all leads


Launching email sequences to a group of leads

  • You want to create a custom field that identifies a group of leads (e.g. Source). Then create a Smartlist that retrieves leads having this custom field saved in their lead view.
  • Then launch your special campaign to this group of leads.


Launching email sequences to a bulk import list


To access detailed articles and obtain full instructions and images, please click on the links in red.

Or, browse aNinja Knowledge Base. You can always contact support@aninja.com for help!

Making a Call in aNinja

Making a Call in aNinja

In aNinja, you can dial a phone number, call a lead’s phone number from the lead view, and power call multiple leads, using the phone number you have saved in your aNinja profile.

Dialing a phone number from aNinja Web app

  • On aNinja Dashboard, on the top right, click on the phone icon.
    • The call is made through the phone number saved in your user profile.
      • If you’re a user with Owner or Admin role you can choose to make the call using other users phone numbers.
    • When you finish the call, tap on the red button.
    • To close the calling window, just click on the phone icon once again.

making a call in aNinja

Calling a lead from aNinja Web app

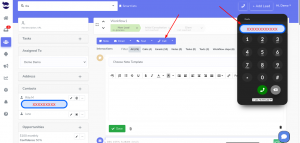
  • When on the Lead View, from the toolbar, choose the call feature. It opens a dialing window and automatically shows the primary phone number in the lead’s contacts.
    • Click on the green button to call.
      • If you’re a user with Owner or Admin role you can choose to make the call using other users phone numbers.
    • When you finish the call, tap on the red button.
    • To close the calling window, just click on the phone icon once again.

Calling multiple leads from aNinja Web app

  • On the Leads View, whether you choose to call all the leads in your CRM, or a group of leads that you have grouped using a Smartlist; on the top right of the page, hit the Power Dial Button.
  • This option allows you to call all the leads sequentially without bothering to go to each lead’s profile to call manually. When the current call is ended, the system starts calling the next lead in queue.

Accessing the calls log

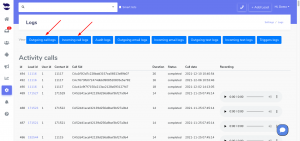
  • If you are a user with a User role, you can view your own calls in Settings / Logs and listen to the conversations.

  • Users with Admin role can view calls and listen to call recordings of all users.

Note: For saved leads, you can keep notes of the calls. In the Lead View, click on Notes to enter relevant information that you picked up from the call.