Building your aNinja Chatbot Playbook is an easy yet tricky thing to do. Our team is available to assist you with building it.
Let’s have an overview of a Chatbot.
What’s a Chatbot
A Chatbot is a live chat program that you can embed on your website. It answers the website visitor’s simple questions. A lead is added to your aNinja account with every chatbot conversation.
The conversations in the Chatbot take the form of questions & answers. You define the questions according to the frequently asked questions about your website. You can also choose to show a brief introduction and guidance on your website. All this is defined in the chatbot playbook.
We recommend that you write down the sequence of the questions before you start to create the steps in the playbook.
Creating a Chatbot in aNinja
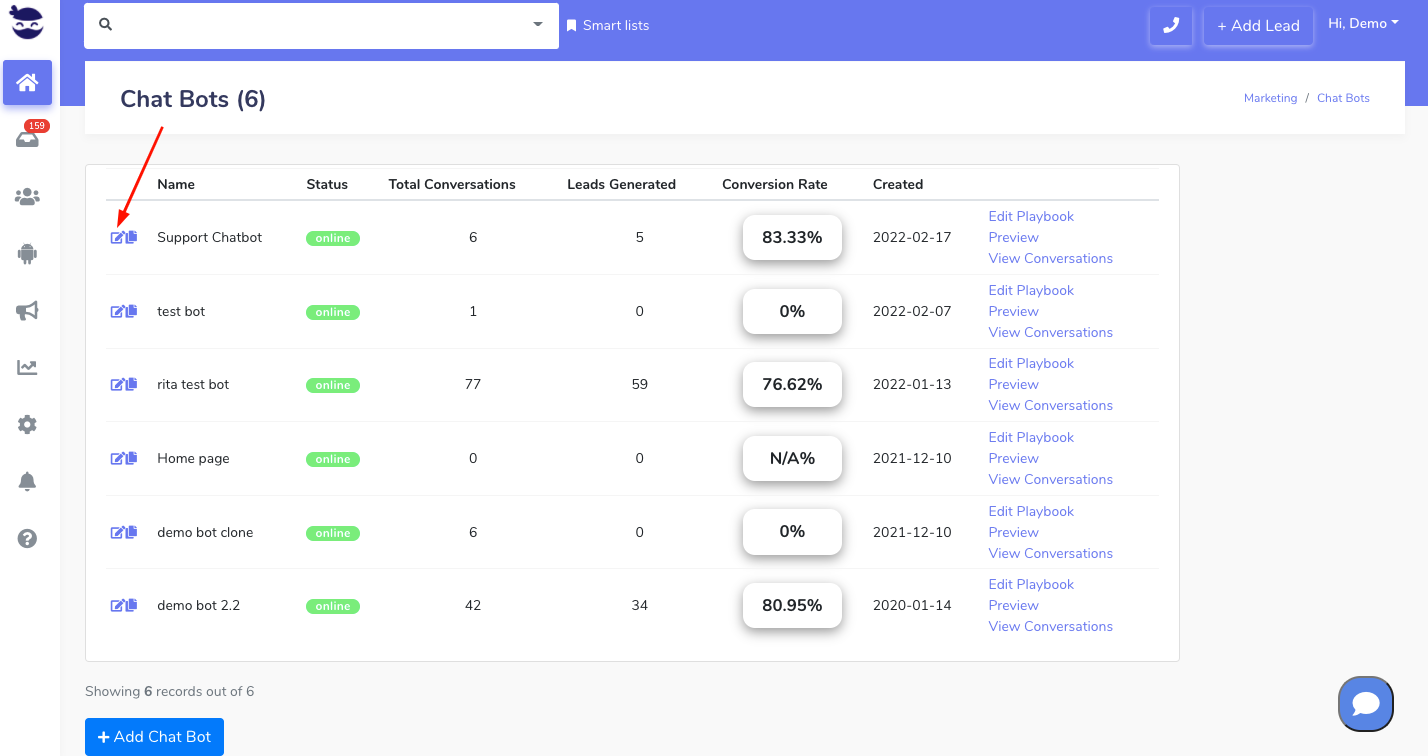
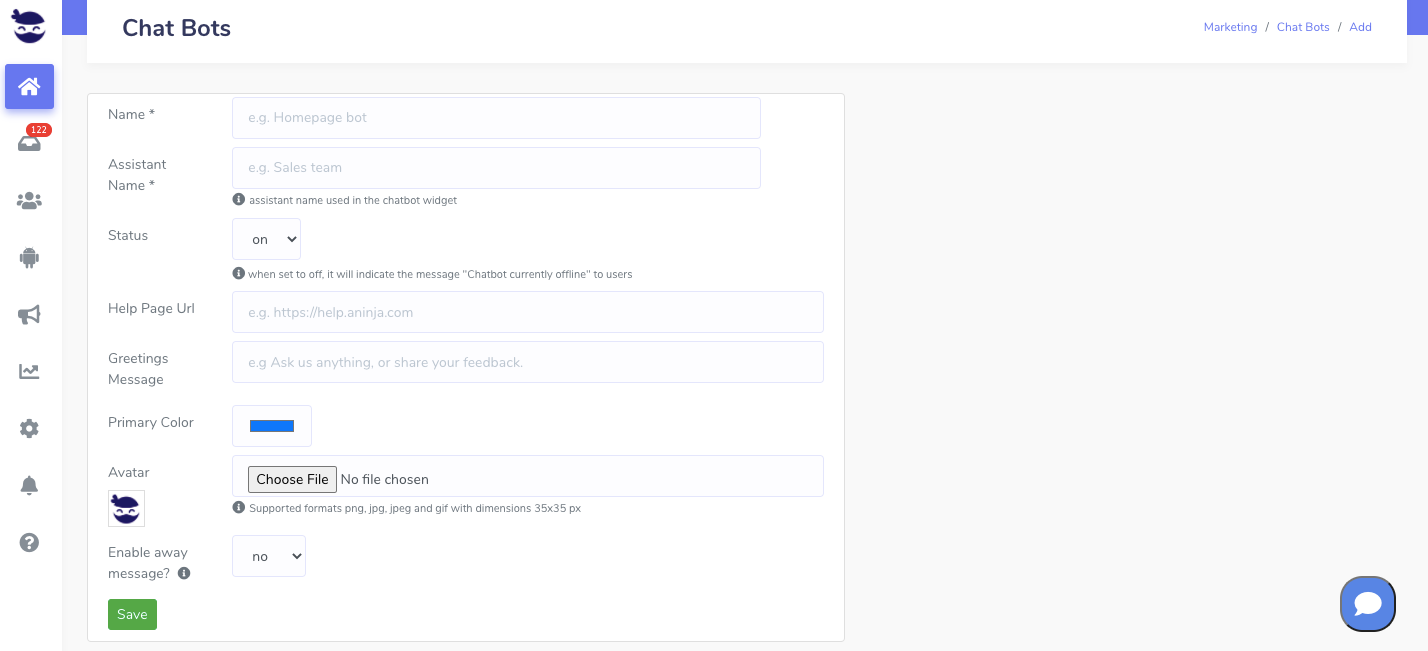
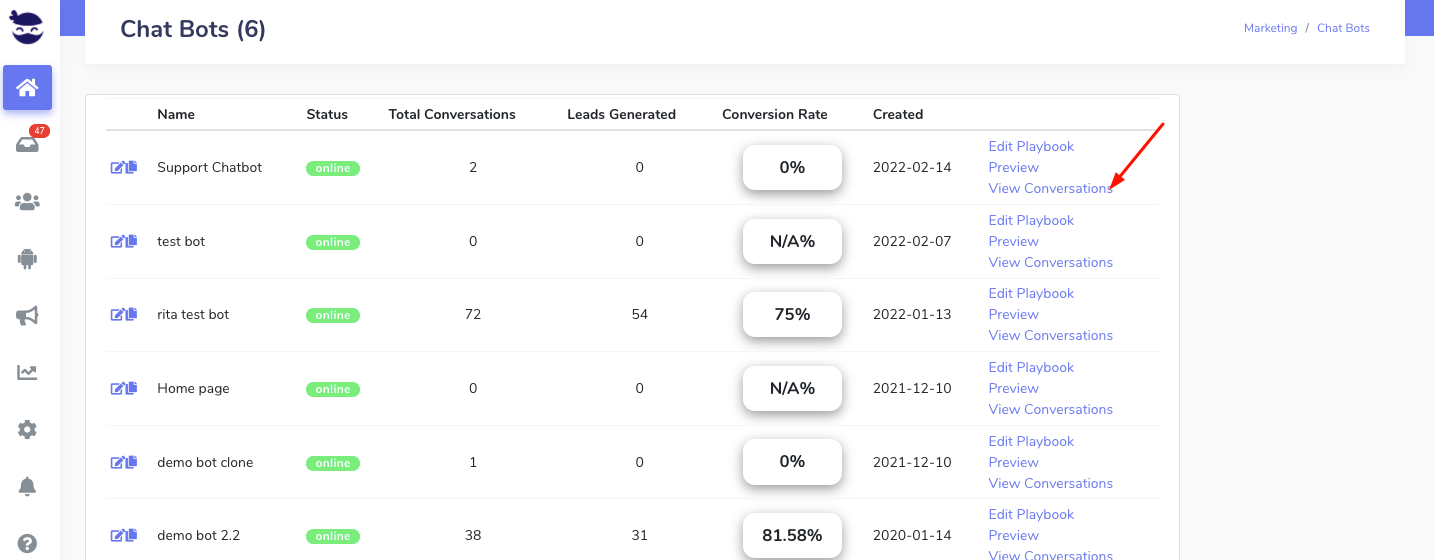
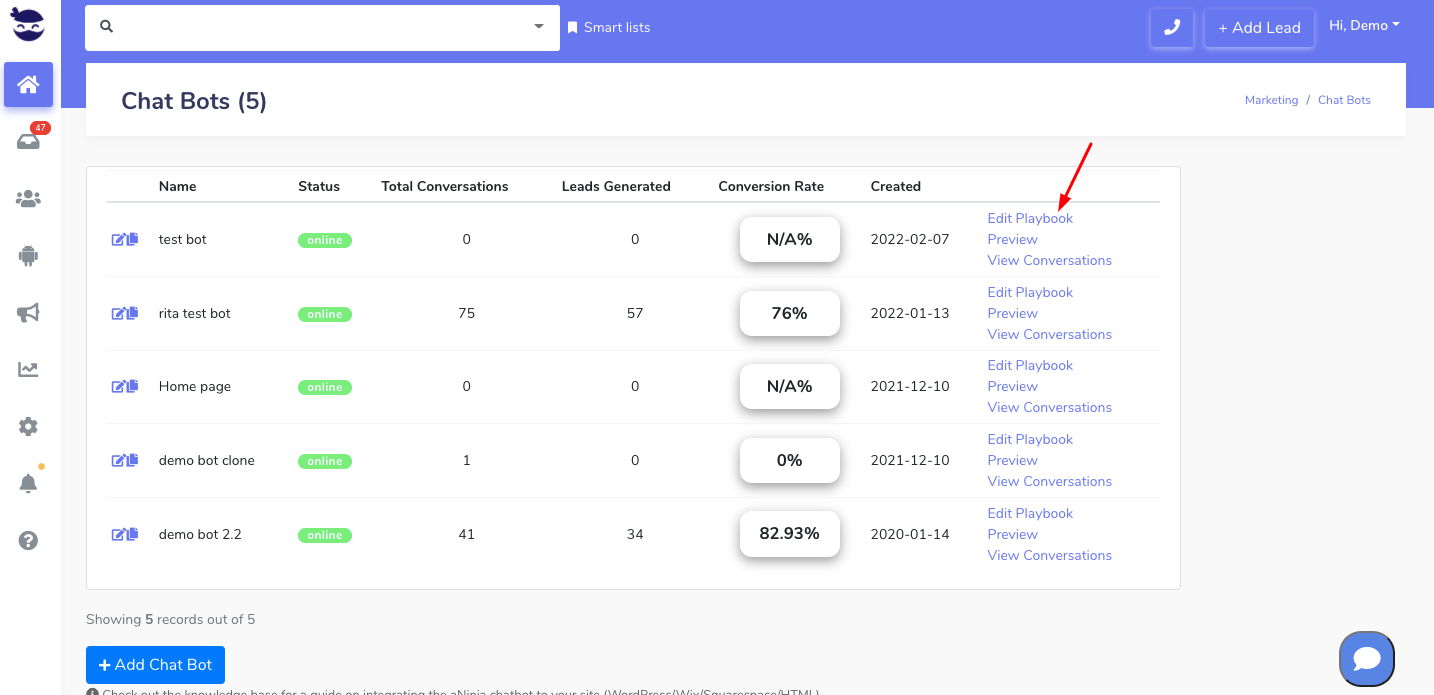
- From the left sidebar, go to Marketing > Chat Bots
- Click + add a chatbot to create a new Chatbot.
Creating the steps of the Playbook
- From the left sidebar, go to Marketing > Chat Bots
- On the right side next to the chatbot name, click on Edit Playbook.
- Toolbar options:
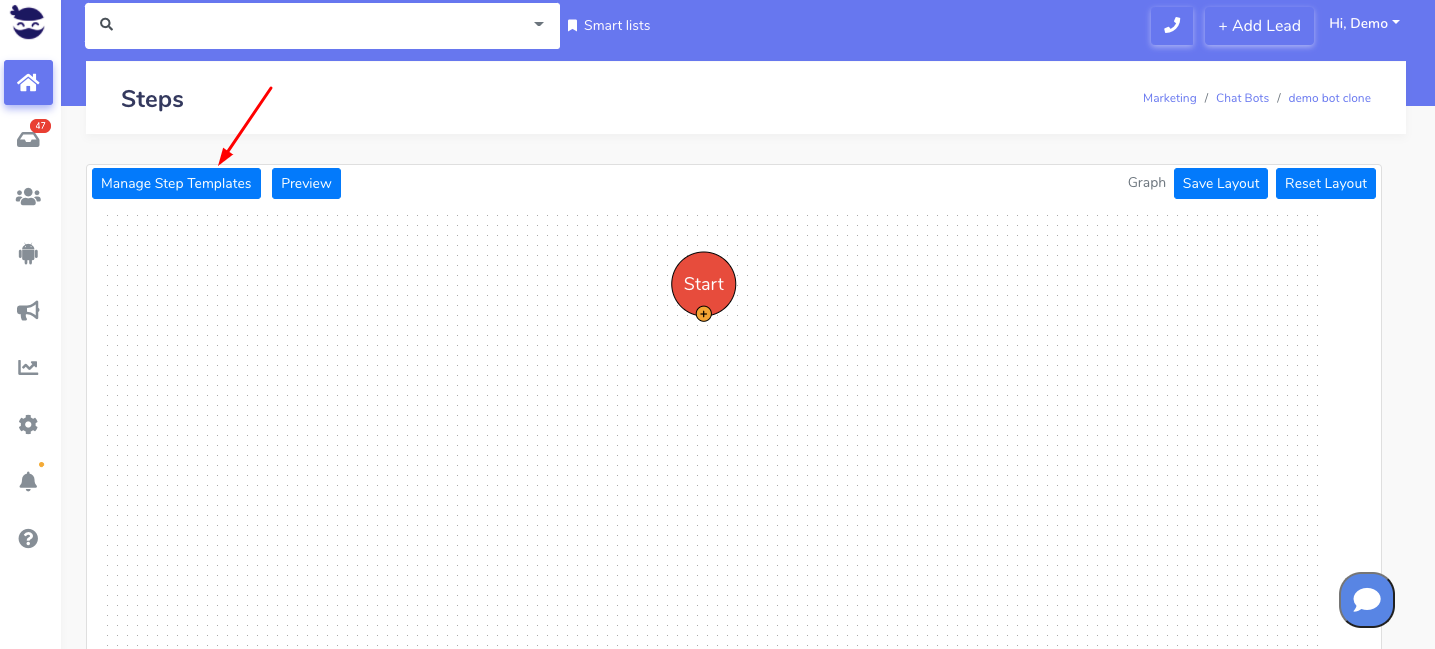
- Manage Step Templates: This is where you create the steps of the playbook.
- Preview the steps created to test how the playbook runs.
- Save the Layout every time you add a step.
- Reset the Layout: This resets the design of the Layout to default (in case you dragged and relocated steps).
Note!
If you hit Reset the Layout without saving your changes, it will be reset to the last step saved.
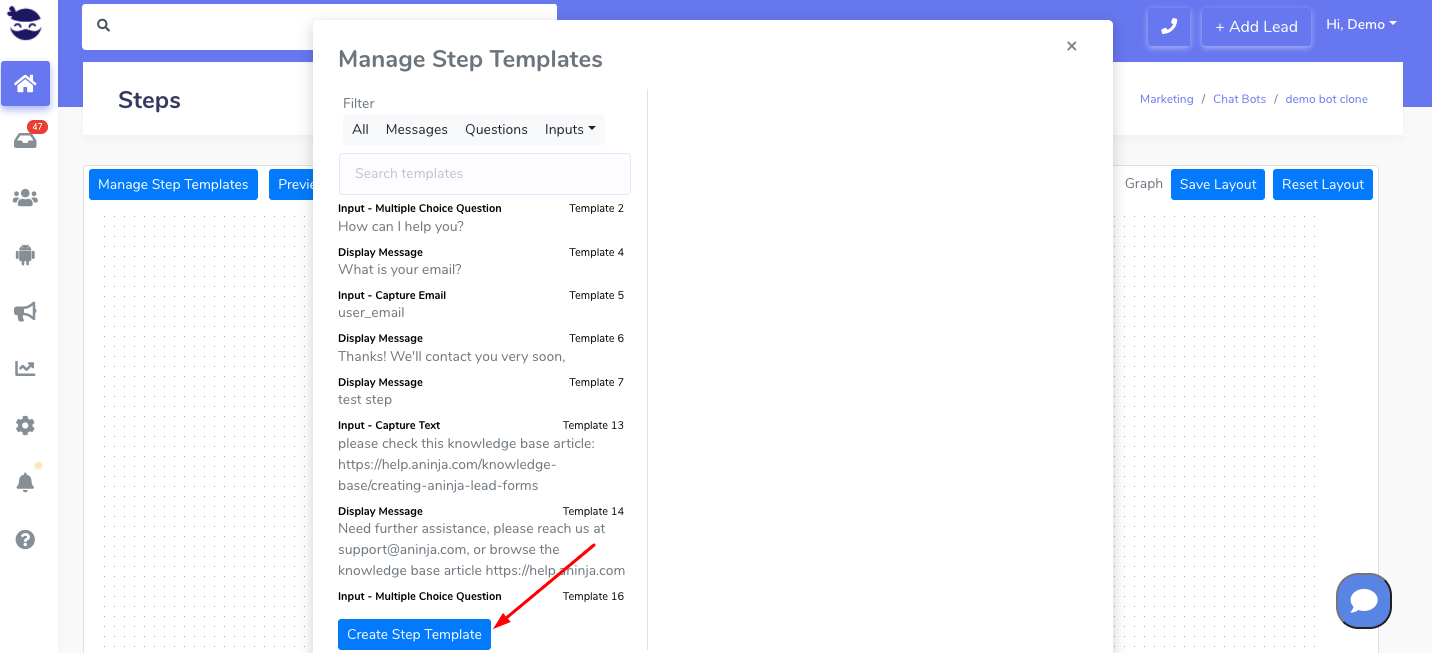
Managing the step templates
- On the right side next to the chatbot name, click on Edit Playbook.
- Choose “Manage Step Templates“. Here you create all the steps of the playbook to be used in the layout.
- Click “Create Step Template” to create a step.

- Types of step templates:
- The display messages: Type a message to link it to a step in the playbook.
- The Inputs is a field where the user enters his answer to the chatbot question, which could be a text, an email, a phone number, a domain name, or a contact name.
- Questions are considered Inputs as we expect an input or reply from the user.
- The questions can have one or multiple choice answers.

Example:
- Message:
Hello, My name is bot.
- Input – Multiple choice question:
How can I help you?
– Need a CRM
– Technical question
– Contact Support
- Input – Capture Email: Chatbot doesn’t execute the step linked to this input before the user enters a valid email address.
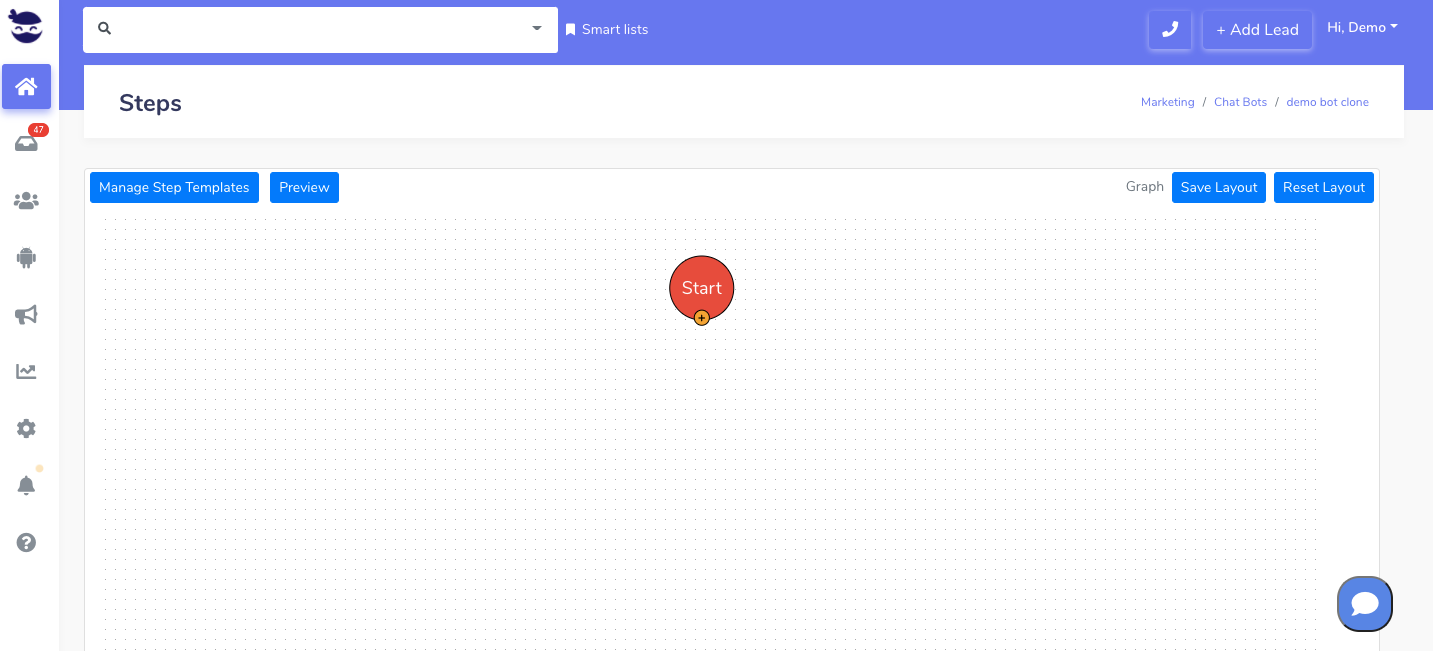
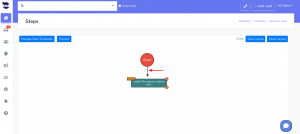
Building the Layout / Graph
To access the layout, click “Edit Playbook” from the right side next to the chatbot name.
- The Start button indicates the beginning of the playbook.
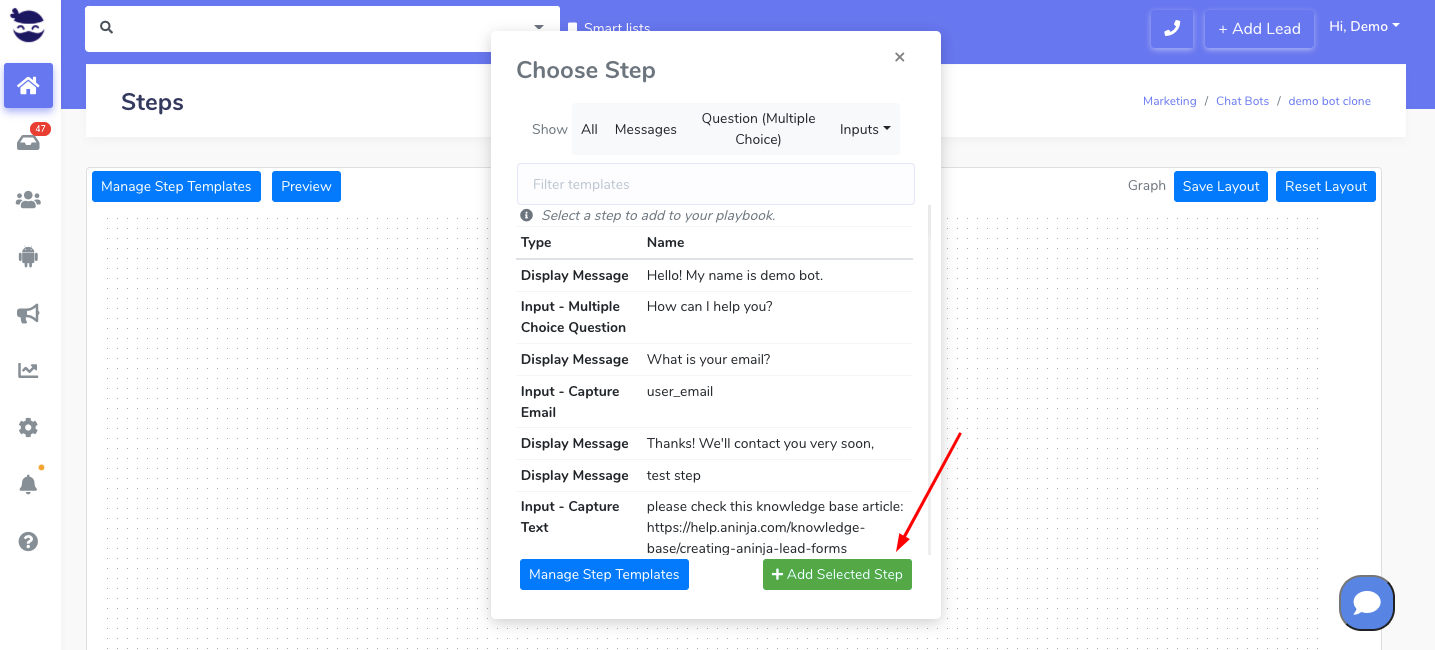
- To add a step, click on the + plus sign.

- Choose a step template and +Add Selected Step.

- The added step will show in the layout linked by an arrow to the previous step.
- Keep on adding the steps to the playbook according to the sequence you want the conversation to follow.
- You can drag the steps to relocate them for a better view of the layout.
- To delete a step, click on the X that’s on its border.
- If a step is deleted, the steps linked to it will remain in the graph. You can either link them to any step in the layout or delete them.
- To change a step in the Layout, click on “change” that’s on its border.
- You can only change a step with a similar type (change message with a message type).
- In the Layout, to link steps to each other, hover over the step you want to link. When the little white cross appears, drag it towards the step you want. Then, an arrow links the 2 steps together.
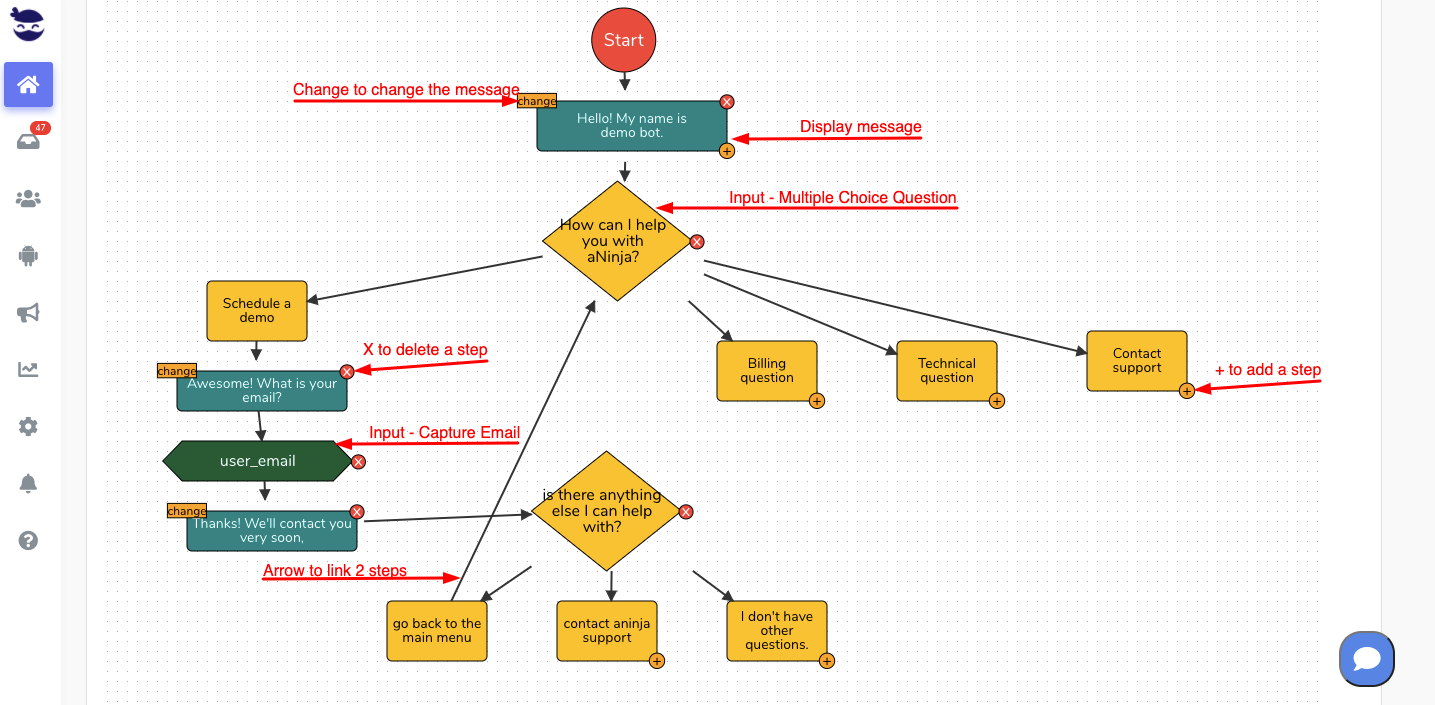
- We recommend you Save the Layout after each step you add to prevent losing the changes.
Previewing the Chatbot
- Click on Preview from the toolbar to test the playbook.
- It will open a new page. Click on “clear cache and reload” to reset the chatbot in case you have tested it before.
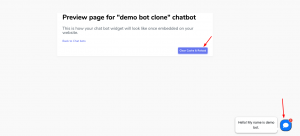
- The chatbot icon starts running the steps created in the playbook.

- Click on “back to chat bot” to leave this page.

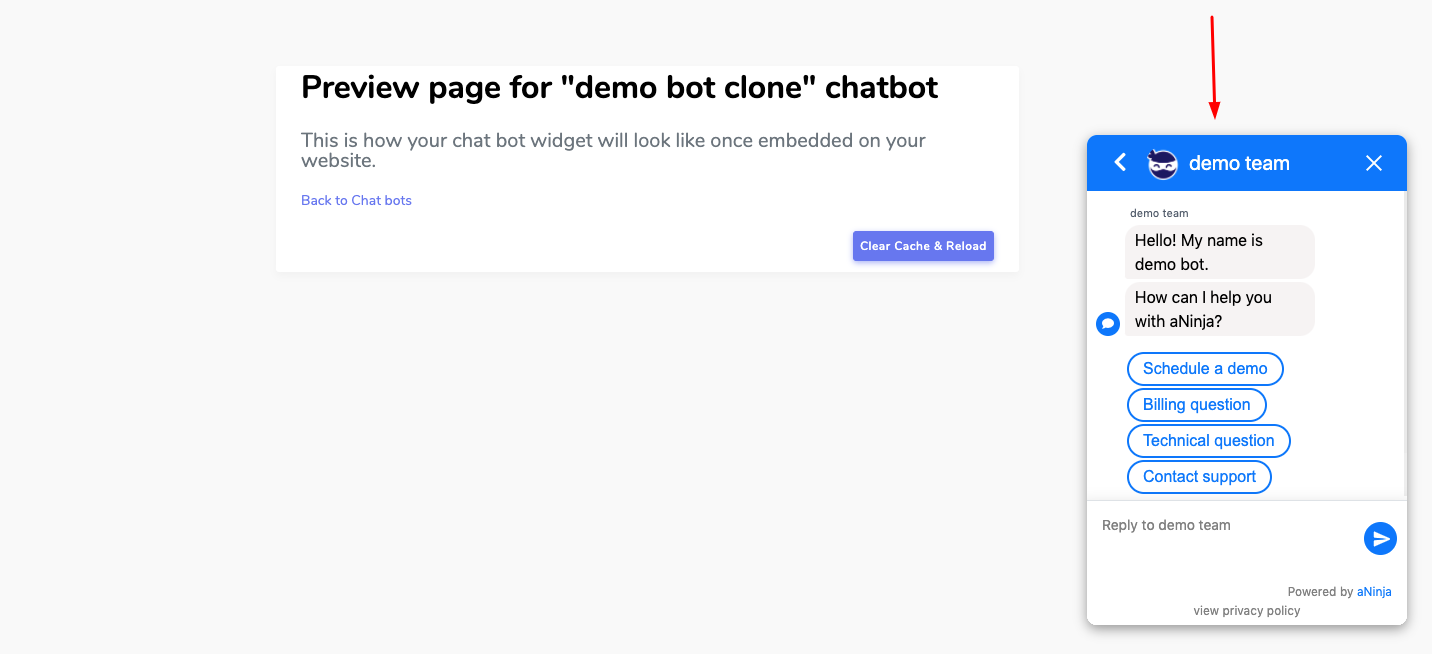
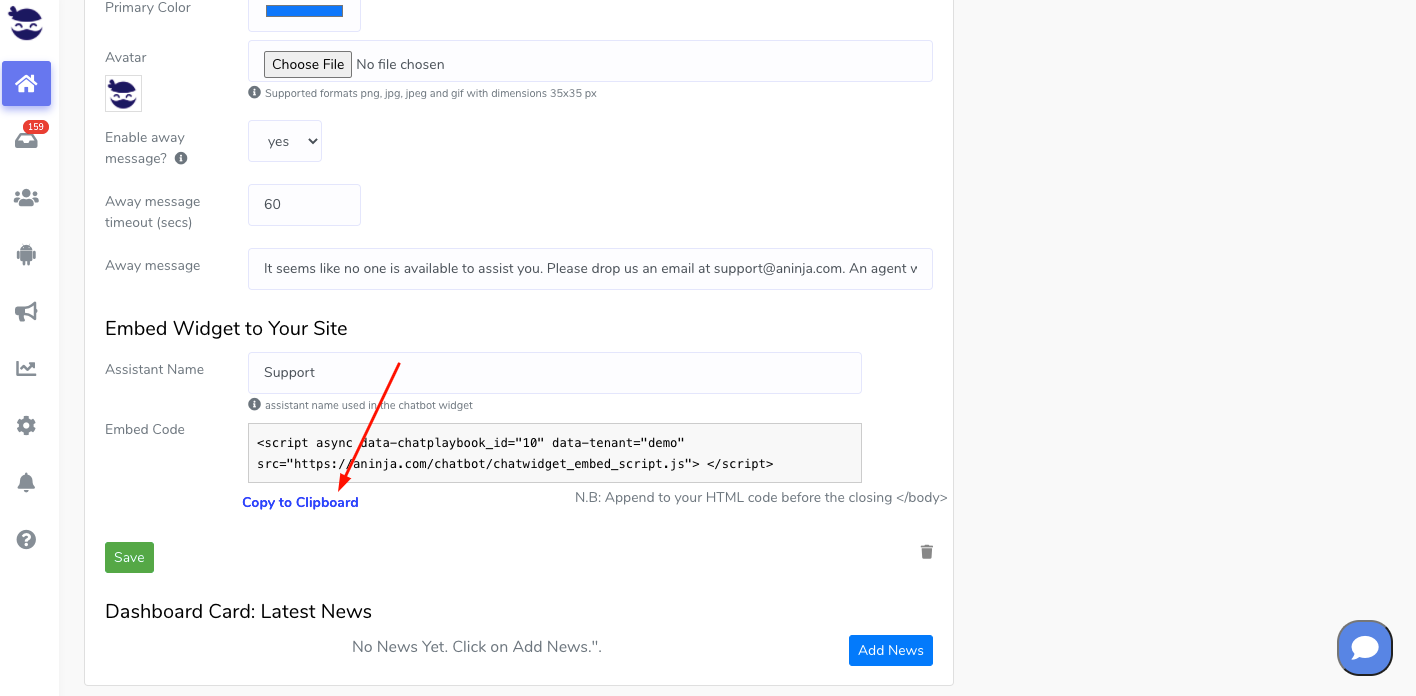
When the playbook is tested and approved to go live, you can embed the chatbot on your website.
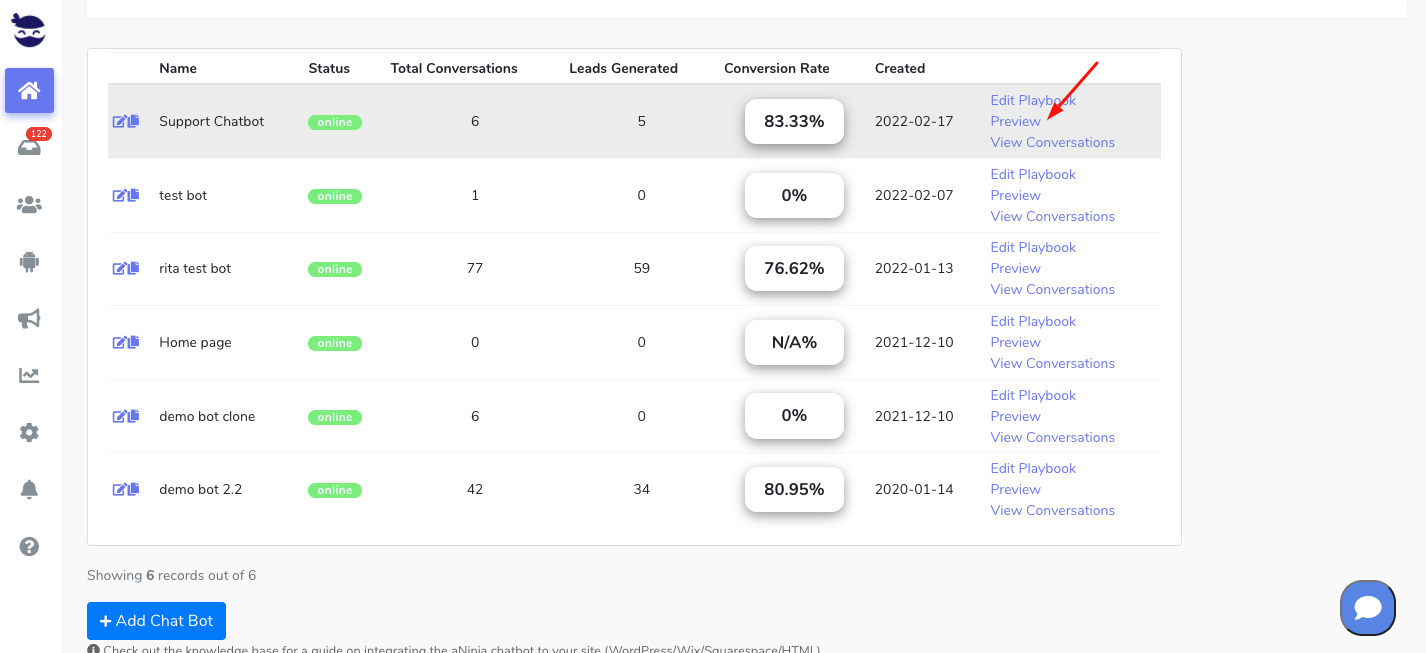
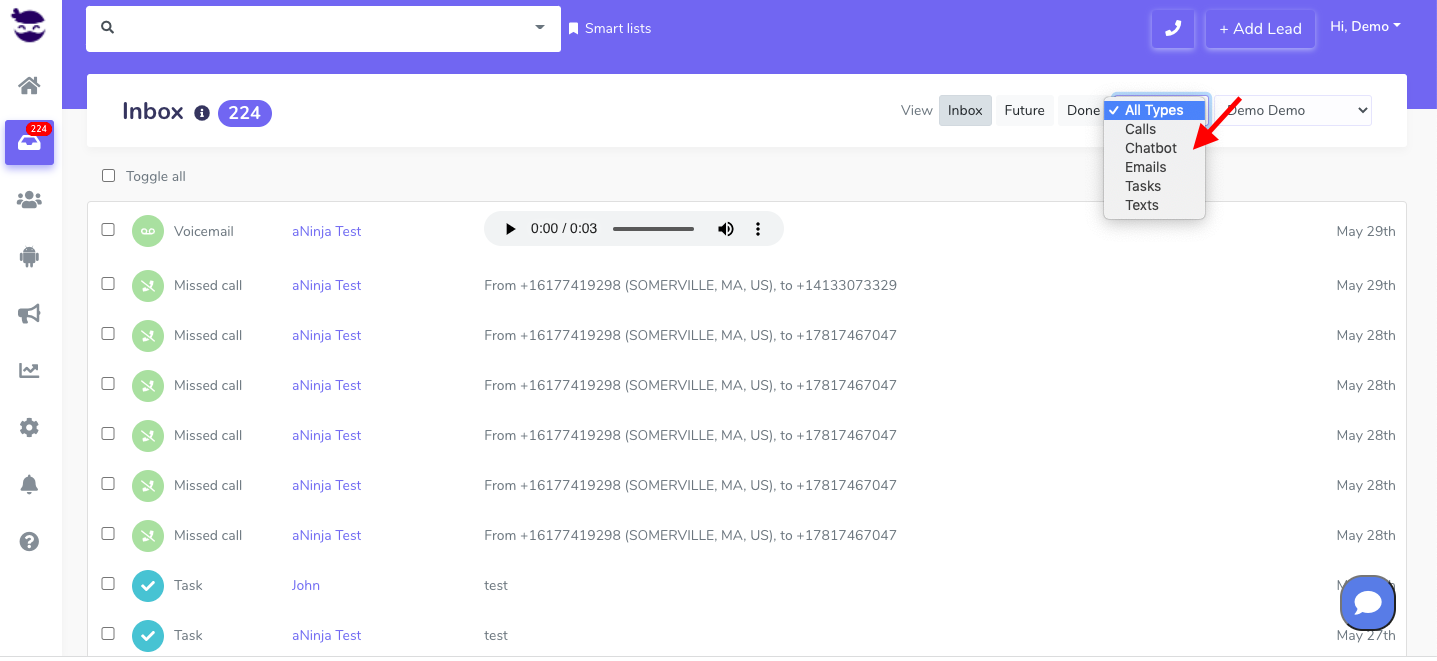
Where do the Chatbot Conversations appear in aNinja
After adding the Chatbot that you created in aNinja to your website, as a result, after every chatbot conversation, a new lead is created into your aNinja account with the info captured in the conversation.
If the lead closed the chatbot conversation before your reply, your message will appear in a bubble next to the chatbot on the website:

You can see these conversations:
- In your inbox. Just select Chatbot from the All types drop down.

- And in your Dashboard widget “Chatbot Conversations”. If you can’t see this widget, just enable it from the little gear on the top right of the dashboard.
Chatbot behavior
The chatbot pop-up gets triggered only for the first user visit to your site. It doesn’t automatically re-pop up on their subsequent visits, mainly because it gets annoying for repeat users. However, they can see that it’s in the bottom right section.
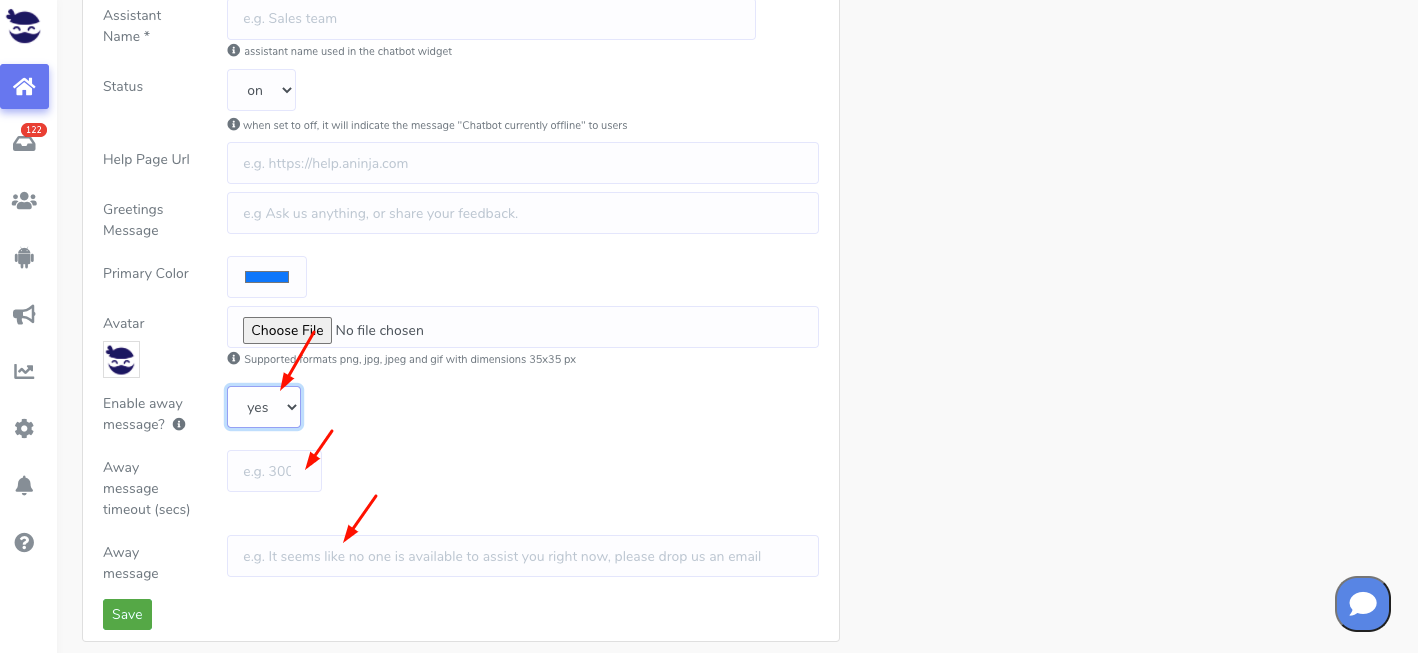
We can customize the following Chatbot behaviors:
- Exposing the Chatbot initial greeting on every visit
- Hiding the initial greeting message on page load
- Delay showing the Chatbot widget for a number of seconds
- Customizing widget container style to fit on the load page
Send us your request to support@aninja.com and we will implement the changes for you.