Customizing the date format in Custom Fields

Customizing the date format in Custom Fields allows you to define and customize the date format in which the date values are displayed in the lead view.

What’s a custom field

Custom fields are a powerful feature that allows you to capture and store specific information according to your unique requirements.

And defining the format of the custom field in Custom field settings, provides flexibility and convenience in managing and presenting information to better suit the needs of businesses and users.

Setting up the custom field with date type

Setting up a custom field with a date type is a straightforward process.

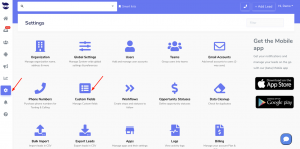
  • Go to Settings > Custom Fields

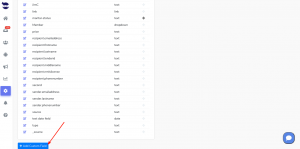
  • Click on Add custom field

  • Name it
  • And specify the type as “Date” or “Datetime” under Type.
  • Define the desired date format in which the date values should be displayed in the lead view. And hit Save.
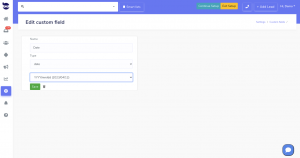
Changes made in the custom fields table are automatically reflected in the lead view.

This means that you can modify the date format in the custom field settings, and the updated format will be applied to the displayed date values in the lead view without any additional efforts.

This real-time synchronization ensures that the lead view remains up-to-date and aligned with the desired date format.

Impact of custom field date changes on Triggers

Another crucial aspect of customizing the date format in Custom Fields, is that it does not affect trigger actions.

Trigger actions are triggered based on certain conditions or events.

And, the customization of date formats in custom fields does not interfere with the trigger actions associated with the custom field. But, it only affects the display format of the date values in the lead view.

However, changing the value of the date custom field in the lead view does affect the trigger and executes the trigger action specified to fire on the “Custom field value changed” event.
Failed leads API injection

The “Failed Leads API injection” feature allows you to track leads that were not successfully injected into your CRM.

When a lead is rejected, the system automatically generates an entry in the logs; it provides detailed information about the failed injection; and includes the reason why the injection failed.

Why does leads injection fails

There are multiple reasons for a lead coming via API to fail being injected in aNinja. Here are the reasons that we log in Settings > logs. Leads injection could fail due to:

  • Duplicate Emails
  • Missing required fields (contact_name)
Failed leads API injection due to duplicate Emails

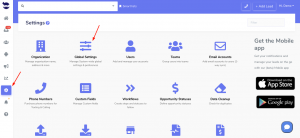
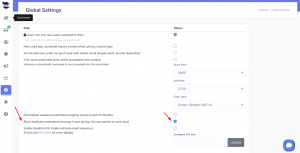
In Settings > Global Settings, if the following rule is enabled,

“Do not add new Leads via api if Lead with similar email already exists (avoids duplicates)”

when a lead is added via API, the system first checks if the lead already exists in the CRM.

It compares the email address of the new lead with the existing leads in the system.

If the system identifies an existing lead with a similar email address, it does not add the new lead to avoid duplication. Subsequently, it generates an entry in Logs, providing the reason of the failed lead injection.

Failed lead API injection due to missing required field

The contact name is the only required field for a successful lead creation. And the system creates the lead in reference to the contact name and saves the lead data.

If the lead data coming through API is missing the contact name, it does not create a new lead; and it generates an entry in Logs with the reason of failed lead injection.

Accessing the Failed leads API injection Logs

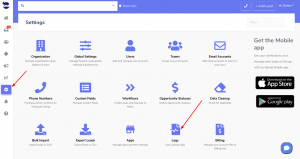
  • Click on “Failed leads API injection” from the toolbar

Failed leads API injection due to duplicate emailsIn this table, you can view:

  • ID: A sequential number
  • Reason: The reason for which the lead failed to inject
  • Data: The source of the lead that failed to inject
  • Created: The date & time this record was created – failed to inject.

By providing clear and detailed information about rejected leads, you can quickly identify the failed leads injection and address the issue.

Blocking a lead phone number

If you want to stop receiving calls from a lead, you can block their phone number in aNinja.

You can also block callers for solicitation and register your phone number in the National Do Not Call Registry.

In this article, we show you how to block a lead phone number in aNinja.

Blocking a lead phone number in aNinja

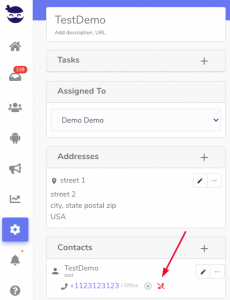
The lead phone numbers are located in the lead view, in the contacts section.

Click on the block icon next to the phone number you want to block. Then the block icon turns red.

To unblock a phone number, just click on the block icon to turn it back to black.

If the lead has multiple phone numbers, you might want to block them all.

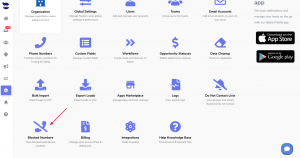
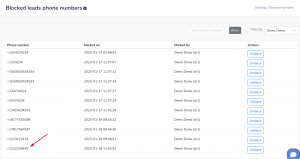
Accessing the list of blocked phone numbers

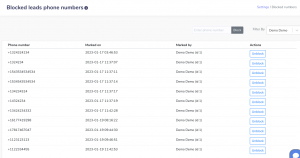
In this view, you can:

  • Block and unblock a phone number
  • Filter the view by User
  • See all the phone numbers marked as “Blocked”
  • See the Date they were marked
  • And, the User who marked them

Blocking a phone number

To block a phone number, just type it in the box and click on Block.

Then the number is added to the list of all the blocked phone numbers and the block icon in the lead view turns to red.

Afterward, the lead calls are immediately hung up. You will be notified on the mobile app and in the Inbox.

Unblocking a phone number

To unblock a phone number, locate it in the list and click on the unblock button.

This automatically unblocks the phone number and turns the block icon in the lead view back to black.

Filtering the results

You can filter the results to appear by user if you are a user with Admin access.

Otherwise, the users can only see the phone numbers blocked by them.

HubSpot aNinja Integration

HubSpot aNinja Integration allows you to make a real-time connection between your HubSpot calling leads and aNinja.

Overview

After the integration, if the lead that called in HubSpot was not saved in aNinja, this integration creates a new lead in aNinja; and it adds the call recording in HubSpot as well as in aNinja lead’s view, in the history section.

If the lead was already saved in aNinja, their lead view is updated with the call recording as soon as the call is made. And the phone recording show in both Apps.

Connecting HubSpot with aNinja

Before you start with the integration, make sure to log in to your HubSpot account.
In aNinja
  • Log in to your aNinja account.
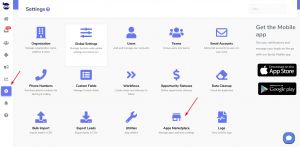
  • On the left sidebar, click on Settings > Apps Marketplaces

Hubspot aNinja Integration

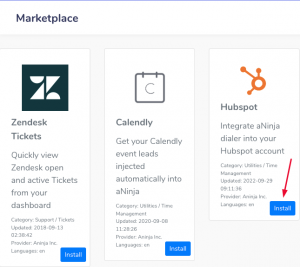
  • Then, click HubSpot > Install

Hubspot aNinja Integration

  • Choose the HubSpot account to integrate with aNinja.
  • Lastly, click Connect app.
  • Now your HubSpot account is connected with aNinja.
In HubSpot
  • Go to Contact > Call
  • Under Other provider, find aNinja dialer.

If there’s no record in aNinja for the lead that called in HubSpot, this integration creates a new lead in aNinja, and it adds the call recording in both apps.

Where does the imported data appear

After the integration, you can search your aNinja CRM for the imported leads.

Expanding the lead info

Text/SMS Signature

When sending a text/SMS via aNinja, you would want to include a text signature at the bottom.

What’s a text signature

It is a powerful way to convey your professionalism to your readers and give them the information they need to contact you. It is placed at the bottom of each text, which helps leave a great impression and makes you stand out from your peers.

You want to consider the size/segmentation of the text when you include a text signature to avoid being overcharged.

Setting your text/SMS signature in aNinja

  • Login to your aNinja account.
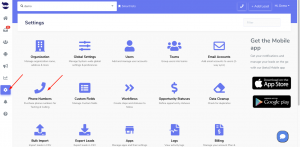
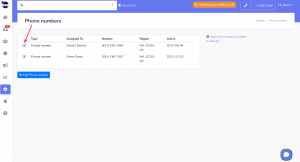
  • Go to Settings > Phone Numbers

  • Click on the edit pen

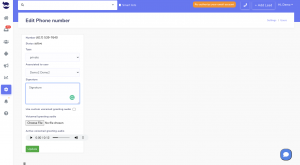
text signature

  • Type in your signature

text signature

  • And hit Update
  • Now your signature will show at the bottom of each text you send via aNinja.

This signature is sent in bulk texts as well. At the time you create your text sequence, the system grabs the lead info, templates that yo’ve included in the sequence, and the phone number assigned to launch this sequence.

However, if you change the signature after the sequence was launched, the system updates the in-queue steps.

Connect your email with aNinja using the Custom IMAP settings

Connect your Email with aNinja to start sending emails to your leads. If you don’t know your email provider, or can’t find it listed in aNinja, you can use your email configuration info or the server settings to connect your email with aNinja using IMAP.

It’s important to complete the 2 steps of the authorization for your email to sync properly.

Connect your Email with aNinja using IMAP

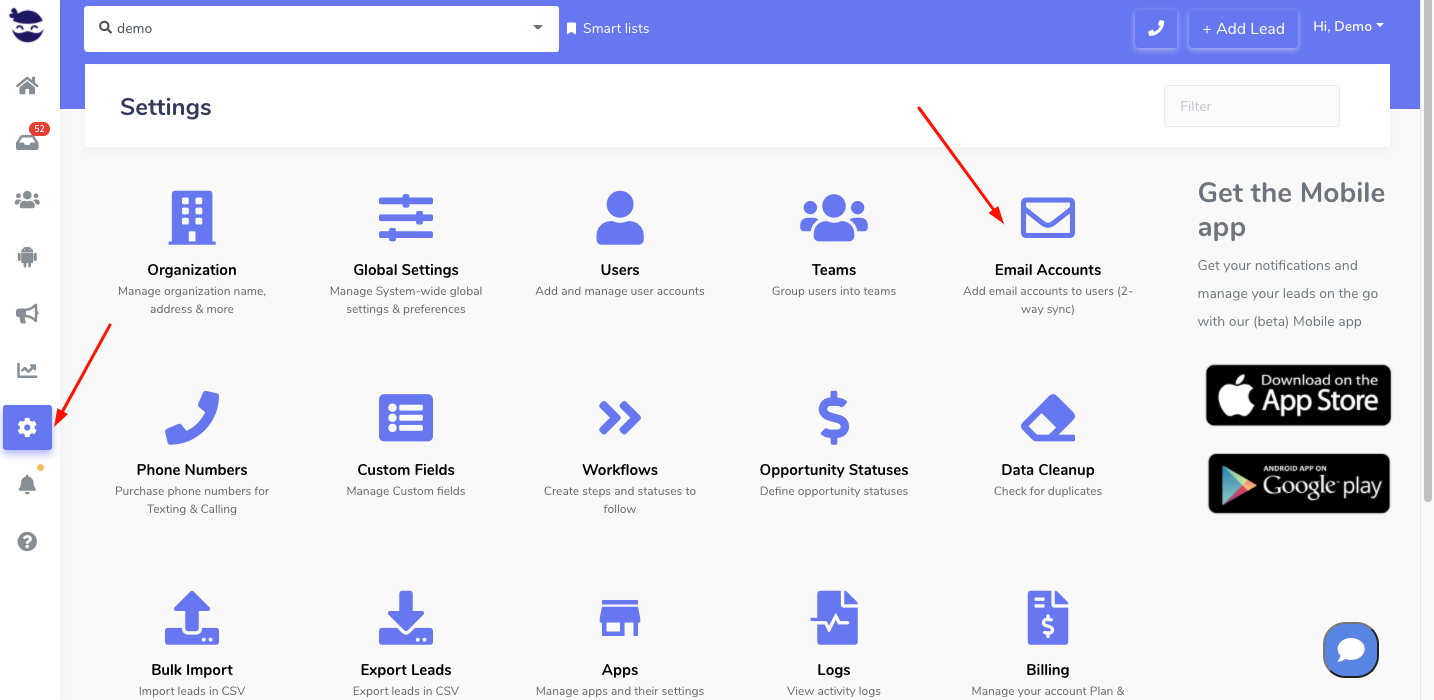
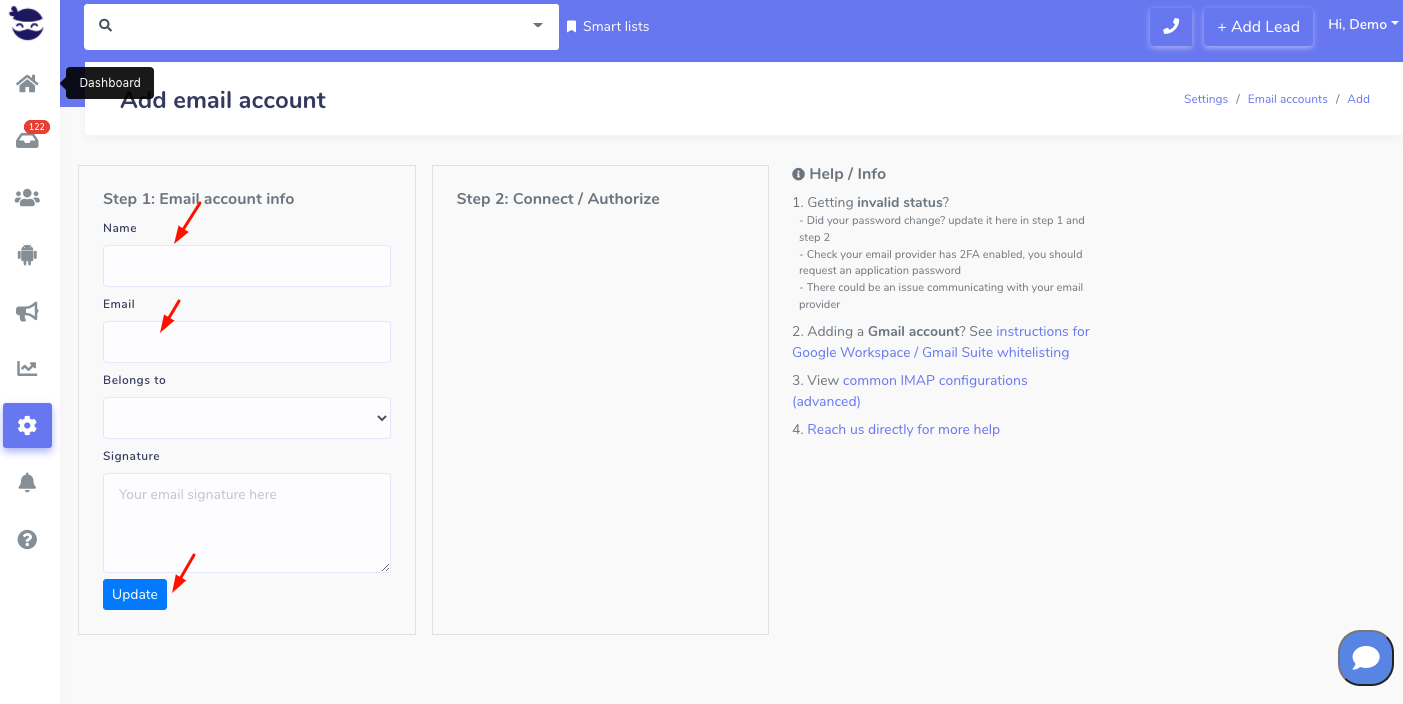
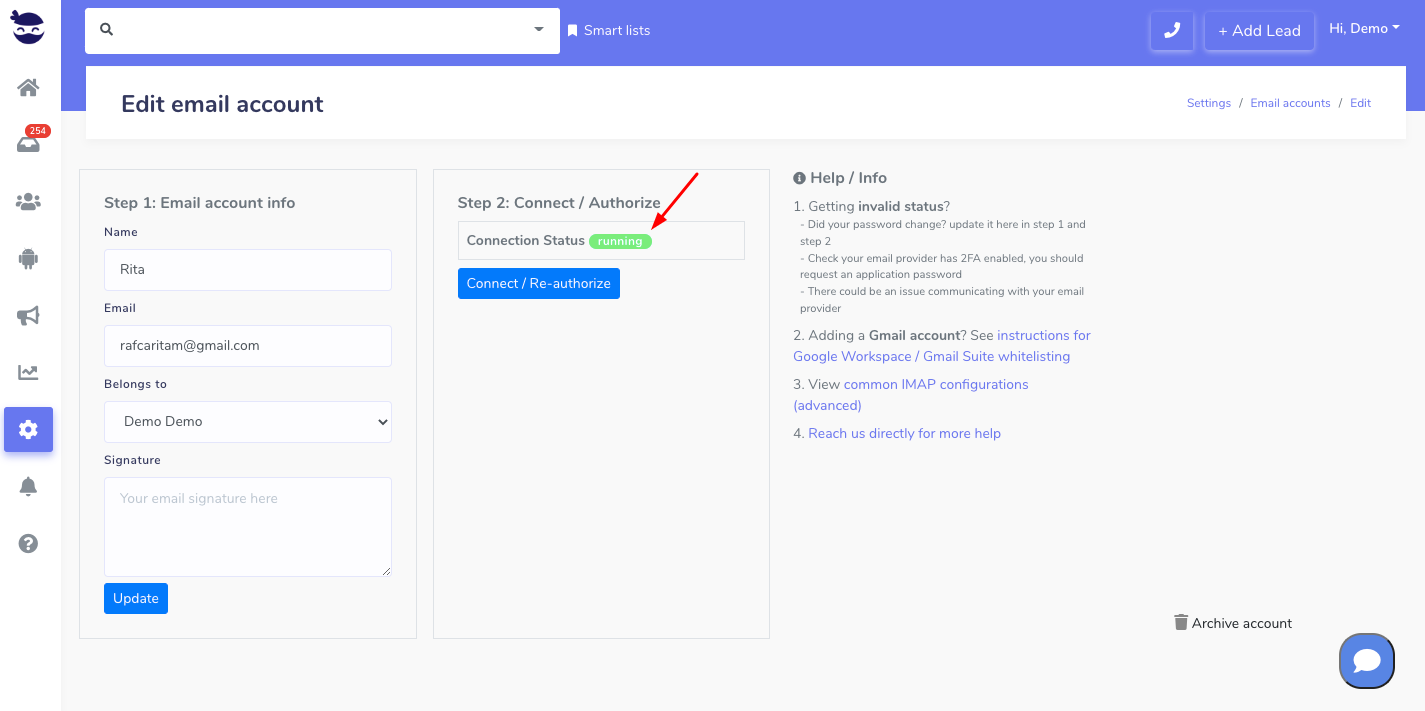
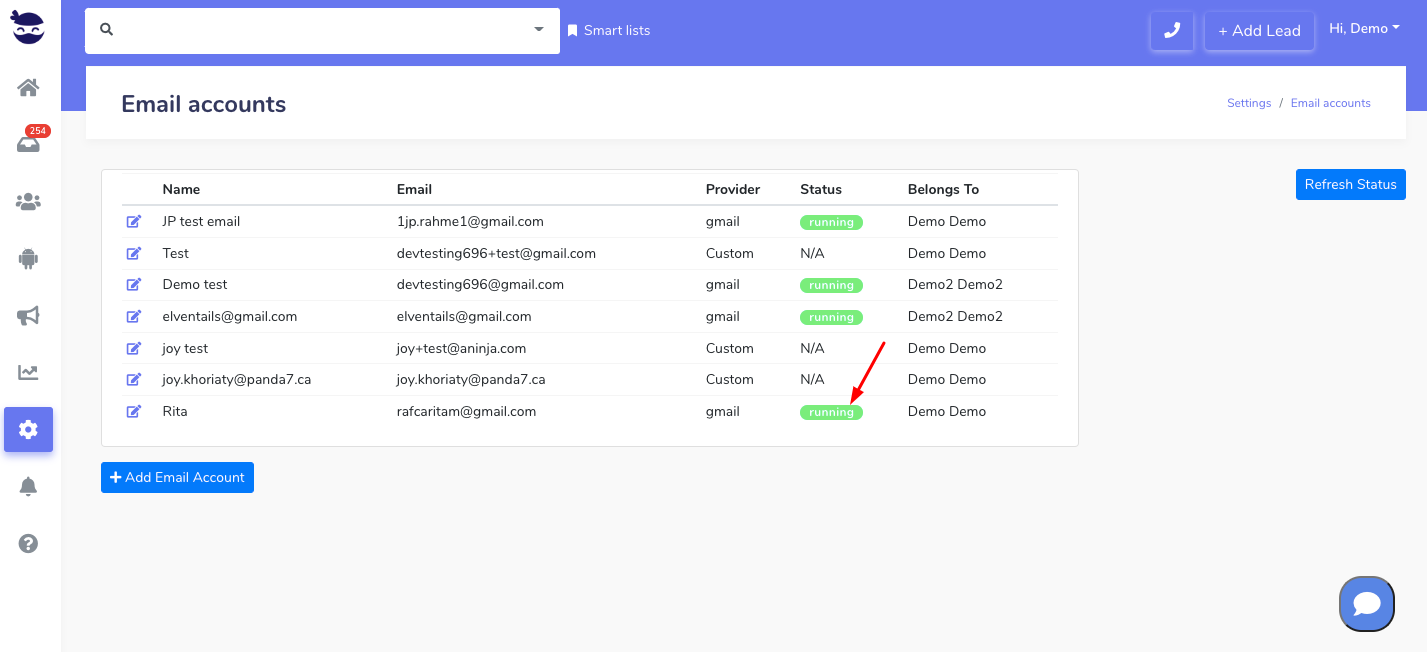
On the left sidebar, click on Settings > Email Accounts

  • If you already have an email account saved and want to complete the authorization, click on the edit pen next to the email. Then go to step 2 —> Connect/Re-auth.
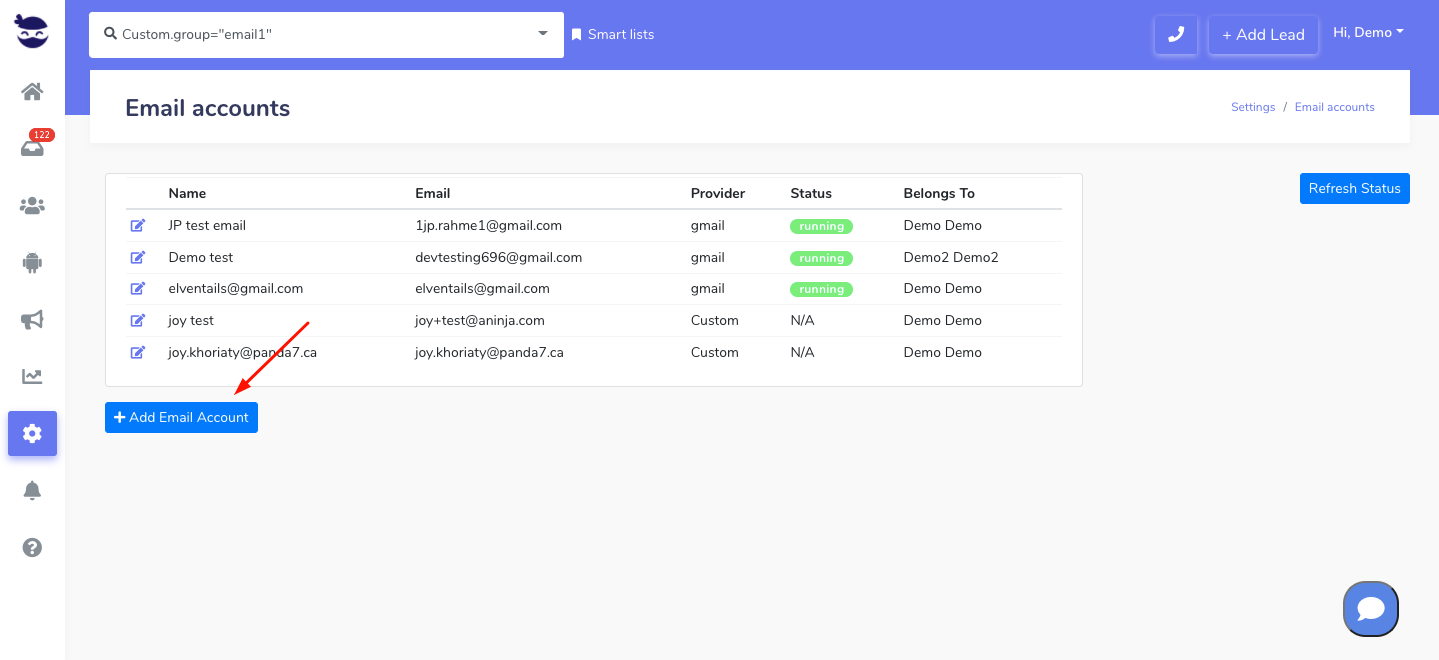
  • Otherwise, go ahead and create an email account. Click Add Email Account.

Step 1

Fill in the following fields: Name and Emailconnect your email with aNinja

  • And hit Update
Step 2
  • Click Connect / Re-auth

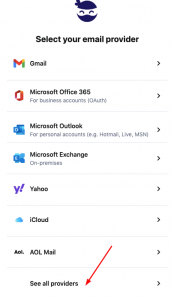
Connect your Gmail with aNinja

  • Scroll down and click on “See all providers

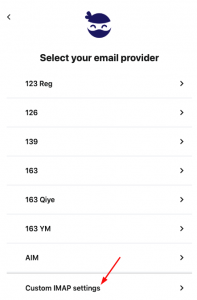
  • Then hit “Custom IMAP settings

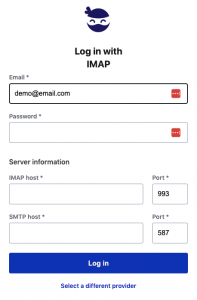
  • Type your password.
  • Fill in the email configuration info under Server Information, to log in with IMAP.
    • You can find the email configuration in your email under “Server Settings”.

  • Lastly, hit Login.

Once set up, your Email account would show up running under the status.

Note! It is very important to complete the 2 steps for the email to sync properly.

Manage the “Do Not Contact” lists

You can manage the “Do Not Contact” lists to view the contacts, remove them from the lists, and even export those contacts into a CSV file.

Marking leads as Do Not Contact

You may mark leads as Do Not Contact to honor their request to opt-out from receiving your automation; or simply because you don’t intend to message them anymore.

This is a useful practice that avoid your texts / emails from being marked as spam.

Managing the “Do Not Contact” lists

  • On the left sidebar, click on Settings > Do Not Contact Lists

In this view, you can:

  • See all the contact items (text / email) marked as “Do Not Contact”
  • Filter the view by text or email
  • See the Date they were marked
  • And, the User who marked them
  • Export the results as CSV
Filter the results

You can filter the results to appear by:

  • Emails marked as Do Not Contact

  • Phone Numbers marked as Do Not Contact

Manage the "Do Not Contact" Lists

  • And by the User who marked the contact item

Remove a contact from the Do Not Contact List

To remove a contact item from the do Not Contact List, under Actions, click on remove. And OK to confirm.

Automatically, the contact item (phone number or email) will be removed from the list. And the Stop button turns back to black in the lead view next to this contact item.

Export results as CSV

To export the results into a CSV file, click on Export CSV

The list is saved in your documents.

The fields exported are:

  • The ID of the record
  • The Email or Text according to the selected filter
  • The Date Marked on
  • The ID of the User who marked it
  • And the user’s full name

imatrix aNinja Form Integration

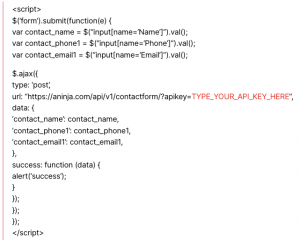
aNinja allows you to integrate your imatrix Website Forms into your aNinja account. In this article, we show you how the imatrix aNinja Form Integration can be done using a simple Javascript code.

imatrix aNinja Form Integration

You can integrate and augment the functionality of popular platforms with aNinja.

  • First, you need to find your API key
    • On the left sidebar, click on Settings > Users
    • Then, click the edit pen next to your name.
    • And, copy it to use it later in the integration
  • Now, login to your imatrix website editor
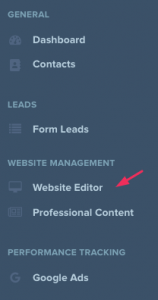
  • On the left side menu, click on Website Editor
  • Then, click on Edit Website in the middle of the page.
  • Type your email and password to login
  • On the left side menu, click on Pages 

  • Next to the form, on the right side, click on the little Settings gear
  • Scroll down to the Custom Info section
  • And insert your Javascript code under “Specify Custom Header”

imatrix aNinja Form Integration

  • Map the form fields to aNinja fields
  • Save and Publish
  • Go to your website, refresh and test submitting a form.
  • Then, check your aNinja account for the new lead automatically generated after the form submission.
You can use the below Javascript code

Where does the imported data appear

After the integration, you can search your aNinja CRM for the imported leads. You can also search for any custom field, opportunities, and any other info that you have imported.

  • Lead contacts appear in the leads contact section in the lead view
  • Opportunities also appear in the opportunity section in the lead view
  • The company’s info appears on the top left of the lead view, in the Company section.
  • Custom fields appear in the custom field section of the lead view.
  • Lead Search is a field that also appears in the bottom left of the lead view. Specifically, these are info/links on the lead or the organization found in Google search.

Need help with imatrix aNinja Form Integration? Leave us an email at support@aninja.com. And we will happily assist you.

VistaPrint aNinja Form Integration

aNinja allows you to integrate your Vistaprint Website Forms into your aNinja account. In this article, we show you how the Vistaprint Form Integration can be done using a simple Javascript code.

Vistaprint aNinja Form Integration

You can integrate and augment the functionality of popular platforms with aNinja.

  • First, you need to find your API key
    • On the left sidebar, click on Settings > Users
    • Then, click the edit pen next to your name.
    • And, copy it to use it later in the integration
  • Now, login to your Vistaprint website editor
  • In the middle of the page, click on edit website
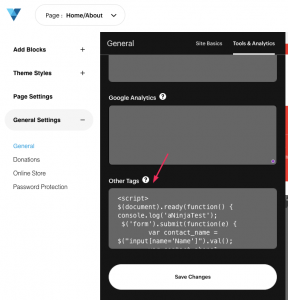
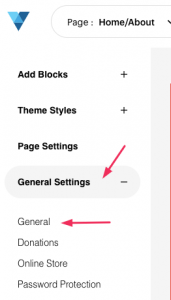
  • On the left side menu, click on General Settings > General
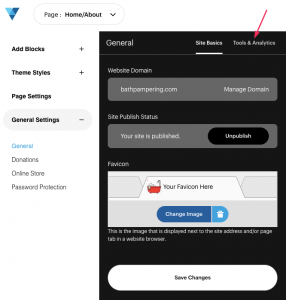
  • Then, choose Tools & Analytics
  • Under Other Tags add the Javascript code (see example below)Javascript aNinja Form Integration
  • Map the form fields to aNinja fields
  • Save and Publish
  • Go to your website, refresh and test submitting a form.
  • Then, check your aNinja account for the new lead automatically generated after the form submission.
You can use the below Javascript code

Where does the imported data appear?

After the integration, you can search your aNinja CRM for the imported leads. You can also search for any custom field, opportunities, and any other info that you have imported.

  • Lead’s contacts appear in the leads contact section in the lead view
  • Opportunities also appear in the opportunity section in the lead view
  • The company’s info appears on the top left of the lead view, in the Company section.
  • Custom fields appear in the custom field section of the lead view.
  • Lead Search is a field that also appears in the bottom left of the lead view. Specifically, these are info/links on the lead or the organization found in Google search.

Need help with Vistaprint aNinja Form Integration? Leave us an email at support@aninja.com. And we will happily assist you.

Block identical automated text messages

In aNinja, you can choose to block identical automated text messages if they are resent within 24 hours; as it could be unpleasant for your leads to receive the same message repeatedly in a short period.

This option is enabled by default. You can disable it at any time.

Block identical automated text messages

“Block duplicate automated messages if sent during 24 hours period to same lead”

  • This setting blocks your duplicate text sequences if they are launched within a period of 24 hours of the first sequence.
  • If you disable this rule, your identical text messages will be sent anyhow.