Customizing the date format in Custom Fields

Customizing the date format in Custom Fields allows you to define and customize the date format in which the date values are displayed in the lead view.

What’s a custom field

Custom fields are a powerful feature that allows you to capture and store specific information according to your unique requirements.

And defining the format of the custom field in Custom field settings, provides flexibility and convenience in managing and presenting information to better suit the needs of businesses and users.

Setting up the custom field with date type

Setting up a custom field with a date type is a straightforward process.

  • Go to Settings > Custom Fields

  • Click on Add custom field
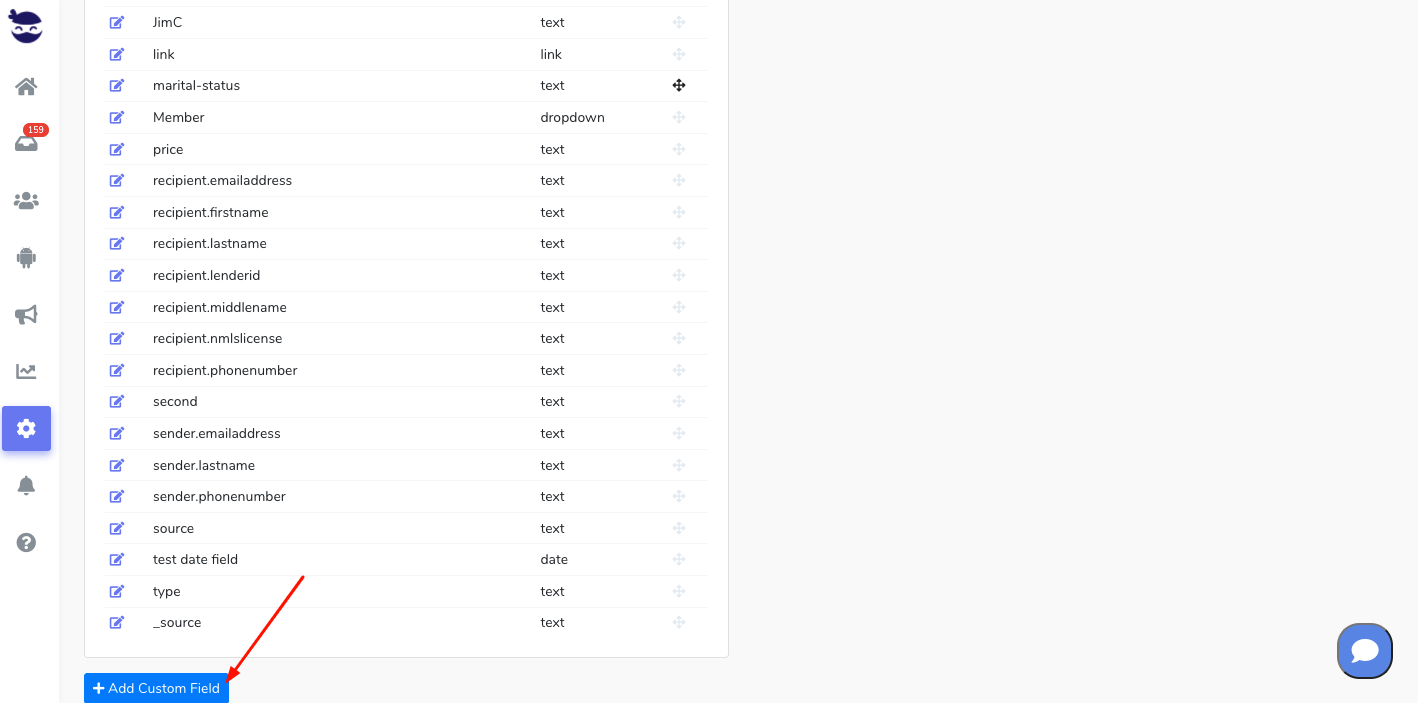
  • Name it
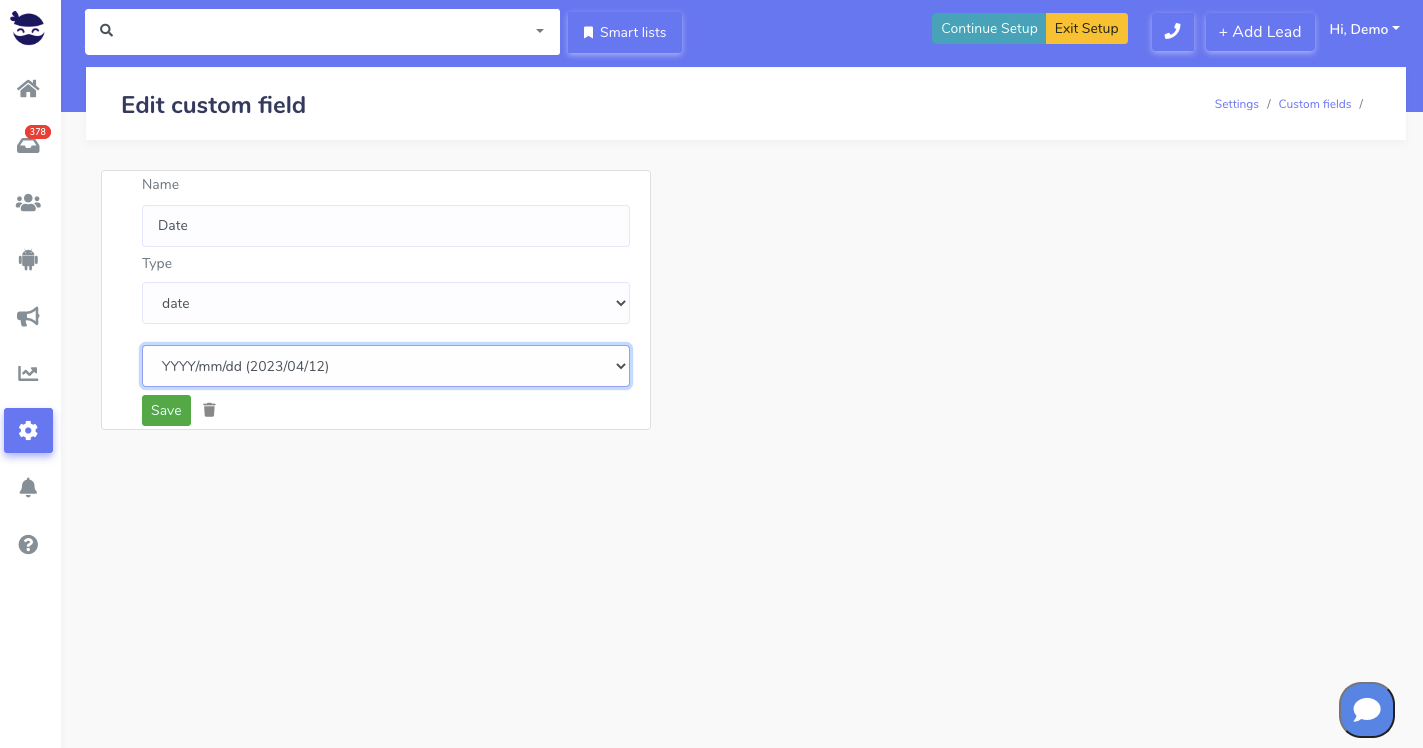
  • And specify the type as “Date” or “Datetime” under Type.
  • Define the desired date format in which the date values should be displayed in the lead view. And hit Save.

Changes made in the custom fields table are automatically reflected in the lead view.

This means that you can modify the date format in the custom field settings, and the updated format will be applied to the displayed date values in the lead view without any additional efforts.

This real-time synchronization ensures that the lead view remains up-to-date and aligned with the desired date format.

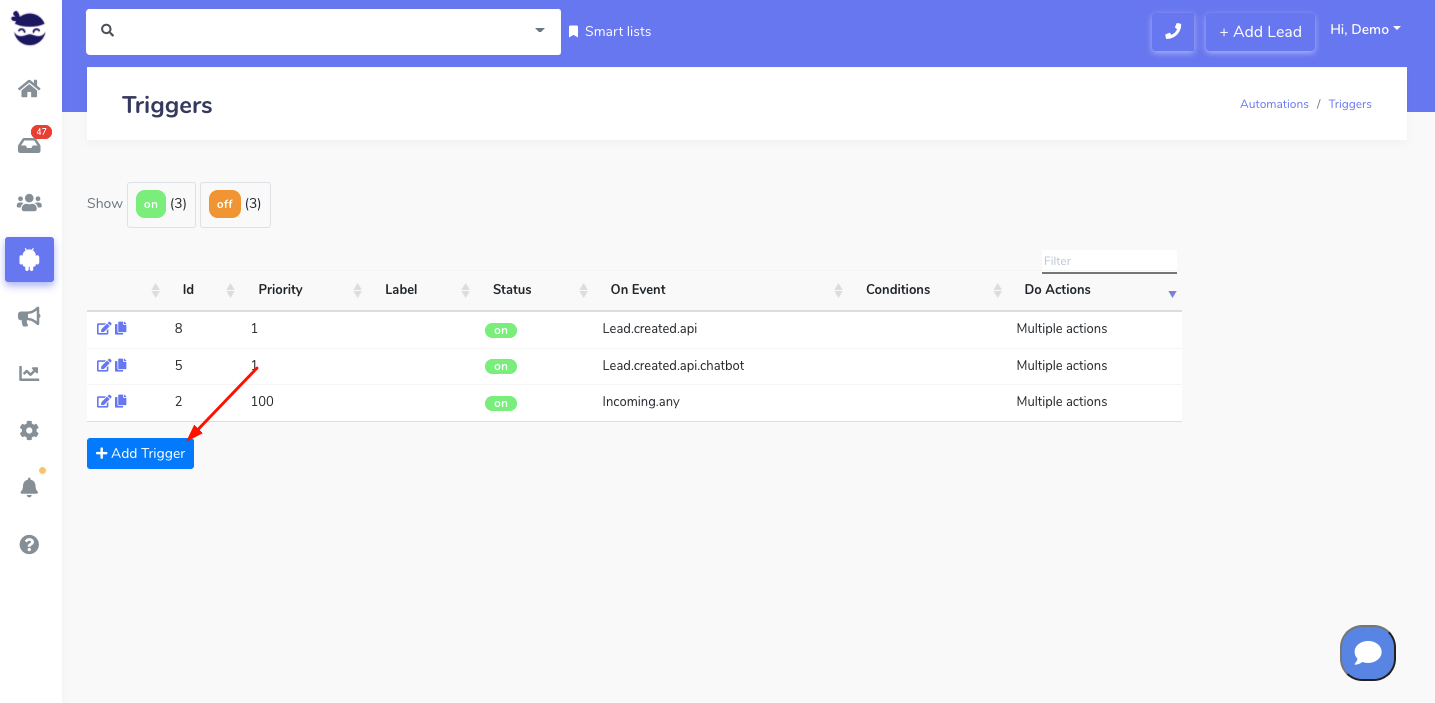
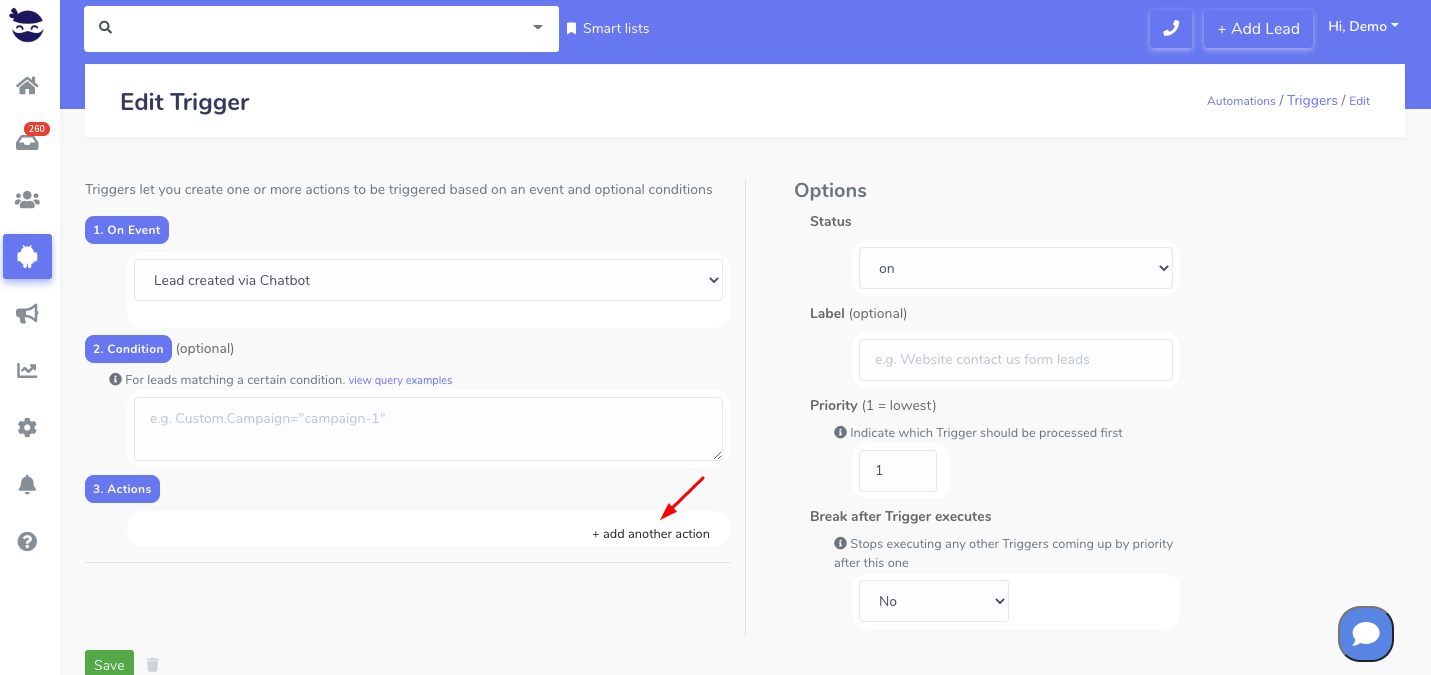
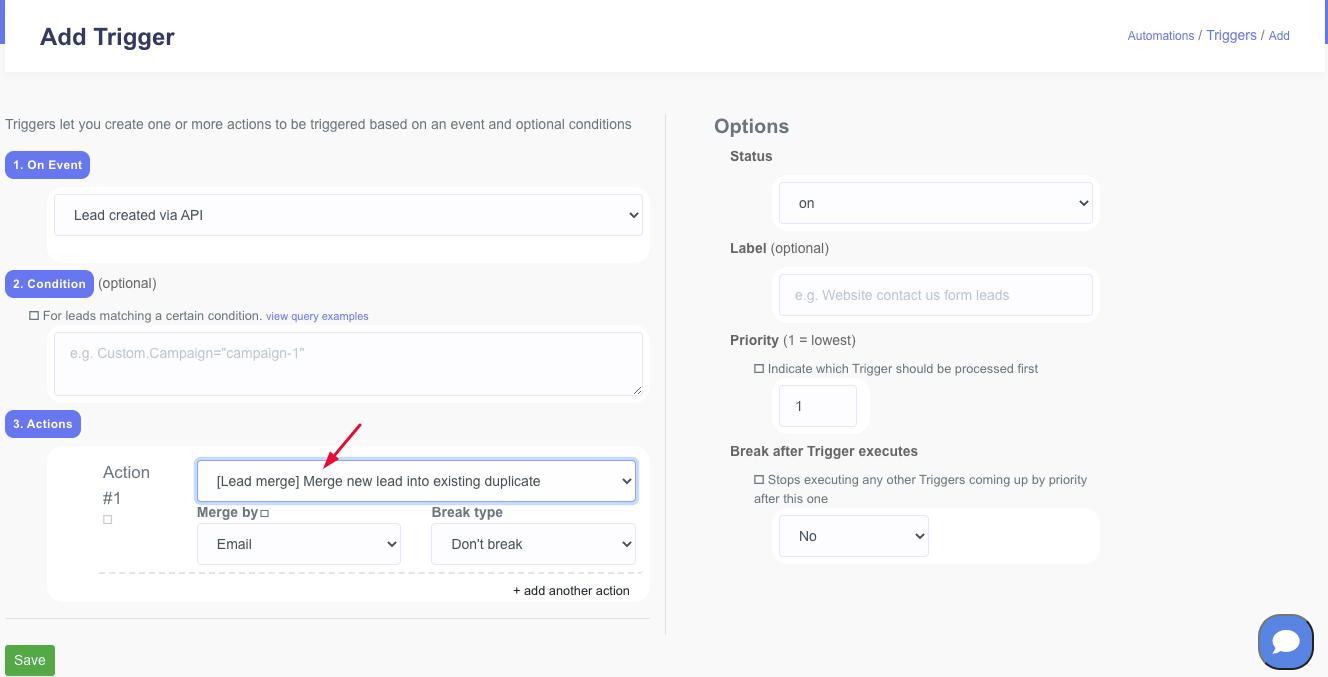
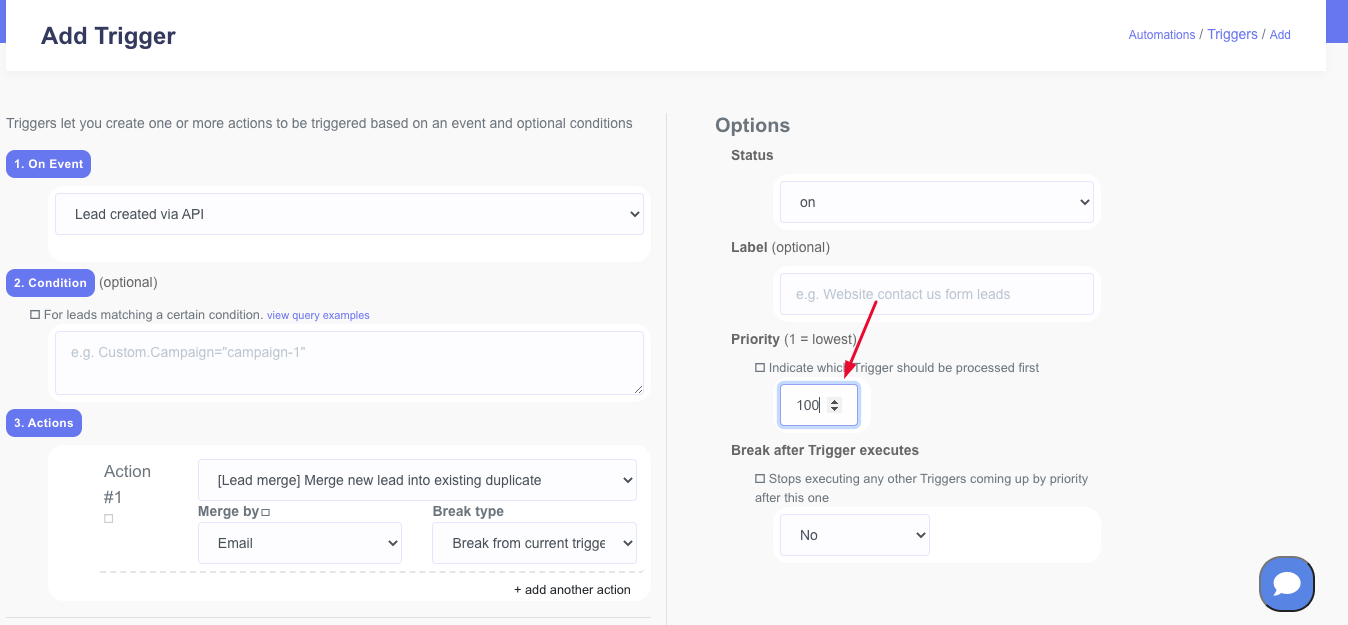
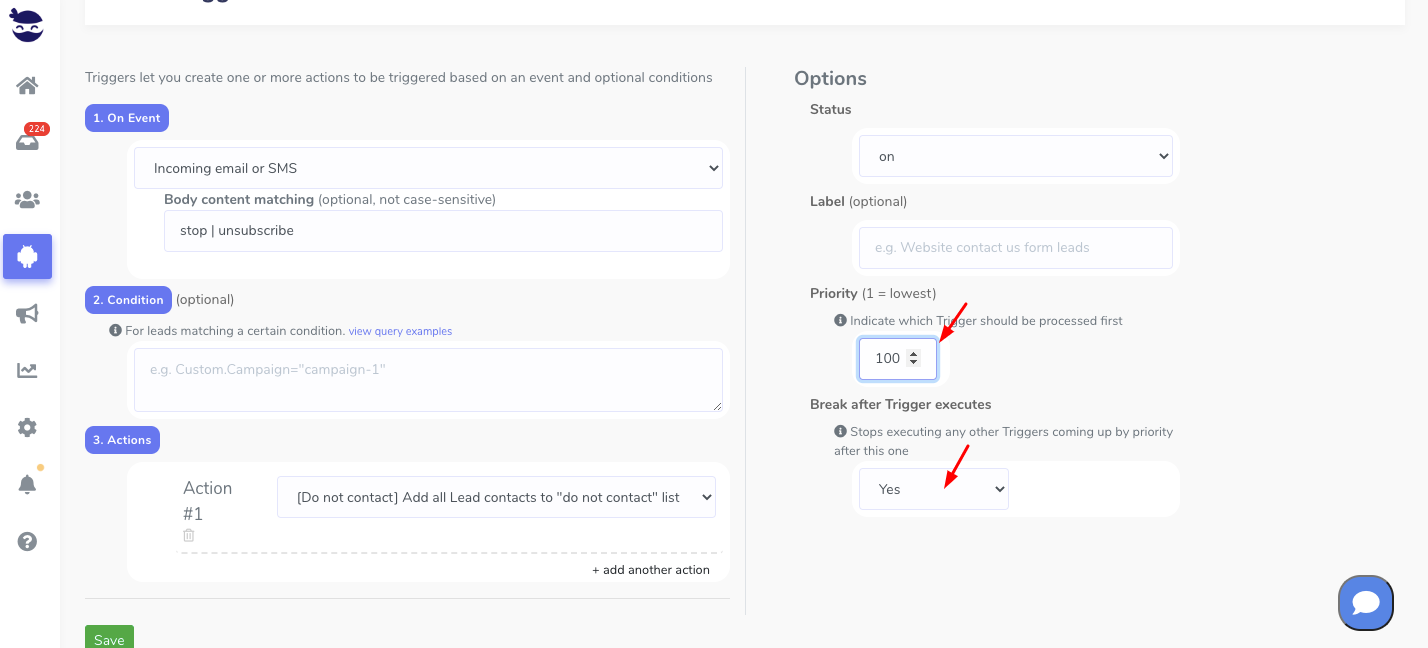
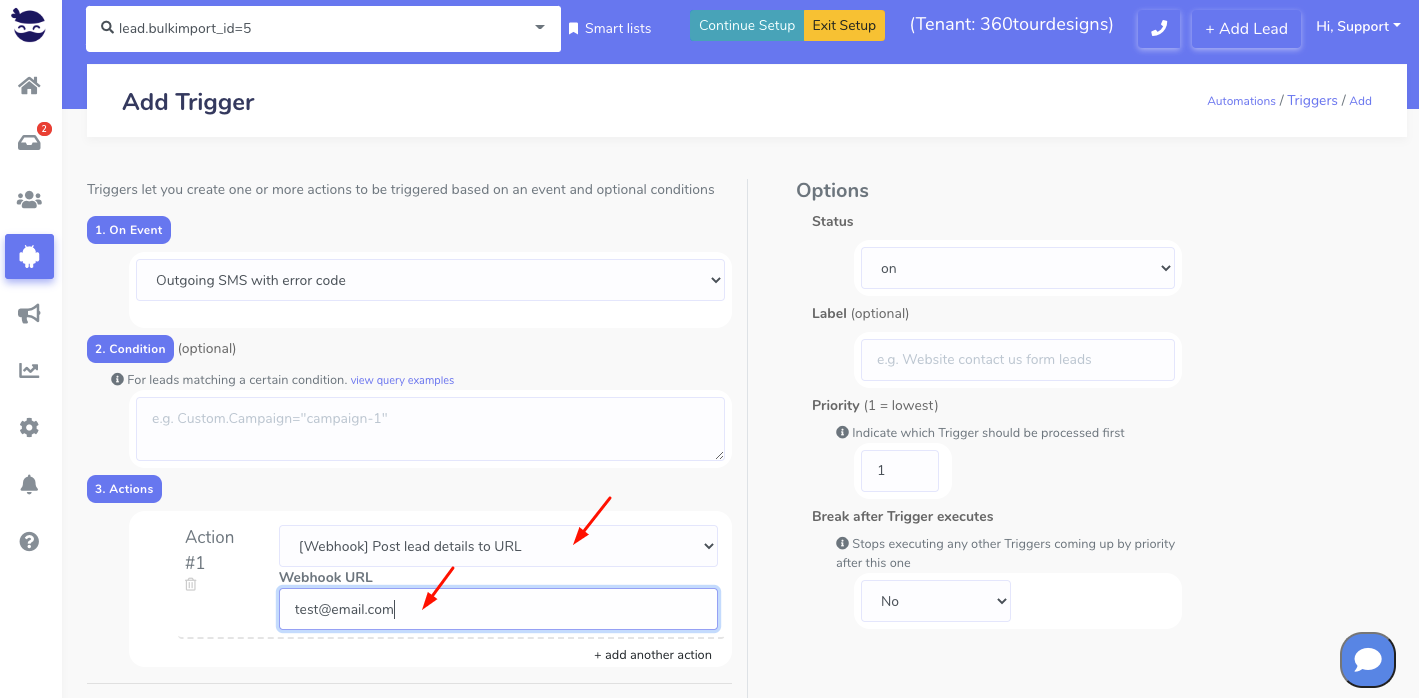
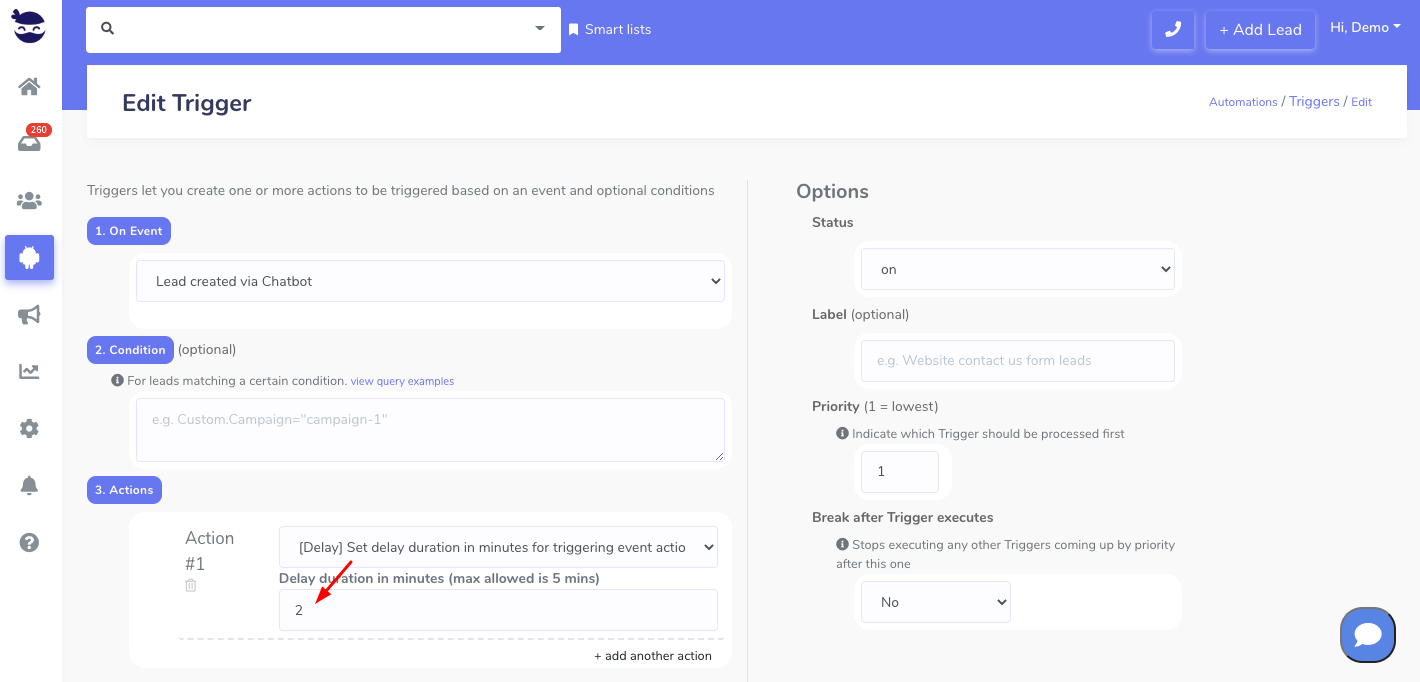
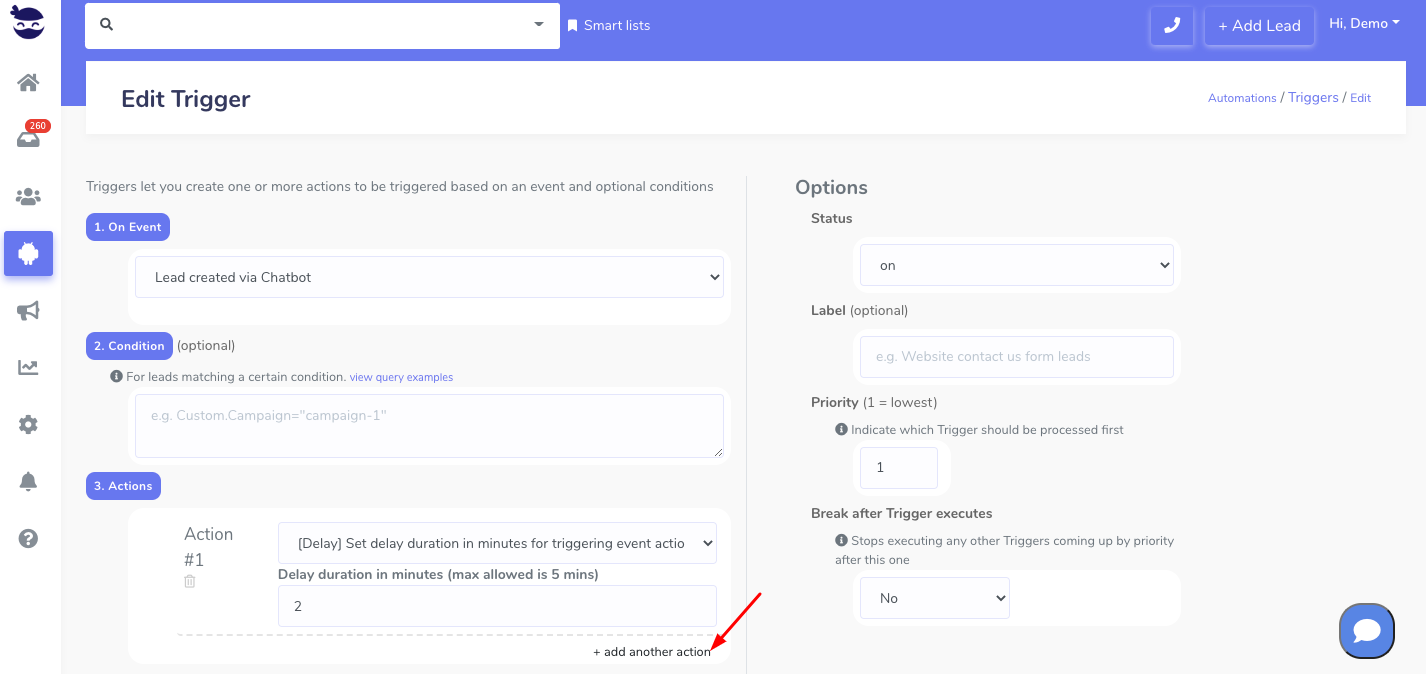
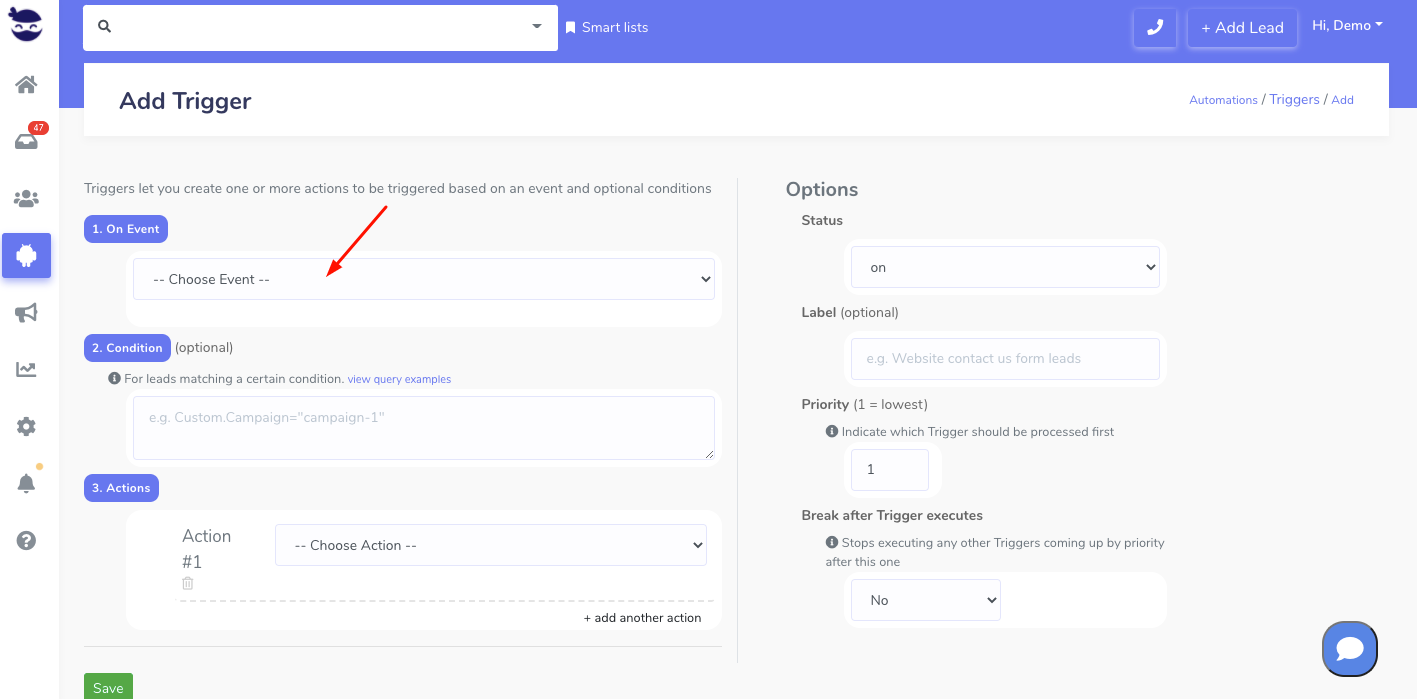
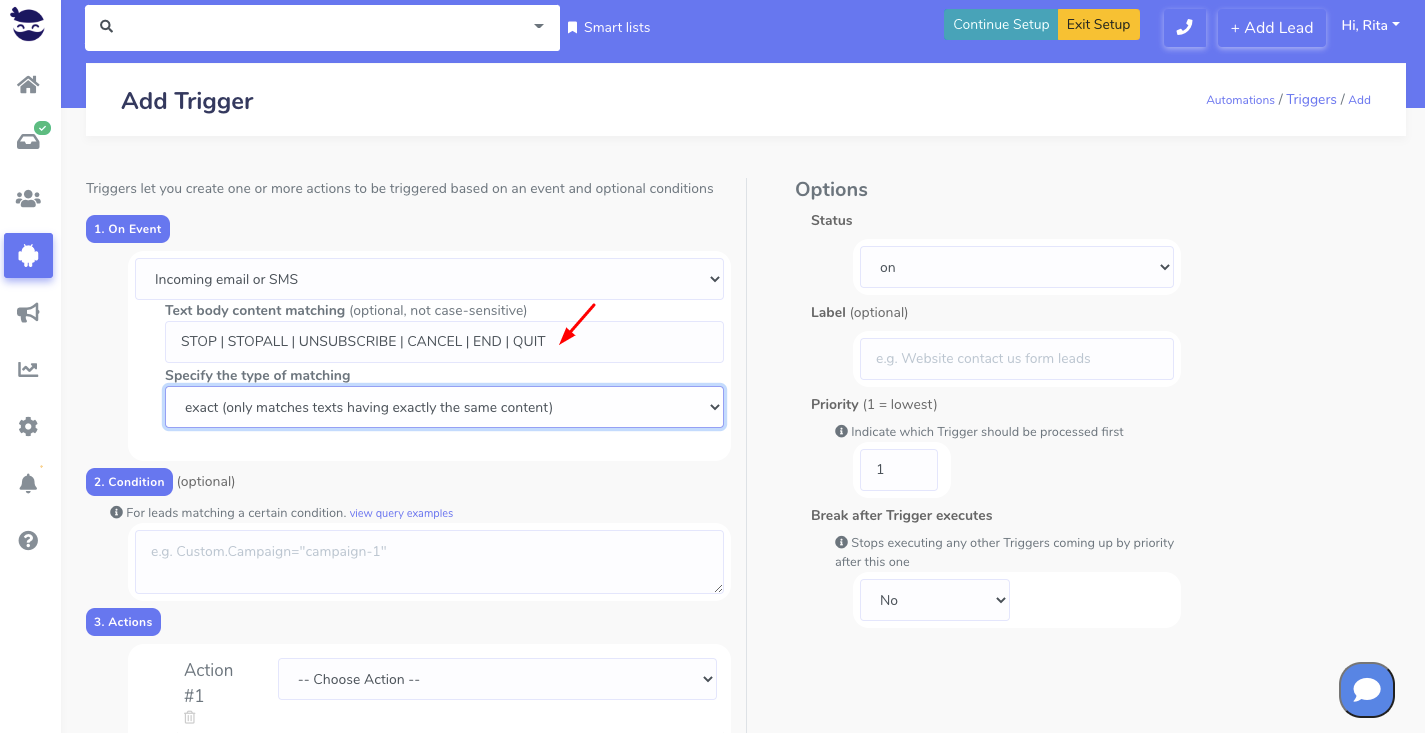
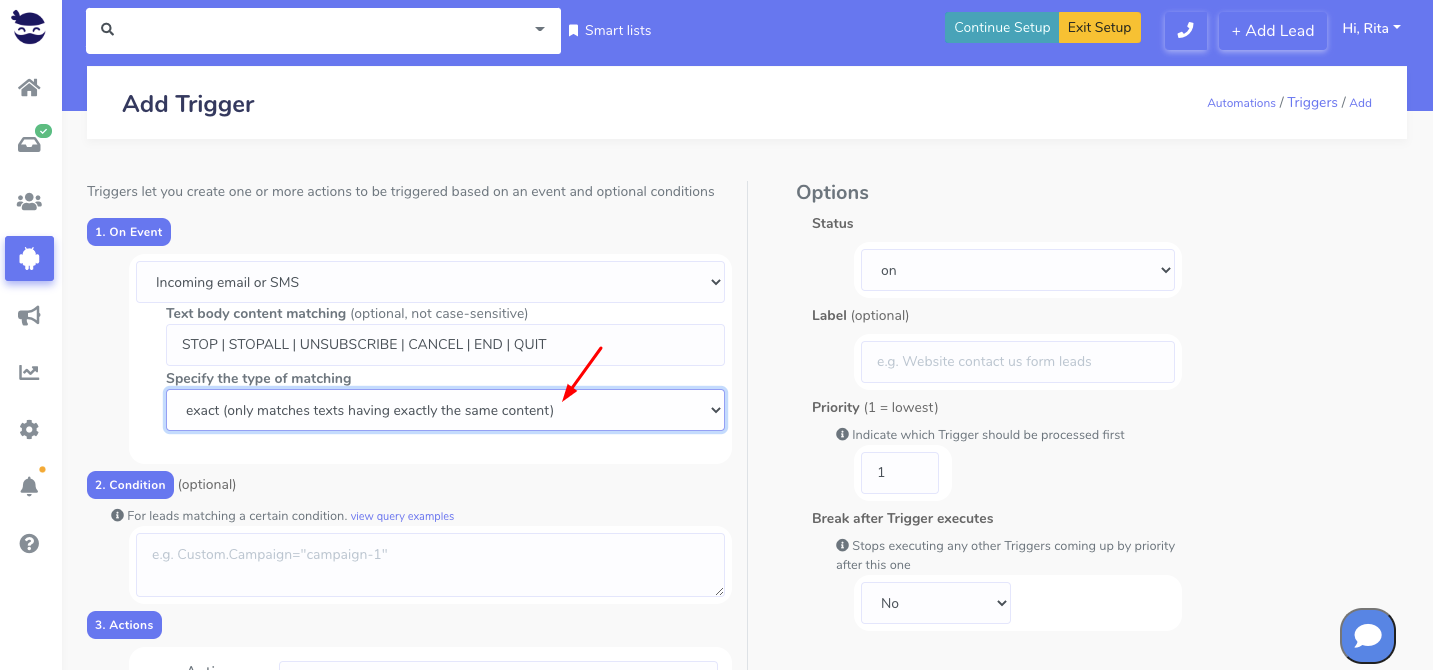
Impact of custom field date changes on Triggers

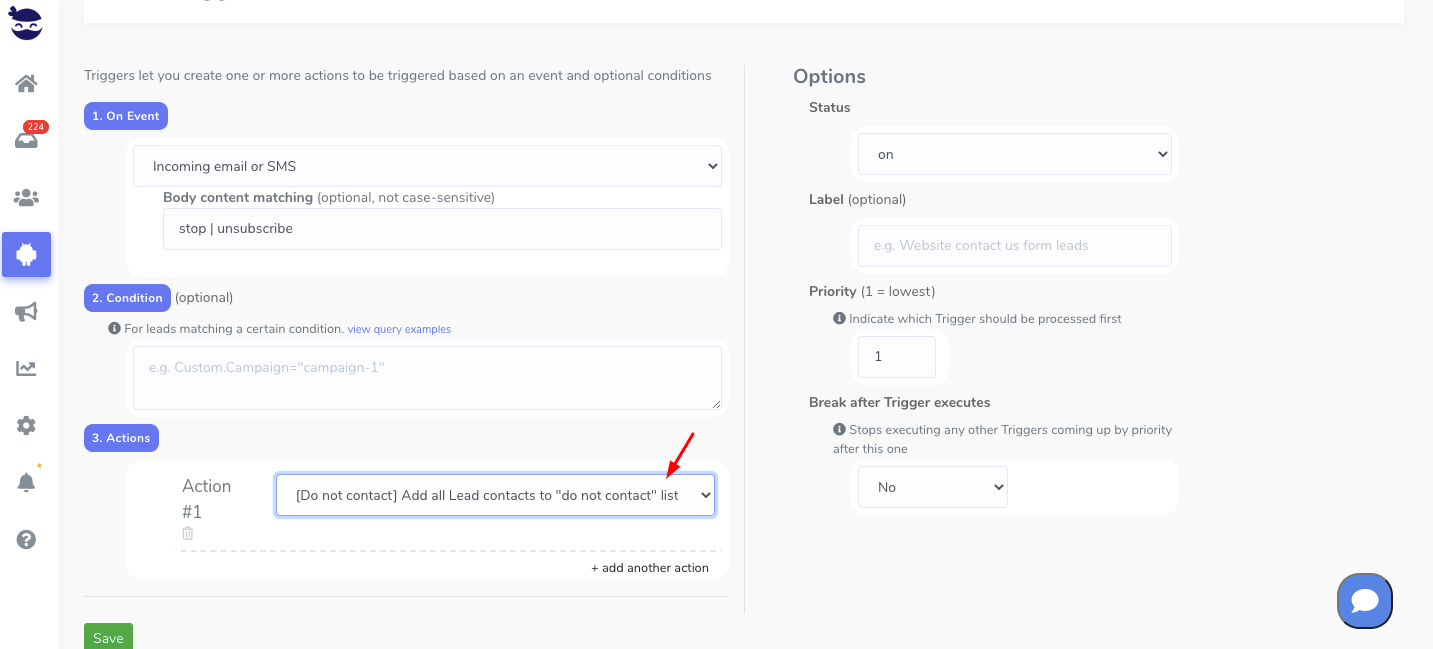
Another crucial aspect of customizing the date format in Custom Fields, is that it does not affect trigger actions.

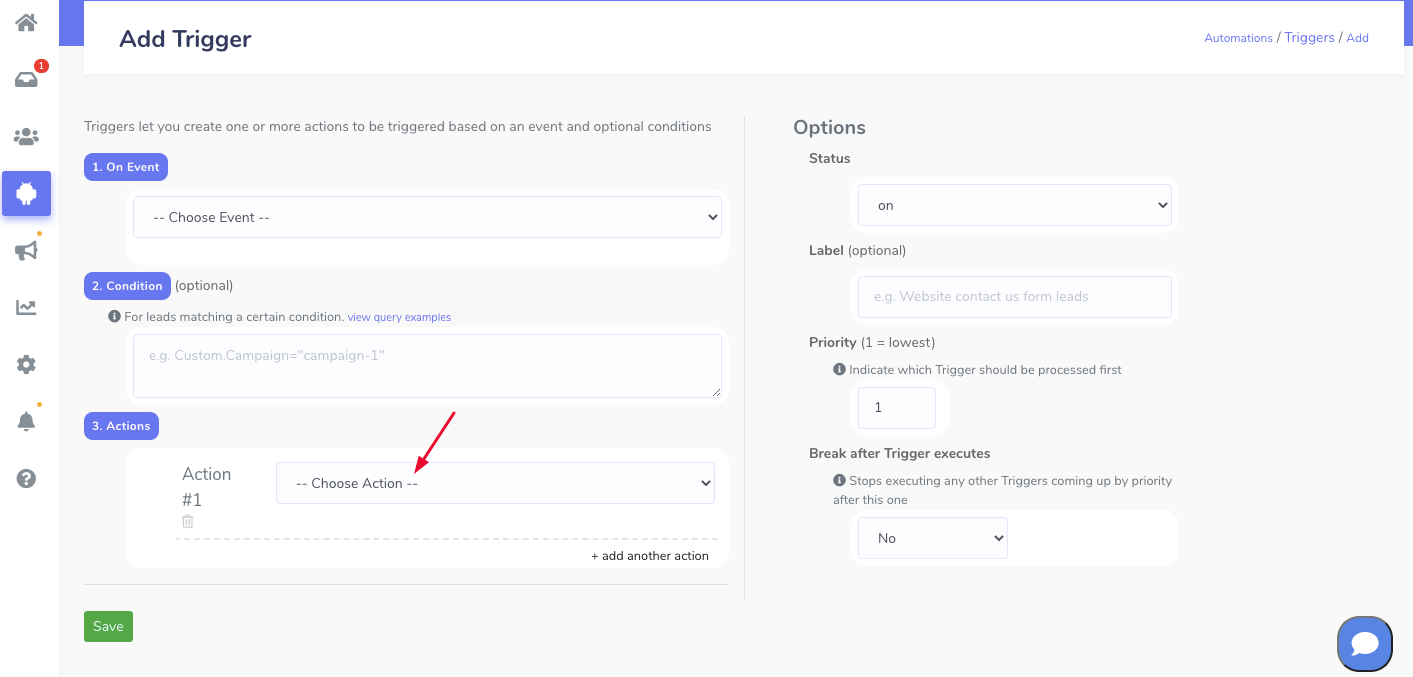
Trigger actions are triggered based on certain conditions or events.

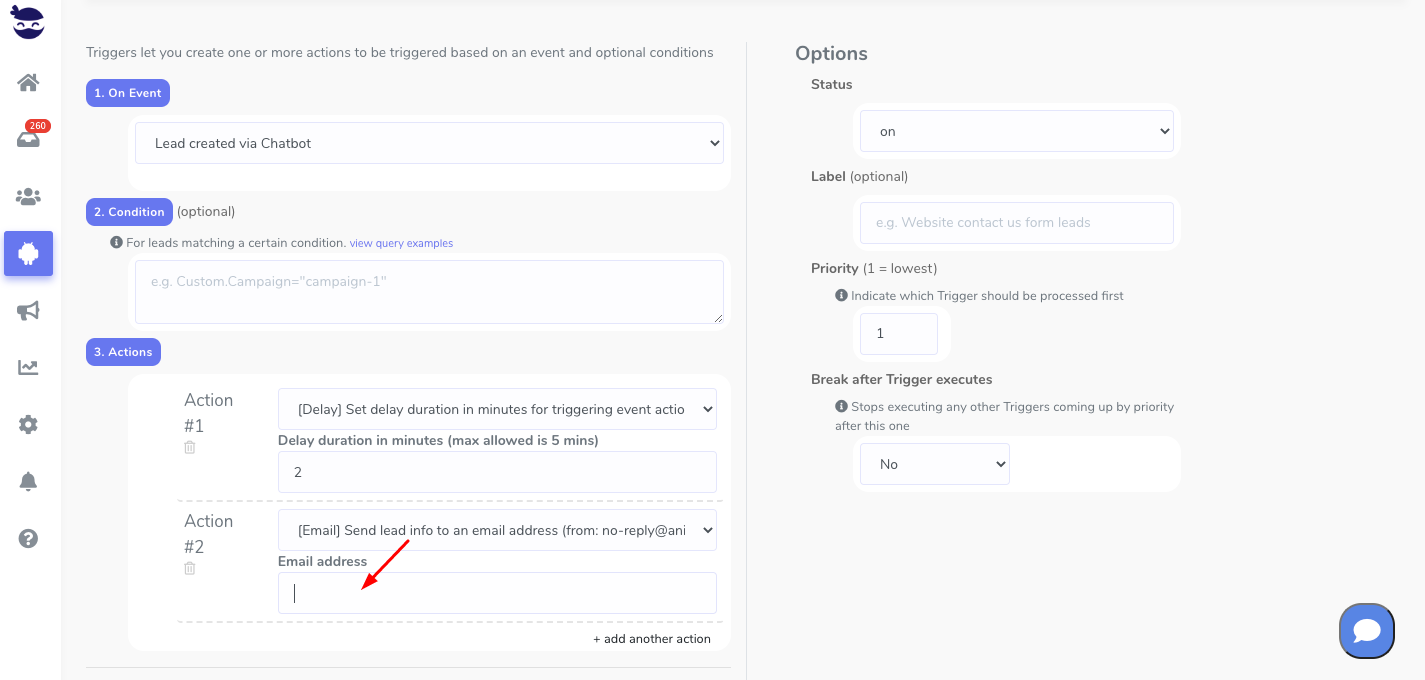
And, the customization of date formats in custom fields does not interfere with the trigger actions associated with the custom field. But, it only affects the display format of the date values in the lead view.

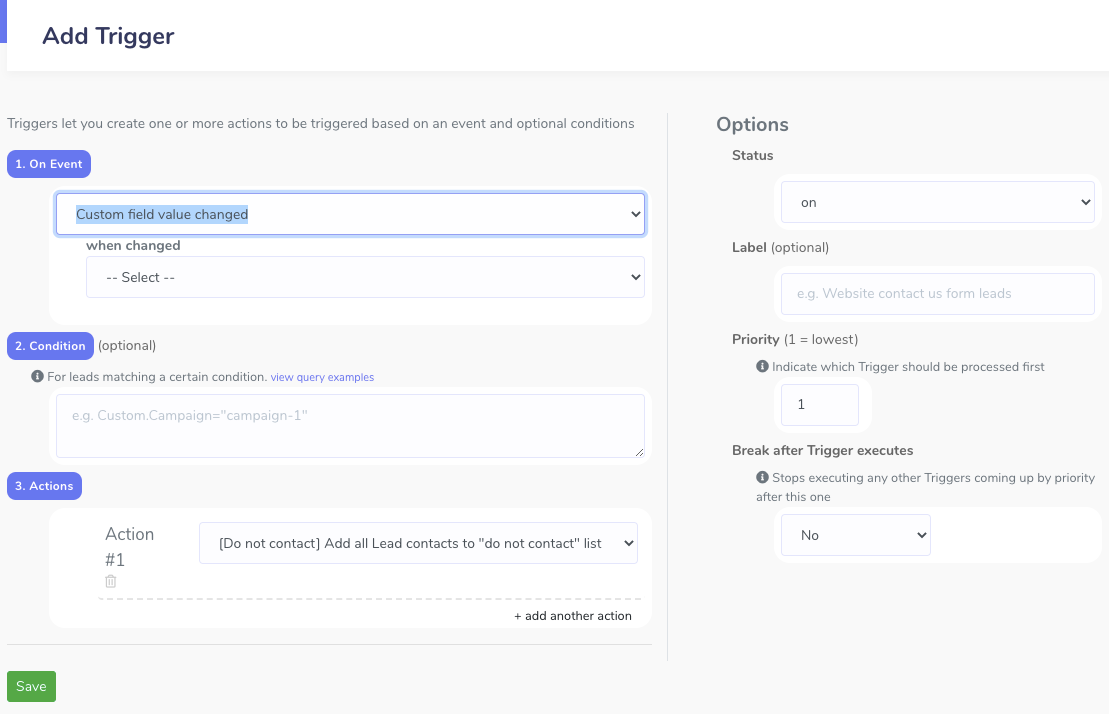
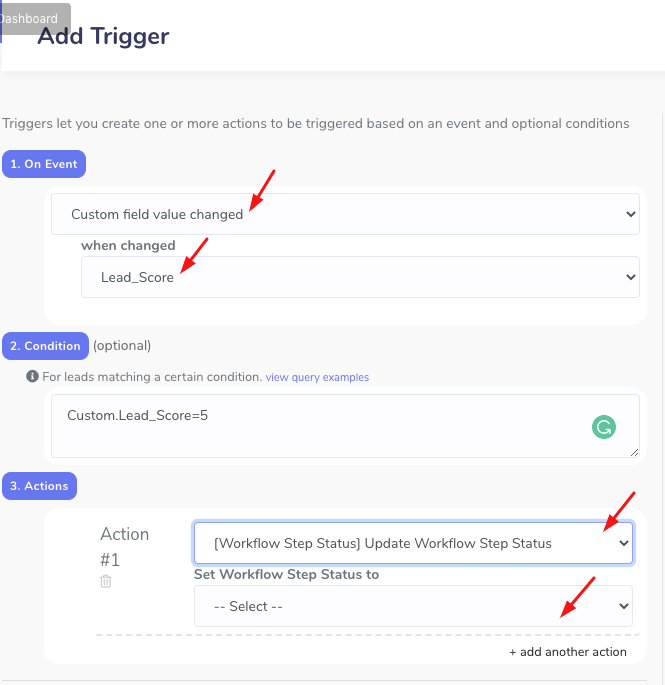
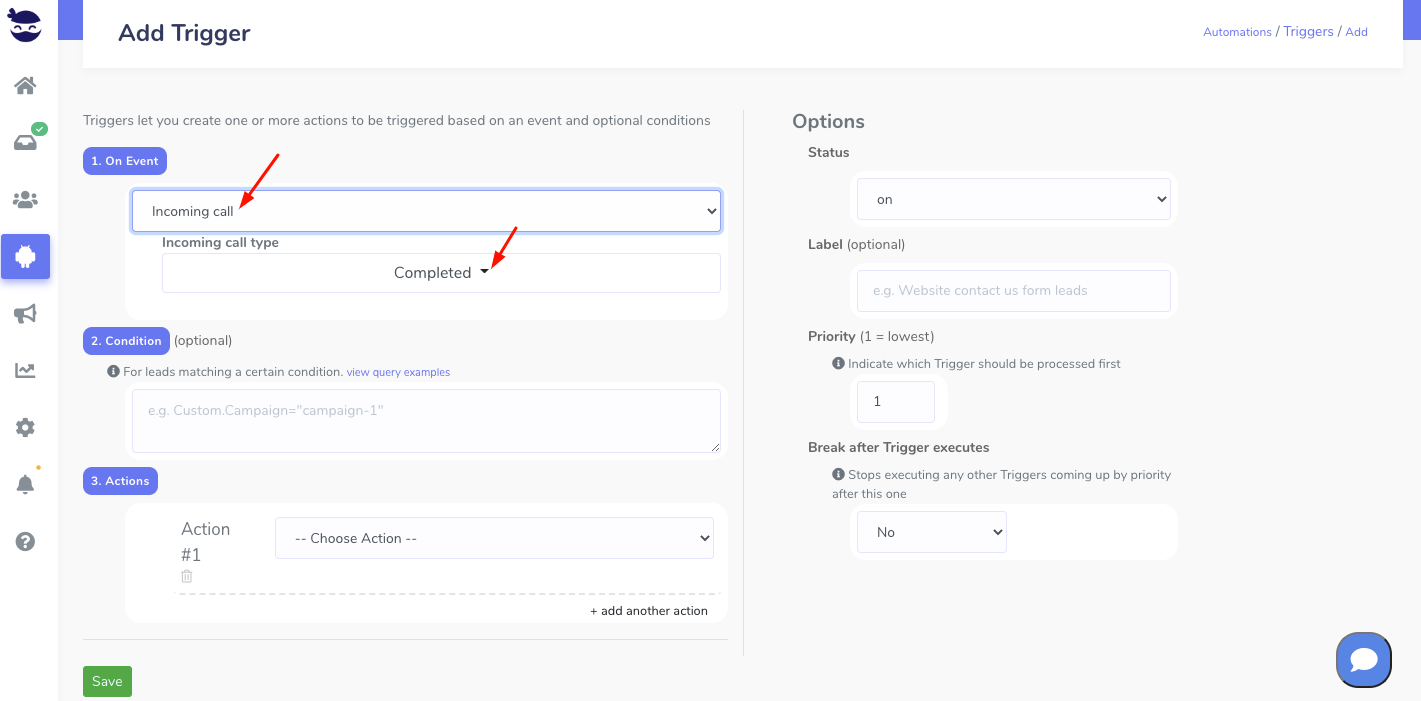
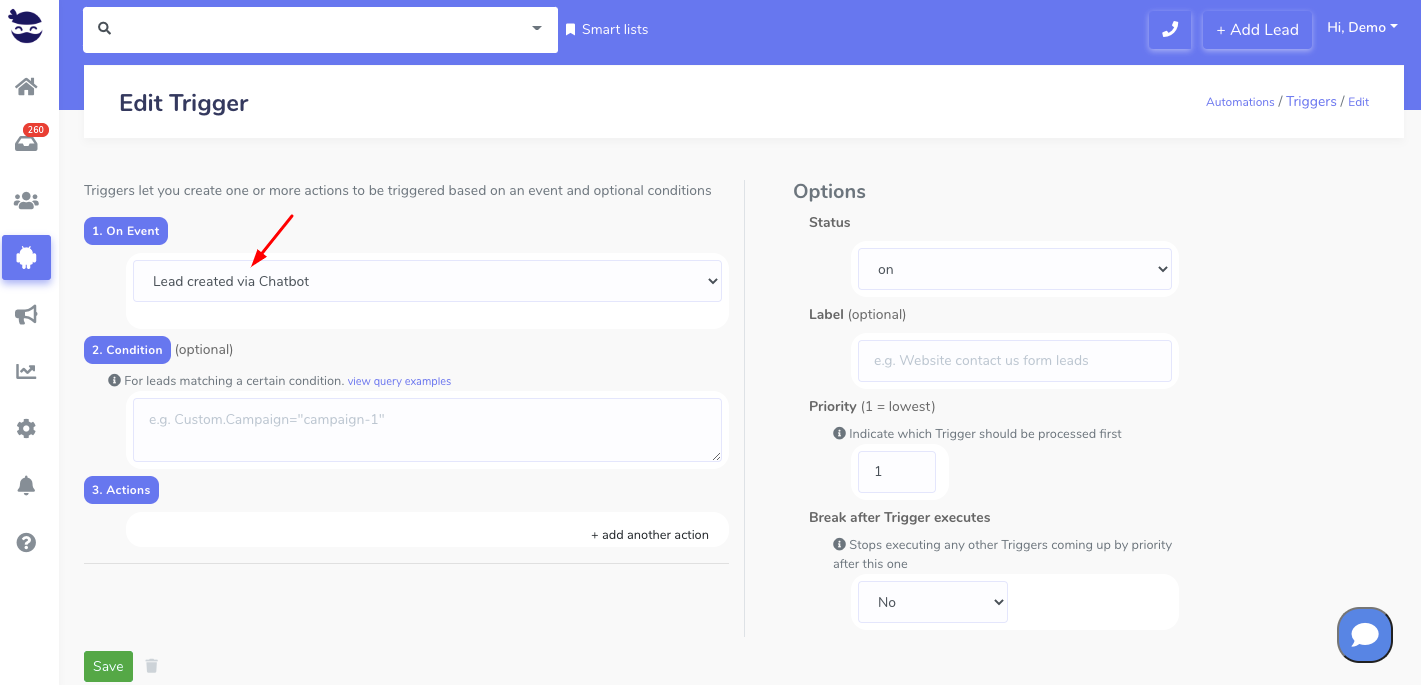
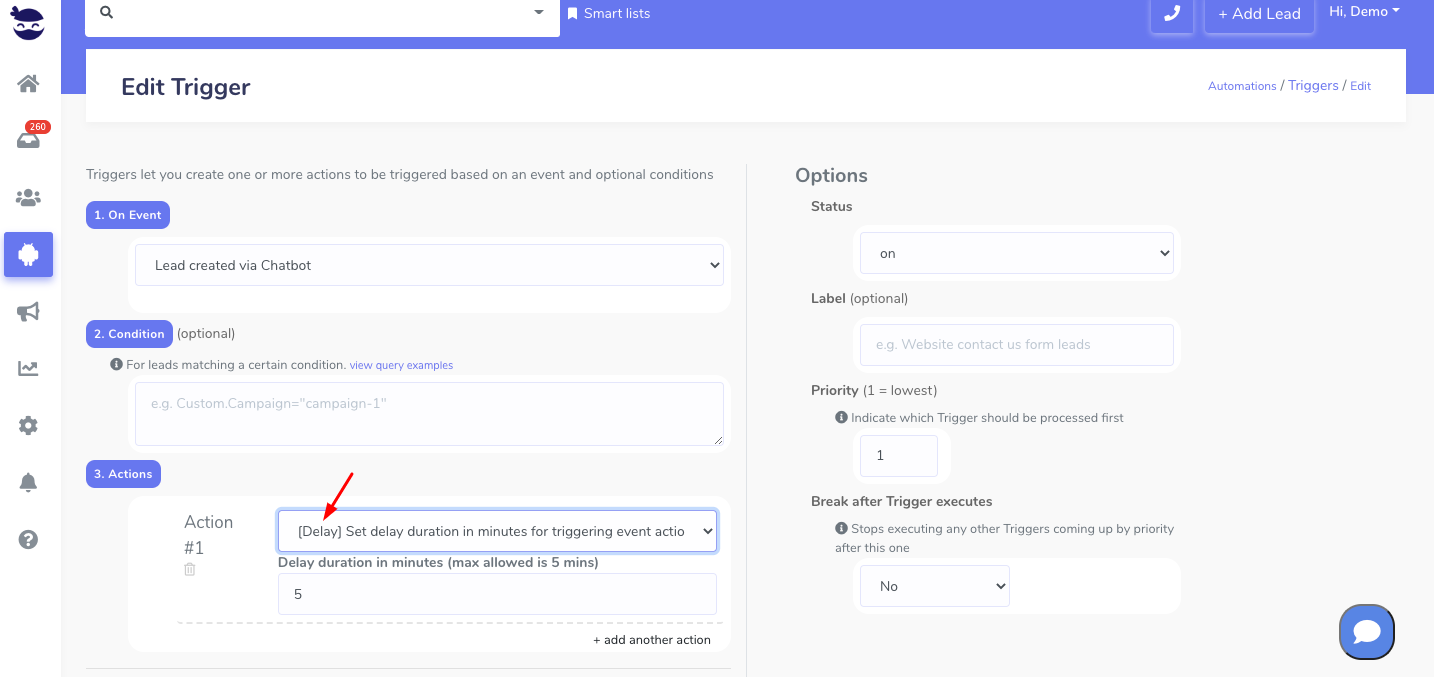
However, changing the value of the date custom field in the lead view does affect the trigger and executes the trigger action specified to fire on the “Custom field value changed” event.

Trigger “Custom field value changed” event

With the “Custom field value changed” Trigger event, you can automatically perform an action based on a specific custom field value.

This powerful trigger event allows you to specify a custom field value and trigger an action whenever that value is changed.

Setting a trigger event to handle Custom field value changed

To set up this trigger event, you will need to indicate the custom field that you want to track in the trigger event and that should trigger the action. Specifying the corresponding value of the custom field in the trigger condition is optional.

Then, you can set the action that should be taken when the trigger fires.

  • Hit + Add Trigger
  • In the Trigger Event:
    • Choose “Custom field value changed

  • In the Trigger Condition (optional):
    • Specify the custom field value that will fire the trigger action. (see example below).
  • In the Trigger Action:
    • Set the trigger action you want to fire in response to the event.
    • You can add multiple actions to be executed when the event takes place.
Example:

If you have a custom field for “Lead Score“; and you want to automatically change the workflow step of the lead to “Qualified” when their lead score reaches a certain threshold (after changing the custom field value of Lead score in the lead view), you can set up a trigger to do this.

  • On an event that is “Custom field value changed”
    • Select the custom field e.g. Lead_Score from the “changed to” dropdown
  • Set the trigger condition to e.g. “Custom.Lead_Score=5”
  • Choose to execute an action to “[Workflow Step Status] Update Workflow Step Status:
    • and Set Workflow Step Status to: “Qualified

You can add multiple trigger actions from the actions dropdown.

Trigger "Custom field value changed" event

aNinja Trigger Actions

When you create a trigger, you define an action or set of actions that are automatically executed when an event occurs in aNinja, without the need for manual intervention.

Here are the main aNinja trigger actions:

Adding and removing leads to/from the “do not contact list”; Forwarding lead info; Lead assignments and merge; Launching automated Email or Text Sequences; Posting lead details to URL through Webhooks; and Updating workflow step status.

aNinja Trigger Actions

You can access Triggers from the left sidebar > Automations > Triggers

aNinja Trigger ActionsTrigger Actions

You can define an action or set of actions to be executed when an event occurs. Trigger actions in aNinja include:

  • [Delay] Set delay duration in minutes for triggering event actions
  • [Do not contact] Add all lead contacts to “do not contact” list.
  • [Do not contact] Remove all lead contacts to “do not contact” list.
  • [Email] Send lead info to an email address (from: no-reply@aninja.com)
  • [Lead Assignment] Assign to User
  • [Lead Assignment] Assign to Users from Team (using Round Robin)
  • [Lead Assignment] Assign to Users from Team (using Weighted Round Robin)
  • [Lead merge] Merge new lead into existing duplicate
  • [Sequence > Email] Start Email Sequence
  • [Sequence > Text] Start Text Sequence
  • [Sequences > Stop] Stop all sequences & Conversations (Email & Text)
  • [Webhooks] Post Lead Details to URL
  • [Workflow Step Status] Update Workflow Step Status

These trigger actions are designed to streamline and automate various aspects of the customer relationship management process, saving time and reducing the risk of human error. They can be customized and configured based on the specific needs and workflows of your business.

Trigger “Duplicate Leads Merge” action

Trigger “Duplicate Leads Merge” action is useful when leads created via API create duplicates in your account;  you can then automatically merge them through Triggers.

Definitely, you want to keep a clean and consolidated data. This allows you to generate more accurate and meaningful reports and analytics, which can help in making informed business decisions.

Setting the Trigger “duplicate leads merge action”

Trigger actions get executed based on a certain event that you specify in the triggers feature:

  • Select the event that will cause the trigger to fire.
    • e.g. Lead created via API

  • Under Actions, click “+ add another action”
  • Select from the actions drop-down:

[Lead merge] Merge new lead into existing duplicate

Trigger duplicate leads merge action

  • And indicate the merge method (email/phone).

  • This automatically merges new leads by ‘phone’ or ’email’ if ‘Lead created via API’ option was selected as the desired event.

Good to know:

If a lead with the same email was sent via API but doesn’t appear in aNinja, you should check if the “Do not add new leads via API if lead with similar email already exists” rule is disabled. This rule prevents duplicate leads from being created, and therefore, the merging logic will not take effect.

  • You can also indicate if this action should stop executing all subsequent actions/triggers in case the new lead has been merged. This is helpful if you don’t want a specific sequence to fire off for already existing leads.

  • With that being said, it would be better if you set the trigger using this action with a high priority number so that it gets fired first.

Trigger “Incoming Call” event

Through aNinja Triggers, you can configure automatically firing a trigger action to handle a trigger event like “Incoming call”.

If you missed a call from a lead, or your line was busy, or even if you answered their call, you might want to send them an automation to honor their call.

Setting a trigger event to handle an incoming call

  • Hit + Add Trigger
  • In the Trigger Event:
    • Choose “Incoming Call”.
    • From the dropdown, specify the type of the call:
      • Missed Call
      • Completed
      • Busy

trigger incoming call event

  • In the Trigger Action:
    • Set the trigger action you want to fire in response to the type of call.
    • You can add multiple actions to be executed when the event takes place.
Example 1:
  • On an event that is “Incoming call”
      • Call type: “Missed call”
  • Choose to execute an action to “[Lead assignment] Assign to User”.

This allows you to assign a user to follow up with the lead after missing their call and send them a text to honor their call.

Example 2:
  • On an event that is “Incoming call”
      • Call type: “Complete”
  • Choose to execute a first action to “[Sequence > Text] Start Text Sequence”
  • Choose to execute a second action to [Workflow Step Status] Update Workflow Step Status.

This way, after completing a call with a lead, you can send them a thank you message, and update their workflow status to “Contacted” for example.


Handle “Outgoing SMS with error code” through Triggers

aNinja allows you to automatically handle the outgoing SMS with an error code through Triggers. You can set a trigger action to set those leads as “do not contact”.

SMS with Error code

When you attempt to send a text through aNinja, the system uses the primary phone number saved in the lead contacts to send your text.

If the phone number saved in the lead contacts is wrong, landline, or blocked by the carrier, your sent SMS will return with an error code.

Setting a trigger to automatically mark leads as “do not contact”

You can configure automatically marking a lead as “do not contact” and handle outgoing SMS with an error code through triggers. You don’t want to keep on sending texts to an invalid phone number.

  • On the left sidebar, click on Automations > Triggers
  • Hit + Add Trigger
  • In the Trigger Event:
    • Choose “Outgoing SMS with error code
    • From the dropdown, choose the error message you want to execute the trigger action.handle incoming SMS with error code
  • In the Trigger Action:

Set “Add all lead contacts to do not contact list

Regarding the leads that that were added to the “do not contact” list, they do get included in the bulk sequence, but their texts get blocked from our side so it doesn’t get actually sent.
You can check them by clicking on the blocked leads count in ‘Bulk Sequences’ widget.

Also, set “Break after Trigger executes” to YES / true so that no other triggers execute after this match on that Lead.

It’s good to give this trigger a high priority level (e.g. 100). This indicates which trigger should be processed first.

Forward Lead info through Trigger “Email” Action

You can set a trigger action to forward the lead info captured on a specific event, to an email that you define in the trigger action.

On an event like “Chatbot Conversations”, we recommend you to delay the transfer of lead info a duration of 5 minutes maximum, to give the user the time to enter the requested info.

Lead info forwarded through trigger email action

On the left sidebar, click Automations > Triggers

  • Click on +Add trigger
  • Choose the trigger event
  • In the trigger action, select

“[Email] Send lead info to an email address (from: no-reply@aninja.com)”

  • And type the email under Email address

When a lead is injected into your account after the trigger event has occurred, his info will be transferred to the email address you define in the trigger action.

If we take the example of the “Chatbot conversation” event;

After the period you’ve set in your trigger, the below fields captured in the conversation, will be transferred to the email defined in the “Trigger Email Action”:

  • contact name
  • phone number
  • email address
  • and the latest 100 chatbot messages with that lead.

In case the user didn’t enter a capture info (e.g. phone number), or it was entered after the delay period you set in the trigger (5 minutes), it will not show in the message you receive by email.

  • After the delay duration is finished, you will receive the below information to the email you defined in the trigger action:

New event from lead (Chatbot 63088754a3b74).

Contact name:
aNinja test

Email address:
test@aninja.com

Phone number:
+1 xxx-xxx-xxxx

Latest messages:
– [Bot] Hey, Happy to assist!
– [Bot] What’s your name?
– [contact_3b74] aNinja test
– [Bot] What can we do for you?
– [aNinja test] Send me information
– [Bot] Okay, what is the best email to send information to?
– [aNinja test] test@aninja.com
– [Bot] Info is on the way! What’s the best number to reach you at?
– [aNinja test] 1xxxxxxxxxx
– [Bot] Thank you! A team member will be in touch shortly.


Trigger Email action after a Delay duration

In this article, we’re going to show you how to set the trigger action to send lead info to an email address, after a delay that you define when a certain event has occurred.

Through aNinja Triggers, you can define which actions to programmatically trigger based on a specific event and condition. 

Setting the trigger Email action after a Delay

The trigger actions get executed based on a certain event that you select when you’re in the triggers feature:

  • Select the event that will cause the trigger to fire.
    • e.g. Lead created via Chatbot

  • Under Actions, click “+ add another action”

  • To set a delay before executing the trigger action, select from the action drop-down:

[Delay] Set delay duration in minutes for triggering event actions

  • And set the duration in minutes to a maximum of 5 minutes.

Trigger Email action after a Delay

  • Click “+add another action

  • To set the trigger to send the lead info to an email, select from the actions drop-down:

[Email] Send lead info to an email address (from: no-reply@aninja.com)

  • And indicate the email address to send to.

  • The delay action is useful in the case for example of a lead created via chatbot, to wait a few minutes as they’re still filling the chatbot info (email, phone, etc.) so that the data is available when the lead’s info is forwarded to the email.

Trigger Webhook action – Posting lead details into URL

aNinja Triggers allow you to programmatically trigger actions based on specific events and conditions. In this article, we’re going to show you how to use the Trigger Webhook action.

Setting the Webhook action

Webhook action gets executed based on a certain event that you select when you’re in the triggers feature:

  • Select the event that will cause the trigger to fire.
    • e.g. Lead created via Chatbot

  • From the actions drop-down, choose

[Webhook] Post lead details to URL.

  • And type the URL.
  • When you choose the Webhook action from the trigger actions drop-down, the data of the lead that verifies the event gets posted into the URL that you add in the input.
    • In our example, when a lead is created via Chatbot, automatically his data gets posted into the specified URL.

trigger webhook action

Handle “Incoming STOP texts” through triggers

When leads send you an opt-out message such as STOP, STOPALL, UNSUBSCRIBE, CANCEL, END, or QUIT; adding them to your “do not contact” list is crucial to avoid further contact and potential legal issues. You can automatically handle those incoming STOP texts to set the lead as “do not contact” through Triggers.

Otherwise, recipients might mark your messages as spam or if they consistently ignore them, telephone carriers may flag your messages as spam and prevent them from reaching anyone’s phones.

Managing Opt-outs

Adding opted-out leads to your do not contact list is a simple process, but it’s important to make sure you’re doing it correctly.

  • First, provide an Unsubscribe link to your texts.
  • Create a trigger that adds the lead that opted out to the do not contact list.
  • Finally, regularly review and manage your do not contact list to keep you in compliance with anti-spam laws.

Setting a trigger to automatically add leads as “do not contact”

You can configure automatically marking a lead as “do not contact” and handle the incoming STOP texts through triggers:

  • Hit + Add Trigger

  • In the Trigger Event:
    • Choose “Incoming email or SMS
      • Presently, this feature is available for incoming texts only.
    • Set Body content matching to: “STOP | STOPALL | UNSUBSCRIBE | CANCEL | END | QUIT“. Add any other words that your leads use to ask for stopping.

    • Select the type of matching in the “Specify the type of matching“dropdown:
      • exact (only matches texts having exactly the same content)
      • word (matches all texts that contain the content anywhere in the body)
      • any (matches all texts that contain the content anywhere in the body and in any form, e.g., “test” would match “testing”)

    • This will match any incoming text with the defined content (not case insensitive) according to the type of matching you choose.
  • In the Trigger Action:
    • Set “Add all lead contacts to do not contact list

Handle incoming STOP texts/emails through triggers

    • Regarding the leads that that were added to the “do not contact” list, they do get included in the bulk sequence but their texts get blocked from our side so it doesn’t get actually sent.
      You can check them by clicking on the blocked leads count in ‘Bulk Sequences’ widget.
    • To honor your client’s opt-out request, you can send them an automated message.
    • Also, set “Break after Trigger executes” to YES / true so that no other triggers execute after this match on that Lead.
    • It’s good to give this trigger a high priority level (e.g. 100). This indicates which trigger should be processed first.