imatrix aNinja Form Integration

aNinja allows you to integrate your imatrix Website Forms into your aNinja account. In this article, we show you how the imatrix aNinja Form Integration can be done using a simple Javascript code.

imatrix aNinja Form Integration

You can integrate and augment the functionality of popular platforms with aNinja.

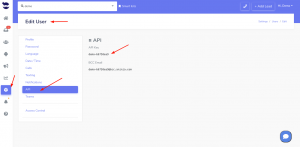
  • First, you need to find your API key
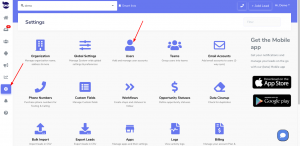
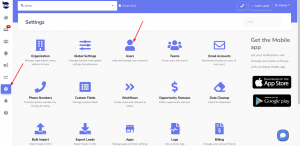
    • On the left sidebar, click on Settings > Users
    • Then, click the edit pen next to your name.
    • And, copy it to use it later in the integration
  • Now, login to your imatrix website editor
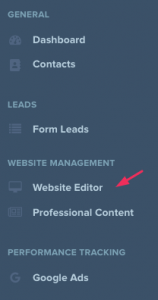
  • On the left side menu, click on Website Editor
  • Then, click on Edit Website in the middle of the page.
  • Type your email and password to login
  • On the left side menu, click on Pages 

  • Next to the form, on the right side, click on the little Settings gear
  • Scroll down to the Custom Info section
  • And insert your Javascript code under “Specify Custom Header”

imatrix aNinja Form Integration

  • Map the form fields to aNinja fields
  • Save and Publish
  • Go to your website, refresh and test submitting a form.
  • Then, check your aNinja account for the new lead automatically generated after the form submission.
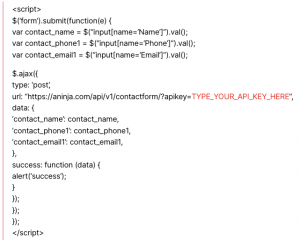
You can use the below Javascript code

Where does the imported data appear

After the integration, you can search your aNinja CRM for the imported leads. You can also search for any custom field, opportunities, and any other info that you have imported.

  • Lead contacts appear in the leads contact section in the lead view
  • Opportunities also appear in the opportunity section in the lead view
  • The company’s info appears on the top left of the lead view, in the Company section.
  • Custom fields appear in the custom field section of the lead view.
  • Lead Search is a field that also appears in the bottom left of the lead view. Specifically, these are info/links on the lead or the organization found in Google search.

Need help with imatrix aNinja Form Integration? Leave us an email at support@aninja.com. And we will happily assist you.

VistaPrint aNinja Form Integration

aNinja allows you to integrate your Vistaprint Website Forms into your aNinja account. In this article, we show you how the Vistaprint Form Integration can be done using a simple Javascript code.

Vistaprint aNinja Form Integration

You can integrate and augment the functionality of popular platforms with aNinja.

  • First, you need to find your API key
    • On the left sidebar, click on Settings > Users
    • Then, click the edit pen next to your name.
    • And, copy it to use it later in the integration
  • Now, login to your Vistaprint website editor
  • In the middle of the page, click on edit website
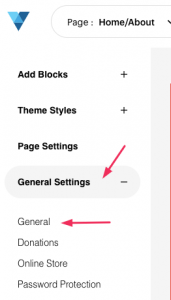
  • On the left side menu, click on General Settings > General
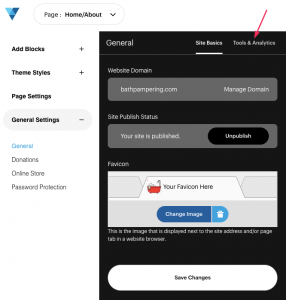
  • Then, choose Tools & Analytics
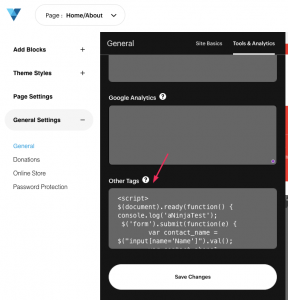
  • Under Other Tags add the Javascript code (see example below)Javascript aNinja Form Integration
  • Map the form fields to aNinja fields
  • Save and Publish
  • Go to your website, refresh and test submitting a form.
  • Then, check your aNinja account for the new lead automatically generated after the form submission.
You can use the below Javascript code

Where does the imported data appear?

After the integration, you can search your aNinja CRM for the imported leads. You can also search for any custom field, opportunities, and any other info that you have imported.

  • Lead’s contacts appear in the leads contact section in the lead view
  • Opportunities also appear in the opportunity section in the lead view
  • The company’s info appears on the top left of the lead view, in the Company section.
  • Custom fields appear in the custom field section of the lead view.
  • Lead Search is a field that also appears in the bottom left of the lead view. Specifically, these are info/links on the lead or the organization found in Google search.

Need help with Vistaprint aNinja Form Integration? Leave us an email at support@aninja.com. And we will happily assist you.
Owner user role

The Owner user role is a default role. Every plan must have a predefined owner.

The Owner role must always exist with all permissions enabled. This is the only role that has billing access.

Owner user role

An Owner user has all permissions enabled in aNinja. In addition to the permissions granted to the Admin role, the owner has the ability to manage the Billing access.

Email Signature

When sending emails via aNinja or in any email account you use, you would want to include your signature at the bottom.

What’s an email signature?

It is a powerful way to convey your professionalism to your readers and give them the information they need to contact you. It is placed at the bottom of each mail, which helps leave a great impression and makes you stand out from your peers.

A good signature design should include the following elements:
  1. Avatar and/or company logo.
  2. First name and last name.
  3. Job title, department, and company name.
  4. Email address and telephone number.
  5. Company physical address.
  6. Social media icons.
  7. Banner (optional)
  8. Offer (optional)

Setting your email signature in aNinja

  • Login to your aNinja account.
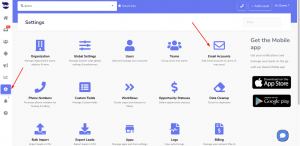
  • Go to Settings > Email Accounts
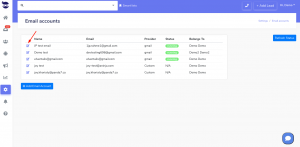
  • Click on the edit pen next to your email/name
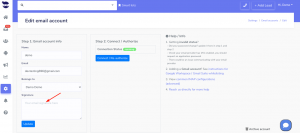
  • Type in your signatureemail signature
  • And hit Update
  • Now your signature will show at the bottom of each email you send via aNinja.

Changing or resetting your aNinja Password

Consider changing/resetting your password every few months for security reasons. You can’t figure out if someone else is using the account.

So by changing your password consistently, you reduce the risk that other people will have access to your account.

Changing your password
  • Login to your aNinja account
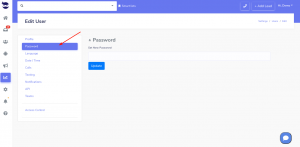
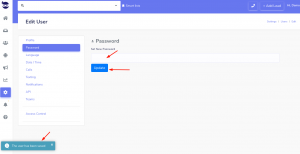
  • Go to your Profile > PasswordChanging or resetting your aNinja Password
  • Enter your new password and click Update
  • Now, the system has saved your new password.

Reseting your password

In case you forgot your password, you can always reset it and generate a new one.

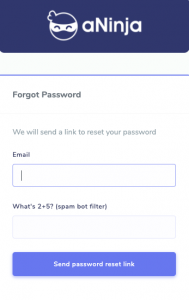
  • First, point your browser to:

https://aninja.com/forgot.php

  • A new tab like the one below will appear:
  • Then, enter your aNinja login email address.
    • Make sure you use the login email that you received in the aNinja user invite email when you were first invited to use aNinja app.
  • Click Send password reset link. After that, a password reset link is sent to the email address within a few minutes.
  • Lastly, use the link provided in the email to create a new password for your aNinja account.

Password security tips

  • Never give out your password to anyone.
  • Don’t use one password in all places.
  • Make the password at least 10 characters long.
  • Include numbers, capital letters, and symbols.
  • Consider using a password manager.
  • Consider using multi-factor authentication.

Need help with changing or resetting your aNinja Password? Leave us an email at support@aninja.com. We will happily assist you!

Create your aNinja account

Create your aNinja account and use the credentials that you’ve received in your email to be able to login to aNinja app

When a user is invited to join aNinja, he receives an email with his credentials (login email and password).

We recommend changing the given login password.

The login email cannot be changed at the user level. However, to change the login email, just send a request to support@aninja.com.

In aNinja, all the user’s info is in the user profile.

User profile

Create your aNinja account and manage your user profile before starting to use aNinja.

  • On the left sidebar, click on Setting > Users
  • Then, click on the edit pen next to your name and you’re in your profile.Create your aNinja account
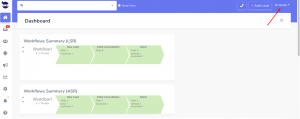
  • You can also access your profile from the top right, hit the arrow next to your name.
  • It’s recommended to change your given password.
    • Set the new password and hit Update.

Assigning a lead to a user

Assigning a lead to a user is the first task that you can do when a lead pops up into aNinja to turn them into a customer faster.

And in the sales/marketing process, multiple users may take charge of a lead, depending on their role.

Moreover, users with admin roles can manage the delegation of leads to different users.

When a lead is assigned to a user, if another user is sending them an email, it will pull out with the name of the user whom the lead is assigned to.

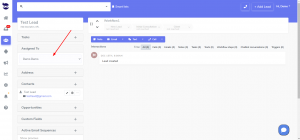
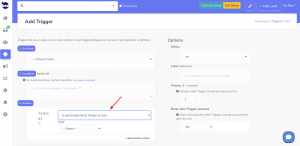
Assigning a lead to a user

Lead assignment can be done through:

  • The lead view
    • This requires admin access if the option “Users can only see Leads assigned to them” is enabled in Settings > Global SettingsAssigning a lead to a user
  • Triggers using [Lead assignment] actions

User ID

Each user is granted a private user-id as soon as they are invited to join aNinja, regardless of their role.

You can find the user-id in Settings > Users.

Using a Smartlist, you can utilize this user-id to filter leads assigned to specific users. You can also enable this Smartlist as a Dashboard Widget.

Similarly, you can narrow down your Opportunity report to see a snapshot of the users’ sales activities over a certain timeframe.


User role

The role assigned to a user controls access to areas and features within the aNinja app. Each user account requires a role. This is a default role. An admin user can change it when need be.

Moreover, the number of users is defined according to your billing plan.

User role

A user role can:

User role

Admin user role

The Admin user role is a default role. It may be assigned to any user. Every plan must have a predefined Admin user(s).

The Admin user role must always exist with all permissions enabled.

Moreover, the number of users is defined according to your billing plan.

Admin user role

An Admin user has all permissions enabled in aNinja. He can manipulate all the lead data existing in his aNinja account, as well as the users and teams.

Find your private BCC email address

Using this email address in the BCC section when sending out an email automatically creates a lead from the recipients. In this article, we show you where to find your private BCC email address in your aNinja account.

Find your private BCC email address

Your private BCC code is found in the user profile.

  • You can access your profile from 2 places:
    • In the left sidebar, click on Settings > Users
    • Or, on top right of the page, click on your name > Profile.
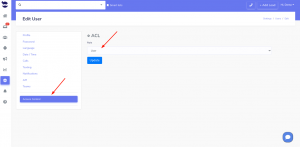
  • Click on the edit next to the user to access your profile.

  • Click on API. Here’s where you find your account’s BCC email.

Find your private BCC email address

Use this code in the BCC section of your emails and a lead is created from the recipient.