Connect your Email with aNinja to start sending emails to your leads. If you don’t know your email provider, or can’t find it listed in aNinja, you can use your email configuration info or the server settings to connect your email with aNinja using IMAP.
It’s important to complete the 2 steps of the authorization for your email to sync properly.
Connect your Email with aNinja using IMAP
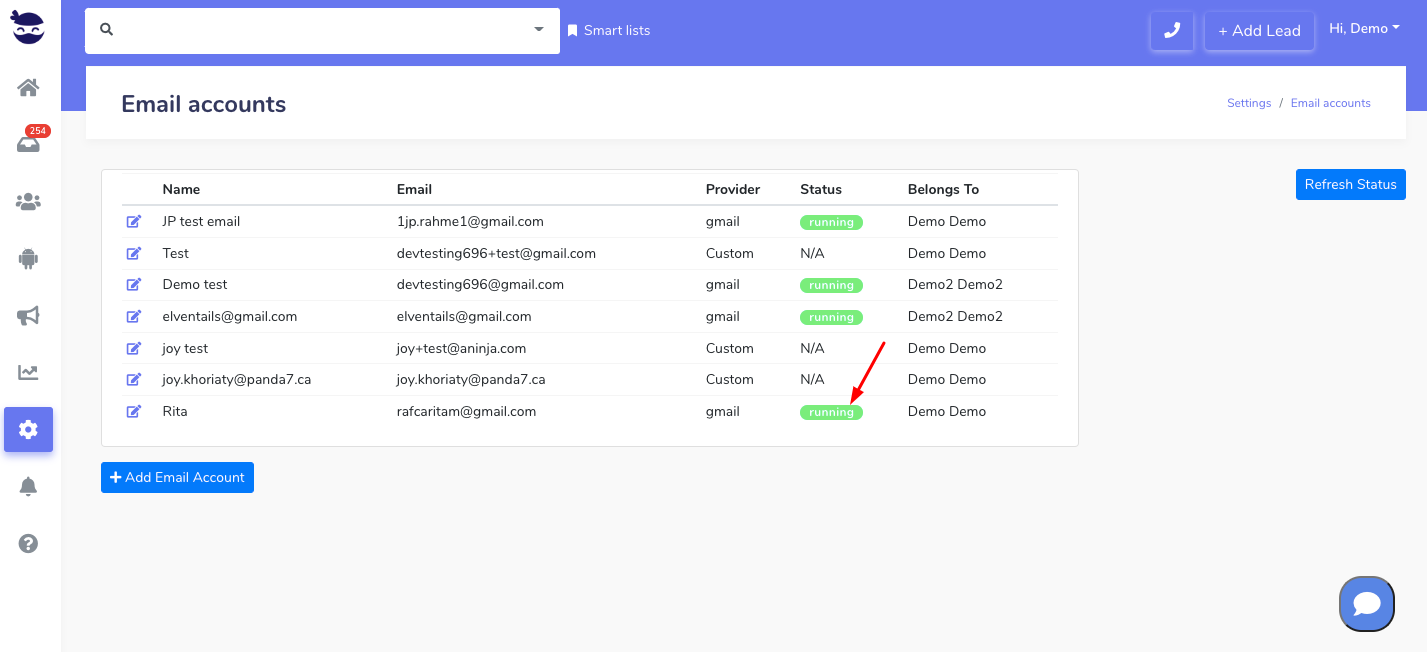
On the left sidebar, click on Settings > Email Accounts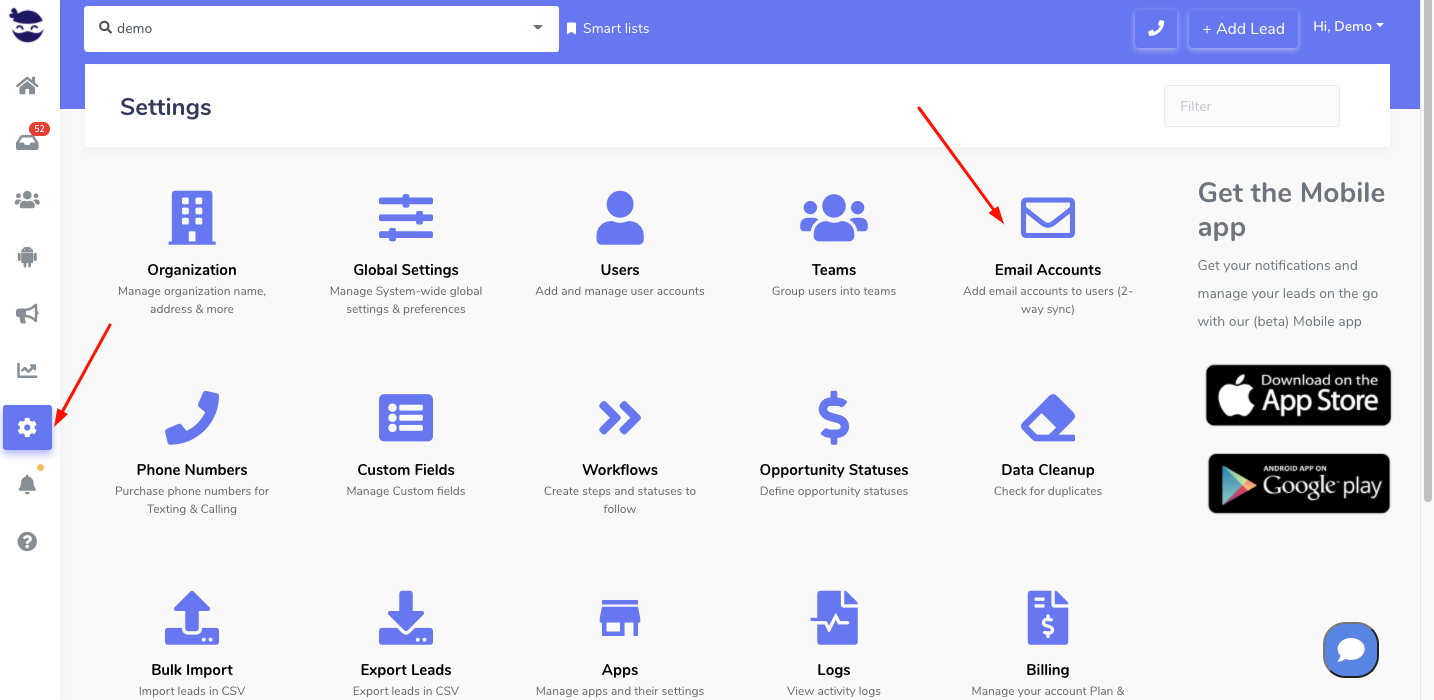
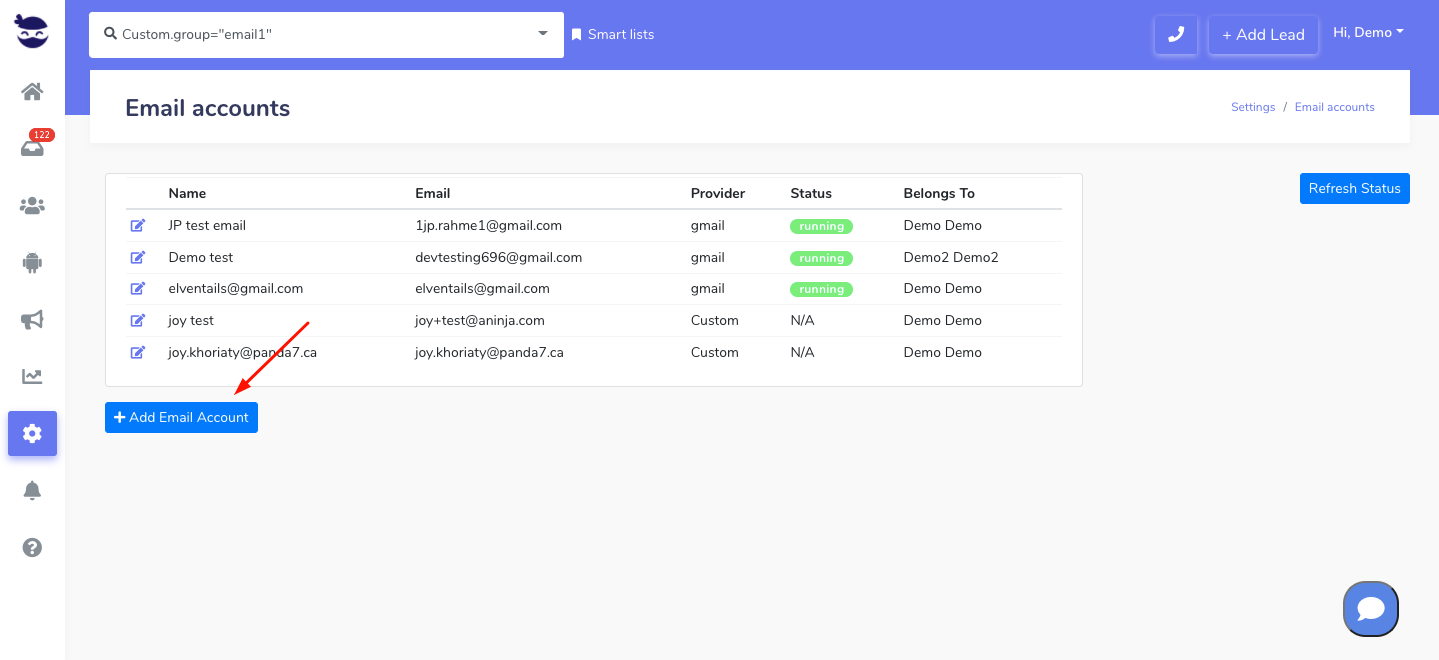
- If you already have an email account saved and want to complete the authorization, click on the edit pen next to the email. Then go to step 2 —> Connect/Re-auth.
- Otherwise, go ahead and create an email account. Click Add Email Account.
Step 1
Fill in the following fields: Name and Email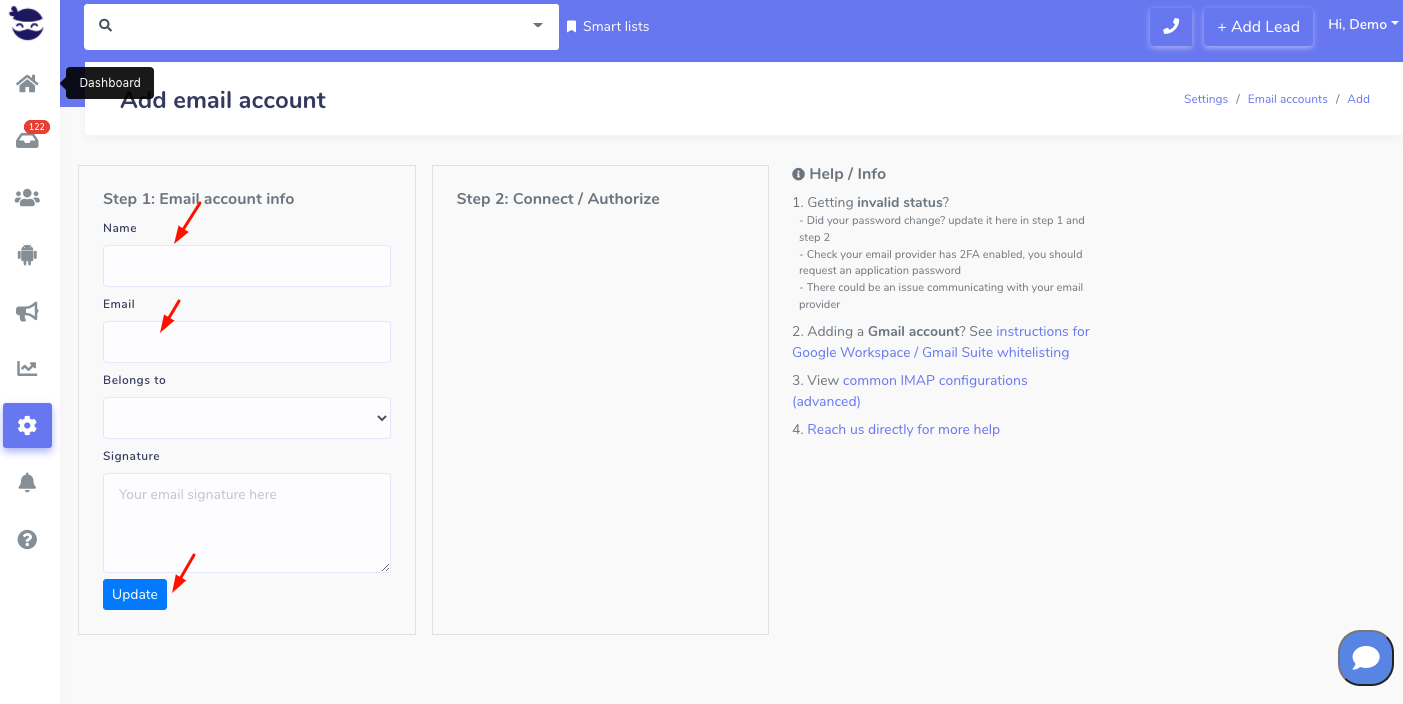
- And hit Update
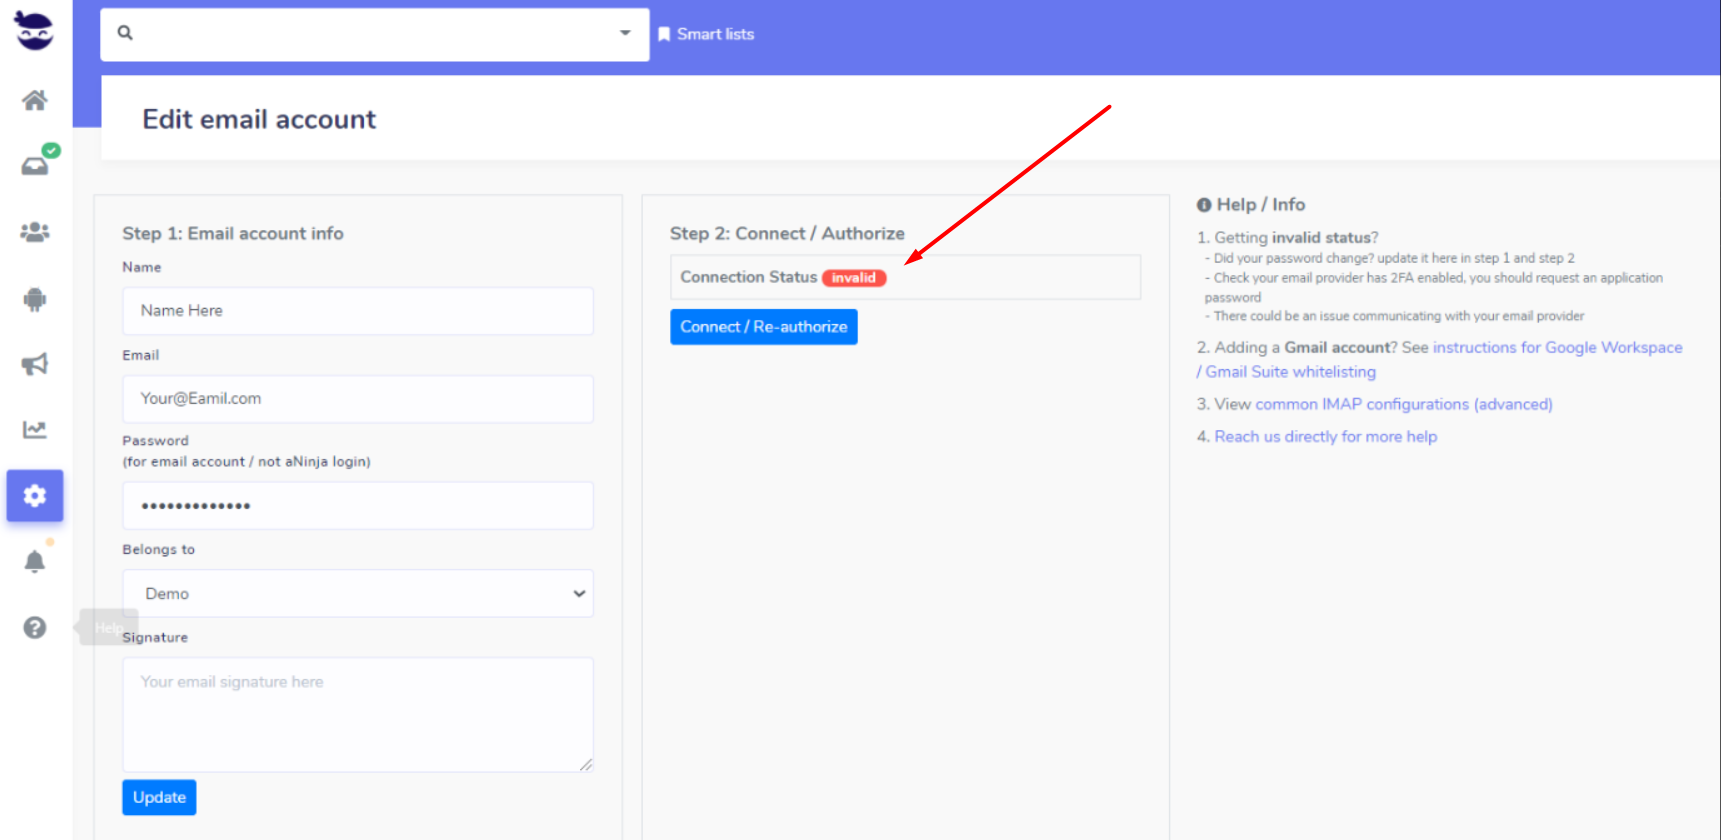
Step 2
- Click Connect / Re-auth
- Scroll down and click on “See all providers“

- Then hit “Custom IMAP settings“

- Type your password.
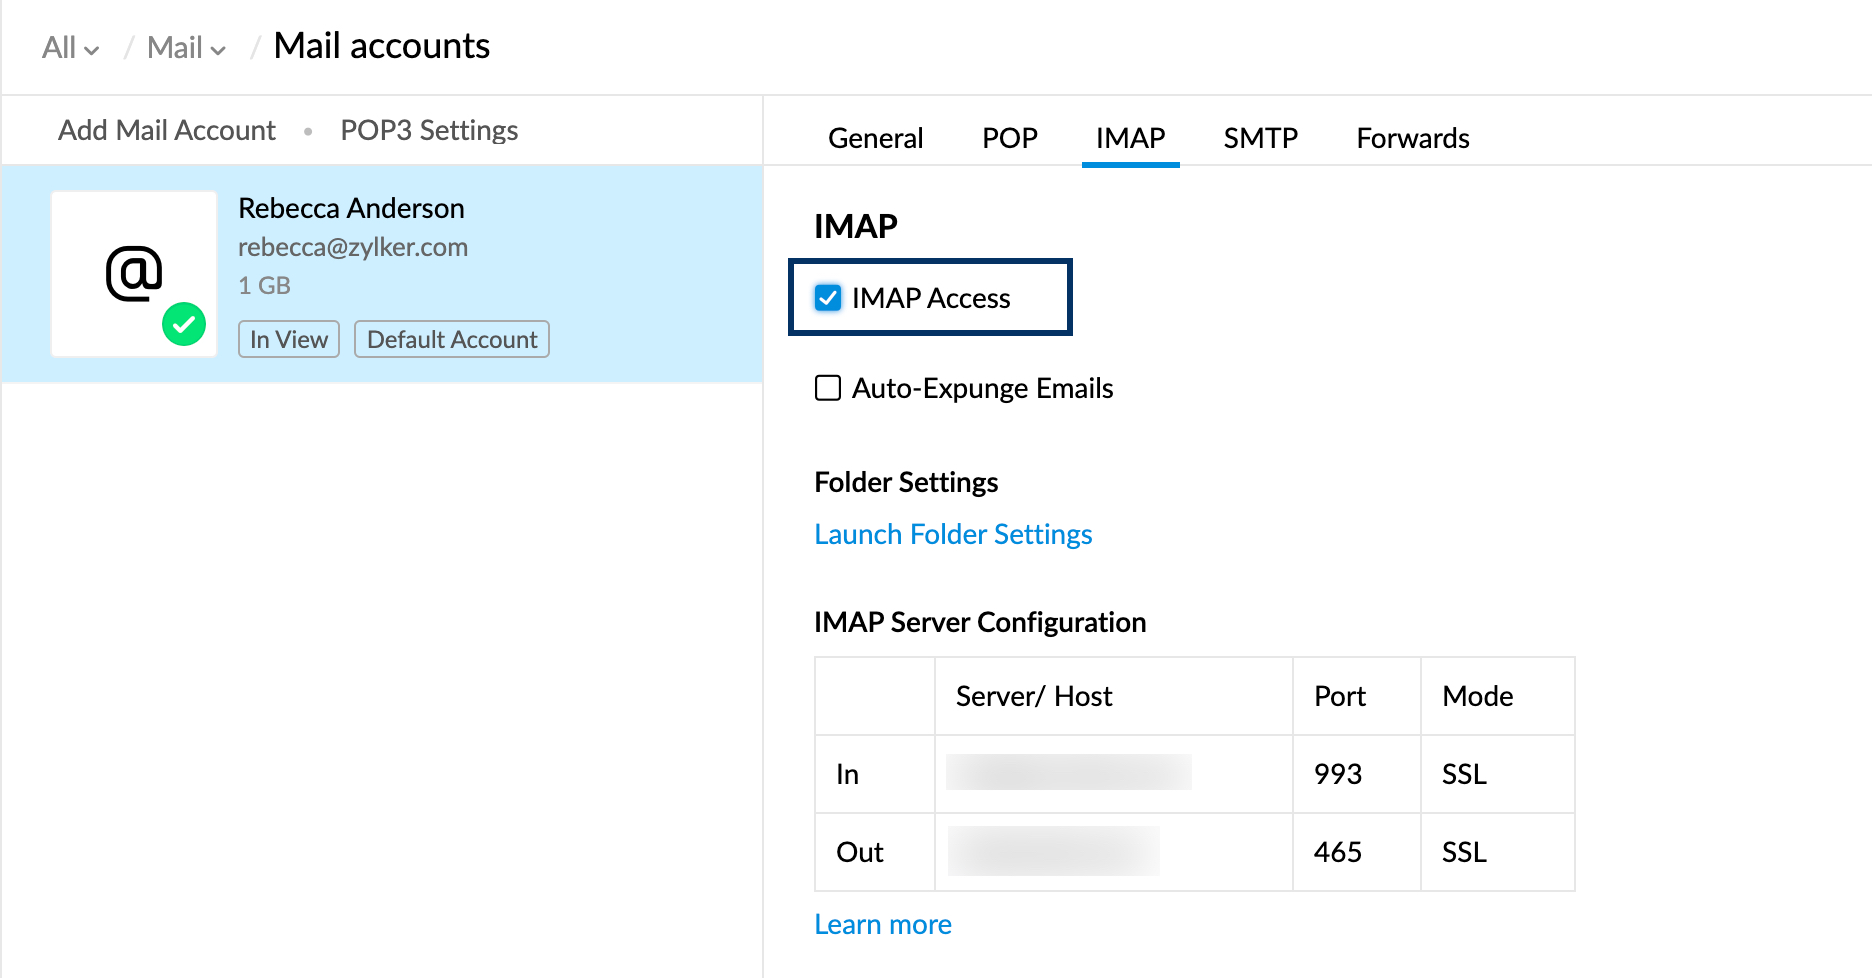
- Fill in the email configuration info under Server Information, to log in with IMAP.
- You can find the email configuration in your email under “Server Settings”.
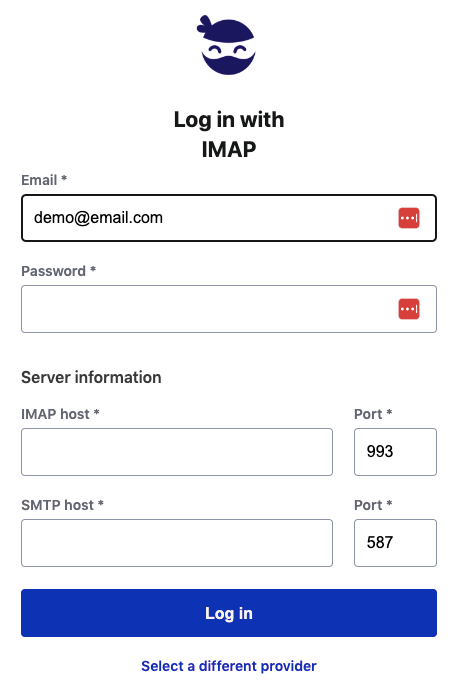
- Lastly, hit Login.
Once set up, your Email account would show up running under the status.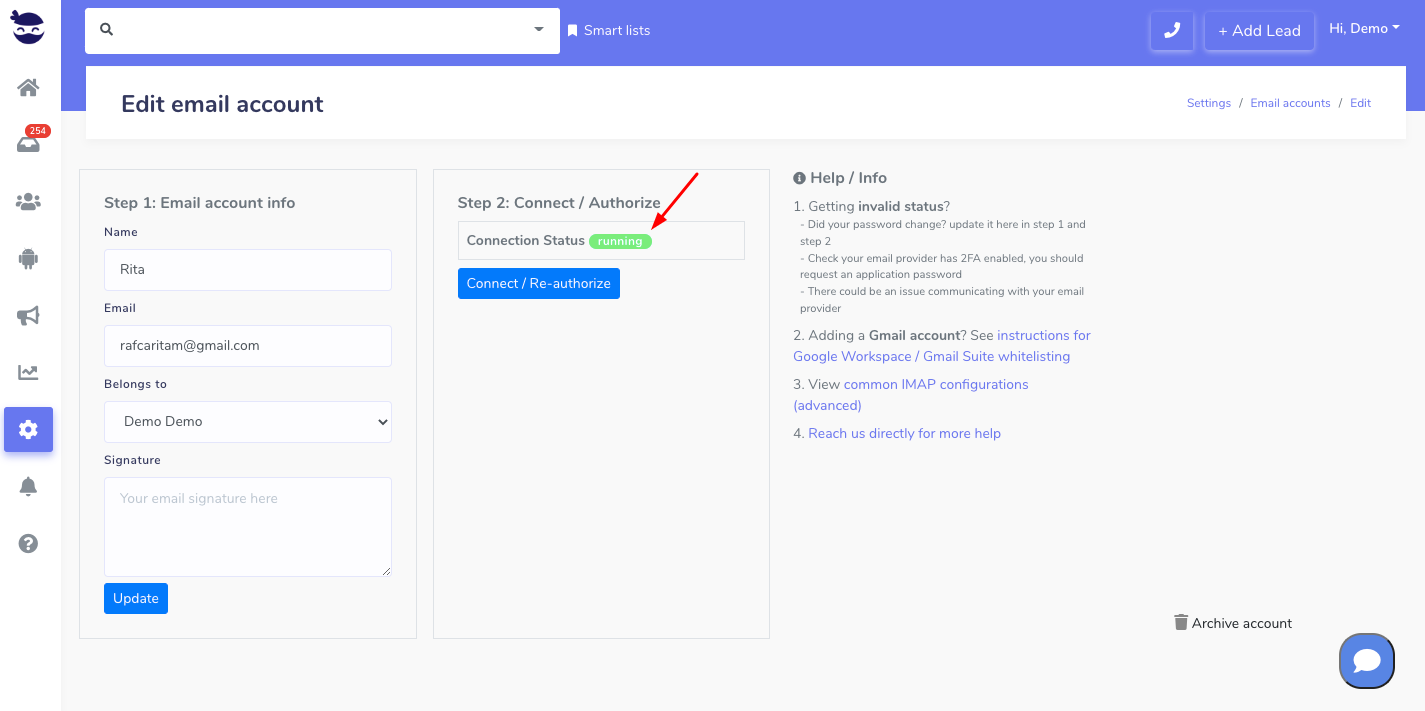
Note! It is very important to complete the 2 steps for the email to sync properly.