Can’t find a phone number in the area code you want

aNinja was designed to allow you to either port your phone number or add a new phone number to your install to be able to make calls and send texts through our app. In this article, we tell you what to be done if you can’t find a phone number in the area code you want.

No phone number in the area code you want

After checking in you aNinja install through Settings > Phone numbers for a phone number, sometimes you can’t find a phone number in the area code you want. This is because phone numbers are not always available from carriers.

Can't find a phone number in the area code you want

What to do

1- You would want to consider “overlay area codes“. In an overlay numbering plan, an additional area code is assigned to an existing numbering plan area. Thereby avoiding the need for existing customers to change telephone numbers.

2- Or you can request a number. Send us an email to support@aninja.com. Tell us what you need so we can notify you when the Phone Numbers become available.

This may take 4-6 weeks to hear back from us. We’ll get back to you when we have a determination on availability.

Notifications on incorrect lead contact data

The Lead contact is the lead info saved in the Lead View (email addresses, phone numbers, URLs). When the lead is created, the contacts are saved as entered/provided.

The system uses the lead contacts to send your emails and texts. This means, in case the lead contact was incorrect, your outbound will surely not reach the lead.

Notifications on unsent emails outbound

You receive an email notification that the email address of this lead is incorrect and your outbound did not reach them.

Notifications on unsent texts outbound

You can see an error message in red in the lead history.

Notifications on incorrect lead contact data

Note: You also receive an error message after you send a text if the primary phone number is a landline number.

You can handle the outgoing SMS with an error code through triggers. e.g. mark as “do not contact” the lead with a landline number.

Making a Call in aNinja

Making a Call in aNinja

In aNinja, you can dial a phone number, call a lead’s phone number from the lead view, and power call multiple leads, using the phone number you have saved in your aNinja profile.

Dialing a phone number from aNinja Web app

  • On aNinja Dashboard, on the top right, click on the phone icon.
    • The call is made through the phone number saved in your user profile.
      • If you’re a user with Owner or Admin role you can choose to make the call using other users phone numbers.
    • When you finish the call, tap on the red button.
    • To close the calling window, just click on the phone icon once again.

making a call in aNinja

Calling a lead from aNinja Web app

  • When on the Lead View, from the toolbar, choose the call feature. It opens a dialing window and automatically shows the primary phone number in the lead’s contacts.
    • Click on the green button to call.
      • If you’re a user with Owner or Admin role you can choose to make the call using other users phone numbers.
    • When you finish the call, tap on the red button.
    • To close the calling window, just click on the phone icon once again.

Calling multiple leads from aNinja Web app

  • On the Leads View, whether you choose to call all the leads in your CRM, or a group of leads that you have grouped using a Smartlist; on the top right of the page, hit the Power Dial Button.
  • This option allows you to call all the leads sequentially without bothering to go to each lead’s profile to call manually. When the current call is ended, the system starts calling the next lead in queue.

Accessing the calls log

  • If you are a user with a User role, you can view your own calls in Settings / Logs and listen to the conversations.

  • Users with Admin role can view calls and listen to call recordings of all users.

Note: For saved leads, you can keep notes of the calls. In the Lead View, click on Notes to enter relevant information that you picked up from the call.

Adding a Voicemail Greeting for aNinja

A Voicemail greeting is a recording that the callers to your delegated number in aNinja can hear when the call is not answered. The voicemail can also play when your phone number has been forwarded.

When recording your voicemail greeting, it’s important to inform the callers that you’re not available to receive their calls. It is an essential part of any effective business communication strategy, especially if you are in Sales.

An important usage for voicemails on busy days! It enables you to screen incoming calls. You can choose to pick high-priority calls. And leave the less urgent ones to go to the voicemail to be acted upon later on.

aNinja default Voicemail greeting

By default, aNinja provides a voicemail greeting record that you can use when you are not available to answer your incoming calls; or when you forward your phone number.

Recording your voicemail greeting message

  • If you don’t already have your voicemail record, you can record it with your mic (ideally 15-30 seconds max) and save an MP3 file here: https://online-voice-recorder.com/
    • There are many other sites online (e.g. https://www.rev.com/onlinevoicerecorder), PC applications, or mobile applications you can use. Feel free to use the application of your choice as long as it can generate an MP3 audio file.

Converting your audio file

If your audio file is not MP3 type, you can use this link to convert it: https://www.media.io/audio-converter.html 

Adding your Voicemail greeting to an aNinja number

  • Go to Settings > Phone numbers
  • Click the edit pen next to the phone number you want to associate the voicemail greeting record with.
  • Hit the checkbox next to “Use Custom Voicemail“.
  • Click on Upload file to upload your voicemail greeting message.
  • Lastly, hit Update.
  • Play the voicemail record under “Active voicemail greeting audio” to listen to it.
  • Go ahead and test it by calling this phone number. Check that your voicemail greeting record is running when the call is not answered.

Changing the voicemail greeting record

To replace your customized voicemail record with a new one, just upload the new file and hit update.

To replace your customized voicemail record with aNinja’s default record, just unmark the “Use Custom Voicemail” checkbox.

Note! The recycle bin at the bottom of the page deletes the phone number and the voicemail record associated with it.

Have any specific questions or clarification? Please send us an email at support@aninja.com. We will happily assist you!

Porting a Phone Number to aNinja

Porting your US phone number to aNinja is a six-step process that can take up to four (4) weeks depending on the type of number you are porting and the country the number is located in.

The process includes coordination between our upstream provider and your service provider to transfer the number to aNinja.

If we are porting a number to Twilio carrier, see additional instructions here: https://support.twilio.com/hc/en-us/articles/223179348-Porting-a-Phone-Number-to-Twilio

Things to consider before phone porting

Once you’ve ported your phone number to aNinja, then, aNinja becomes the Carrier.

You will no longer be able to make phone calls from the office’s traditional line.

And the phone number will ring only in aNinja web app and the mobile app.

So, for Inbound:
We can have an aNinja number forward to another traditional line (if you prefer picking up on that).

For Outbound:
You won’t be able to place outbound calls from a traditional line once it’s ported to aNinja. The calls will only be able to be placed from a computer/browser running aNinja, or the mobile app.

Porting a phone number to aNinja

Step 1 – Submit your port request

Email us at support@aninja.com and go to the Porting Request page.

  • You will need the following for a successful request:
    • The authorized user or owner’s first and last name.
    • The corresponding service address. This must be an actual physical address.
      • PO Boxes are not valid addresses.
    • A Letter of Authorization (LOA) signed by the authorized user and/or owner of the number(s). Note that the information on your LOA must match the authorized user name and service address provided by your current carrier.
    • Obtain a Customer Service Record (CSR).
    • A scanned (or electronic) copy of the most recent phone bill, within the last 30 days, that includes the account, owner/authorized user name, and address information for all the numbers you’d like to port.
    • The last 4 digits of SSN (seems to now be required by Twilio / telephony provider to prevent abuse).

  • Read the most common reason for rejections to avoid them.

Be sure to configure each phone number, particularly your voice URL, messaging URL, and/or SIP trunk, so that the phone numbers are ready in advance of the porting date.

    • You can configure your numbers at any point of the porting process.
    • Find the numbers in Port In Request or Active Numbers to configure your numbers.
Step 2 – Number gets approved by Twilio
  • If everything in Step 1 was done correctly, you can expect your porting request to be approved in 24 hours.
  • Again, depending on the type of number you are porting (for example, Toll Free or Landline), the approval time may vary.
Step 3 – Number is submitted to Carrier Partner
  • This can take up to 24 hours.
  • Your request is then submitted to your soon-to-be former carrier as a port request.
  • During this time, do not close your account with your carrier and keep your numbers active.
Step 4 – Carrier Partner reaches out to Losing Carrier

This can take one (1) week to complete.

Step 5 – Response from carrier

At this point, your request will either be approved or rejected:

  • Approved:
    • If approved, then you will receive a porting date of when your number will be ported to aNinja.
  • Rejection: These occur for a variety of reasons such as
    • An incorrect PIN for an account
    • An address or zip code that doesn’t match the current carrier’s record
    • A port request that’s made by an unauthorized user on the account.
    • Read more about common reasons for port request rejections here.
    • Additionally, you will need to reach out to your losing carrier to find out what’s needed to move forward. Depending on the needs of the carrier, this will add an undetermined amount of time to your porting request.
Step 6 – aNinja reaches out to you with your porting date
  • aNinja will send you an email with your porting date for when your number will be transferred to aNinja.
  • Once your date has passed and you’ve verified the number has transferred to your aNinja, you can begin using your number.
  • Note that SMS can take up to 2 business days after the porting date to be activated as all carriers must update their routing records. Until carriers have updated their routing records, the number will not be SMS enabled.

Adding a Phone Number to aNinja

In order to send SMS and make calls in aNinja, you need to have a phone number. You can either add a phone number to aNinja, or port your phone number.

Adding a phone number to aNinja

  • Log in to your account
  • On the left sidebar, click on Settings > Phone Numbers
  • Click Add Phone Number
  • Select any Available number or choose the State / ProvinceAdding a Phone Number to aNinja
  • Click on OK to confirm the purchase.

Note: If you didn’t find a phone number in the area code you want, you would want to consider “overlay area codes“.

aNinja Call Forwarding

When you’re out of reach, you might want to consider call forwarding to forward your incoming calls to an available phone number in aNinja.

Call forwarding with aNinja

  • On the top right of your login, click on the name dropdown > Profile
  • You can also access your profile from Settings > Users > click the edit pen next to your name.
  • Go to Calls
  • And toggle the Call Forwarding On/OffaNinja Call Forwarding
  • Enter the phone number that you want to forward the calls to
  • And hit Update
  • As a result, the call forwarding has now been configured!

Call forwarding info in the Lead view

The recordings of the forwarded calls are saved in the lead view with the note “Forwarded”.

If the number is busy or the call was canceled, it is saved as a missed-call.

The Voicemail or completed calls are saved as completed call + recording.

In the case of forwarded calls, voicemails appear as completed calls.

Call Forwarding info in Settings

We’ve also displayed the call forwarding info in Settings > Phone Numbers.

Forwarding message alert

The receiving number receives a “forwarding message alert” when he answers calls coming from the forwarded number.

It’s enabled by default in your Settings. However, you can choose to skip this forwarding message alert.

  • In Settings > Global Settings, un-toggle the checkbox:

“Include “aNinja Incoming call” on aNinja call forwarding”

MMS messages

MMS stands for ‘multimedia messaging service’. It was built using the same technology as SMS (short message service) text messages.

While SMS was built to send short messages, MMS focuses on sending multimedia messages.

Some of the rich content types which can be sent include phone contacts, audio and video files, and images.

Types of MMS messages

  • Audio files
  • Video files
  • Images

Sending MMS through aNinja

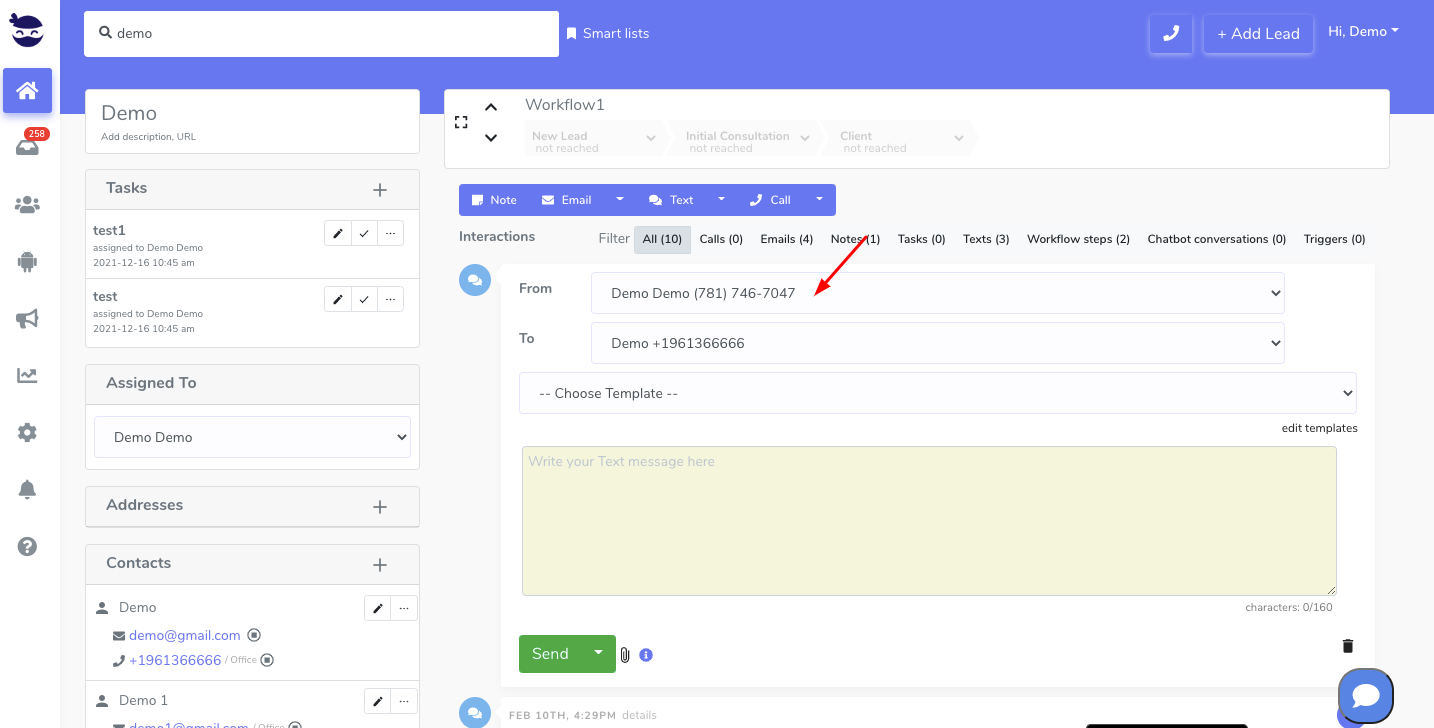
  • Search for your lead
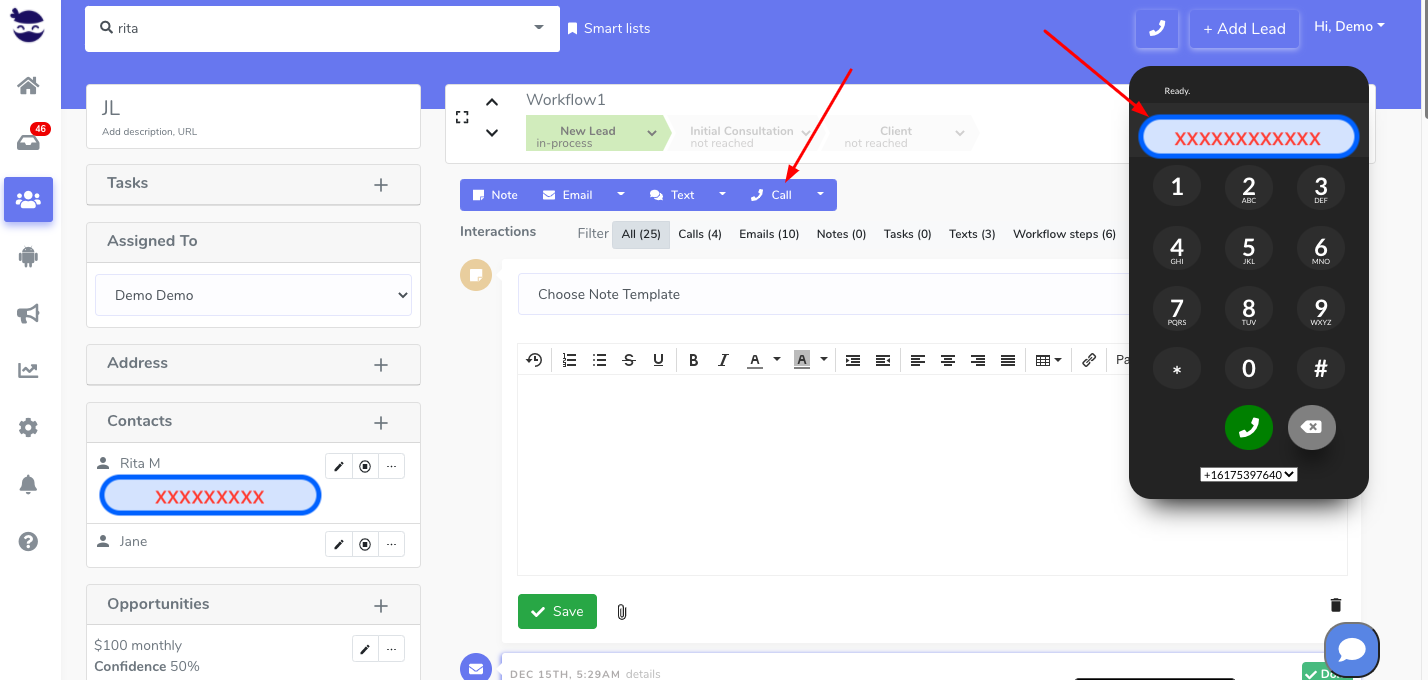
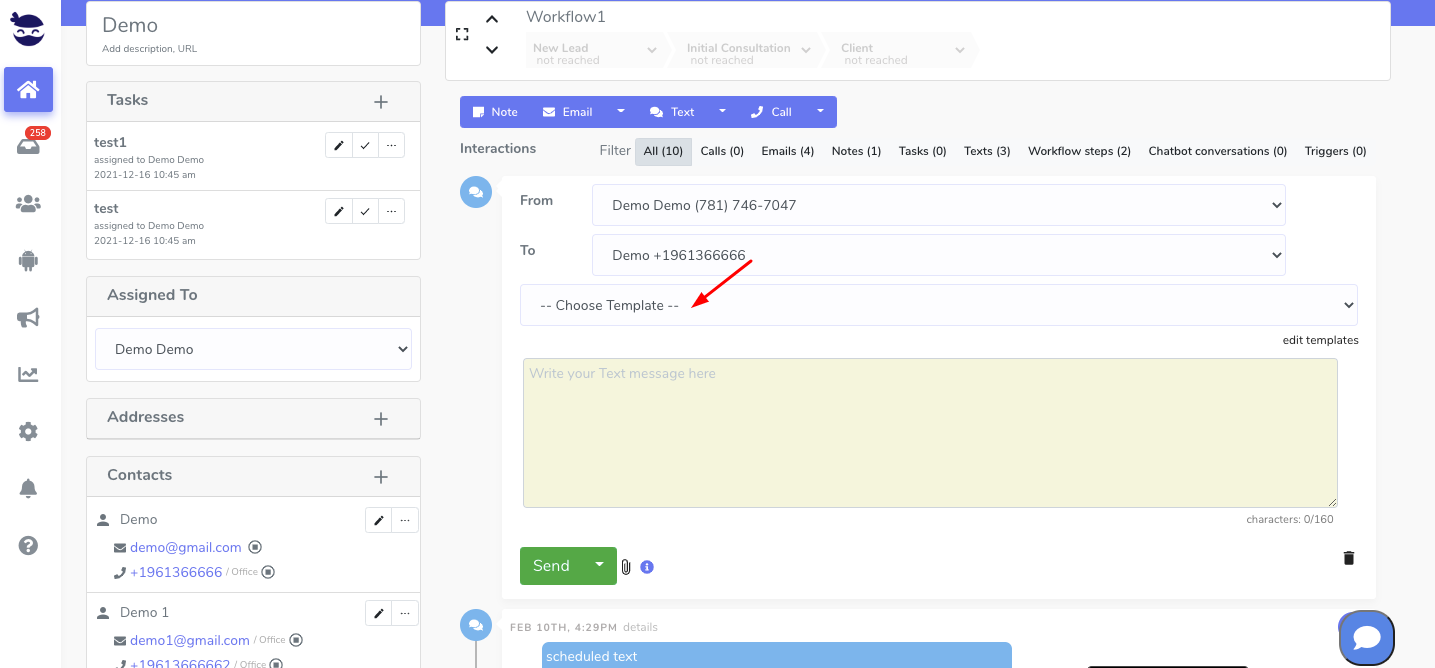
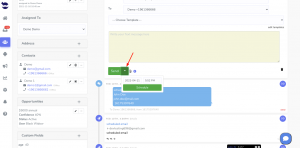
  • When on a lead View, click on Text in the toolbar
  • Your phone number is automatically injected next to “From”.
    • If you’re an Admin user, from the dropdown, you can choose the phone number you want to send the text through.

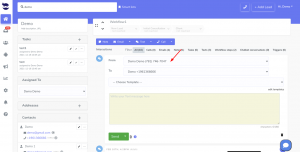
  • The primary phone number is also automatically injected next to “To”.
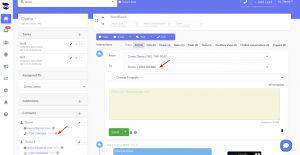
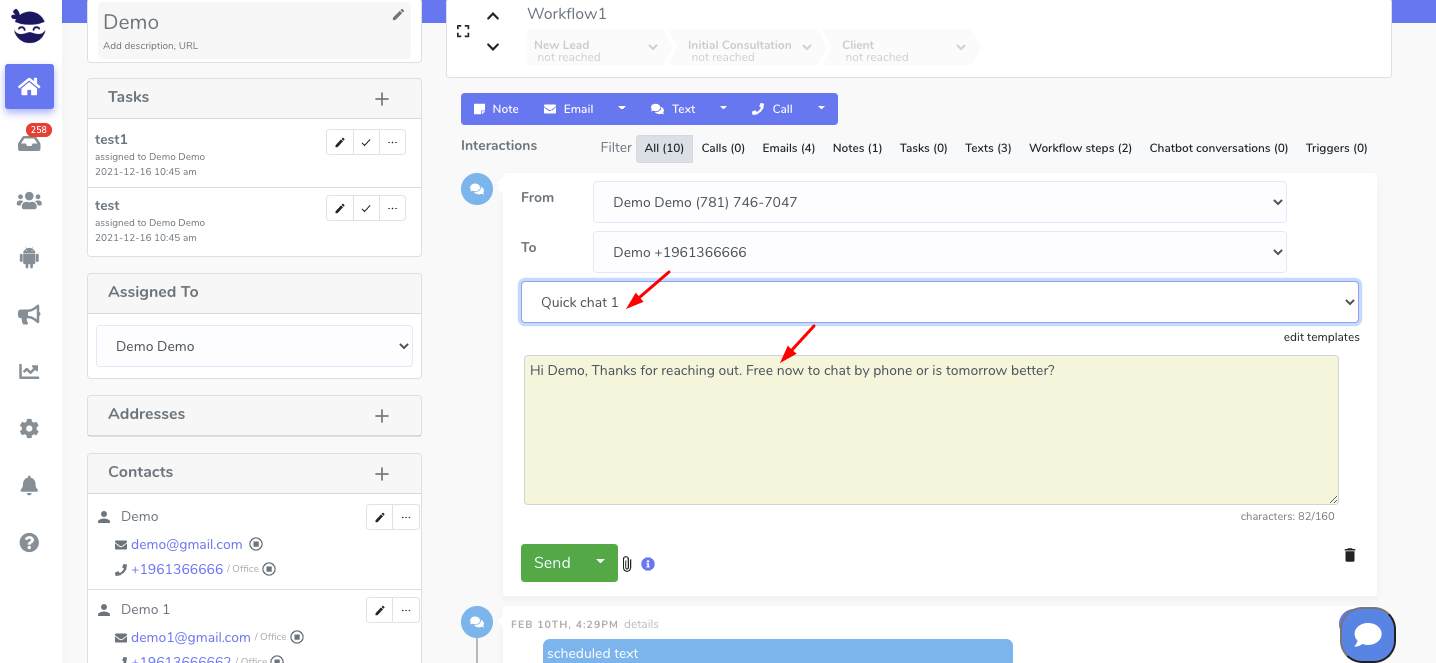
  • You can either select an available template
    • Then, the content of the template is injected into the body section. And the media file saved in the template is attached to it.
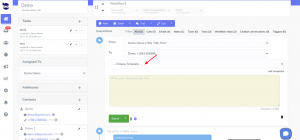
  • Or, you can manually type the message in the body section.
  • Click on the attachment icon and select a file
    • Supported file formats (jpeg, png, and gif)
    • Check the “Supported media types” below.
  • Before you send your text, you want to make sure that the total message size is under the maximum size limit for the channel.
    • Check the “Attachment Limits” section below.
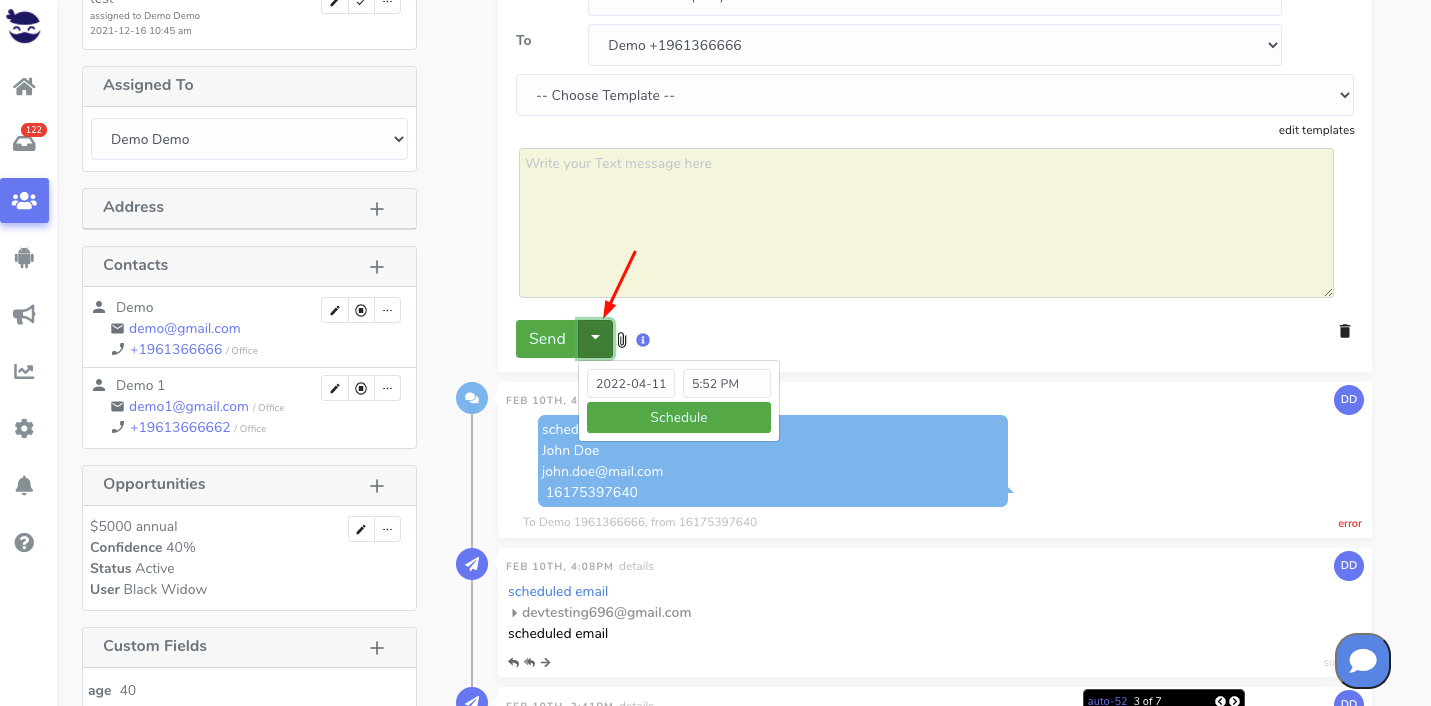
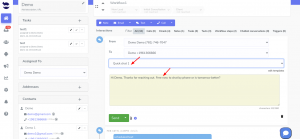
  • Click Send to send your text immediately,
  • Or, click on the arrow next to send to schedule to a later date and time.
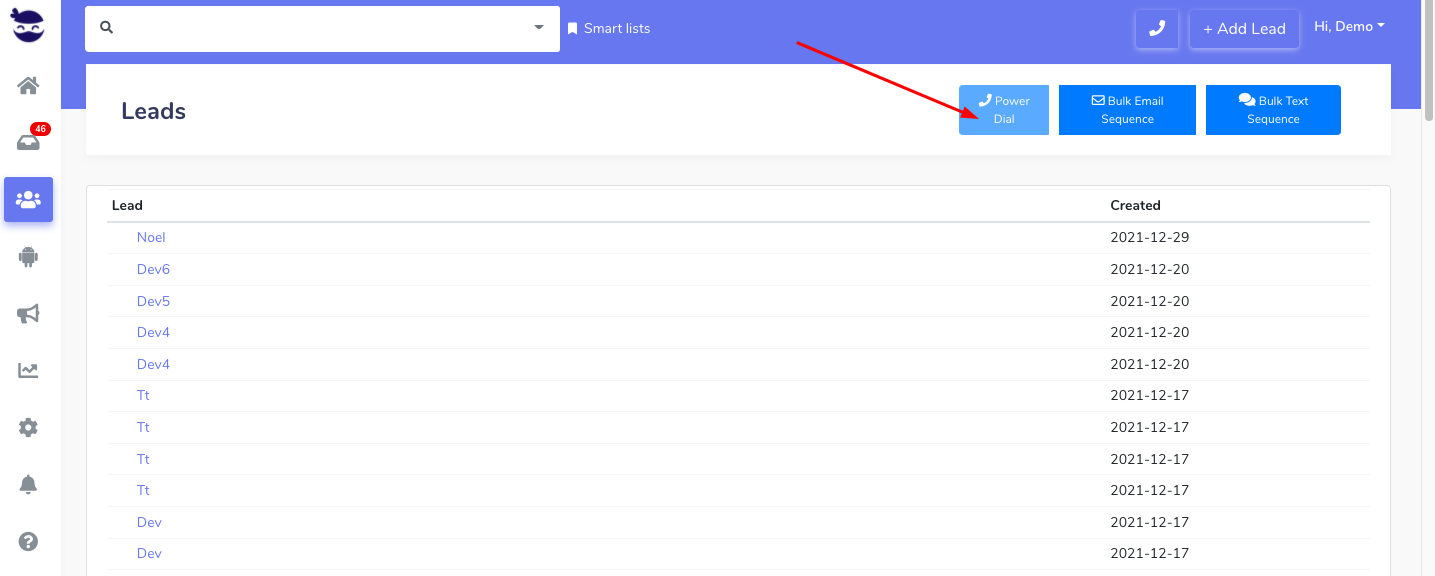
  • An MMS can also be sent in bulk text sequences. Attach the media file to the template and use it in the sequences.

Note!

Make sure to include content in your template before saving it, not only attachment(s). Otherwise, when attaching it to a text sequence, it will not be launched.

Supported Media Types

Different carriers support different types of media, regardless of the media types allowed in aNinja.

When you send an MMS, the telephone carrier checks the content-type header at the provided MediaURL to validate the content type of the media file. If the content type header does not match that of the media file, the request will be rejected.

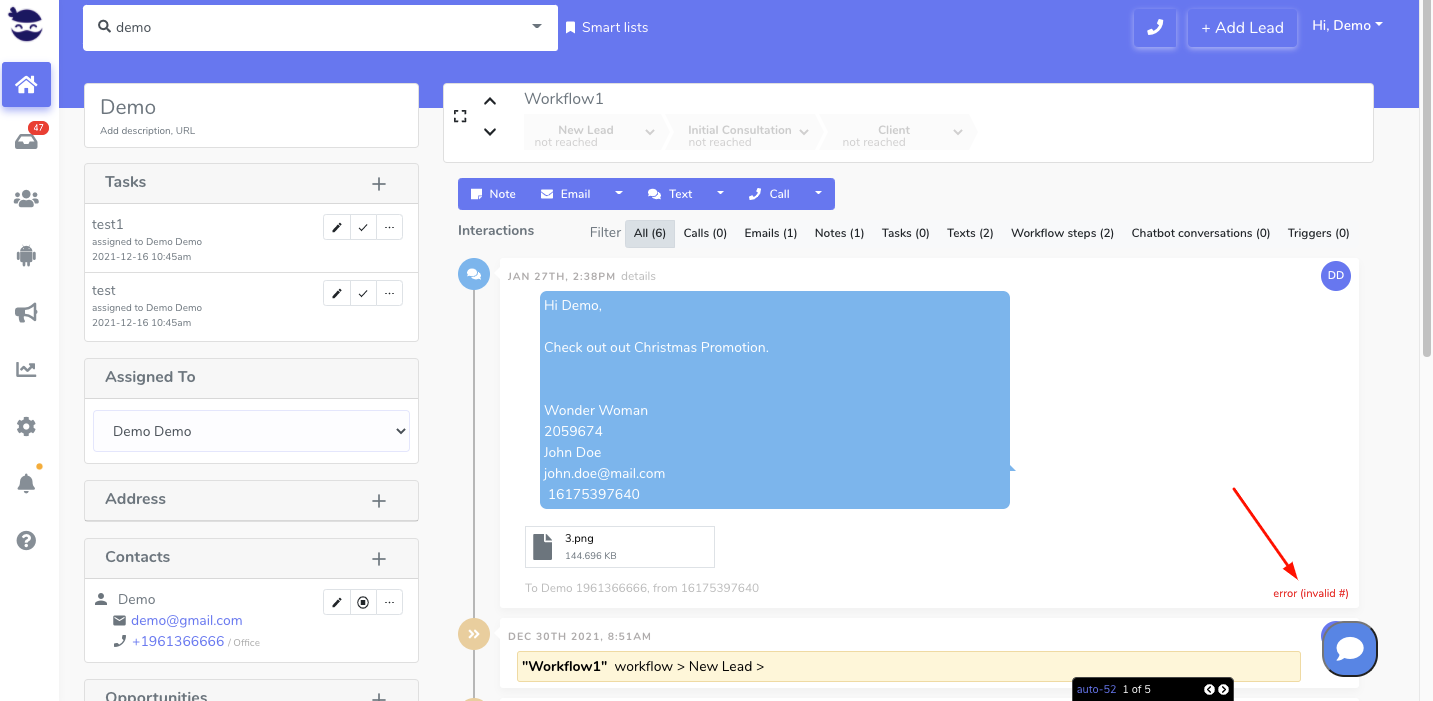
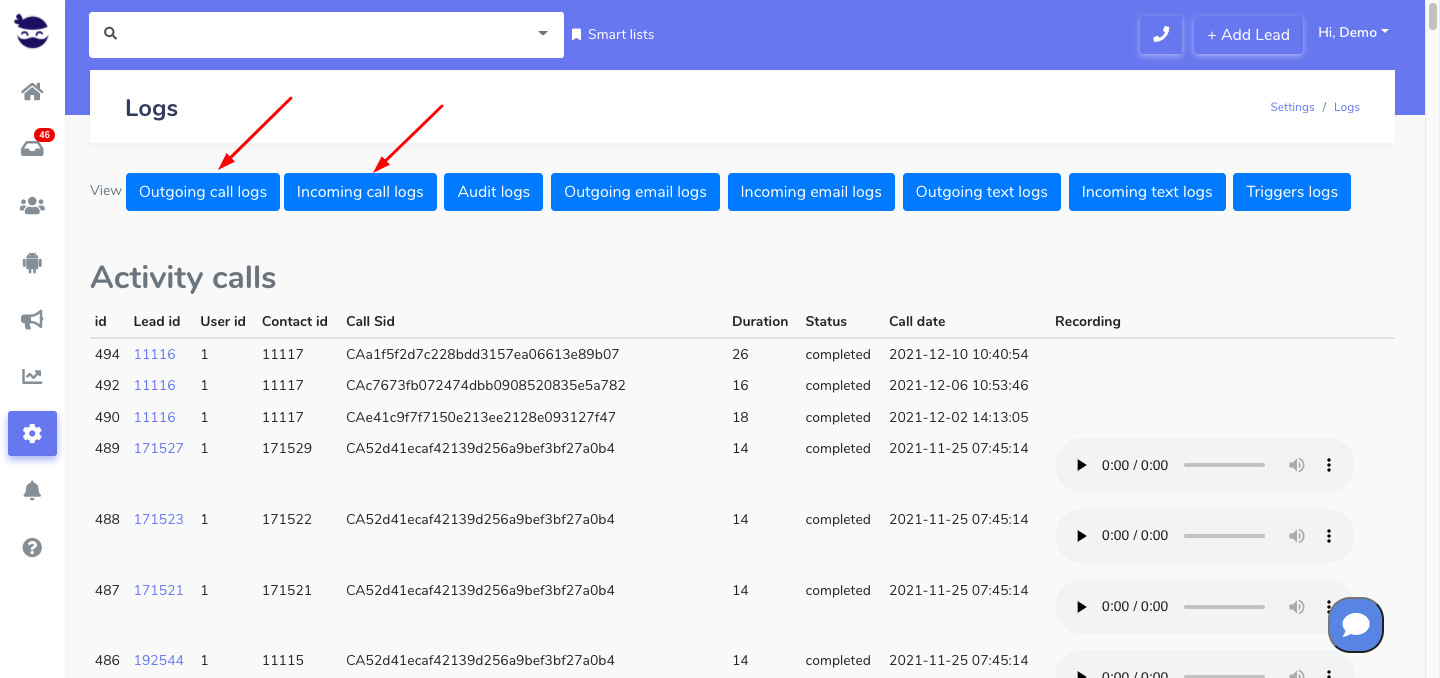
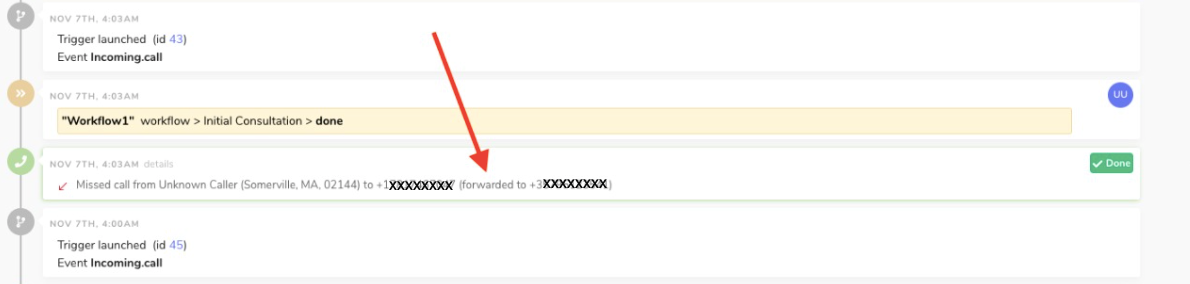
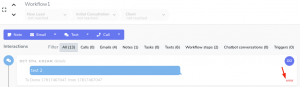
You can check the status of the MMS in the lead view, on the bottom right of the message. Hover your mouse over the error to see the message provided by the carrier. Some carriers don’t provide error messages.

The following types of content are fully supported. This content will be formatted for delivery on destination devices.

  • image/jpeg
  • image/jpg
  • image/gif
  • image/png


The following types of content are accepted. Requests will not be rejected, but the content will not be modified for device compatibility.

Audio
  • audio/basic
  • audio/L24
  • audio/mp4
  • audio/mpeg
  • audio/ogg
  • audio/vnd.rn-realaudio
  • audio/vnd.wave
  • audio/3gpp
  • audio/3gpp2
  • audio/ac3
  • audio/webm
  • audio/amr-nb
  • audio/amr
Video
  • video/mpeg
  • video/mp4
  • video/quicktime
  • video/webm
  • video/3gpp
  • video/3gpp2
  • video/3gpp-tt
  • video/H261
  • video/H263
  • video/H263-1998
  • video/H263-2000
  • video/H264
Image
  • image/bmp
  • image/tiff
Text
  • text/vcard
  • text/x-vcard
  • text/csv
  • text/rtf
  • text/richtext
  • text/calendar
  • text/directory
Application
  • application/pdf
  • application/vcard
  • application/vnd.apple.pkpass

Most of the phone carriers support image file attachments in one of the supported file formats (jpeg, png, and gif) and they might not support these types (PDF, BMP, MPEG, MP4, Quicktime, and 3GPP).

Message encoding

Text messages, also known as SMS, are encoded by the carriers in different formats to represent the characters and special characters used in the message.

The default encoding used in SMS is GSM-7, which consumes fewer segments, making it more cost-effective.

However, if the text content includes special characters like emojis or backticks, a different encoding called UCS-2 is used; which consumes more segments, approximately double the amount of GSM-7.

When it comes to MMS, the encoding used can vary depending on the content of the text. It can be either GSM-7 or UCS-2, depending on whether special characters are included in the message or not.

Attachment Limits

When sending text and pictures in the same message (MMS messaging), a message can contain up to 10 images and 1600 characters.

Through aNinja, you can send an MMS of 600KB. If your message (including body text and media) is larger than 600KB, your message request will fail to send.

In aNinja, we have reduced the size of the MMS to 600KB to increase the chances of deliverability. As the top US carriers have recently reduced their allows MMS sizes as follows:

Carrier Short code MMS attachment size
AT&T 600 KB <—- ideal size
Sprint 1400 KB
T-mobile 1000 KB
Verizon 1200 KB

So you want to provide a shorter video that is ideally < 600KB if you want to reach all the targeted audience.

Our carrier automatically compresses JPEG, PNG, or GIF files to reduce their size if they exceed certain thresholds, to help you fit more images on your message when needed.

Hence, there will not be any additional charges applied for the message body. It will be included in the MMS cost.

If your media is not an image file and is larger than the limit allowed by the destination carrier, your MMS message will fail.

You can always compress the size of your media file using tools online.

Lastly, we recommend hosting your media file on your website or a file hosting service and adding the link to download it in your template or text call to action.