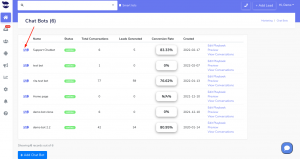
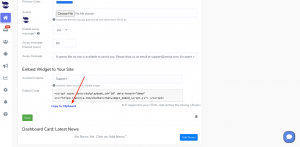
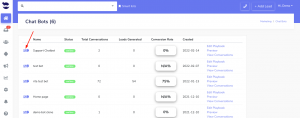
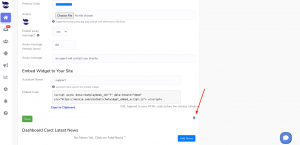
Find your aNinja Chatbot embed code

Now that you’ve created the chatbot playbook, you want to embed it on your website so it starts assisting your website visitors, and collecting leads. Find your aNinja Chatbot embed code that is required to embed your aNinja chatbot on your website.

Find your Chatbot Embed Code

Adding aNinja Chatbot to your Website

Before adding aNinja Chatbot to your Website, you want to create the playbook steps in your install and find the embed code.

Adding aNinja Chatbot embed code to your Website

  • Find your aNinja Chatbot embed codeAdding aNinja Chatbot to your Website
  • Add the Javascript embed code to your website for the aNinja chatbot to start loading on the page.
  • This Javascript snippet will automatically load the chatbot widget onto your site when your website pages load.

Where to add the Chatbot embed code

  • Typically you want to add this code in the HTML section before the closing body tag of your HTML code or layout.
  • If you’re not familiar with basic HTML at all, feel free to contact us for additional support at support@aninja.com.

Chatbot embed on websites

Additionally, you can also look at the Websites-specific information:

WordPress Websites

Wix Websites

Squarespace Websites

Ueni websites

Godaddy Websites

What’s next

  • Once you’ve successfully added the chatbot embed code script to your website, your defined chatbot playbook should start loading on page visits!
  • You’ll also be able to see stats on how the chatbot is performing in your aNinja install.

Where do the Chatbot Conversations appear in aNinja

Now that you’ve added your Chatbot to your website, as a result, after every chatbot conversation, a new lead is created into your aNinja account with the lead data captured in the conversation.

If the lead closed the chatbot conversation before your reply, your message will appear in a bubble next to the chatbot on the website:
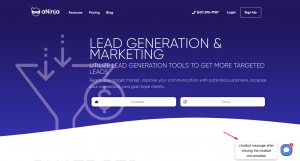
You can see these conversations:

  • In your inbox. Just select “Chatbot” from the All types drop down.
  • And in your Dashboard widget “Chatbot Conversations”. If you can’t see this widget, just enable it from the little gear on the top right of the dashboard.

Chatbot behavior

The chatbot pop-up gets triggered only for the first user visit to your site. It doesn’t automatically re-pop up on their subsequent visits, mainly because it gets annoying for repeat users. However, they can see that it’s in the bottom right section.

We can customize the below Chatbot behaviors:

  • Exposing the Chatbot initial greeting on every visit
  • Hiding the initial greeting message on page load
  • Delay showing the Chatbot widget for a number of seconds
  • Customizing widget container style to fit on the load page

Send us your request to support@aninja.com and we will implement the changes for you.


Removing aNinja chatbot from your website

The aNinja Chatbot loads on your site because you (or your web developer) added a piece of code on your website that loads it.

Removing aNinja chatbot from your website requires deleting the chatbot from your aNinja install and removing the embed code from your Website.

Find the code in aNinja

<script async data-chatplaybook_id=”1″ data-tenant=”YOUR_TENANT_CODE” src=”https://aninja.com/chatbot/chatwidget_embed_script.js”> </script>

  • Or you can find the chatbot embed code on your website.

Removing aNinja chatbot from your website

  • If you no longer want Chatbot on your website, you should simply remove the piece of code.
  • If you still have access to your aNinja account, you can find the code by looking here:
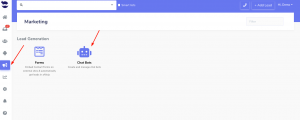
    • On the left sidebar > Marketing > Chatbot
    • Click on the edit pen next to the chatbot name
    • Once you’ve removed that code from your website, simply hit delete to also delete the chatbot and its playbook in aNinja.Removing aNinja chatbot from a website

Adding aNinja Chatbot to your WordPress website

No matter whether you’re a growing company or a market leader, aNinja Chatbot helps you communicate better with customers and push your business forward. Adding aNinja Chatbot to your WordPress Website can be done by using a simple Javascript code.

Adding aNinja Chatbot to your WordPress website

For the WordPress websites:

If you can’t see the Headers and Footers plugin in Settings, you just want to install the “insert-headers-and-footers” plugin directory that allows the plugin to appear in Settings.

Where do the Chatbot Conversations appear in aNinja

Now that you’ve added your Chatbot to your website, as a result, after every chatbot conversation, a new lead is created into your aNinja account with the info captured in the conversation.

If the lead closed the chatbot conversation before your reply, your message will appear in a bubble next to the chatbot on the website:

You can see these conversations:

  • In your inbox. Just select “Chatbot” from the All types dropdown.
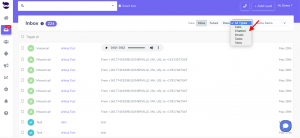
  • And in your Dashboard widget “Chatbot Conversations”. If you can’t see this widget, just enable it from the little gear on the top right of the dashboard.

Chatbot behavior

The chatbot pop-up gets triggered only for the first user visit to your site. It doesn’t automatically re-pop up on their subsequent visits, mainly because it gets annoying for repeat users. However, they can see that it’s in the bottom right section.

We can customize the following Chatbot behaviors:

  • Exposing the Chatbot initial greeting on every visit
  • Hiding the initial greeting message on page load
  • Delay showing the Chatbot widget for a number of seconds
  • Customizing widget container style to fit on the load page

Send us your request to support@aninja.com and we will implement the changes for you.
Embedding aNinja Form on Godaddy page

Embedding aNinja Form on Godaddy page creates a lead into your aNinja account with every form submission.

In this article, we’re going to show you how you can embed the aNinja form on your Godaddy page.

Embedding aNinja Lead Form on Godaddy page

  • Choose the website you want to edit in your GoDaddy account.
  • Choose the Page (or add a new page) where you want to add an aNinja Lead Form in the right-side panel of the Godaddy Website builder.
  • Click “Add Section” to add a new section to your Godaddy page, and choose “HTML” in the section types.
  • Paste the aNinja Lead Form code in the “Custom code” box in the Godaddy section sidebar.
  • Hit Preview then publish.
  • Your integration between aNinja Lead forms and GoDaddy is now complete.

Where does the imported data appear

After the integration, you can search your aNinja CRM for the imported leads. You can also search for any custom field, opportunities, and any other info that is collected from the forms.

  • Lead’s contacts appear in the leads contact section in the lead view
  • Opportunities also appear in the opportunity section in the lead view
  • The company’s info appears on the top left of the lead view, in the Company section.
  • Custom fields appear in the custom field section of the lead view
  • Lead Search is a field that also appears in the bottom left of the lead view. Specifically, these are info/links on the lead or the organization found in Google search.

Need help? Leave us an email at support@aninja.com. We’re more than happy to assist you.