Creating Leads in aNinja

In aNinja, creating leads can be done in several ways.

A growing database of leads means more potential engagement. So import your leads from different sources and keep them engaged with newsletters and product or service updates.

Creating leads in aNinja

In aNinja, you can create leads in multiple ways:

  1. Manually one at a time.
  2. Importing Leads in Bulk using CSV file.
  3. Third-party Integration using aNinja API (including Chatbot conversations, form submissions, and website integration).
  4. Importing leads from your Phone Contacts.
  5. Importing leads from your Gmail account.
  6. Creating leads using BCC email address.
  7. Generating a lead from incoming SMS.

1- Creating Leads manually

  • First, log in to your aNinja account.
  • Then, on the top right, click on + add lead

2- Importing leads from a CSV file

Another way to add leads to your aNinja account is importing contacts in a CSV or XLSX file directly to your aNinja account.

3- Third-party integration using aNinja API

In simple words, API is a set of functions that allow applications to interact with each other by exchanging data.

Basically, you can forward leads from your different marketplaces into your aNinja app using API.

  • Here, you need your aNinja API key for the integration.
  • After the integration, you start receiving leads in your aNinja account from the different integration channels, including Chatbot conversations, Form submissions, and website integration.

4- Importing contacts from your Gmail account

Importing contacts from your Gmail account is another way to expand your leads database.

5- Importing your Phone contacts

You can also get your phone contacts to your aNinja account.

6- Creating new leads using BCC email

By BCC’ing your private BCC email address, the system automatically creates new leads from the recipients.

After all, you want to get all your leads into one place to target them with your sales and marketing strategies.

7- Generating a lead from incoming SMS

This is a basic function in aNinja that generates a lead from an incoming SMS, if the phone number is not already saved in the system.

However, this practice is not available for incoming emails. So if the sender’s email is not saved in your system, you will not be able to see the email in aNinja. But it still shows in your email client (Gmail, Outlook, etc…).

Search for more help articles in aNinja Knowledge base.

Or reach us at support@aninja.com. Our support team will happily assist you.
Marking a lead as “Do Not Contact”

When you don’t intend to message a certain lead, you can mark them as “Do Not Contact”.

Moreover, through triggers, you can stop emails or texts sequences for this lead separately.

Marking a lead’s contact as “do not contact”

To mark a lead as “do not contact”,

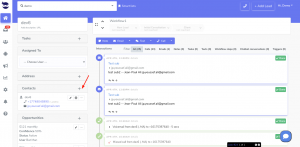
  • Go to the lead View, on the left side, click on the plus sign (+) next to Contacts.

  • Push the Stop next to a contact item to activate the “do not contact”.
    • e.g. If you want to stop sending texts to a certain lead, just click on the stop button next to the phone number(s).
    • If you want to stop sending emails and texts to a certain lead, click on the stop button next to all contact items (emails and phone numbers).

mark lead as "do not contact"

  • Once the “do not contact” button turns red, all automatic messages (emails or texts based on your selection) will be automatically blocked for this lead.
  • You can still however manually contact the lead through email from the lead view.
  • If you’re replying to a lead’s text after being marked as do not contact, it will show you “no contact” in the phone number section.
  • Regarding the leads that were added to the “do not contact” list; they do get included in the bulk sequences but their texts get blocked by aNinja so it doesn’t get actually sent.
    You can check them by clicking on the blocked leads count in ‘Bulk Sequences’ widget.
  • Adding a lead’s contact to the “do not contact” list”, can be automatically executed through Triggers, based on an event that verifies the trigger’s condition.
  • You can manage the contacts saved in the “Do Not Contact List” in Settings > Do Not Contact Lists (view, remove from the do not contact list, and export as CSV).

Using aNinja Template Variables

All Email templates, text templates, and note templates created in aNinja, support variables. Using aNinja template variables allows for the automatic replacement of the contact’s name, for example in the outgoing email, text, or note.

In this article, we show you how to use the variables and what are the available variables in aNinja.

What are template variables

Variable allows for the automatic replacement of a field, e.g. the contact name, in the outgoing email, text, or note. Allowing you to customize an outgoing message so that it says 

Hi John,

instead of just

Hi.

Injecting a variable in a template

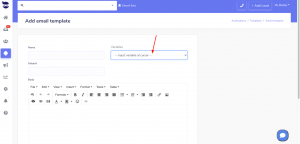
  • When you’re editing your email/text/note template, you see the “Variables” dropdown.
  • Select an available variable, and it’ll automatically inject into the text area of your template.
  • You can notice that variables are represented with 2 curly braces around them, for example:

For example:

Hi {{Contact.name}}, this is {{User.firstname}} from {{Organization.name}}

will show for the recipient in an outgoing email/template/note:

Hi John Doe, this is Rita from aNinja

You can use the dropdown to automatically inject the variable you need at your cursor when editing templates.

Make sure to position the cursor in the template text area where you want to inject the variable.

What are the available variables

To see the list of available variables, simply click on the variables dropdown. 

  • User variables refer to the system users – that is your accounts.
    • They are usually prefixed with User. or Organization.  e.g. User.firstname, or Organization.name, Organization.address. And emailaccountsignature
  • Contact related variables have to do with a lead’s contact in the Lead View.
    • They are usually prefixed with Lead. or Contact. e.g. Lead.name (is the lead company name), Lead.address.street, Lead.address.full_formatted. Also Contact.title, Contact.name.
  • Another template variable is Unsubscribe link which is a link that allows leads to opt out from your outgoing automations.
  • Lastly, any custom field saved in your account. These variables start with Custom. e.g. Custom.Source

Need help using aNinja template variables? Just leave us an email at support@aninja.com. And we will happily assist you!