Duplicate Data Cleanup

Sometimes duplicate data is useful, sometimes it just makes it harder to understand your data. Perform a duplicate Data Cleanup more often to merge the relevant duplications as you don’t want to send multiple emails / texts to the same lead.

Using Data Clean-up

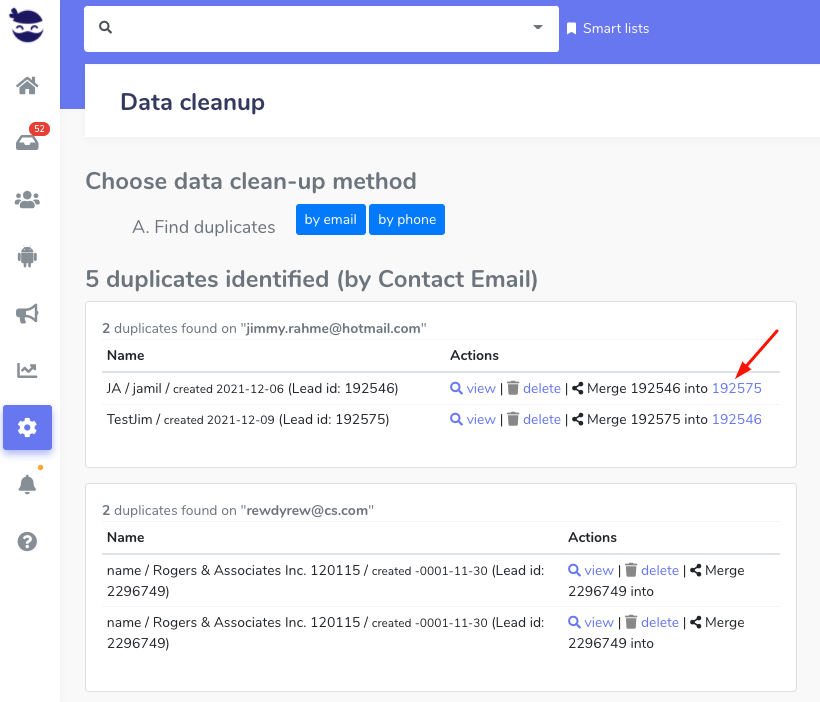
Use the data clean-up to find and highlight duplicate data. That way you can review the duplicates and decide if you want to merge them.

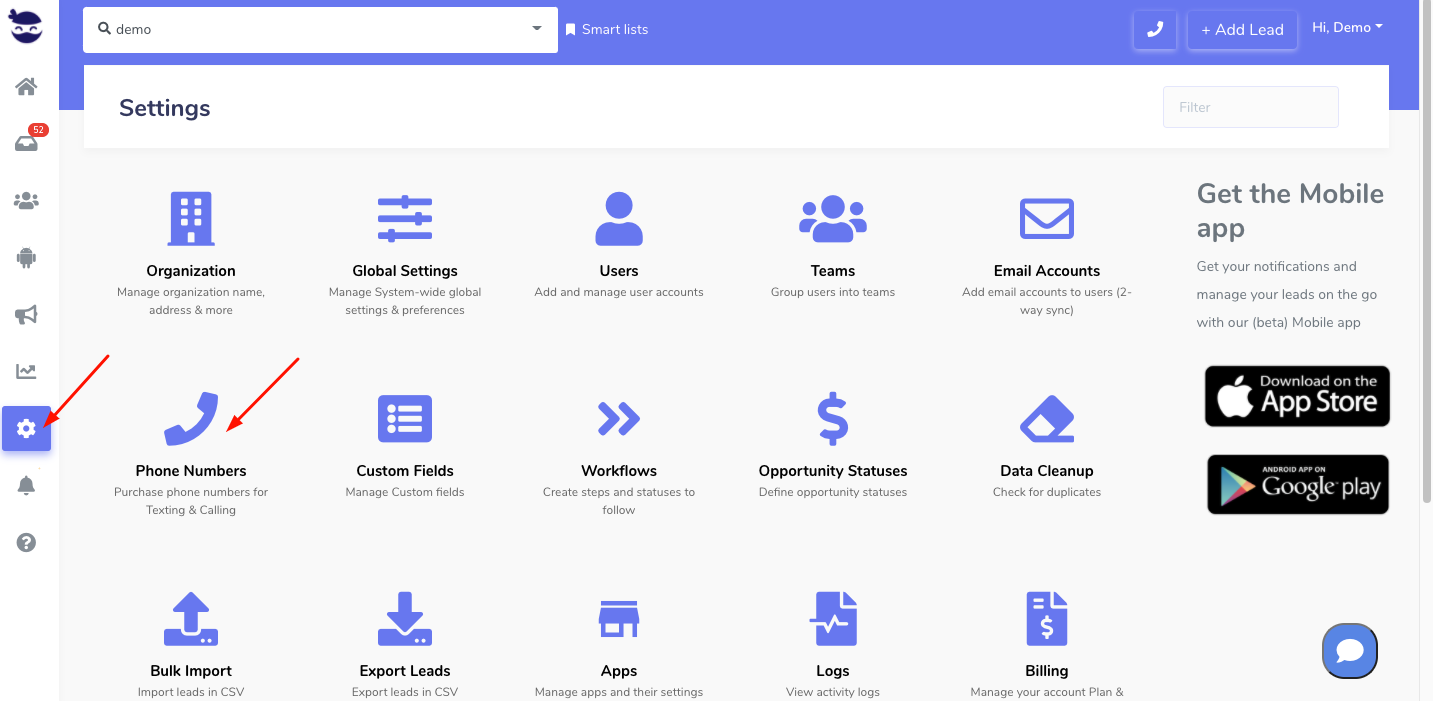
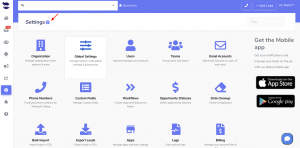
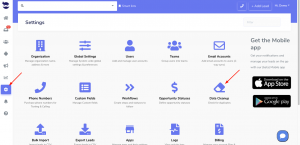
  • In the left sidebar, click on Settings > Data Clean-up
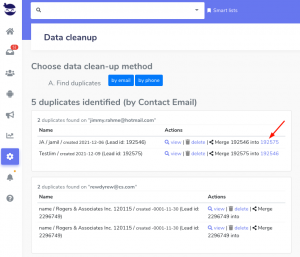
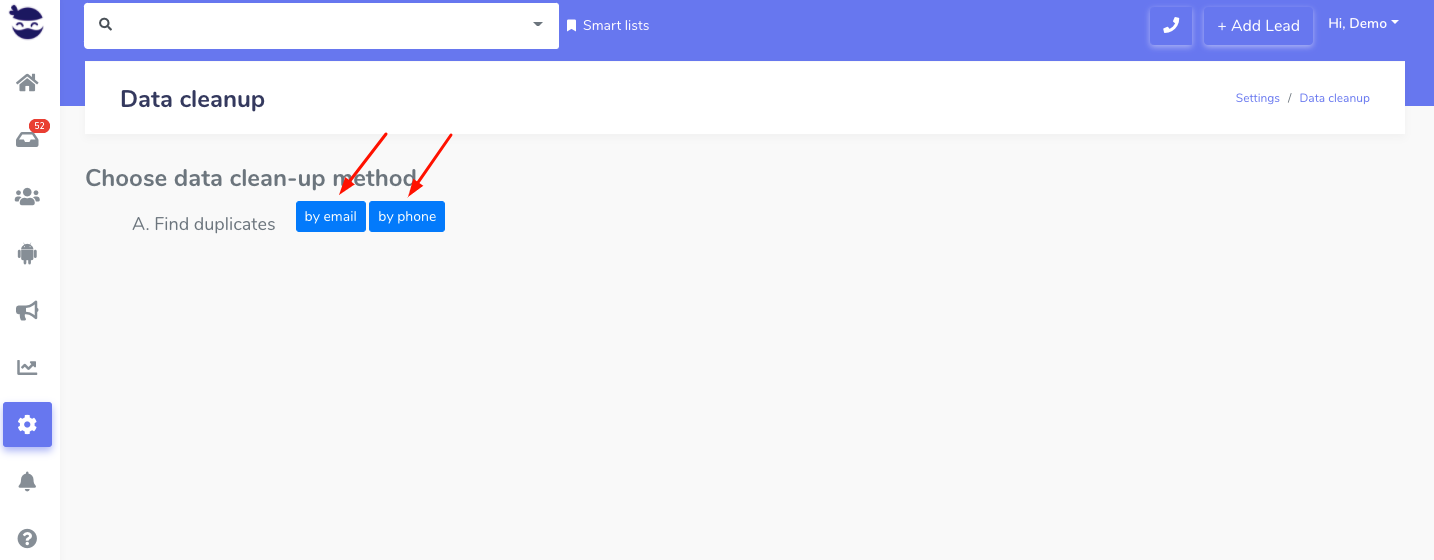
  • Choose to see the duplicates based on Email Or Phone
  • Merge the duplicates in a single lead

Adding a Phone Number to aNinja

In order to send SMS and make calls in aNinja, you need to have a phone number. You can either add a phone number to aNinja, or port your phone number.

Adding a phone number to aNinja

  • Log in to your account
  • On the left sidebar, click on Settings > Phone Numbers
  • Click Add Phone Number
  • Select any Available number or choose the State / ProvinceAdding a Phone Number to aNinja
  • Click on OK to confirm the purchase.

Note: If you didn’t find a phone number in the area code you want, you would want to consider “overlay area codes“.

aNinja Text Forwarding

When you are out of reach, you might want to use text forwarding to forward your aNinja texts to an available phone number.

Text forwarding with aNinja

  • On the top right of your login, click on your Profile
  • Go to Texting
  • And turn the Text Forwarding On/OffaNinja Text Forwarding
  • Text forwarding in aNinja has now been configured!

aNinja Call Forwarding

When you’re out of reach, you might want to consider call forwarding to forward your incoming calls to an available phone number in aNinja.

Call forwarding with aNinja

  • On the top right of your login, click on the name dropdown > Profile
  • You can also access your profile from Settings > Users > click the edit pen next to your name.
  • Go to Calls
  • And toggle the Call Forwarding On/OffaNinja Call Forwarding
  • Enter the phone number that you want to forward the calls to
  • And hit Update
  • As a result, the call forwarding has now been configured!

Call forwarding info in the Lead view

The recordings of the forwarded calls are saved in the lead view with the note “Forwarded”.

If the number is busy or the call was canceled, it is saved as a missed-call.

The Voicemail or completed calls are saved as completed call + recording.

In the case of forwarded calls, voicemails appear as completed calls.

Call Forwarding info in Settings

We’ve also displayed the call forwarding info in Settings > Phone Numbers.

Forwarding message alert

The receiving number receives a “forwarding message alert” when he answers calls coming from the forwarded number.

It’s enabled by default in your Settings. However, you can choose to skip this forwarding message alert.

  • In Settings > Global Settings, un-toggle the checkbox:

“Include “aNinja Incoming call” on aNinja call forwarding”

Integrating Gravity Forms with aNinja

Gravity Forms is an easy to use form-building plugin. When integrating Gravity Forms with aNinja, the collected information will be pushed to your aNinja account creating a new lead with every form submission.

Integrating Gravity forms with aNinja

  • Go to Add-Ons under Forms
  • Click on Webhooks under the form Settings
  • Click on Add New under Webhooks Feeds
  •  Here, we need to get your aNinja API key
  • Fill in the field values as provided in the screenshot below. Check the Fields mapping section below to map your form fields to the appropriate aNinja fields

  • In Feed Settings, under Request URL field put:

https://aninja.com/api/v1/contactform/?apikey=YOUR_API_KEY

    • Example:  https://aninja.com/api/v1/contactform/?apikey=sample123-6yauyue5e
  • Click Update Settings
  • Your integration between Gravity forms and aNinja is now complete. And all form submissions will be injected into aNinja as new leads.

Fields mapping

Map the Data on the aNinja fields and Form fields

These are the default aNinja fields:

For the Custom Fields, just prefix the field name with “Custom.” e.g. Custom.Source

Where does the collected data appear

After the integration, you can search your aNinja CRM for the collected leads. You can also search for any custom field, opportunities, and any other info that you have collected from the form.

  • Lead’s contacts appear in the leads contact section in the lead view
  • Opportunities also appear in the opportunity section in the lead view
  • The company’s info appears on the top left of the lead view, in the Company section.
  • Custom fields appear in the custom field section of the lead view
  • Lead Search is a field that also appears in the bottom left of the lead view. Specifically, these are info/links on the lead or the organization found in Google search.

Lastly, have any specific questions? Please leave us an email at support@aninja.com. We will happily assist you!

Find Your aNinja API Key

aNinja API allows you to integrate your different marketplaces into your aNinja account. Find your private aNinja API key in your aNinja profile to use it for your integrations.

Find your aNinja API key

  • On the top left of your aNinja, click on your name dropdown and choose Profile.

  • Or from the left sidebar, click on Settings > Users
    • Click on the edit icon next to your name
  • Click on APIFind your aNinja API key
  • Here’s your private aNinja API key

aNinja Settings

Manage personal and system-wide settings to configure aNinja to work the way you want it to.


Overview 

  • You can access Settings by clicking on the gear icon in the left sidebar.
  • Also, you can directly access your personal account settings by clicking on the top-right drop-down next to your name when you are logged into aNinja.
  • Go ahead and click on the help (?) icon next to Settings. It will redirect you to a short youtube video to get an overview of the Settings.
  • Settings allow you to manage many aspects of aNinja. Feel free to explore the and reach out to us if you have any questions at support@aninja.com