Automated Texts time window

With the automated Texts time window, you can schedule your texts so that they arrive at the most optimal time.

If your audience didn’t respond to a sequence previously, it’s likely because the timing wasn’t right. Experiment with different timings to see what works best. Consider sending texts during the weekend or early morning, when people are more likely to check their phones.

Specifying the time window for sending out text messages

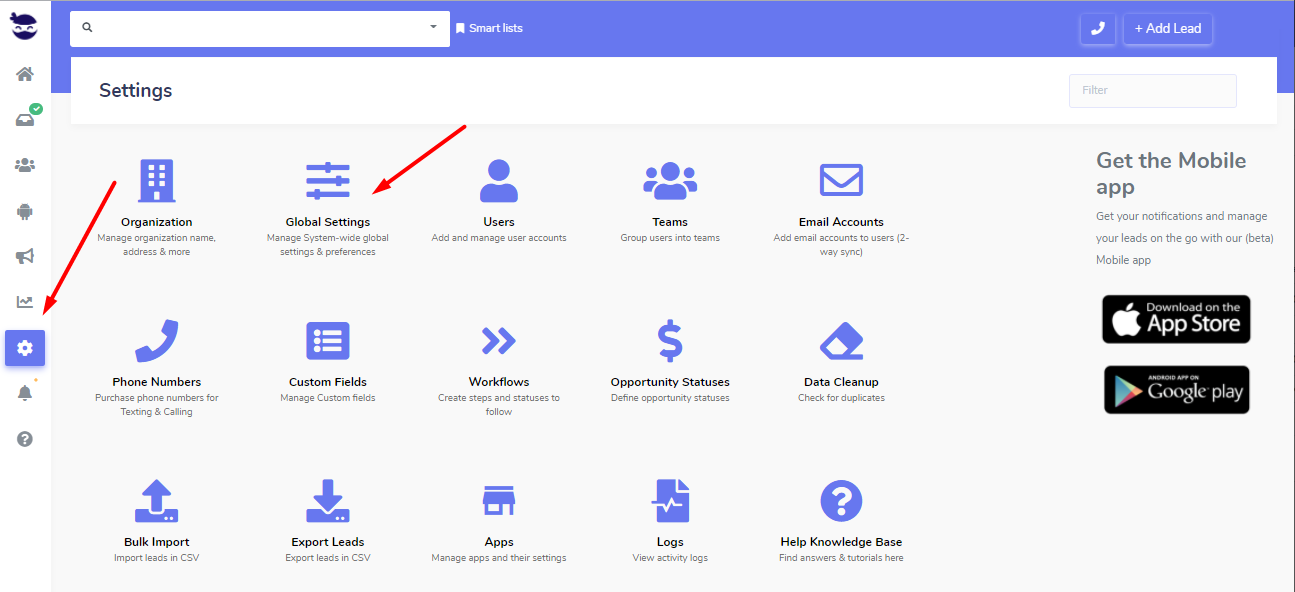
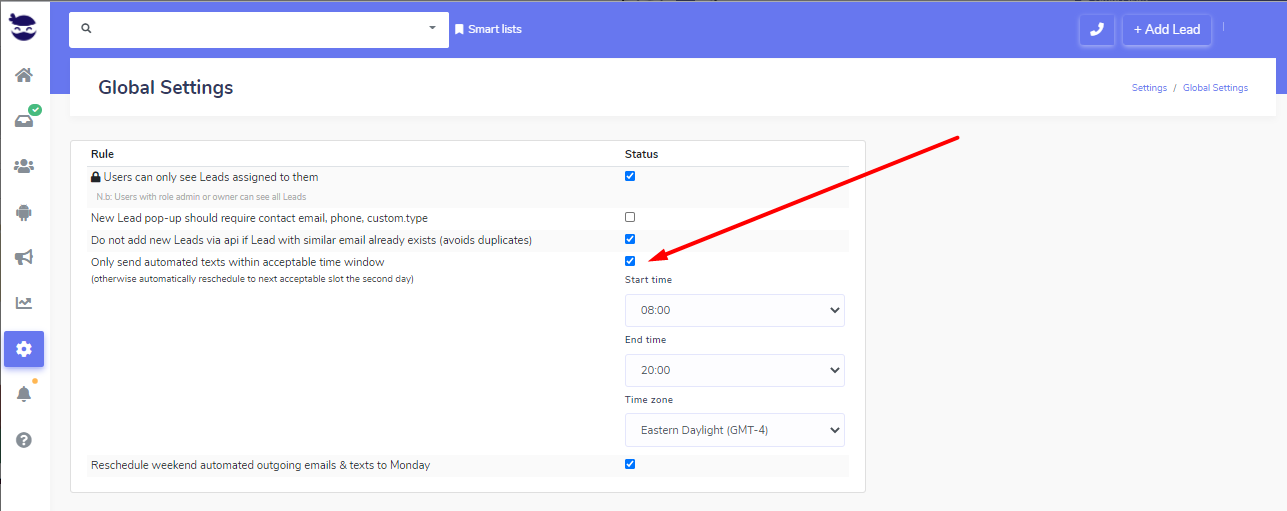
  • Enable the “Only send automated texts within acceptable time window”
  • And set the start / end / timezone accordingly.

Benefits of sending messages within an acceptable time window

Sending text messages within an acceptable time window has numerous benefits, including:

  1. Increased Open Rates: If you send messages outside of business hours or during times when people are unlikely to be looking at their phones, your messages are more likely to go unopened or unnoticed.
  2. Improved Response Rates: You’re more likely to receive a response from your recipients.
  3. Enhanced Engagement: You’ll build stronger connections with your audience.
  4. Increased Conversions: You ensure that your messages are being received and acted upon. And you’re more likely to convert recipients into customers.
  5. Better Customer Experience: You’ll provide a better overall customer experience. People appreciate messages that are sent at times when they are more likely to be available and receptive

Remove Calendly app

If you’ve added Calendly app in your aNinja, you can easily remove it from your aNinja account at any time.

Removing Calendly app

Here are the steps to follow to remove the Calendly app from  your aNinja account.

Remove Calendly app

Need help to remove the Calendly app? Leave us an email at support@aninja.com. We will happily assist you!

aNinja Custom Fields

aNinja Custom Fields allow you to add extra information to your lead’s contact. They can be created manually, or dynamically created via API-injected leads.

What is a Custom Field

A custom field is a personalized data field that you can create and define to store specific information in your aNinja account. It allows for customization and flexibility in capturing and organizing data according to unique requirements.

aNinja Custom fields allow you to augment your lead data with additional custom fields of different types.

Moreover, custom fields are searchable within the system and can be used to build smartlists and search for leads and execute a trigger action based on a custom field value changed event.

Types of Custom Fields

  • Text – For text input
    • e.g. Campaign, category, form name, etc…
  • Link – For fields with any link/URL
    • If you designate the type as “Link” here, it will render the URL value as a clickable link in the lead view.

  • Date – Date in different formats
    • Select “Date” or “Datetime” as the type, and indicate the desired date format for displaying the value in the lead view.
  • Dropdown – Fields with multiple options dropdown
    • Select “Dropdown” as the type, and indicate the desired values for displaying in the lead view. Type one value on each like and hit enter to enter the second value.
    • e.g. “Source” with the values “Facebook”, “LinkedIn”, “Twitter”, etc…

Manually adding a custom field

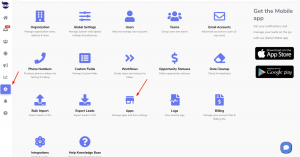
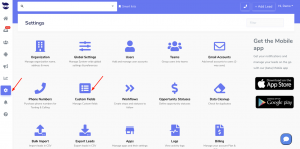
  • On the left sidebar, click on Settings
  • Go to Custom Fields
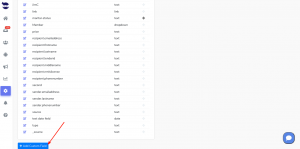
  • Here, click on Add Custom Field
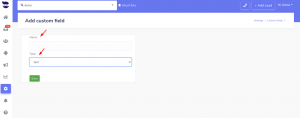
  • Label the Custom Field,
  • And, select the Type as described above (Text, Link, Date, or Dropdown).
  • Lastly, hit Save

Editing a Custom Field

  • On the left sidebar, click on Settings
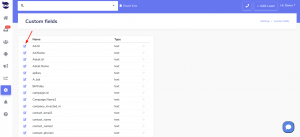
  • Go to Custom Fields
  • Click the edit pen next to the field name
  • Make the changes and hit Save

Deleting a Custom Field

  • On the left sidebar, click on Settings
  • Go to Custom Fields
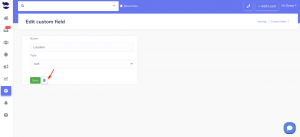
  • Click the edit pen next to the field name
  • Click the recycle bin icon
  • And hit OK to delete.

Adding a custom field to the contacts file / CSV file

When you’re preparing the contacts file, and before you import it to your aNinja account; save any additional information that you have on the leads as custom fields. Like “created date”, “source”, “platform”… Then map them to the aNinja custom fields.

Name the header and prefix it with “Custom.” e.g. Custom.Platform.

Using Custom fields in Triggers

You can use the Custom field value changed as a Trigger event to execute a trigger action.

Related articles:

Segmenting leads using Custom fields

Searching for leads using custom fields

Trigger Custom Field value changed event


Zillow aNinja Integration

In this article, we show you how the Zillow aNinja integration can be easily done.

With the Zillow integration, you can forward new leads from Zillow into your aNinja account. All you have to do is simply use a webhook from Zillow into aNinja.

Integrations allow you to centralize your leads in one place, augment the data you have on them, and target them with your automations.

Forwarding leads from Zillow

  • From your Zillow account, set up a webhook to push new leads in aNinja.
  • Basically, the aNinja webhook URL is
    https://aninja.com/api/v1/webhook_zillow?apikey=YOUR_ANINJA_API_KEY
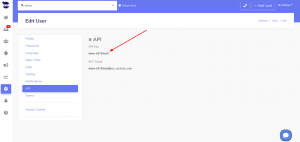
  • So, you need to find your aNinja API key. In the left sidebar, Settings > Users
  • After that, you should then see your Zillow leads created in aNinja.

Where does the imported data appear?

After the integration, you can search your aNinja CRM for the imported leads. You can also search for any custom field, opportunities, and any other info that you have imported.

  • Lead’s contact appear in the leads contact section in the lead view
  • Opportunities also appear in the opportunity section in the lead view
  • The company’s info appears on the top left of the lead view, in the Company section.
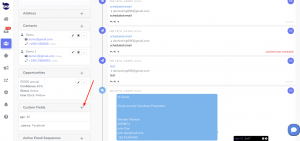
  • Custom fields appear in the custom field section of the lead view
  • Lead Search is a field that also appears in the bottom left of the lead view. Specifically, these are info/links on the lead or the organization found in Google search.

Need help in your Zillow integration? Leave us an email at support@aninja.com. And, we will happily assist you!

WordPress Forms aNinja Integration

WordPress Forms aNinja integration is a way to integrate WordPress websites into your aNinja account.

After the integration, a lead is injected into your aNinja account after each form submission.

aNinja Integration

WordPress Sites Integration

You can integrate and augment the functionality of popular platforms with aNinja, including Shopify, Squarespace, WordPress, and Wix.

  • First, you need to find your API key
    • On the left sidebar, click on Settings > Users
    • Then, click the edit pen next to your name.
    • And, copy it to use it later in the integration

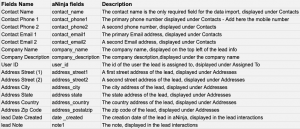
Fields mapping

Map the data on the aNinja fields and Form fields.

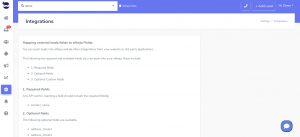
These are the default aNinja fields:

For the Custom Fields, just prefix the field name with “Custom.” e.g. Custom.Source

Where does the imported data appear

After the integration, you can search your aNinja CRM for your leads. You can also search for any custom field, opportunities, and any other info that was pushed from the form.

  • Lead’s contacts appear in the leads contact section in the lead view
  • Opportunities also appear in the opportunity section in the lead view
  • The company’s info appears on the top left of the lead view, in the Company section.
  • Custom fields appear in the custom field section of the lead view
  • Lead Search is afield that also appears in the bottom left of the lead view. Specifically, these are info/links on the lead or the organization found in Google search.

Need help in your aNinja integrations? Leave us an email at support@aninja.com. We will happily assist you!

Porting a Phone Number to aNinja

Porting your US phone number to aNinja is a six-step process that can take up to four (4) weeks depending on the type of number you are porting and the country the number is located in.

The process includes coordination between our upstream provider and your service provider to transfer the number to aNinja.

If we are porting a number to Twilio carrier, see additional instructions here: https://support.twilio.com/hc/en-us/articles/223179348-Porting-a-Phone-Number-to-Twilio

Things to consider before phone porting

Once you’ve ported your phone number to aNinja, then, aNinja becomes the Carrier.

You will no longer be able to make phone calls from the office’s traditional line.

And the phone number will ring only in aNinja web app and the mobile app.

So, for Inbound:
We can have an aNinja number forward to another traditional line (if you prefer picking up on that).

For Outbound:
You won’t be able to place outbound calls from a traditional line once it’s ported to aNinja. The calls will only be able to be placed from a computer/browser running aNinja, or the mobile app.

Porting a phone number to aNinja

Step 1 – Submit your port request

Email us at support@aninja.com and go to the Porting Request page.

  • You will need the following for a successful request:
    • The authorized user or owner’s first and last name.
    • The corresponding service address. This must be an actual physical address.
      • PO Boxes are not valid addresses.
    • A Letter of Authorization (LOA) signed by the authorized user and/or owner of the number(s). Note that the information on your LOA must match the authorized user name and service address provided by your current carrier.
    • Obtain a Customer Service Record (CSR).
    • A scanned (or electronic) copy of the most recent phone bill, within the last 30 days, that includes the account, owner/authorized user name, and address information for all the numbers you’d like to port.
    • The last 4 digits of SSN (seems to now be required by Twilio / telephony provider to prevent abuse).

  • Read the most common reason for rejections to avoid them.

Be sure to configure each phone number, particularly your voice URL, messaging URL, and/or SIP trunk, so that the phone numbers are ready in advance of the porting date.

    • You can configure your numbers at any point of the porting process.
    • Find the numbers in Port In Request or Active Numbers to configure your numbers.
Step 2 – Number gets approved by Twilio
  • If everything in Step 1 was done correctly, you can expect your porting request to be approved in 24 hours.
  • Again, depending on the type of number you are porting (for example, Toll Free or Landline), the approval time may vary.
Step 3 – Number is submitted to Carrier Partner
  • This can take up to 24 hours.
  • Your request is then submitted to your soon-to-be former carrier as a port request.
  • During this time, do not close your account with your carrier and keep your numbers active.
Step 4 – Carrier Partner reaches out to Losing Carrier

This can take one (1) week to complete.

Step 5 – Response from carrier

At this point, your request will either be approved or rejected:

  • Approved:
    • If approved, then you will receive a porting date of when your number will be ported to aNinja.
  • Rejection: These occur for a variety of reasons such as
    • An incorrect PIN for an account
    • An address or zip code that doesn’t match the current carrier’s record
    • A port request that’s made by an unauthorized user on the account.
    • Read more about common reasons for port request rejections here.
    • Additionally, you will need to reach out to your losing carrier to find out what’s needed to move forward. Depending on the needs of the carrier, this will add an undetermined amount of time to your porting request.
Step 6 – aNinja reaches out to you with your porting date
  • aNinja will send you an email with your porting date for when your number will be transferred to aNinja.
  • Once your date has passed and you’ve verified the number has transferred to your aNinja, you can begin using your number.
  • Note that SMS can take up to 2 business days after the porting date to be activated as all carriers must update their routing records. Until carriers have updated their routing records, the number will not be SMS enabled.
Removing aNinja chatbot from your website

The aNinja Chatbot loads on your site because you (or your web developer) added a piece of code on your website that loads it.

Removing aNinja chatbot from your website requires deleting the chatbot from your aNinja install and removing the embed code from your Website.

Find the code in aNinja

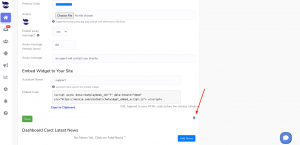
<script async data-chatplaybook_id=”1″ data-tenant=”YOUR_TENANT_CODE” src=”https://aninja.com/chatbot/chatwidget_embed_script.js”> </script>

  • Or you can find the chatbot embed code on your website.

Removing aNinja chatbot from your website

  • If you no longer want Chatbot on your website, you should simply remove the piece of code.
  • If you still have access to your aNinja account, you can find the code by looking here:
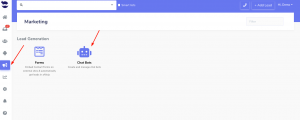
    • On the left sidebar > Marketing > Chatbot
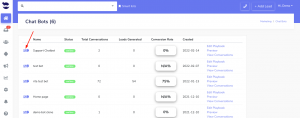
    • Click on the edit pen next to the chatbot name
    • Once you’ve removed that code from your website, simply hit delete to also delete the chatbot and its playbook in aNinja.Removing aNinja chatbot from a website

Reconnect / Re-authorize your email account with aNinja

Reconnect your email account with aNinja if it’s disconnected to be able to send and receive email through the app.

Disconnected email alert

If your email stopped running correctly, you need to reconnect your email account with aNinja to be able to send and receive emails through the app.

When an email is no longer synced, an alert pops up in red on the top middle of the page as a warning to reconnect the email.

When the email gets disconnected, any attempt for sending emails fails and it shows an error in the lead view.

Failed emails don’t show up on the reports page, however, they show up on the logs page with an error status.

But what are the reasons for a synced email to disconnect from aNinja?

The reasons that lead to reconnecting your email account

Several reasons may lead to reconnecting / re-authorizing your email account. Of which we mention:

  • If you have changed your password and did not update it here.
  •  Or, if you’ve enabled two-factor authentication and did not generate an aNinja app password.
  •  It could also be an issue communicating with your email provider.
  • Lastly, to help identify the problem, check for any error messages at your end.

Reconnect / Re-authorize the email account

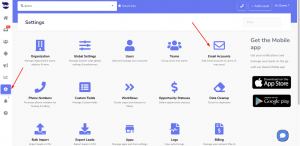
On the left sidebar, click on Settings > Email accounts

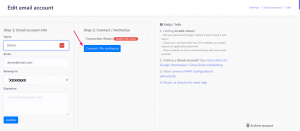
  • Then, click the edit pen next to your name.

  • Lastly, hit the “Connect / Re-auth” button and follow the on-screen instructions to re-authorize your email.

Still unable to connect / re-authorize

Need help reconnecting your email account with aNinja? Just leave us an email at support@aninja.com. And we will happily assist you!


Relevant links:

Connect your Gmail account

Connect. your Microsoft Outlook account

Connect your email account using Custom IMAP

Shopify aNinja Integration – example of Fulfillment generating Lead in aNinja

With Shopify aNinja Integration you can instantly connect Shopify with aNinja and have your leads forwarded to your aNinja account.

In this article, we show you how the Shopify integration with aNinja can be easily done.

Integrating Shopify with aNinja

The following steps will walk you through the Shopify integration.

  • Log-in to your Shopify account
  • Go to Settings on the left
  • Click on Notifications
  • Scroll down, and in the Webhooks section, choose “Create webhook”
  • Choose “Fulfillment creation” event, Format JSON, and set the URL to be:
    https://aninja.com/api/v1/webhook_shopify?apikey=YOUR_ANINJA_API_KEY
    and use the Webhook API version 2020-10

  • Once it’s created – click the “Send test notification” in Shopify.

You should then see the test lead created in aNinja.

Where does the imported data appear

After the integration, you can search your aNinja CRM for the imported leads. You can also search for any custom field, opportunities, and any other information that you have imported.

  • Lead’s contacts appear in the leads contact section in the lead view.
  • Opportunities also appear in the opportunity section in the lead view.
  • The company’s info appears on the top left of the lead view, in the Company section.
  • Custom fields appear in the custom field section of the lead view.
  • Lead Search is a field that also appears in the bottom left of the lead view. Specifically, these are info/links on the lead or the organization found in Google search.

Have a specific question on the Shopify aNinja Integration? Just leave us an email at support@aninja.com. Our support team will happily assist you!

Launch a bulk email or text sequence for a specific group of leads

Create a custom field that specifies a group of leads – create a Smartlist using this custom field – and Launch a bulk email or text sequence for this group of leads.

Using the custom fields feature, you can pick the right leads delegated for a special campaign. The custom field could be a location, creation time, source, or any identification you want to add to a lead.

Whether you choose to reach out to your leads by email or by text, you can send them in Sequence.

You can also launch an email or text sequence on a specific event using aNinja triggers feature.

Launching a bulk email or text sequence for a specific group of leads

1- Create a new custom field
2- Segment your leads

Group or segment your leads based on their specific characteristics by assigning them a custom field, to personalize the messages and make them relevant to each specific segment/group.

3- Create a Smartlist using Custom fields

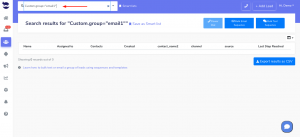
Add the Custom field to the Smartlist search query which dedicated to retrieve leads based on their characteristics. e.g. Custom.Group=”email1″. This brings all the leads having this custom field to the leads view.

4- Launch the sequence
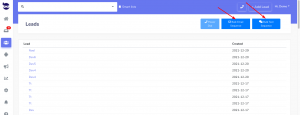
  • Select the Buk Email Sequence or Bulk Text Sequence from the top right of the page, and hit Launch Bulk Sequence to Launch a bulk email or text sequence for this specific group of leads.Launch a bulk email or text sequence for a specific group of leads
  • An alert pops up to show the number of leads included in this sequence and that have no phone numbers or no email addresses. Click on the number in the alert to see those leads.