How Can We Help?
Zapier aNinja Integration
In this article, we show you how Zapier aNinja integration can be done.
What is Zapier
Zapier is a tool that allows you to connect web apps together. An integration between two apps is called a Zap.
And a Zap is made up of a Trigger and one or more Actions.
Whenever the trigger happens in one app, Zapier will automatically perform the action in the other app.
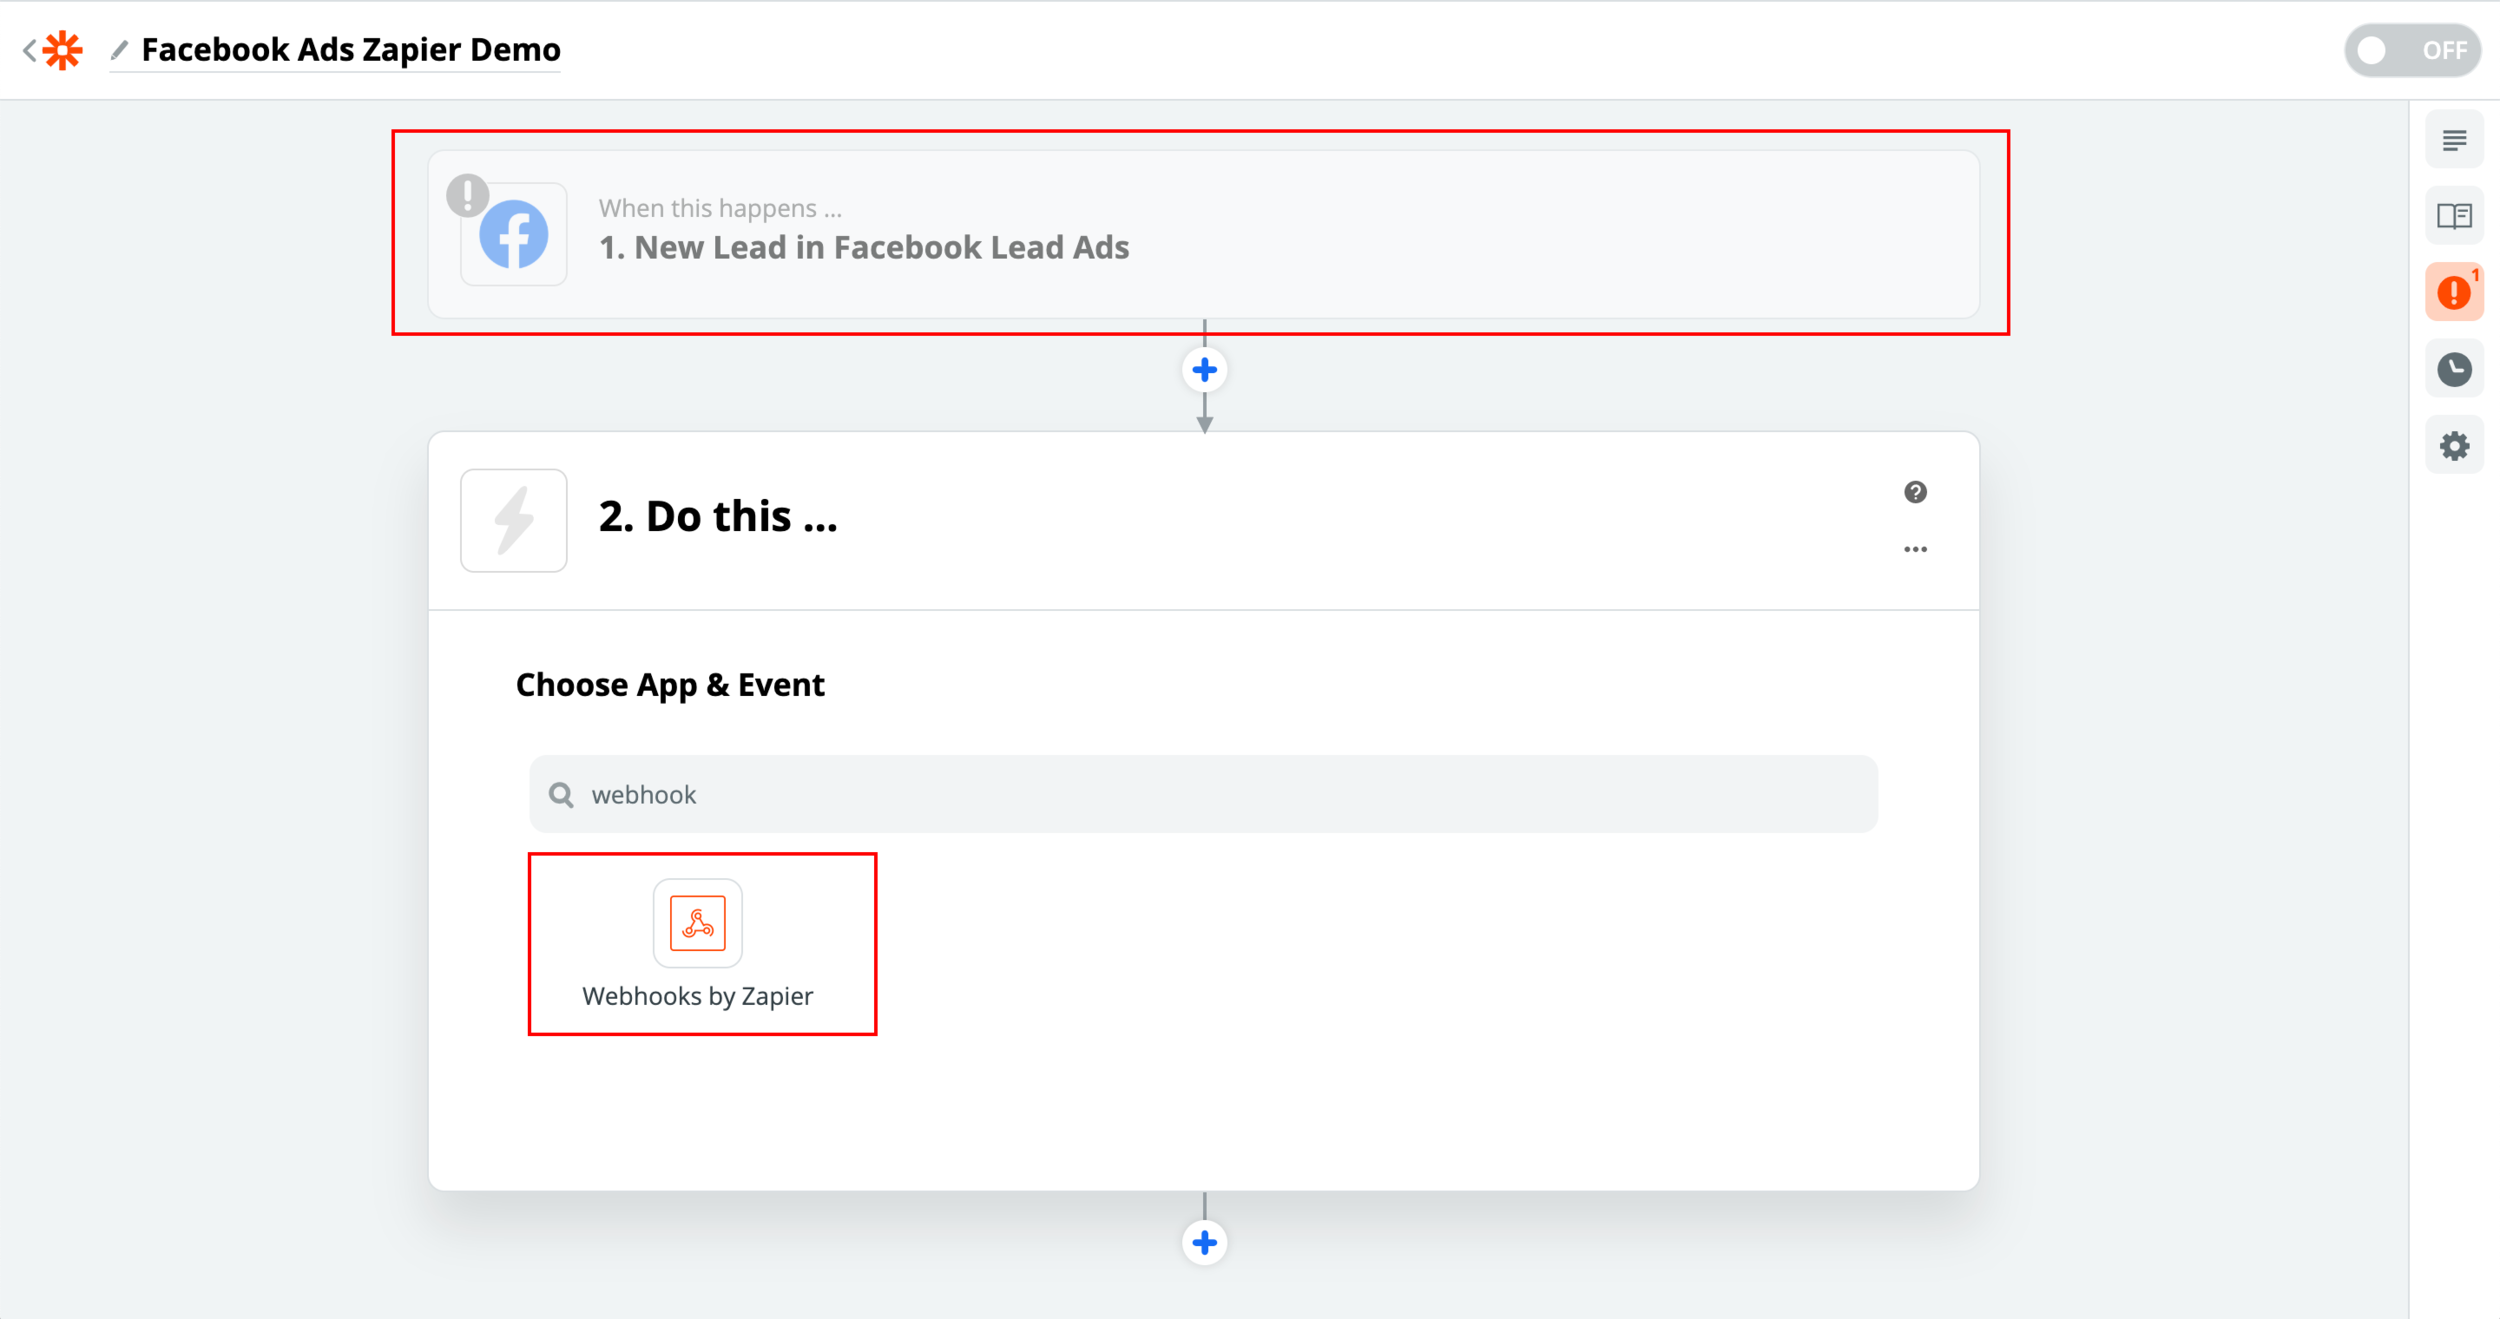
So you can set up the trigger step of your choosing. In this example, we will be using Facebook Ads as the trigger. Next, select *“Webhooks by Zapier” to enter new records into aNinja.
*Requires Zapier Premium account.
Setting up a Zap trigger
- Choose your App and event
- In the Zap editor, click to open the Trigger step.
- Under Choose app & event section, search for and select the app that will trigger the Zap.
- Click the Event dropdown menu and select the event that will trigger the Zap.
- Choose your App account
- If you already have an account connected to Zapier for the trigger app, select it from the account dropdown menu.
- If not, click + Connect a new account and follow the instructions to connect your app to Zapier.
- Once a connection is selected, click Continue.
- Customize your Options
- Next, set up your trigger options if available.
- Test your Trigger
- Click Test Trigger
Once you’ve set up your trigger, you can set up the rest of your Zap by adding an action.
Setting up a Zap action
After setting up the first Trigger of the Zap, the next step is to add an action to your Zap.
- Choose your App and event
- In the Zap editor, click the Action step, or the plus + icon to add an action to your Zap.
- Search for or select the app you want to use in your action (aNinja).
- Select “Webhooks by Zapier” to post into aNinja.
-
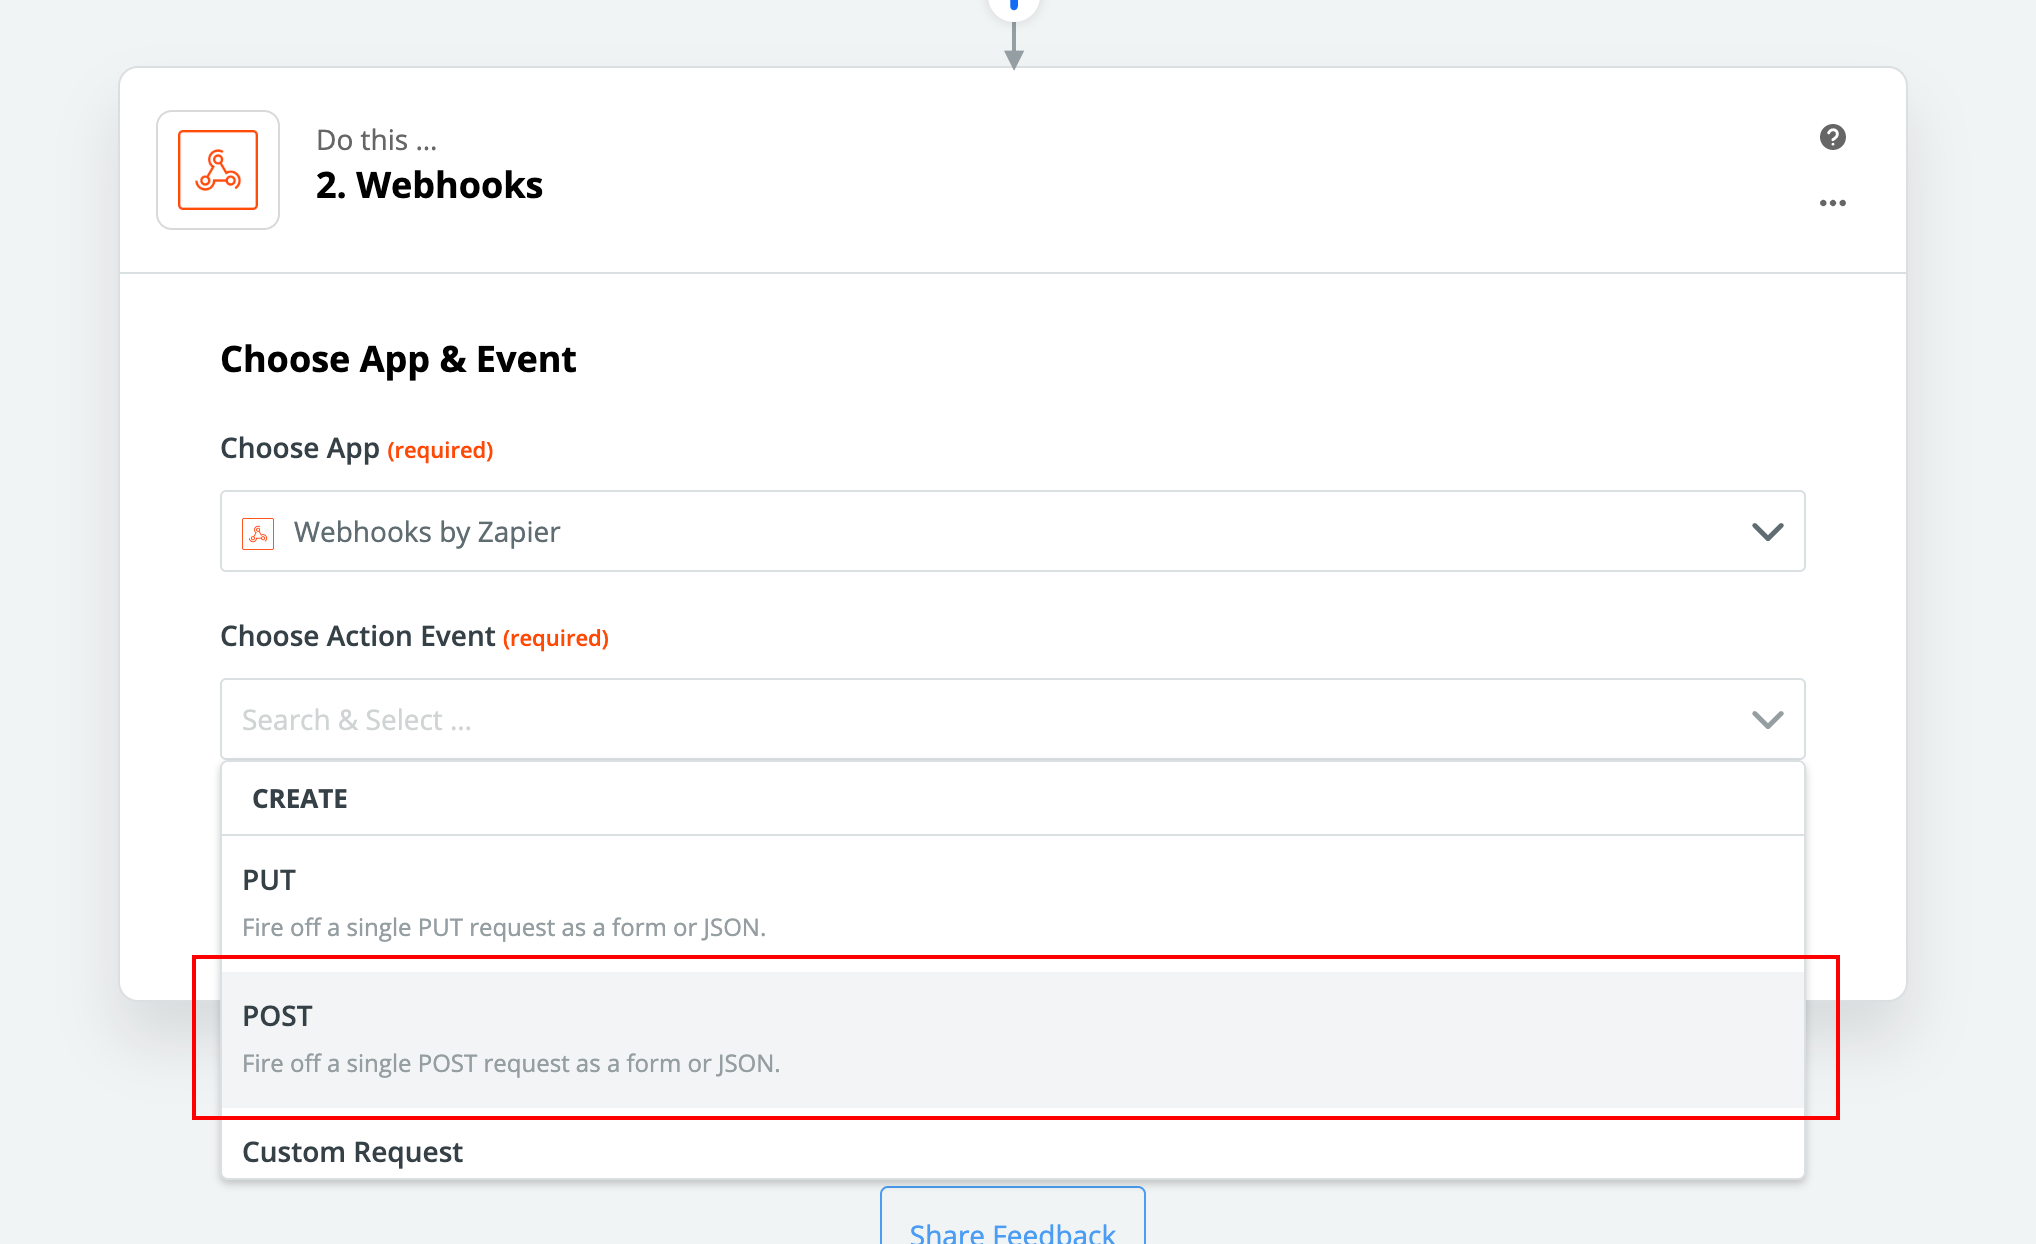
- Choose Action Event
- aNinja only supports receiving leads using a request because POST is more secure than GET.
- Choose Action Event
- Then, we need to find aNinja API Key
- Under Submission URL field put:
- https://aninja.com/api/v1/contactform/?apikey=YOUR_API_KEY
- Example: https://aninja.com/api/v1/contactform/?apikey=sample123-6yauyue5e
- Enter the Posting URL
– Copy & Paste in the Posting URL from above
- https://aninja.com/api/v1/contactform/?apikey=YOUR_API_KEY
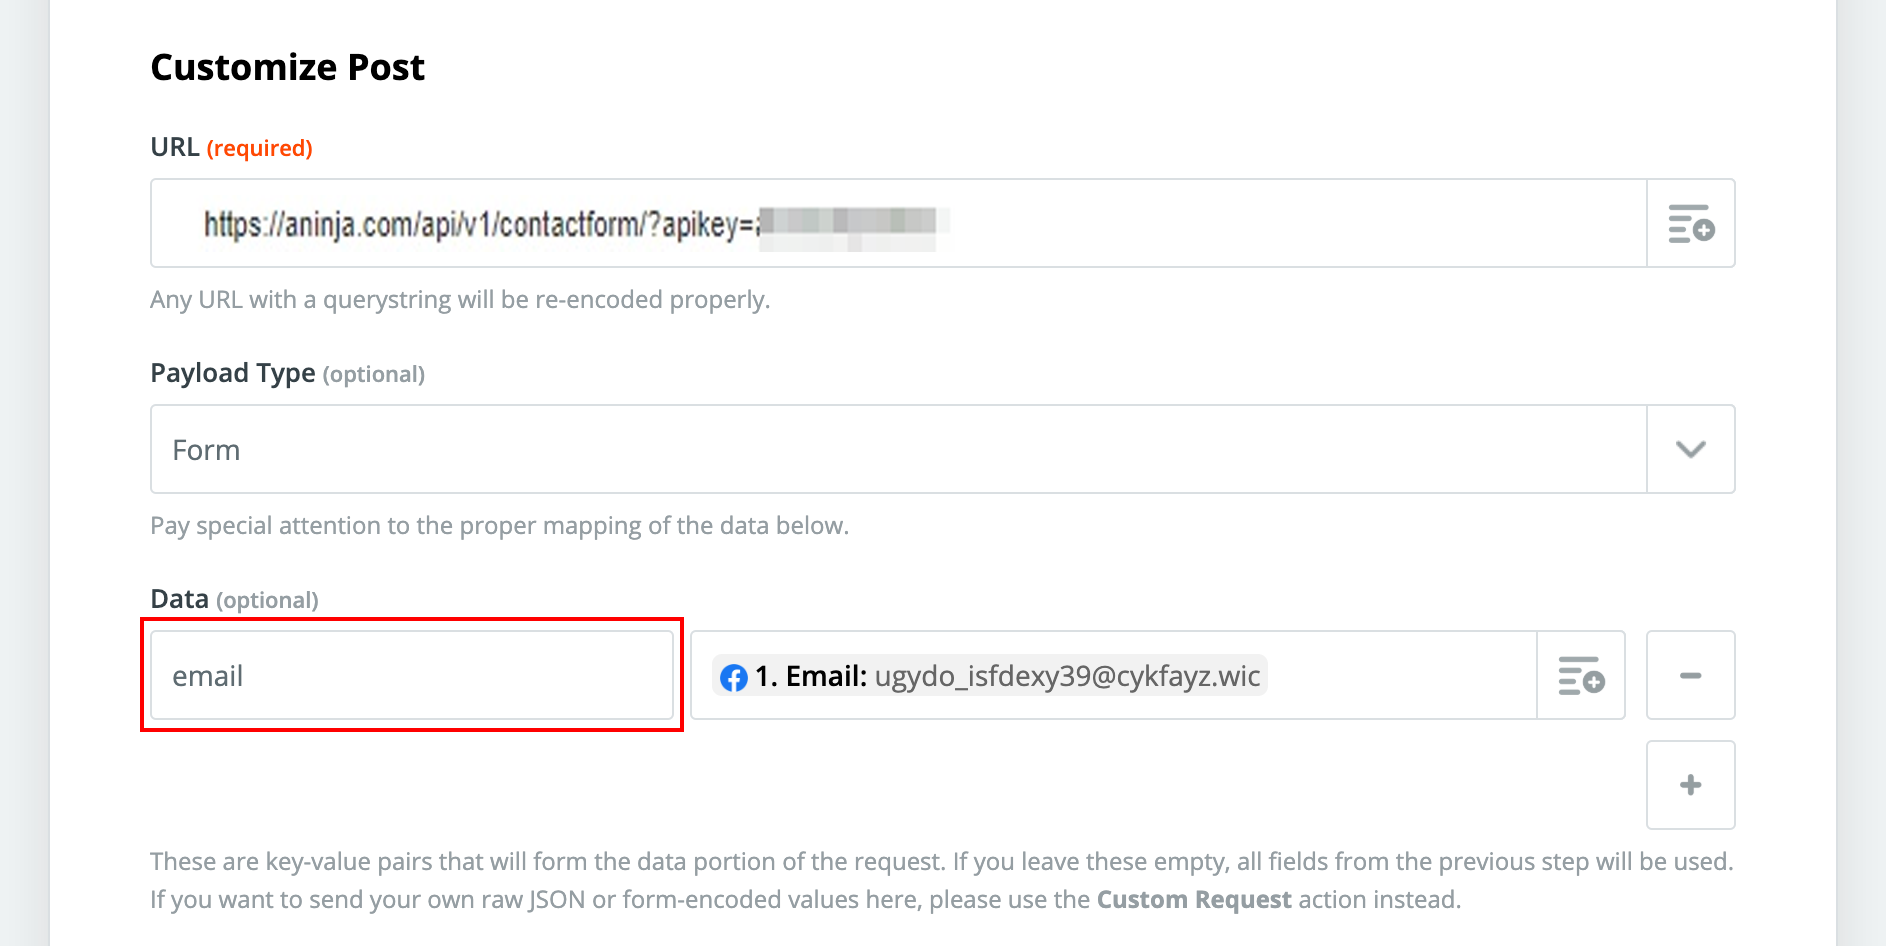
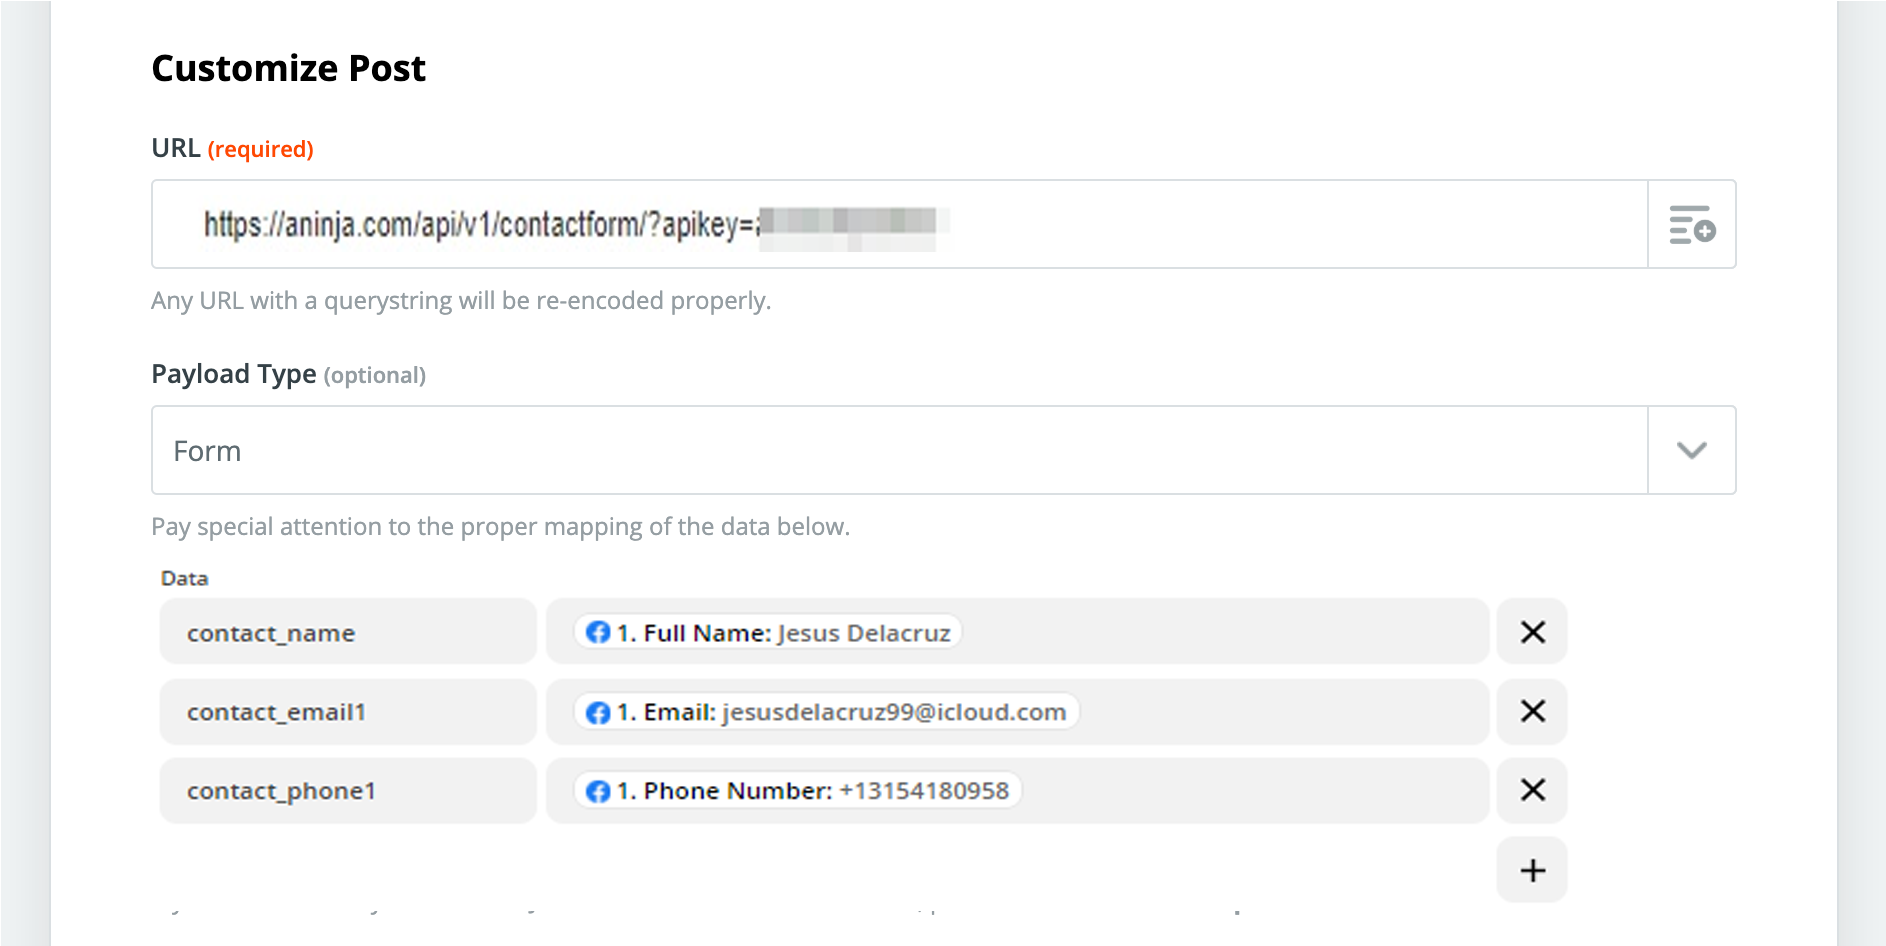
Mapping
- Start mapping the data. Use the “+” icon in Zapier to choose the information that you’d like to map.
- The “Data” field should be the aNinja Field Name.
- Please note your field mappings may look different than the example screenshot below.
* For adding a custom field, simply add “Custom.” before the data field. For example Custom.source would automatically create a custom field and map data in your aNinja account.
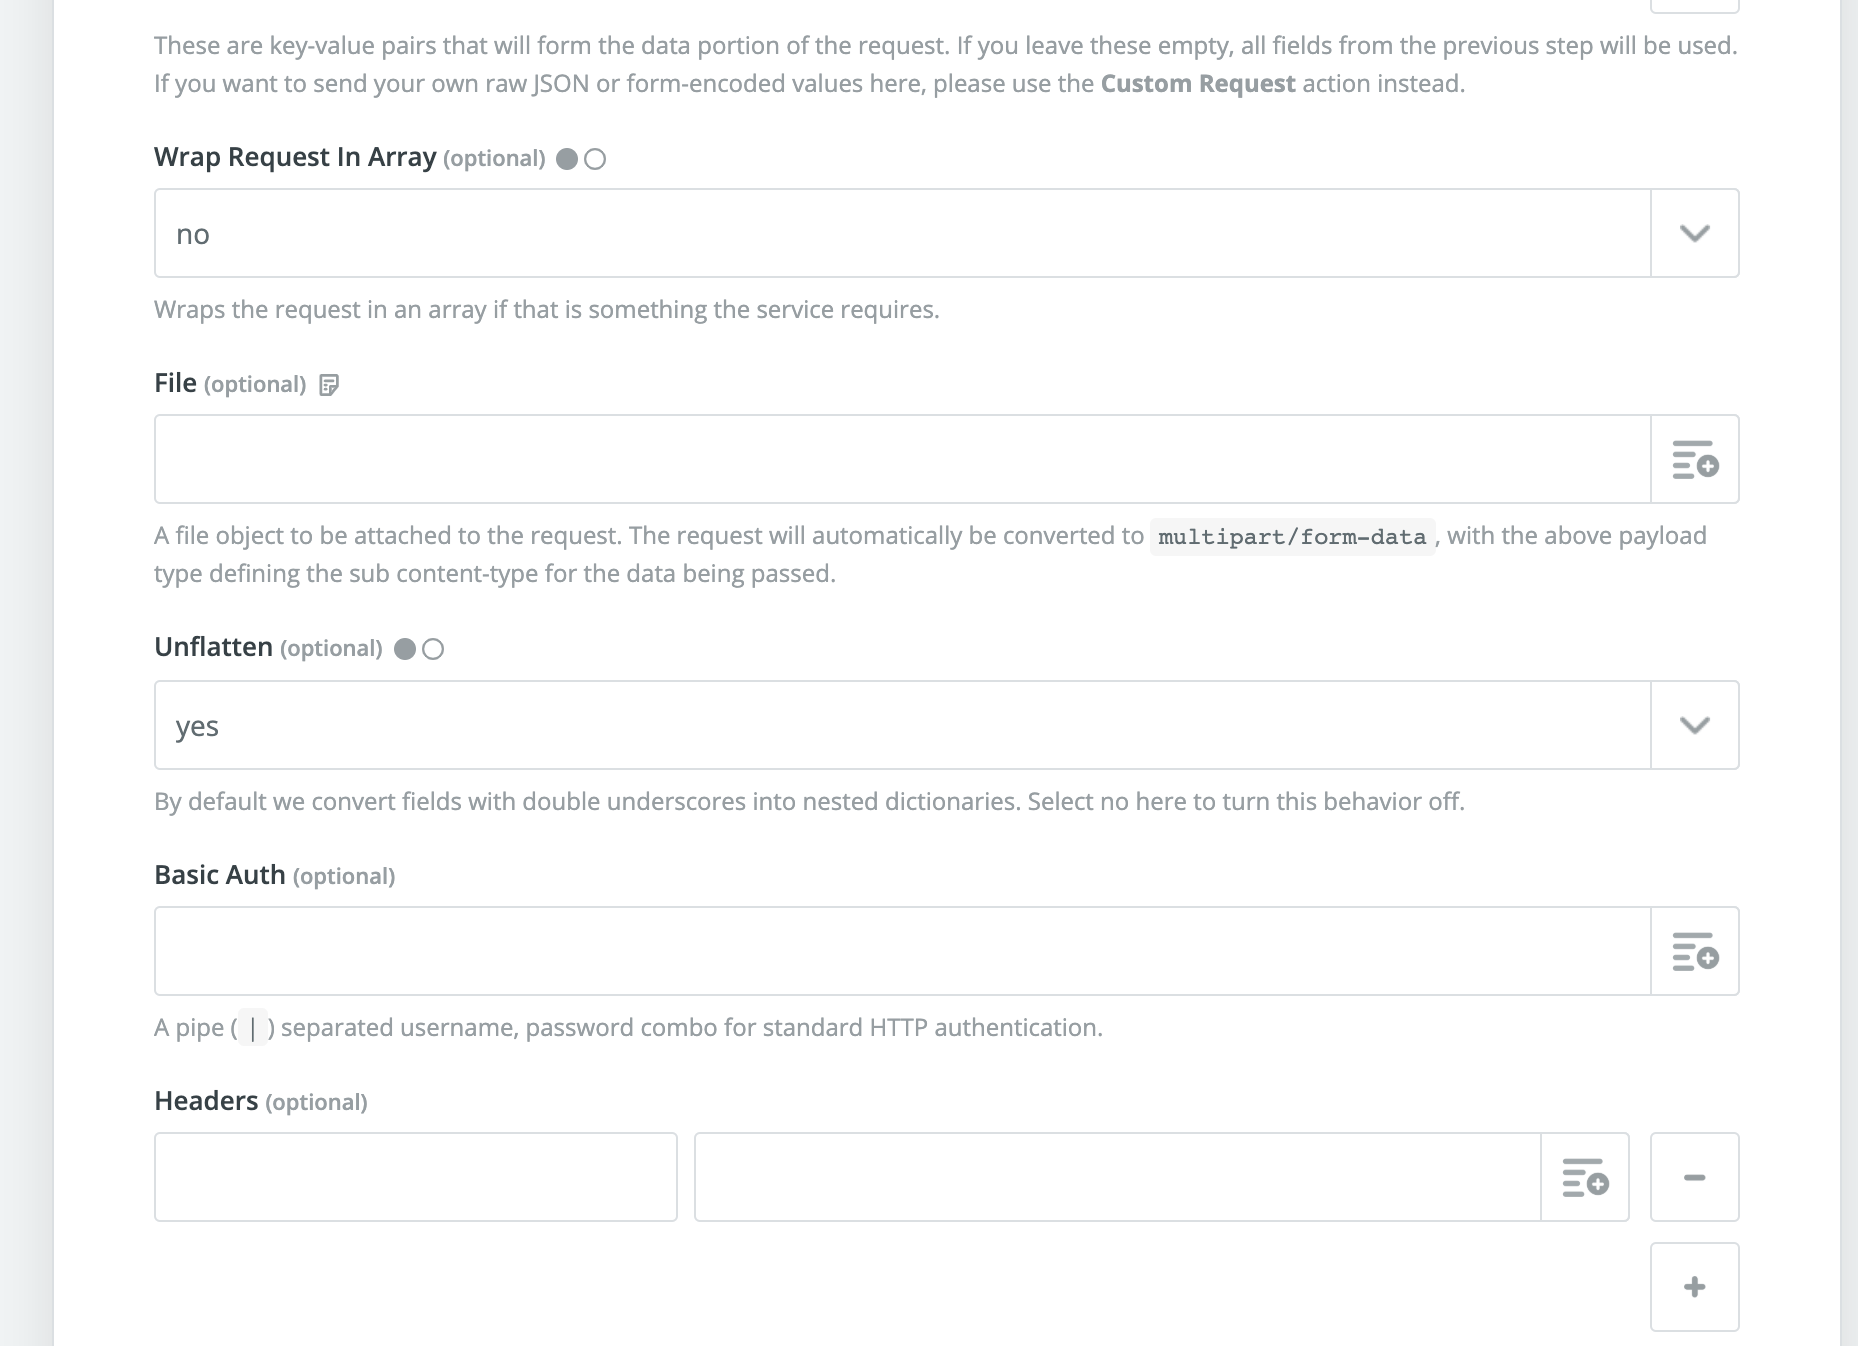
Customizing
- After mapping, you can skip these fields, as there is no need to make any alterations to these fields in Zapier.
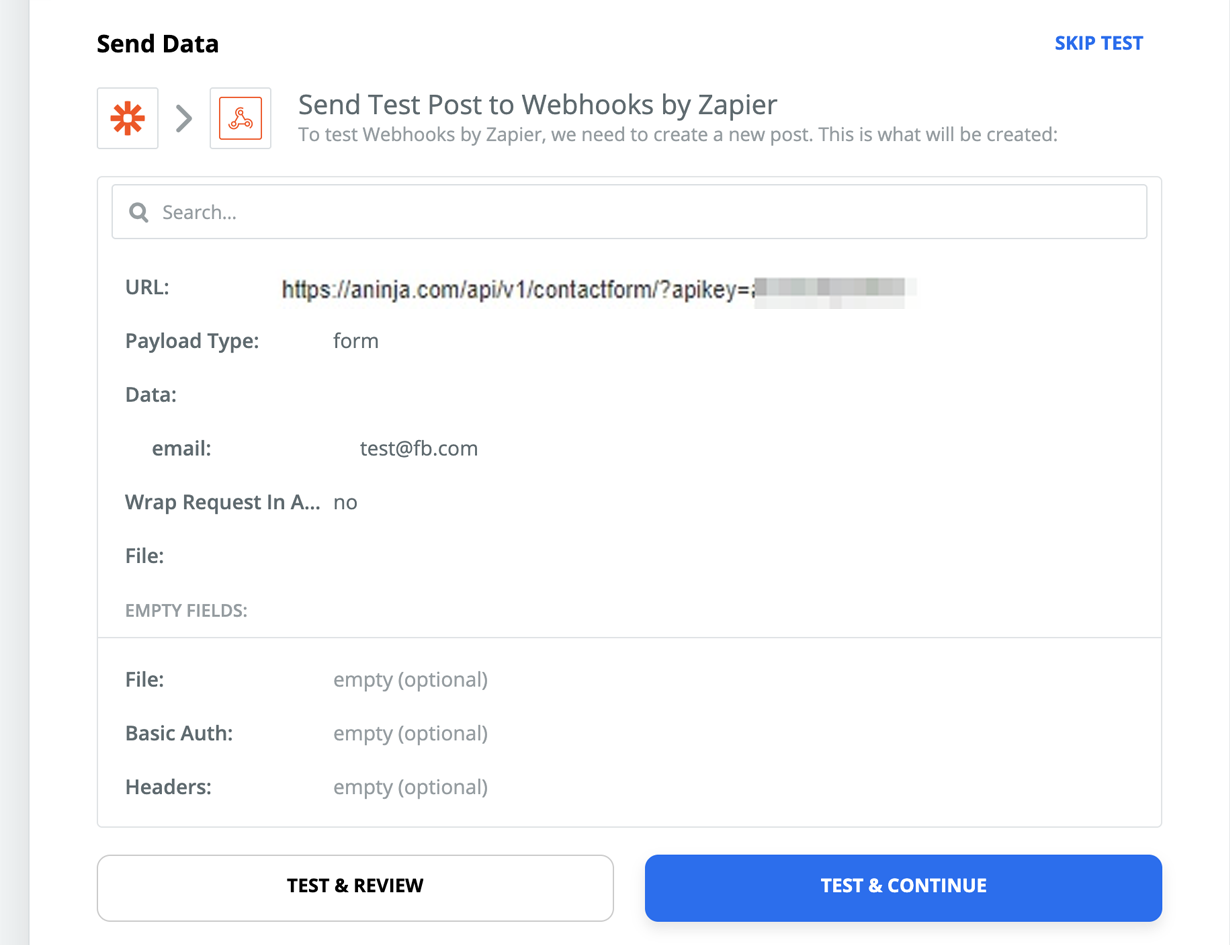
Test & Continue
- Next, review the data you’re trying to map and test!
- Lastly, if there is any failure or error, please update the data accordingly.
- The next screen will show you whether or not Zapier was able to successfully perform the action step for you.
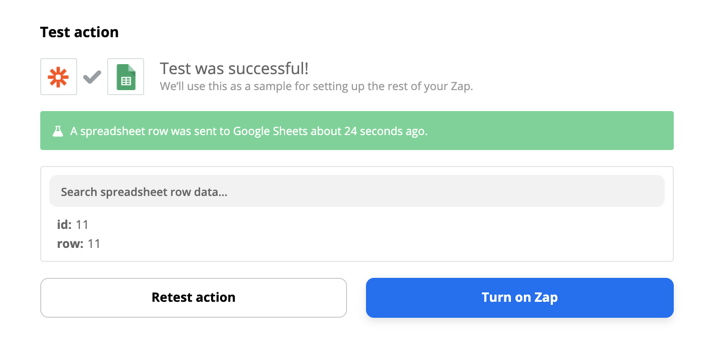
- Click Close.
Where does the imported data appear
After the integration, you can search your aNinja CRM for the imported leads. You can also search for any custom field, opportunities, and other information you have imported.
- Lead’s contacts appear in the leads contact section in the lead view.
- Opportunities also appear in the opportunity section in the lead view.
- The company’s info appears on the top left of the lead view, in the Company section.
- Custom fields appear in the custom field section of the lead view.
- Lead Search is a field that also appears in the bottom left of the lead view. Specifically, these are info/links on the lead or the organization found in Google search.
Need help with your Zapier aNinja integration? Leave us an email at support@aninja.com. And we will happily assist you.