aNinja Centralized Inbox

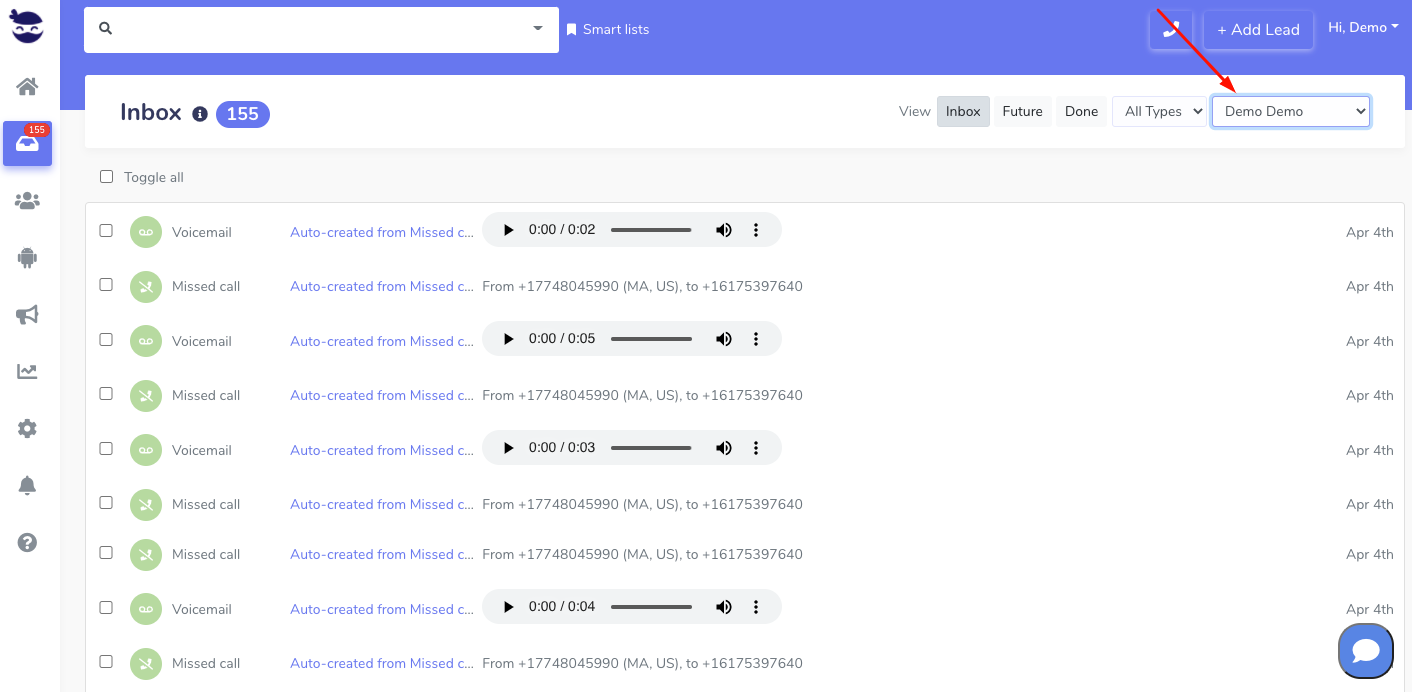
The aNinja Inbox is a centralized view of all your incoming communication emails, textsvoicemails, missed calls, open tasks, and the chatbot conversations too.

Accessing the Inbox

On the left sidebar, click on Inbox icon.
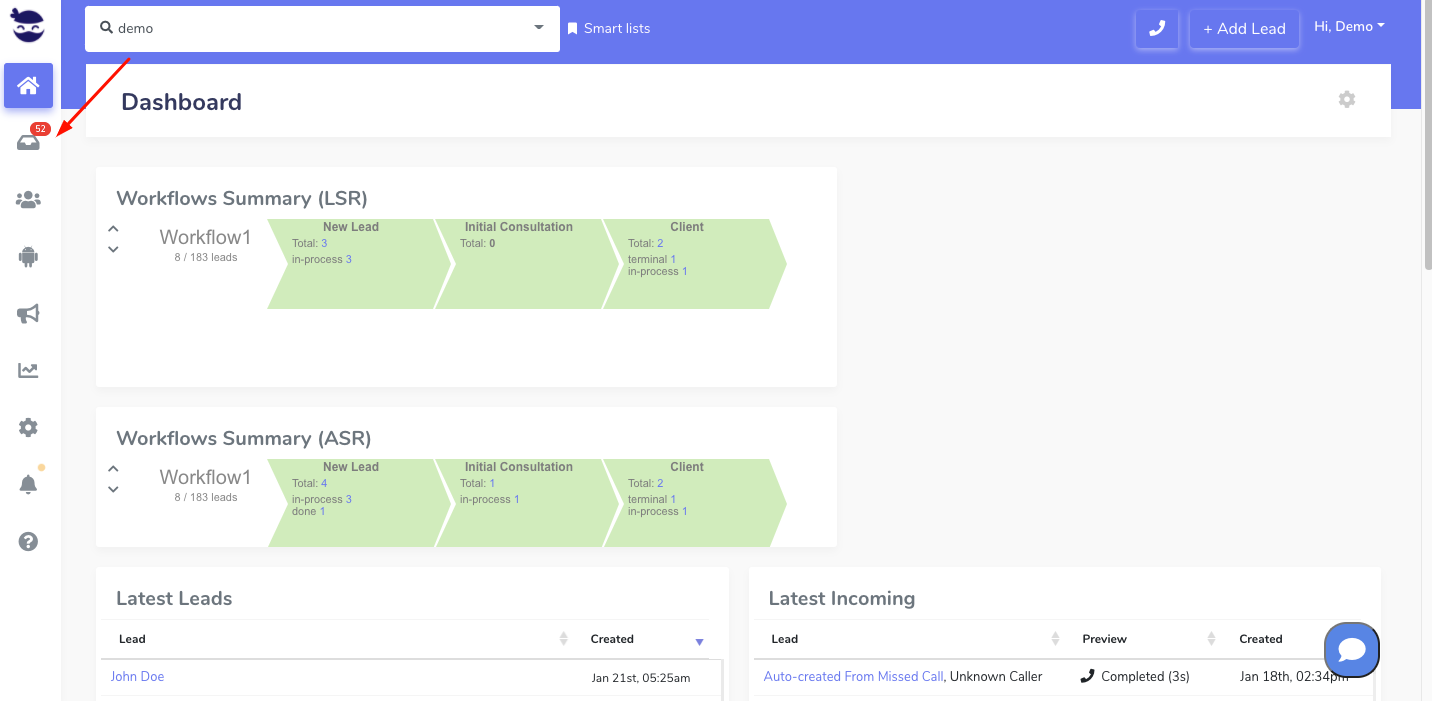
New Centralized Inbox

Inbox activities

You should be able to work exclusively from your aNinja Inbox.

From your Inbox items, you can:

Dynamic Inbox

The Inbox badge in the sidebar dynamically updates to show you how many Inbox items are available.

Concluded Tasks

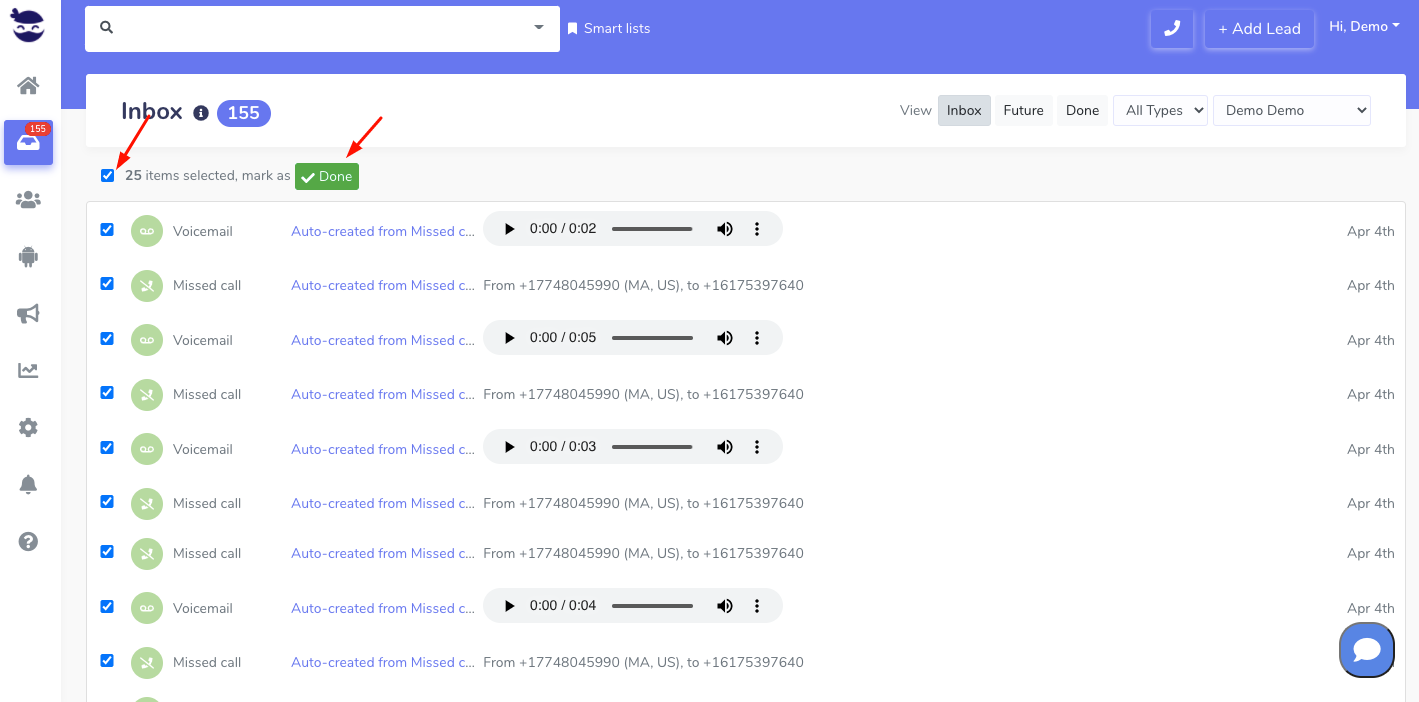
  • Ultimately, all items of the aNinja centralized inbox should be completed on daily basis. However, if that was not possible, you can report them to the next day. Just toggle all the remaining items of the inbox and click on future in the toolbar.
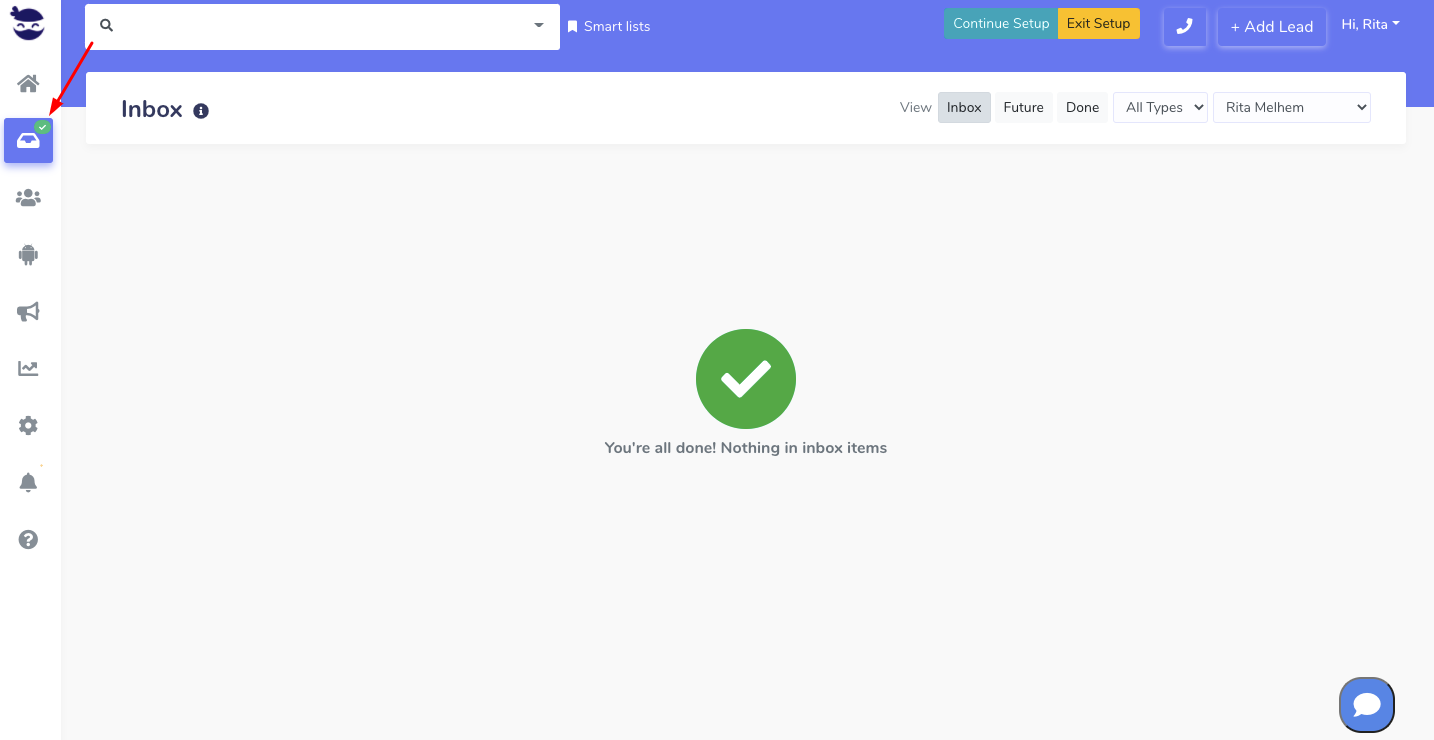
  • The Inbox badge in the sidebar will show a green checkmark when all your Inbox items are done!

Task Management

  • You can also bulk mark inbox items as done / not done.

  • Answering a Lead from the Lead view (send/reply to an email, or send/reply to text) will automatically mark previous inbox items of the same type (e.g. email/text) as done.
  • Admin users can view inbox items for other team users, as well as filter them by type.

User role

The role assigned to a user controls access to areas and features within the aNinja app. Each user account requires a role. This is a default role. An admin user can change it when need be.

Moreover, the number of users is defined according to your billing plan.

User role

A user role can:

User role

Changing the role of a user

The role assigned to a user controls access to areas and features within the aNinja app. Each user account requires a role. And changing the role of a user can be done at any time.

Different roles of aNinja users

There are 3 predefined user roles in aNinja. User’s permissions to use aNinja features vary according to the role assigned to them.

The user roles are:

  • Owner
    • The owner user is the owner of the application and the one who assigns the admin role and the user role to the users.
  • Admin
    • The admin user assigns the user role to the users.
  • User
    • The user role doesn’t have permission to assign other users.

Changing / assigning the user role

  • On the left sidebar, click on Settings > Users
  • Choose the user and click on the edit pen.Changing the role of a user
  • Click on Access Control and assign the role.

All the new users will be on the same billing plan as the current one the owner user is on.

To change the owner user, please contact us at support@aninja.com.

Adding Users to aNinja

Adding users to aNinja is very easy.  However, the number of users in aNinja is set according to your Billing plan.

The role assigned to a user controls his access to areas and features within the aNinja app. Each user account requires a role. And changing the role of a user can be done at any time.

Adding / inviting users

Users with admin or owner roles can invite other users to join their aNinja installation.

  • Fill in the following info:
    • Email: email address of the user to invite. This will be the login username.
    • First Name: of the user
    • Last Name: of the user
    • Role: Role to assign to the new user (user/admin)
  • After reviewing the data added, just click invite.
  • Lastly, your newly invited team member will receive the login information by email.

Adding users to aNinja

Note: the new user will be on the same billing plan as the current one the owner user is on.

User ID

Each user is granted a private user-id as soon as he is invited to join aNinja, regardless of his role.

Using a Smartlist, you can utilize this user-id to filter leads assigned to a certain user.

You can also assign a bulk import to a user or multiple users using this user-id in the CSV file.