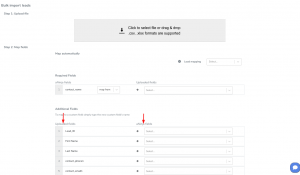
Customizing the date format in Custom Fields

Customizing the date format in Custom Fields allows you to define and customize the date format in which the date values are displayed in the lead view.

What’s a custom field

Custom fields are a powerful feature that allows you to capture and store specific information according to your unique requirements.

And defining the format of the custom field in Custom field settings, provides flexibility and convenience in managing and presenting information to better suit the needs of businesses and users.

Setting up the custom field with date type

Setting up a custom field with a date type is a straightforward process.

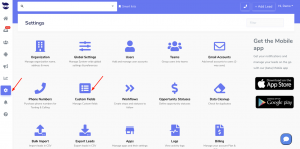
  • Go to Settings > Custom Fields

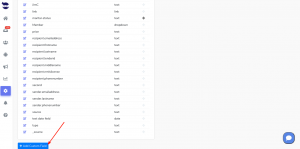
  • Click on Add custom field

  • Name it
  • And specify the type as “Date” or “Datetime” under Type.
  • Define the desired date format in which the date values should be displayed in the lead view. And hit Save.

Changes made in the custom fields table are automatically reflected in the lead view.

This means that you can modify the date format in the custom field settings, and the updated format will be applied to the displayed date values in the lead view without any additional efforts.

This real-time synchronization ensures that the lead view remains up-to-date and aligned with the desired date format.

Impact of custom field date changes on Triggers

Another crucial aspect of customizing the date format in Custom Fields, is that it does not affect trigger actions.

Trigger actions are triggered based on certain conditions or events.

And, the customization of date formats in custom fields does not interfere with the trigger actions associated with the custom field. But, it only affects the display format of the date values in the lead view.

However, changing the value of the date custom field in the lead view does affect the trigger and executes the trigger action specified to fire on the “Custom field value changed” event.

Trigger “Custom field value changed” event

With the “Custom field value changed” Trigger event, you can automatically perform an action based on a specific custom field value.

This powerful trigger event allows you to specify a custom field value and trigger an action whenever that value is changed.

Setting a trigger event to handle Custom field value changed

To set up this trigger event, you will need to indicate the custom field that you want to track in the trigger event and that should trigger the action. Specifying the corresponding value of the custom field in the trigger condition is optional.

Then, you can set the action that should be taken when the trigger fires.

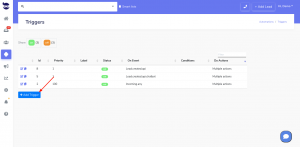
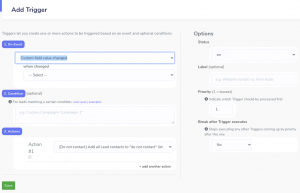
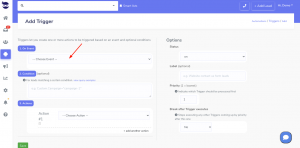
  • Hit + Add Trigger
  • In the Trigger Event:
    • Choose “Custom field value changed

  • In the Trigger Condition (optional):
    • Specify the custom field value that will fire the trigger action. (see example below).
  • In the Trigger Action:
    • Set the trigger action you want to fire in response to the event.
    • You can add multiple actions to be executed when the event takes place.
Example:

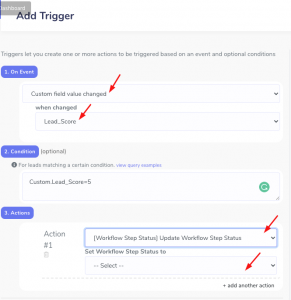
If you have a custom field for “Lead Score“; and you want to automatically change the workflow step of the lead to “Qualified” when their lead score reaches a certain threshold (after changing the custom field value of Lead score in the lead view), you can set up a trigger to do this.

  • On an event that is “Custom field value changed”
    • Select the custom field e.g. Lead_Score from the “changed to” dropdown
  • Set the trigger condition to e.g. “Custom.Lead_Score=5”
  • Choose to execute an action to “[Workflow Step Status] Update Workflow Step Status:
    • and Set Workflow Step Status to: “Qualified

You can add multiple trigger actions from the actions dropdown.

Trigger "Custom field value changed" event

WPForms integration with aNinja

With WPForms integration, you can push forms responses to your aNinja account using webhooks, as soon as someone submits a new form on your website.

Webhooks allows you to automatically send information from your form to aNinja.

WPForms integration with aNinja

To configure webhook integration settings within the WPForms plugin, follow these steps:

Installing the Webhooks Addon
Setting Up a Webhook
  • Create a new form or edit an existing form in the WPForms form builder.
  • Click on the “Settings” tab at the top of the form builder.
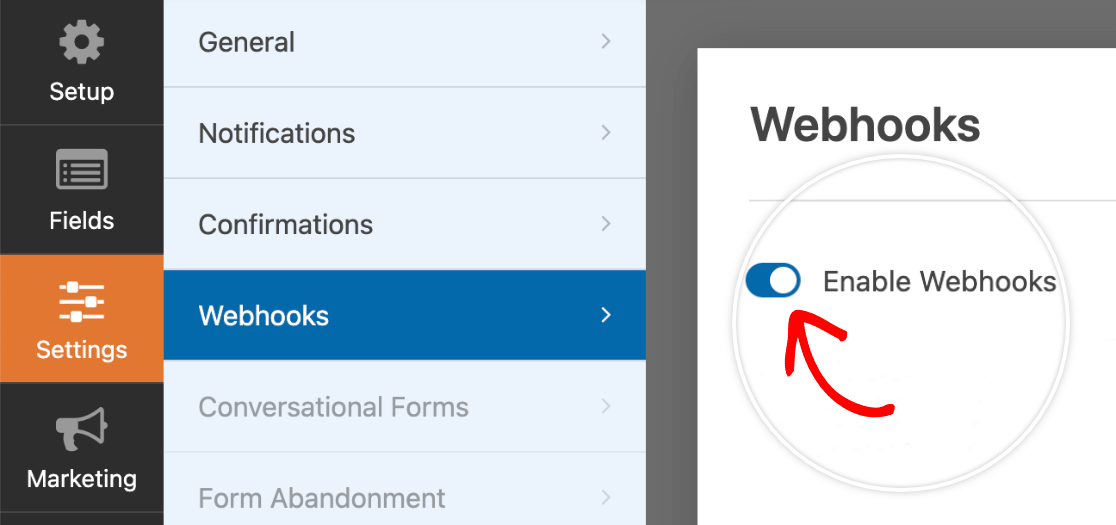
  • Under Webhooks, toggle the Enable webhooks option on.

Enabling webhooks for a form

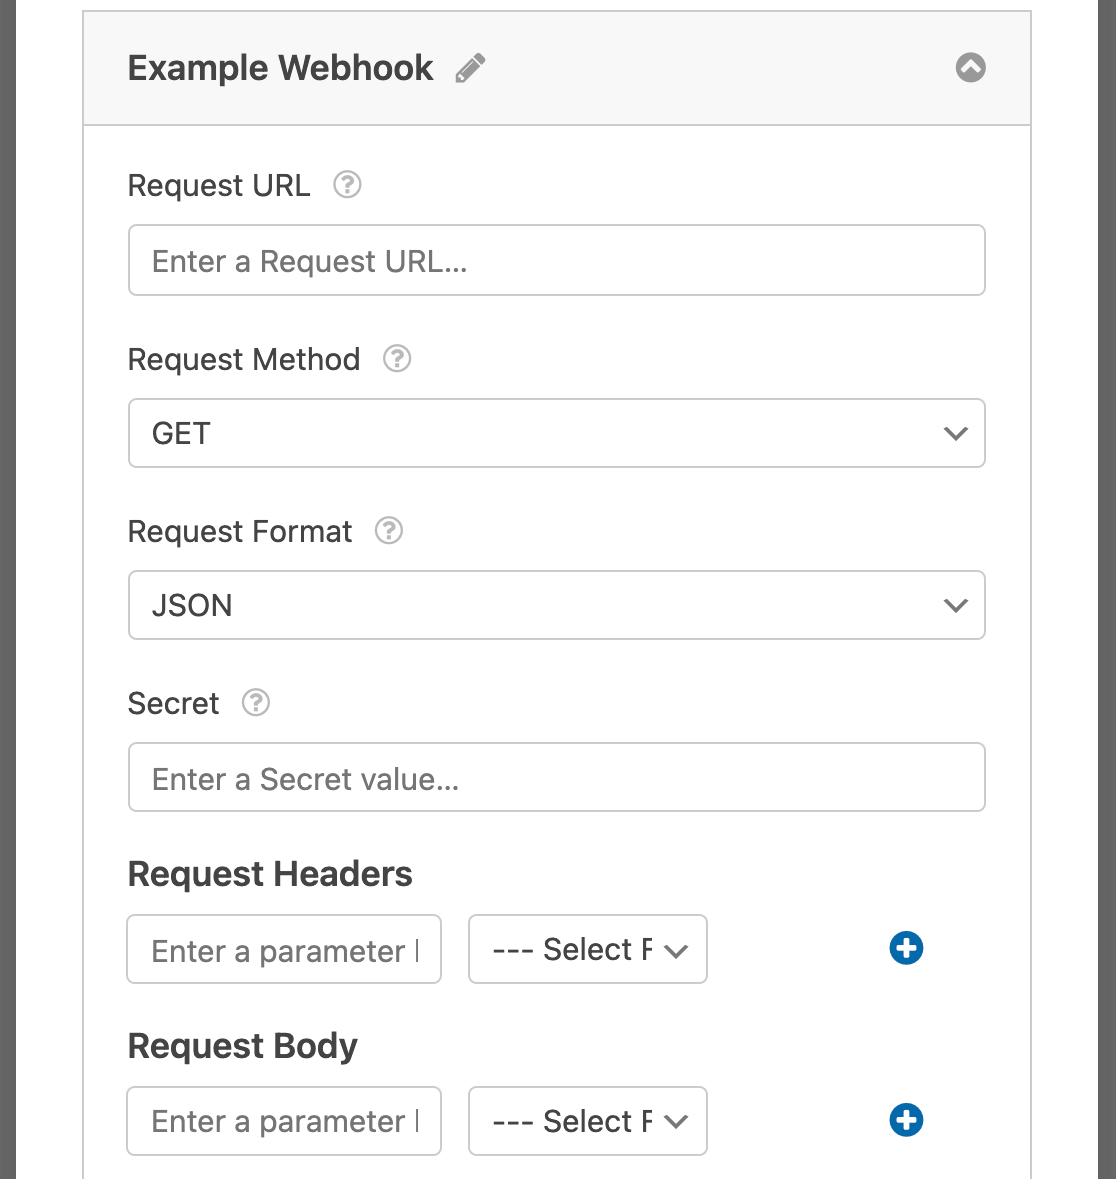
  • Click on the pencil to give a name to your webhook
  • Then fill out the settings for this connection:
  • Under “Request URL”, enter the below aNinja webhook URL:

https://aninja.com/api/v1/contactform/?apikey=YOUR_API_KEY 

  • Under “RequestMethod” enter “POST”

The webhooks settings in the form builder

  • Under “Request Body” define the keys and values that will be sent in the body of your webhook’s request.:

    • aNinja fields in the parameter box

    • Form fields from the dropdown.

Check the fields mapping section below to map to the correct aNinja fields.

  • Once you have added all the fields you want to include, click “Save” at the bottom of the “Webhooks” panel to save your changes.
  • Go ahead and test the form on your website. The submissions will be pushed to your aNinja account with the lead data captured in the form.

Fields mapping

Map the data on the aNinja fields and Form fields.

These are the default aNinja fields:

For the Custom Fields, just prefix the field name with “Custom.

Where does the data appear

After the integration, you can search your aNinja CRM for the imported leads. You can also search for any custom field, opportunities, and any other info that you have imported.

  • Lead’s contacts appear in the leads contact section in the lead view
  • Opportunities also appear in the opportunity section in the lead view
  • The company’s info appears on the top left of the lead view, in the Company section.
  • Custom fields appear in the custom field section of the lead view
  • Lead Search is a field that also appears in the bottom left of the lead view. Specifically, these are info/links on the lead or the organization found in Google search.

Godaddy API Form integration

With the simple Javascript code, you can forward your web form leads into your aNinja account. In this article, we show you how the Godaddy API Form integration can be done.

Godaddy API Form integration

The following example is specific to GodDaddy websites.

  • First, log in to your GoDaddy account
  • Then, go to the Product page.
  • Scroll down to Websites + Marketing
  • And, select Manage next to your website to open your site.
  • Select Edit Website or Edit Site to open your website builder.
  • Then, select the form page.
  • Here, you want to search for the HTML section and select Add.
  • Click Embed custom code on the page.

User-added image

  • Click inside the new section to open up the HTML editor.

User-added image

  • Here, in the “Custom Code” box, paste the Javascript code in the following example.
    • You want to replace the fields names used in the example with your form fields names.
    • Also, check the fields mapping table section to map your form fields to aNinja’s.

Example:

<script src = “https://ajax.googleapis.com/ajax/libs/jquery/3.2.1/jquery.min.js”></script>
<script>
$(document).ready(function () {

window.parent.submitted = false;
$(window.parent.document).on(‘submit’, ‘[data-aid=”CONTACT_FORM_CONTAINER_REND“] form’, function (e) {
// Avoid mutliple submissions during 5 seconds period to avoid duplicates
if (window.parent.submitted) {
return;
}
window.parent.submitted = true;
setTimeout(() => {
window.parent.submitted = false;
}, ‘5000’);

let contact_name = ”;
if ($(‘input[data-aid=”CONTACT_FORM_NAME“]’, window.parent.document)) {
contact_name = $(‘input[data-aid=”CONTACT_FORM_NAME“]’, window.parent.document).val();
}
let contact_email1 = ”;
if ($(‘input[data-aid=”CONTACT_FORM_EMAIL“]’, window.parent.document)) {
contact_email1 = $(‘input[data-aid=”CONTACT_FORM_EMAIL“]’, window.parent.document).val();
}
let contact_phone1 = ”;
if ($(‘input[data-aid=”CONTACT_FORM_PHONE“]’, window.parent.document)) {
contact_phone1 = $(‘input[data-aid=”CONTACT_FORM_PHONE“]’, window.parent.document).val();
}
let address_street1 = ”;
if ($(‘input[data-aid=”Address (Street, City, Zip Code)”]’, window.parent.document)) {
address_street1 = $(‘input[data-aid=”Address (Street, City, Zip Code)”]’, window.parent.document).val();
}
let custom_message = ”;
if ($(‘textarea[data-aid=”CONTACT_FORM_MESSAGE“]’, window.parent.document)) {
custom_message = $(‘textarea[data-aid=”CONTACT_FORM_MESSAGE“]’, window.parent.document).val();
}

// Ajax call
$.ajax({
type: ‘POST’,
url: “https://aninja.com/api/v1/contactform/?apikey=<YOUR_APIKEY>“,
data: $.param({contact_name : contact_name}) + “&”+ $.param({contact_email1 : contact_email1}) + “&”+ $.param({contact_phone1 : contact_phone1}) + “&”+ $.param({address_street1 : address_street1})+ “&”+ $.param({custom_message : custom_message}),
success: function (data) {
alert(‘success’);
}
});
});
});
</script>

Fields mapping Table

The following are standard fields you can map to, in addition to any custom fields created in your application that you can see under Settings > Custom fields.

For the Custom fields:

Where does the imported data appear

After the integration, you can search your aNinja CRM for the imported leads. You can also search for any custom field, opportunities, and any other info that you have imported.

  • Lead’s contacts appear in the leads contact section in the lead view
  • Opportunities also appear in the opportunity section in the lead view
  • The company’s info appears on the top left of the lead view, in the Company section.
  • Custom fields appear in the custom field section of the lead view
  • Lead Search is a field that also appears in the bottom left of the lead view. Specifically, these are info/links on the lead or the organization found in Google search.

Need help with Godaddy API Form integration? Leave us an email at support@aninja.com. And we will happily assist you.

aNinja Trigger Events

aNinja trigger events is a specific incident, when verified, triggers the execution of one or multiple actions.

aNinja trigger events include:

“Custom Field Value Changed”, “Incoming Calls”, “Incoming SMS or Email”, “Lead creation”, “Outgoing SMS with error code”, and “Workflow step status changed”.

aNinja Trigger Events

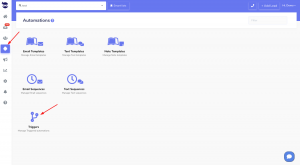
You can access the Trigger Events from the left sidebar > Automations > Triggers > Add trigger.

aNinja Trigger eventsTrigger Events
  • Custom Field Value Changed
    • Indicate the custom field value that when changed in the lead view, fires the trigger action.
  • Incoming Call
    • Specify the call type: missed call, busy, or completed.

  • Incoming Email or SMS
    • When you receive an Email or Text from outside aNinja.
    • Add a specific body content for the incoming Texts to be identified by the system.
  • Lead Created via API
    • Leads coming through API are the result of aNinja integrations (e.g. Forms, Ads, etc…).
  • Lead Created via Chatbot
    • Leads coming through Chatbot are the result of Chatbot conversations.
  • Outgoing SMS with error code
    • If the phone number saved in the lead contacts is wrong, landline, or blocked by the carrier, your sent SMS will return with an error code that we log for each call.

  • Workflow step status changed


Keeping a clean database

Bad data infiltrates every database in form of duplicate contacts, un-standardized lead data, and junk records. While you can’t always keep bad data from coming in, you can clean it up when it’s there.

In order to keep a clean database, you can sanitize your contact file before you import it, and perform a clean-up routine to the existing data.

Importing a correct data

Before you import contacts in a CSV/Excel file, check the following tips:

  • Provide correct email addresses to ensure the deliverability of your emails.
  • Provide correct phone numbers to ensure the deliverability of your texts and campaigns.
  • If possible, assign the mobile number to the primary phone number.
  • Ensure the uniformity of custom fields: don’t create multiple custom fields for identical data. This will lead to confusion over the correct custom field to keep updated, and over the Smartlists results.
    • e.g. on a first data import, custom field “Source”; on a second data import, custom field “Created through”, on a third “Origin”, on a fourth “From”. This creates 4 custom fields for one identical data.
  • Set the Global Setting rule: Do not add new Leads via API if Lead with similar email already exists (avoids duplicates)

Cleaning up the existing data

However, the bad data can still be cleaned up when it’s already there.

  • Remove duplicates
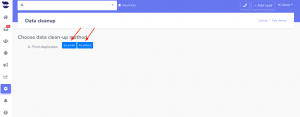
    • Go to Settings > Data Clean up
    • Choose the merging method (by email or by phone)
    • Repeat this task every now and then, depending on the volume of the incoming leads.
  • Prune inactive and junk contacts
    • Contacts with no emails and/or phone numbers are of no use in your database.
    • Leads who asked to stop receiving from you can crowd your database and preferably be deleted.

Keeping a clean database reserves more space for the correct data.

Reach us at support@aninja.com to assist you in merging duplicates.

Mapping fields for a successful data import

It’s important to understand the data types for successful fields mapping during the import of data.

Whether you’re importing your contacts in a CSV file, or through API (Forms, Ad campaigns, etc…); saving your data in the right place allows you to easily manipulate it and create Smartlists, search for leads, and launch automation.

Data Types

Mapping fields for a successful data import:

aNinja has both Standard fields which are the built-in default fields and Custom fields, which you customize to your needs.

All the imported data is located in the Lead view.

Standard Fields

aNinja standard fields are found under the categories: Lead’s Contacts, Company, and Address.

The Contact name is the only required field and it’s essential to complete the import.

Custom Fields

Prefix your field’s name with “Custom.” so it is saved as a custom field on the lead page.

When importing leads in bulk in a CSV file to aNinja, if you can’t see the fields you need, you can create them manually upon import.

Or, before the bulk import, go to Settings > Custom FieldsWhen doing a bulk import, aNinja anticipates which Custom fields you might want to create and marks them as ‘New’. Mapping to a field marked ‘New’ automatically creates a new Custom Field within aNinja.

Types of Custom Fields

When you create a custom field in Settings > Custom fields, you can designate its type:

Text – For text input
Link – For fields with any link/URL
Date – Date in YYYY-MM-DD format
Dropdown – Fields with multiple options dropdown

Then, you can use it on the lead page and assign it a value to be able to group/search for specific leads when needed.

Where does the imported data appear

After the import, you can search your aNinja CRM for the imported leads. You can also search for any custom field and any other info that you have imported.

In the lead view, the left side is where the lead’s data appears:


Javascript API Integration

With Javascript API Integration you can forward leads into your aNinja account simply using a programming code or an API. In this article, we show you how Javascript API Integration can be done.

Javascript applications

The following example is of an API request in Javascript. You can customize off of the following examples to suit your actual code/use case.

Example use cases: Squarespace, Shopify

ajax({
type: 'POST',
url: "https://aninja.com/api/v1/contactform/?apikey=YOUR_API_KEY_HERE",
data:$.param({contact_name : contact_name}) + "&"+ $.param({contact_email1 : contact_email1}) + "&"+ $.param({contact_phone1 : contact_phone1})+ "&"+ $.param({company_name : company_name}),
success: function (data) {
alert('success');
}
});

Fields mapping Table

The following are standard fields you can map to, in addition to any custom fields created in your application that you can see under Settings > Custom fields.
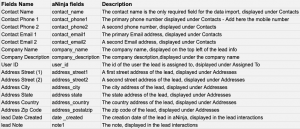
Where does the imported data appear

After the integration, you can search your aNinja CRM for the imported leads. You can also search for any custom field, opportunities, and any other info that you have imported.

  • Lead’s contacts appear in the leads contact section in the lead view
  • Opportunities also appear in the opportunity section in the lead view
  • The company’s info appears on the top left of the lead view, in the Company section.
  • Custom fields appear in the custom field section of the lead view
  • Lead Search is a field that also appears in the bottom left of the lead view. Specifically, these are info/links on the lead or the organization found in Google search.

Need help with Javascript API Integration? Leave us an email at support@aninja.com. And we will happily assist you.
Mapping fields for Leads Bulk Import

aNinja offers different ways to create leads in your account. Importing leads in a CSV file is one of them.

Before the import, you want to sanitize the contacts file to ensure proper mapping.

The correct mapping of leads’ data to aNinja fields saves your data in the right place which makes searching for it easy.

You can also save bulk import mappings and reload it when you have a similar file to import (same order and number of headers).

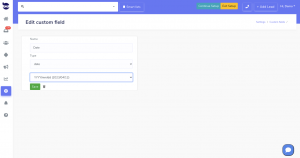
Mapping leads data to aNinja fields

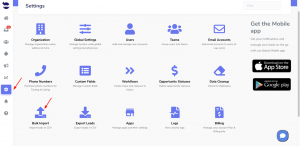
  • For the bulk import, go to Settings > Bulk Import
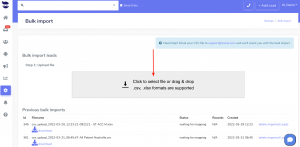
  • Select the contact’s file.
    • If in your CSV file there are records with no contact names, you receive an alert so you go back to the file and add the names. Then try to upload it again.
  • Now, map the data to aNinja fields:

  • The contact name is the only required field.
    • You can either map it to one field or join 2 fields in case the first name and last name are saved in 2 separate columns in your CSV file.
  • It’s important to map the data in your contacts file with the correct aNinja fields to be able to find them in the right place in the lead view.

You can even create custom fields if they’re not already there.

Standard fields
  • Contact_name: is a required field and it’s essential to complete the import.
  • Primary contact’s email: contact_email1. You can also add a second email (contact_email2).
  • Primary contact’s phone: contact_phone1.You can also add a second phone number (contact_phone2).
    • Here we recommend choosing the mobile number to be the primary contact phone as the system grabs the primary phone number to be used when texting.

Custom fields

You can create custom fields immediately when doing the mapping if they were not listed among the fields. Just prefix the field with “Custom.” e.g. Custom.Source

Saving field mappings

It’s optional. You can save the fields mapping and reload it when you have a similar file to import (same order and number of headers).

It’s useful if you regularly do bulk imports into aNinja and have many fields to map.

Don’t forget to click Upload to import the data.

Where does the imported data appear

After the import, you can search your aNinja CRM for the imported leads: Lead Contacts, Custom fields, and Addresses. Type your search on the top navigation bar.

  • Lead’s contacts appear under Contacts in the lead view.
  • Opportunities also appear in the opportunity section in the lead view.
  • The company’s info appears on the top left of the lead view, in the Company section.
  • Custom fields appear under Custom fields in the lead view.

Have any specific questions on the best ways to import your data? Please, email our Support team at support@aninja.com.

Sanitizing or cleaning the contacts file before import

Saving the right data in aNinja allows for easy searching, powerful Smartlists, and the ability to automate your emails and texts.

Here are the essential steps to take and the common mistakes to avoid when importing your Leads into aNinja.

Sanitizing or cleaning the contacts file before import

To successfully import your contacts file, you want to remove unnecessary fields and characters.

  • Have your data saved in an Excel or Google sheet file as a dataset* and work on sanitizing it there.
    • Start your table at cell A1.
    • Always reserve the first row for the headers.
    • Make the contact name in the first column (A) of your sheet.

*dataset:

  • Remove unnecessary columns and rows. You don’t want to bloat your CRM with data that you’re not going to use.
  • Remove duplications. You don’t want to be sending the same email or text sequence to the same leads. That would be annoying for the leads and extra charges for you.
  • Trim spaces. Though we don’t save contact items with empty or just spaces values, your data would look tidier using the proper spacing.
  • Remove weird and unnecessary characters to avoid receiving errors when uploading the file.
  • Remove hyperlinks from the email or the URL addresses. Save them as text.
  • Convert the phone numbers to Numbers.
  • Delete the empty columns and rows. They might contain hidden data.
  • Rename your file headers according to aNinja fields. This helps you choose the correspondent aNinja field to map.
    • For the custom field values, simply prefix them with “Custom.” in the header.
      e.g. Custom.Location for a header of a column with the location.

Headers are in the first row (1):

Check the mapping rules to name your headers according to aNinja’s fields.

  • Lastly, save your file as CSV or Excel as aNinja supports these 2 formats.
    • A CSV file has commas in between the values of each column. If there is no comma separating the values of the columns, the CSV file is not valid. And you’ll not be able to import your file to aNinja. So, you want to check the export options that generated this file to make sure the comma is there to have a valid CSV.

Now your file is clean and ready to import to aNinja.

Have any specific questions about sanitizing or cleaning the contacts file before import? Feel free to leave us an email at support@aninja.com. We will happily assist you.