Trigger “Custom field value changed” event

With the “Custom field value changed” Trigger event, you can automatically perform an action based on a specific custom field value.

This powerful trigger event allows you to specify a custom field value and trigger an action whenever that value is changed.

Setting a trigger event to handle Custom field value changed

To set up this trigger event, you will need to indicate the custom field that you want to track in the trigger event and that should trigger the action. Specifying the corresponding value of the custom field in the trigger condition is optional.

Then, you can set the action that should be taken when the trigger fires.

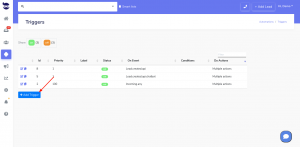
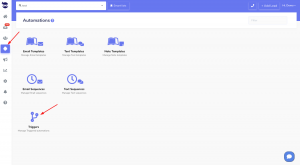
  • Hit + Add Trigger
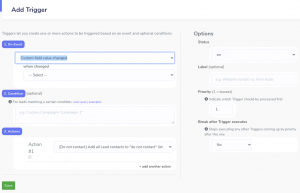
  • In the Trigger Event:
    • Choose “Custom field value changed

  • In the Trigger Condition (optional):
    • Specify the custom field value that will fire the trigger action. (see example below).
  • In the Trigger Action:
    • Set the trigger action you want to fire in response to the event.
    • You can add multiple actions to be executed when the event takes place.
Example:

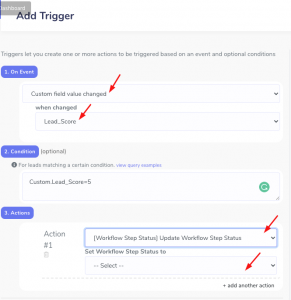
If you have a custom field for “Lead Score“; and you want to automatically change the workflow step of the lead to “Qualified” when their lead score reaches a certain threshold (after changing the custom field value of Lead score in the lead view), you can set up a trigger to do this.

  • On an event that is “Custom field value changed”
    • Select the custom field e.g. Lead_Score from the “changed to” dropdown
  • Set the trigger condition to e.g. “Custom.Lead_Score=5”
  • Choose to execute an action to “[Workflow Step Status] Update Workflow Step Status:
    • and Set Workflow Step Status to: “Qualified

You can add multiple trigger actions from the actions dropdown.
Trigger "Custom field value changed" event

Integrating Hubspot forms with aNinja

In this article, we show you how integrating the Hubspot forms with aNinja can be done in 2 steps.

The integration allows you to forward leads into your aNinja account simply using a programming code or an API. Which allows you to augment the number of your leads.

1- In Hubspot Marketing Hub, Edit your page, then, go to page Settings > Advanced Options.

2- In Footer HTML add the following Javascript (here, you will need to adapt the code to your form and use your aNinja API key).

<script src=”https://ajax.googleapis.com/ajax/libs/jquery/3.2.1/jquery.min.js”></script>
<script>

$(document).on(‘submit’,’form’,function(){
var contact_name = $(“input[name=’firstname’]”).val() +” “+$(“input[name=’lastname’]”).val();
var contact_email1 = $( “input[name=’email’]”).val();
var contact_phone1 = $( “input[name=’phone’]”).val();

    $.ajax({
        type: 'POST',
        url: "https://aninja.com/api/v1/contactform/?apikey=YOUR_ANINJA_API_KEY_HERE",
        data: {
            'contact_name': contact_name,
            'contact_email1': contact_email1,
            'contact_phone1': contact_phone1,
            'your-comments': 'From my Hubspot form'
        },
        success: function (data) {
            console.log('[Info] aNinja form submitted successfully');
        }
    });
});

</script>

  • Also, check if your Hubspot plan offers Workflows. If so, you can post the Form submission to aNinja through a Workflow webhook in Hubspot.

Where does the imported data appear

After the integration, you can search your aNinja CRM for the imported leads. You can also search for any custom field, opportunities, and any other info that is collected from the forms.

  • Lead’s contact appears in the leads contact section in the lead view
  • Opportunities also appear in the opportunity section in the lead view
  • The company’s info appears on the top left of the lead view, in the Company section.
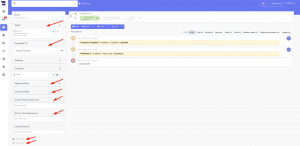
  • Custom fields appear in the custom field section of the lead view
  • Lead Search is a field that also appears in the bottom left of the lead view. Specifically, these are info/links on the lead or the organization found in Google search.

Need help integrating Hubspot forms with aNinja? Leave us an email at support@aninja.com. We’re more than happy to assist you.

Creating a Widget for every workflow step

To better identify the leads in the step they have reached in the workflow, consider creating a widget for every workflow step.

Creating a widget for every workflow step

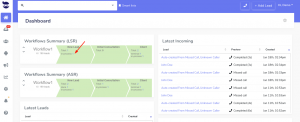
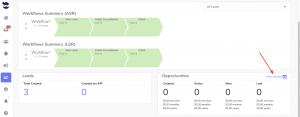
On the Dashboard Widgets “Workflow summaries LSR” and “Workflow Summary ASR”, you can see the leads that reached every step of the workflow.

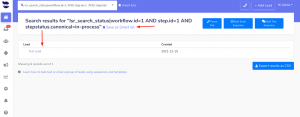
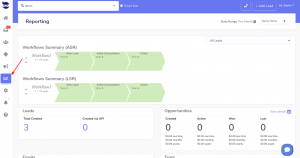
  • From the Dashboard widget “Workflow Summary LSR” / ASR, click on the dynamic number in blue next to the workflow step.Creating a Widget for every workflow step
  • It shows you the leads that have reached that step.
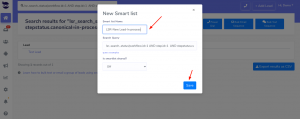
  • Go ahead and save this query / Smartlist.
  • Name it with both the workflow name and the step name. Therefore, you will be able to recognize the leads in it. Example: LSR/New Leads/In-process.

See the Workflow step in a Widget

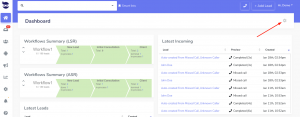
  • Go to your dashboard and click on the little gear on the top right.
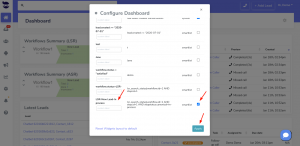
  • Enable the Smartlist that you’ve just created to show as a widget on the Dashboard.
  • Repeat the above for all the steps in your workflows. As a result, you can have a widget for every step of your workflows shown on the Dashboard.

Changing the Lead’s Status in the Workflow

Changing the Lead’s status in the workflow represents the lead’s position in the Sales/Marketing pipeline until you turn them into a customer.

Changing the Lead’s Status in the Workflow

  • Search for your lead in the top navigation bar
  • Type any info you have on your lead (name, company, phone number, email, custom fields, etc…) and aNinja will bring the results to the leads view. Click on the lead and you will be redirected to their lead view.
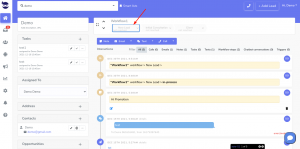
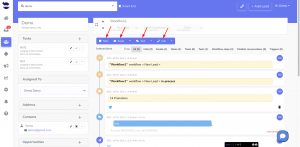
  • Then, when in the Lead View, on the top of the page, you can manipulate the status of the lead in the workflow. This allows you to keep a close follow-up on the lead’s progress from prospect to closing.Changing the Lead's Status in the Workflow

Activities using the workflow steps

aNinja Reports

Get reports on the workflow of your latest activities and interactions that you’ve made in aNinja in a certain period of time. aNinja reports are simple, understandable, and provide you with a detailed view of your business performance.

When every user can see his reports, admin users can see all users reports and stats.

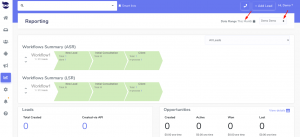
On the top right of the Reports page, you can select the period and the user.

Accessing Reports

On the left sidebar, click on Reports icon.aNinja reports

aNinja reports

Below are the reports provided by aNinja:

  • Workflow Summary (ASR)
    • See All Steps Reached across the workflow.
  • Workflow Summary (LSR)
    • See the Last Steps Reached across the workflow.
  • Leads
    • See stats of leads created and Via API.
  • Opportunities
    • See figures of the Opportunity statuses.
    • On the right corner of the Opportunity report, see details of leads’ opportunities. Inside the report, you can export stats into a CSV file.
  • Emails
    • See stats of all sent and opened emails, and the open rate.
  • Texts
    • See stats of incoming and outgoing texts.
  • Calls
    • See stats of outgoing calls and their total duration.

History of Interactions and Activities of a lead

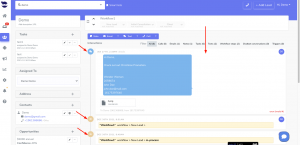
aNinja brings you the history of all interactions and activities made for a lead in the lead view.

What’s the history of interactions and activities

Once the creation of a lead in your aNinja account, the system saves all the interactions and activities that you make to this lead, in the history section.

Moreover, they are listed in ascending order. So, the users and team members are kept in the loop of the actions performed on this lead.

In the history section you can view:

  • Calls made and durations.
  • Emails sent & received with this lead.
  • Notes that are left by any team member so any other user stays updated on any relevant info.
  • Texts sent to this lead.
  • Tasks assigned and their statuses.
  • Workflow steps changes.
  • Chatbot conversations initiated by this lead.
  • Triggers

Accessing the lead history

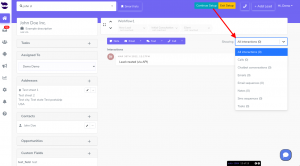
From the lead view, in the middle right of the page, you can see all the interactions and activities of the lead.The history of all interactions and activities for a leadYou can also filter activities and interactions that appear in the history section from “All Interactions” dropdown:

Including: Calls, Chatbot Conversations, Emails, Email Sequences,  Notes, Text Sequences, and Tasks.

The Lead View

aNinja was designed to show you all the lead activities and interactions in one place: the Lead View.

The lead view is divided into 4 sections:

Accessing the lead view

You can access the it from 2 places:

  • On the top navigation bar, type the name of the lead or any info related to the lead (email, phone, URL, or custom fields). aNinja will find them for you. Click on the name. Then the system opens the lead view.
  • From the left sidebar, click on Leads. It will show you the list of all the leads you have in aNinja. Find your lead among them and click on the name. Then, the system opens the lead view.

Leads Search

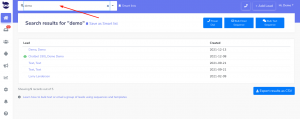
The lead search is one of the most common actions performed in regular business applications. aNinja searches among all your CRM records – Name, contact, email, phone, and any other custom fields, and brings you the results in the Leads View.

aNinja searches among all your CRM records – Name, contact, email, phone, and any other  and brings you the results in the

Leads Search in aNinja

Searching for a specific lead

Simply type your search in the top navigation bar here (name/contact/email/phone):

Searching for leads falling under certain criteria

Filtering your leads into any wished criteria, allows you to group them under these criteria, and target them with your specific campaigns call to action.

  • Create the criteria in the status of the lead(s) in the workflows.
  • Call a Smartlist with these criteria when it’s time to launch the campaign.

Categorizing your Leads before importing them

Search for leads using custom fields

You can also search for leads using custom fields.

Bulk Activities

The results of your search will show in the Leads View. You can save your search as smartlist for future use. You can also share it with other users.

After filtering your leads, you can start your activities:

More articles on Leads management

aNinja Workflows

aNinja WorkflowsWith aNinja workflows, you can organize your work and the steps you want the salespersons to carry out to reach the highest productivity of your team. It’s all that it takes to turn a lead into a customer.

aNinja is designed to make your sales communication quick, easy and effective. You can easily build out unique sales workflows using our dynamic Smartlists and email sequences.

What is a Workflow

A Workflow consists of a series of sequential steps. You need to carry them out one after another with proper approvals at each stage from the beginning to the end.

That includes everything from prospecting to closing the sale. Sales cycles vary between companies and industries, but they usually have a similar sequence of steps.

And while most business owners can intellectually understand why workflow is important, it’s hard to truly wrap your brain around it until you have actually seen it in action.

Benefits of workflows

  • Monitor the lead/client progress in the sales/customer pipeline.
  • Better align leads/clients with the most appropriate staff members.
  • Since the workflow keeps a record of what occurs in the system, an audit trail shows who, what, when, and what actions were performed.
  • Excellent communication with leads/clients makes day-to-day operations smoother overall.

Adding a workflow

These are the steps to add aNinja Workflows:

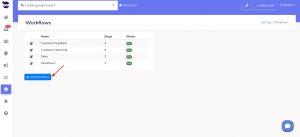
  • On the left sidebar, click on Settings > Workflows
  • Click Add Workflow
  • Name the Workflow
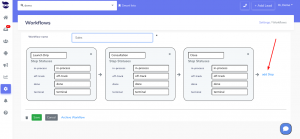
  • Keep/Rename the Step Status and hit Save

You can add multiple steps to the workflow.