Error codes returned by the carrier on SMS or MMS

You might receive error codes returned by the telephone carrier after you’ve sent a SMS or MMS.

The telephone carriers filter all the messages to protect the mobile subscribers from spam and other forms of unwanted messaging.

And, these systems look at both message content and volume.

Filtering in the United States and Canada can affect the delivery of your SMS and MMS messages.

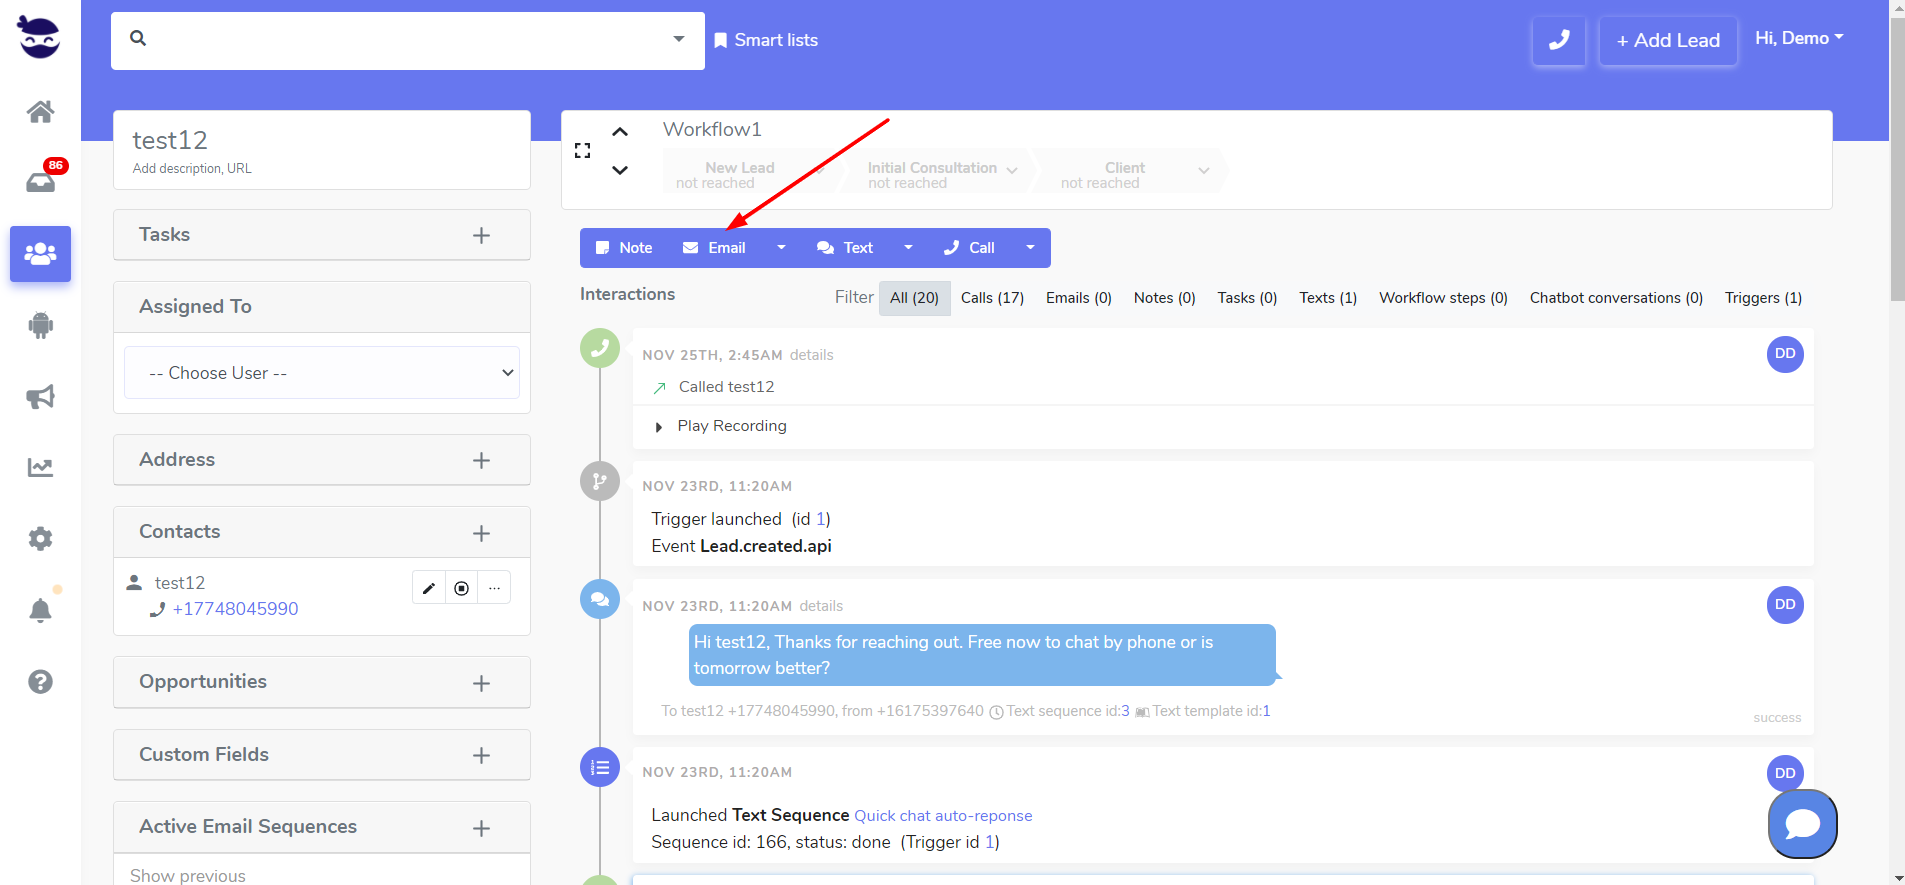
Where do error codes appear in aNinja

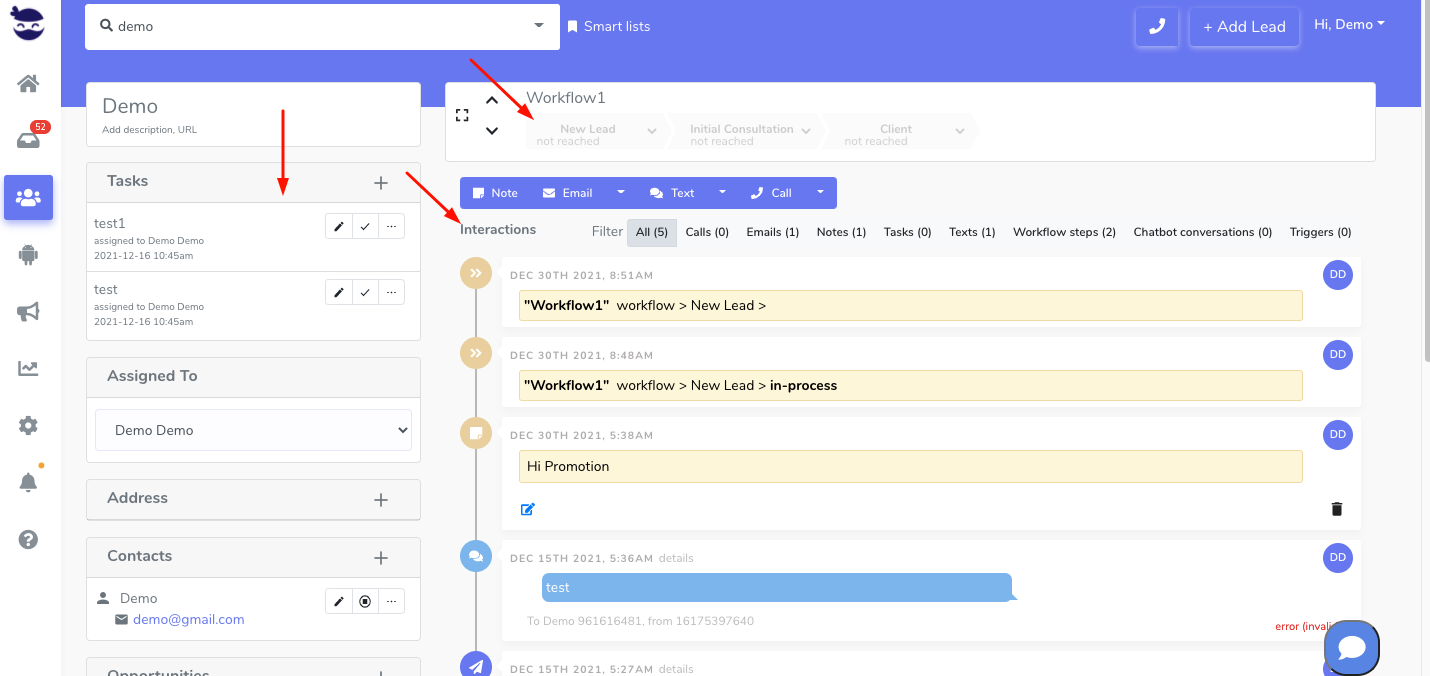
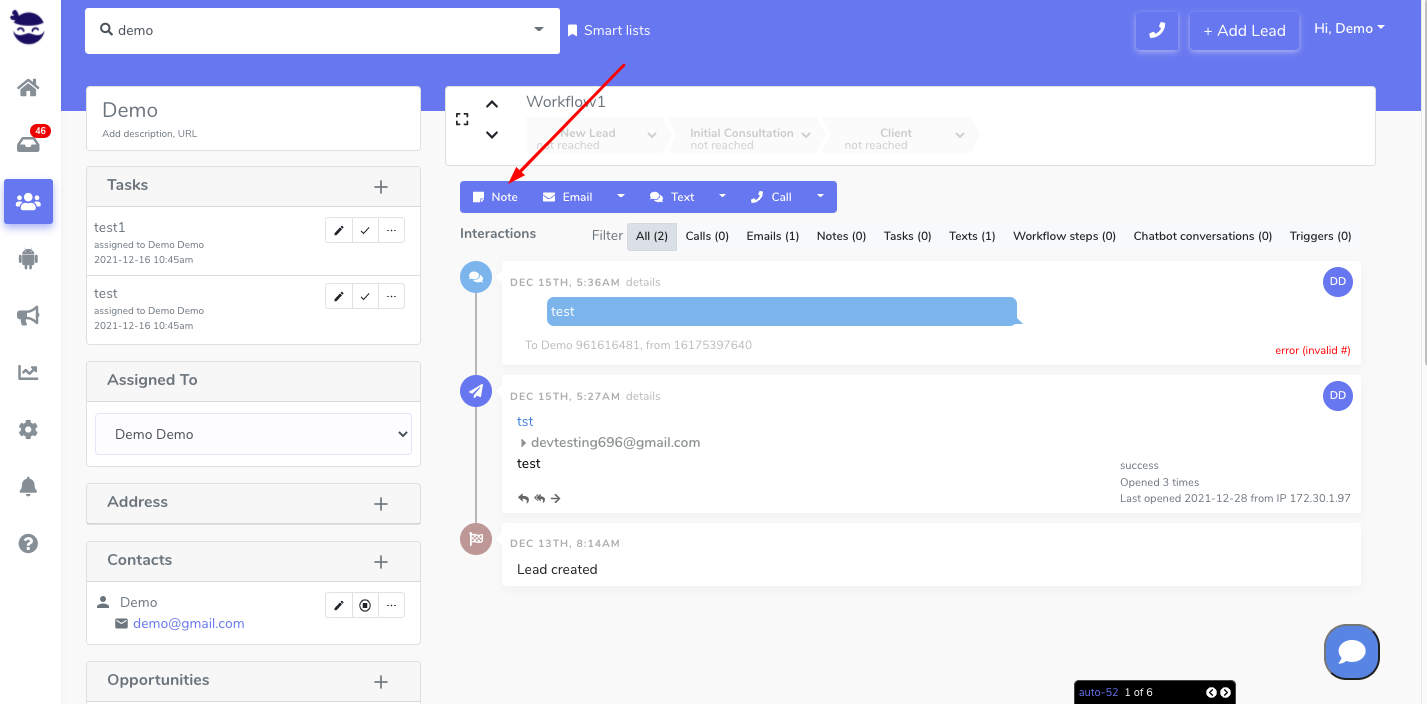
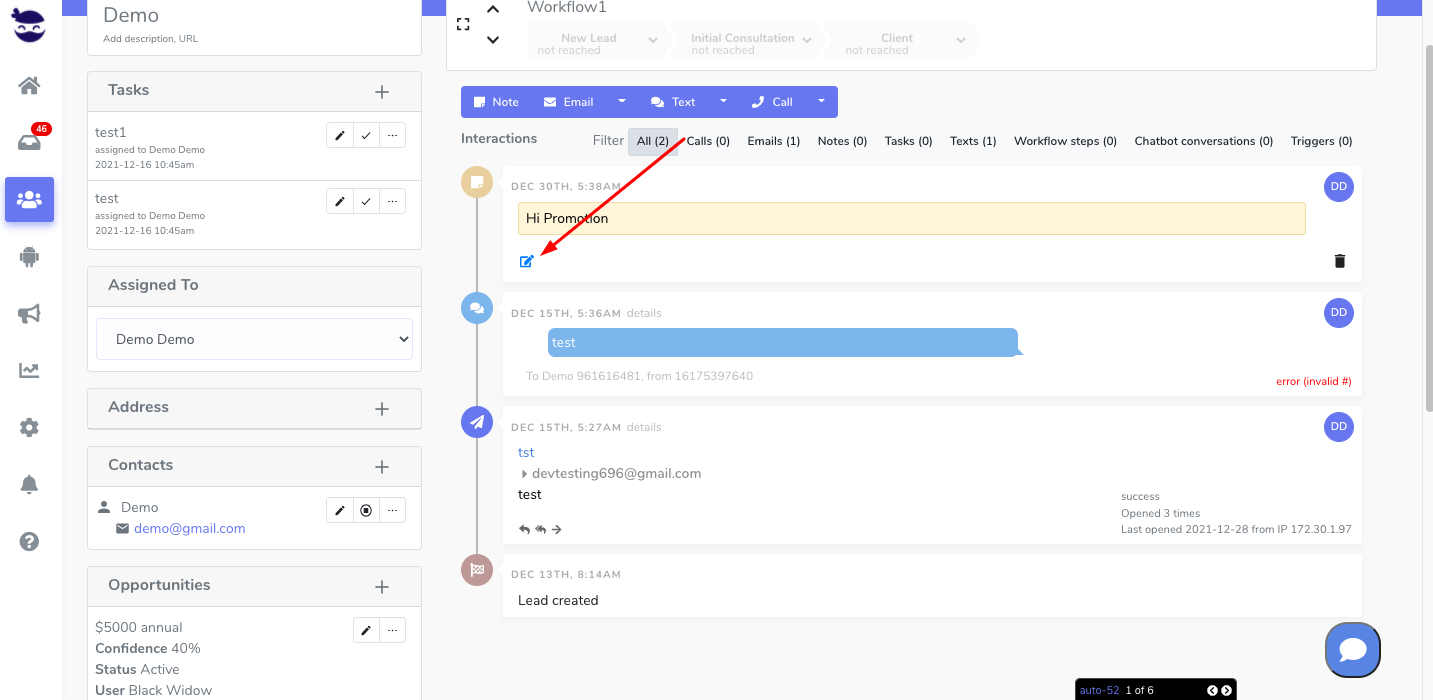
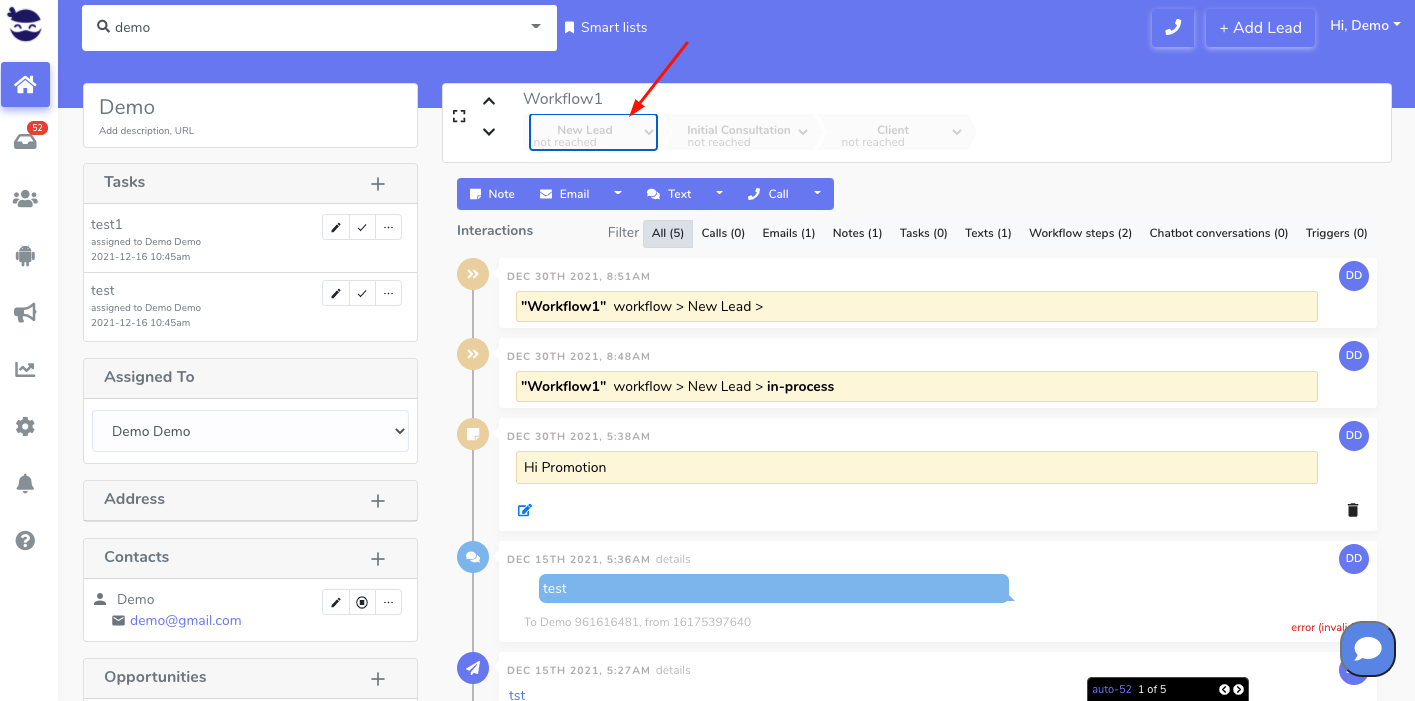
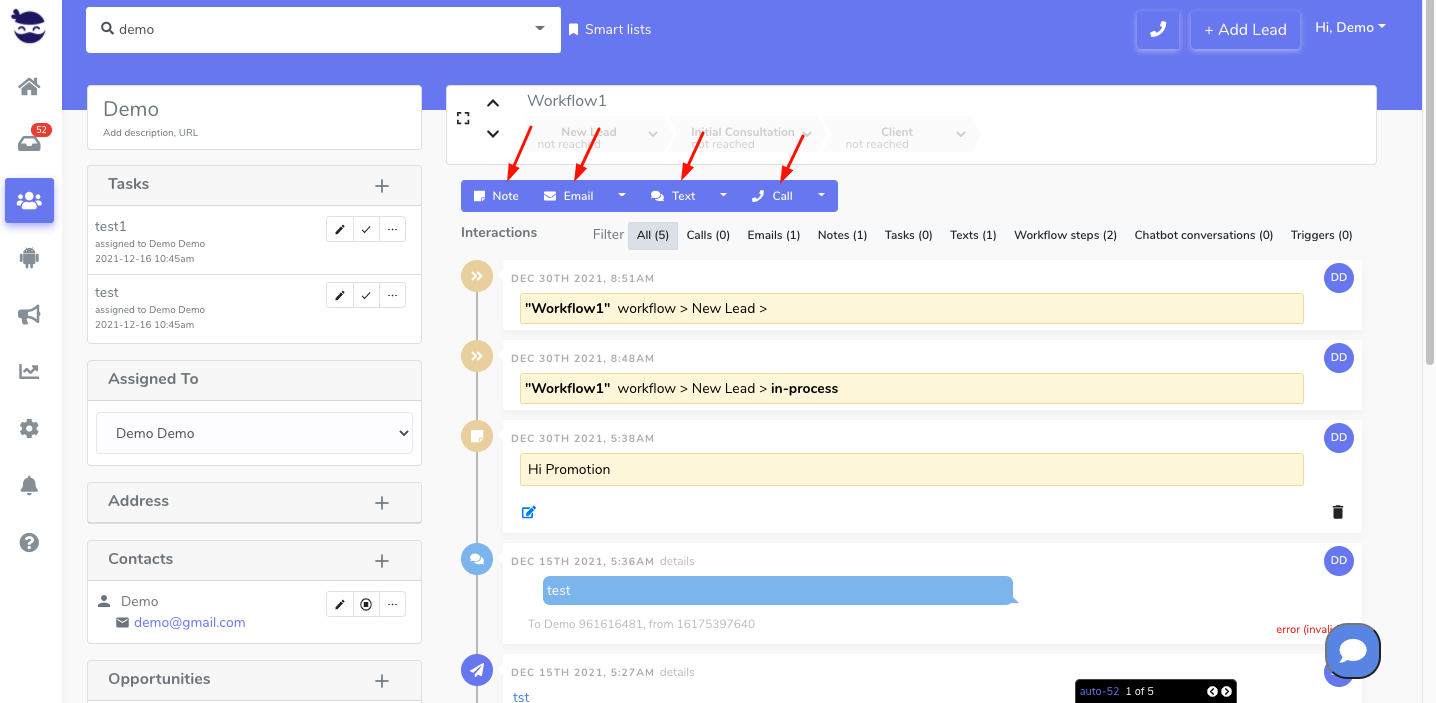
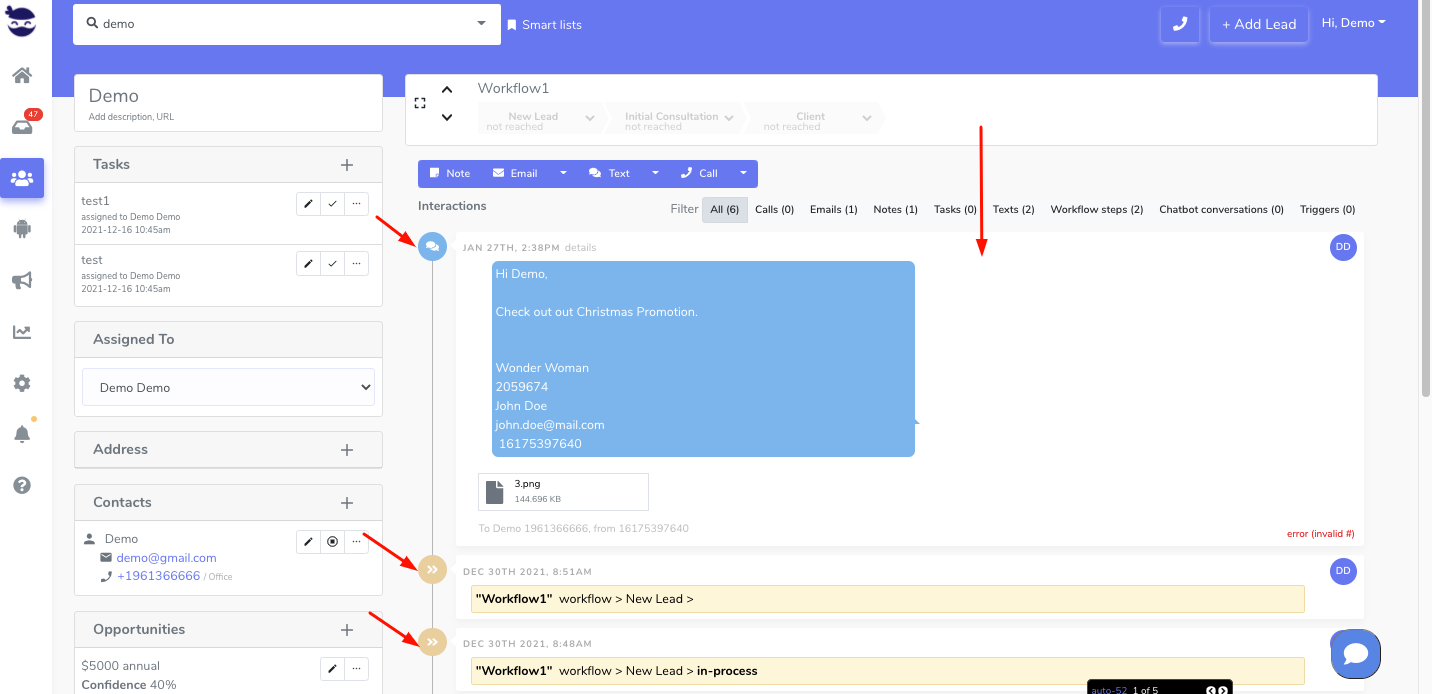
When in the lead view, in the history section, you can see “error” in red on the right corner under the sent SMS or MMS.

Hover your mouse over “error” to see the error code.

Error codes on SMS or MMS

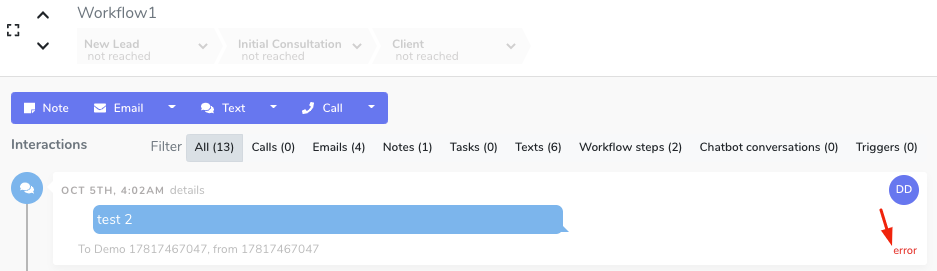
Then, search for this code in the below section to understand the reason for this error.

Error codes references on SMS or MMS

Below are most common error messages returned by the carriers.

  • 11751 => Media exceeds messaging provider size limit.
    • Maximum size limit depends on the messaging channel.
    • aNinja supports an MMS of 600KB.
  • 12300 => Invalid Content-Type.
    • Our carrier is unable to process the Content-Type of the provided URL.
    • You must return a Content-Type for all requests. Requests without a Content-Type will appear in the Debugger as a 502 Bad Gateway error.
  • 30002 => Account suspended
    • The message you sent was filtered by the Carrier for containing forbidden content which resulted in suspending your account/number.
  • 30003 => Unavailable or unreachable destination.
    • The destination handset you are trying to reach is switched off or otherwise unavailable.
  • 30005 => Unknown or inactive destination number.
    • The destination number you are trying to reach is unknown and may no longer exist.
    • The device you are trying to reach is not on or does not have sufficient signal.
    • The device cannot receive SMS (e.g. the phone number belongs to a landline).
    • There is an issue with the mobile carrier.
  • 30006 => Landline or unreachable destination.
    • The destination number is unable to receive this message. Potential reasons could include trying to reach a landline. Or, in the case of short codes, an unreachable carrier.
  • 30007 => Your message was blocked by the carrier due to spam, phishing, and fraud content.
  • 30008 => Delivery of your message failed for unknown reasons.
    • Our carrier receives a very generic error from the destination carriers that they have no further details about. They associates the message with the error code 30008 letting you know that they truly don’t know what caused this error from the provider.
  • 30019 => Content size exceeds carrier limit.
    • Message failed because the size of the content associated with the message exceeded the carrier limit.
  • 30410 => Provider timeout.
    • The provider used may be experiencing disruptions resulting in errors or request timeouts. Messages are failed and not retried to avoid duplicate message delivery.
  • 32017 => Carrier blocked call due to poor reputation score on the telephone number.
    • The calling number has a low answer rate from end users; or, generates low-duration calls; or it is responsible for large volumes of unwanted calls.

aNinja Activities Logs

It’s important to have a clear understanding of all the activities and interactions that occur on your aNinja account. aNinja provides a helpful solution in the form of activity logs reports, allowing you to conduct audits whenever necessary.

Specifically, the logs report feature provides a comprehensive overview of all incoming and outgoing calls, emails, and texts, and the triggers you’ve launched. Additionally, you can easily view the failed leads API injection.

Accessing aNinja Activities Logs reports

Activities Logs

  • Calls
    • You can see the details of the incoming and outgoing calls, including the lead ID, duration and date of the calls.
    • You can also listen to the recordings of the conversations.
  • Emails
    • Here are saved all the details on the incoming and outgoing emails, including the sequences and their statuses.
  • Texts
    • You can see the details of the incoming and outgoing texts, including the sequences and their statuses.
  • Audit Log
    • As an admin user, this option allows you to see the activity of the users in searching for leads using smartlists or from the top navigation bar, and the lead view that the users opened.
  • Failed leads API injection
    • You can identify any leads that failed to import into your aNinja account via API for duplicate emails.

Lead Interactions

Lead interactions refer to the various touchpoints between a business and a potential customer, or lead, throughout the sales and marketing process.

You can track and manage those interactions in aNinja. Which allows you to monitor and analyze them with leads and track their progress through the sales pipeline.

In aNinja, they can take many forms, including notes, emails, texts, and phone calls.

Types of lead interactions

  • Note 
    • Leave any important note for you or other team members to pick up on, including minutes notes.
  • Email
    • Send personalized emails to leads to introduce your product or service, provide value, and encourage them to take action.
  • Text
    • Using SMS or other messaging apps to communicate with leads in a more immediate and personal way.
  • Call 
    • Speaking with leads over the phone to build rapport, answer questions, and provide more information about your product or service.

Where can I see the lead interactions

They exist in the lead view, in “All Interactions” dropdown.

Lead Interactions

You can access the lead view from 2 places:

  • On the top navigation bar, type the name of the lead or any info related to this lead (email, phone, URL, or custom field). Then, aNinja finds them for you. Just click on the name and the system redirects you to the lead view where you can start the lead interactions.
  • From the left sidebar, click on Leads icon. It shows you the list of all the leads you have in aNinja. Locate the lead, click on their name, and you will be guided to their lead view.

All your interactions are saved in the Lead View in the History section to give you a deep view of the tasks performed for this lead.

Search for more help articles in the aNinja Knowledge base

Leads View v/s the Lead View

Leads View v/s the Lead View

In the leads view, you can see all or a group of leads that you have in your CRM. The lead view shows the info you have on a specific lead.

The Leads View

The Lead View

In the Lead View you will see the personal info of a specific lead with the history of interactions and activities you have made with this lead since his creation in your aNinja account and his status in the workflow.

Search for a lead to see his lead view info.

aNinja Reports

Get reports on the workflow of your latest activities and interactions that you’ve made in aNinja in a certain period of time. aNinja reports are simple, understandable, and provide you with a detailed view of your business performance.

When every user can see his reports, admin users can see all users reports and stats.

On the top right of the Reports page, you can select the period and the user.

Accessing Reports

On the left sidebar, click on Reports icon.aNinja reports

aNinja reports

Below are the reports provided by aNinja:

  • Workflow Summary (ASR)
    • See All Steps Reached across the workflow.
  • Workflow Summary (LSR)
    • See the Last Steps Reached across the workflow.
  • Leads
    • See stats of leads created and Via API.
  • Opportunities
    • See figures of the Opportunity statuses.
    • On the right corner of the Opportunity report, see details of leads’ opportunities. Inside the report, you can export stats into a CSV file.
  • Emails
    • See stats of all sent and opened emails, and the open rate.
  • Texts
    • See stats of incoming and outgoing texts.
  • Calls
    • See stats of outgoing calls and their total duration.

Lead Notes

Any time you are on the Lead view, you can keep a note for yourself or for other users in the team on any important point worth saving for the record. e.g. minutes of a meeting/call.

Creating a Lead Note

  • Here, you can choose to use a note template, or just type a new one.
    • You can also access all the note templates and edit them.
    • Click on edit templates on the right bottom of the note template dropdown.

  • Lastly, don’t forget to save.
  • aNinja auto-saves your work so you don’t lose it.
    • Click on the clock in the toolbar and choose what you want to recover.
  • Afterward, you can see the note you just created, the first record in the history in the middle of the page.

Adding an attachment to a Note

  • When creating a note, before saving it, click on the attach to add any useful document worth saving on the lead view.
  • Lastly, click on save.

Editing a Note

  • From the history of interactions in the Lead View, locate the note.
  • And, click on the edit pen in the left of the note.

  • Make the changes you want (example: add an attachment).
  • Lastly, Save it again to save the changes.
  • Or, click on the recycle bin to disregard the changes. The note will not be deleted from here.

Deleting a Note

  • From the history section in the lead View, locate the note.
  • Then, click on the recycle bin on the right bottom of the note.
  • And OK to confirm deleting the note.

The Lead View

aNinja was designed to show you all the lead activities and interactions in one place: the Lead View.

The lead view is divided into 4 sections:

Accessing the lead view

You can access the it from 2 places:

  • On the top navigation bar, type the name of the lead or any info related to the lead (email, phone, URL, or custom fields). aNinja will find them for you. Click on the name. Then the system opens the lead view.
  • From the left sidebar, click on Leads. It will show you the list of all the leads you have in aNinja. Find your lead among them and click on the name. Then, the system opens the lead view.

Making a Call in aNinja

Making a Call in aNinja

In aNinja, you can dial a phone number, call a lead’s phone number from the lead view, and power call multiple leads, using the phone number you have saved in your aNinja profile.

Dialing a phone number from aNinja Web app

  • On aNinja Dashboard, on the top right, click on the phone icon.
    • The call is made through the phone number saved in your user profile.
      • If you’re a user with Owner or Admin role you can choose to make the call using other users phone numbers.
    • When you finish the call, tap on the red button.
    • To close the calling window, just click on the phone icon once again.

making a call in aNinja

Calling a lead from aNinja Web app

  • When on the Lead View, from the toolbar, choose the call feature. It opens a dialing window and automatically shows the primary phone number in the lead’s contacts.
    • Click on the green button to call.
      • If you’re a user with Owner or Admin role you can choose to make the call using other users phone numbers.
    • When you finish the call, tap on the red button.
    • To close the calling window, just click on the phone icon once again.

Calling multiple leads from aNinja Web app

  • On the Leads View, whether you choose to call all the leads in your CRM, or a group of leads that you have grouped using a Smartlist; on the top right of the page, hit the Power Dial Button.
  • This option allows you to call all the leads sequentially without bothering to go to each lead’s profile to call manually. When the current call is ended, the system starts calling the next lead in queue.

Accessing the calls log

  • If you are a user with a User role, you can view your own calls in Settings / Logs and listen to the conversations.

  • Users with Admin role can view calls and listen to call recordings of all users.

Note: For saved leads, you can keep notes of the calls. In the Lead View, click on Notes to enter relevant information that you picked up from the call.

Sending emails via aNinja

Sending emails via aNinja to your leads when having all relevant information at your fingertips is what you really need to handle all your communications directly through aNinja.

You can take advantage of aNinja’s features to make your interactions with the leads more efficient.

Moreover, aNinja auto-saves your work every few seconds so you don’t lose it.

Sending emails via aNinja

Users with Admin role can send emails from any email account associated with aNinja. When composing an email, an admin will have all the email accounts listed in the “From” dropdown.

  • When on the lead view, click on email from the toolbar
  • Type the email or select an available template
  • Click Send
  • If you choose to “reply”, “reply all” or “forward”, this brings you the old communicated messages in the body of the email.
    • However, if you select a template in the reply/reply all/forward, the template overwrites the old messages with the pre-defined text saved in the template.

Sending an attachment by email

To attach a file to your email, click on the attachment icon.

Note! We presently don’t allow attachments in Email Templates.

You might want to take security measures to avoid your email being marked as SPAM.

Deleting Leads

Deleting leads removes all associated interactions and activities.

Moreover, when you delete a lead, you can no longer retrieve the deleted lead and the contacts, interactions, and activities associated with them.

Deleting a lead in aNinja

In aNinja, you can delete a lead and remove all associated interactions and activities.

  • Go to lead view
  • Scroll all the way down. In the bottom left, click delete.Deleting Leads
  • And confirm by clicking on Yes, delete it.Deleting Leads

Deleting previous bulk imports files

You might want to delete a bulk import that you’ve previously imported to your aNinja account.

Just remember that this removes all associated interactions and activities.

  • On the left sidebar, click on Settings > Bulk import
  • Locate the file you want to delete.
  • On the right side of the page, next to the file you want to delete, click on the delete imported leads link.

Deleting leads in Bulk

If you want to delete leads in bulk, send your request to support@aninja.com and let us know the context. We can bulk delete on our side if there’s a range.