VistaPrint aNinja Form Integration

aNinja allows you to integrate your Vistaprint Website Forms into your aNinja account. In this article, we show you how the Vistaprint Form Integration can be done using a simple Javascript code.

Vistaprint aNinja Form Integration

You can integrate and augment the functionality of popular platforms with aNinja.

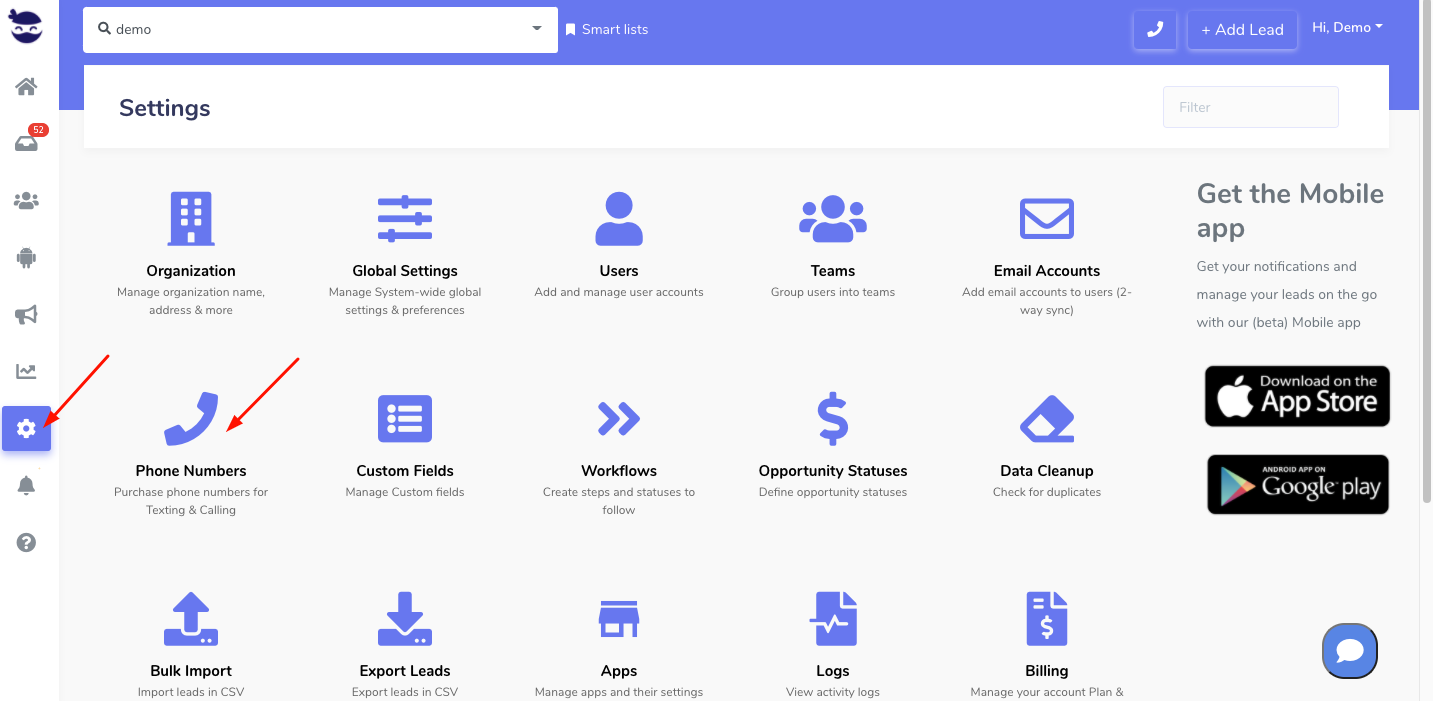
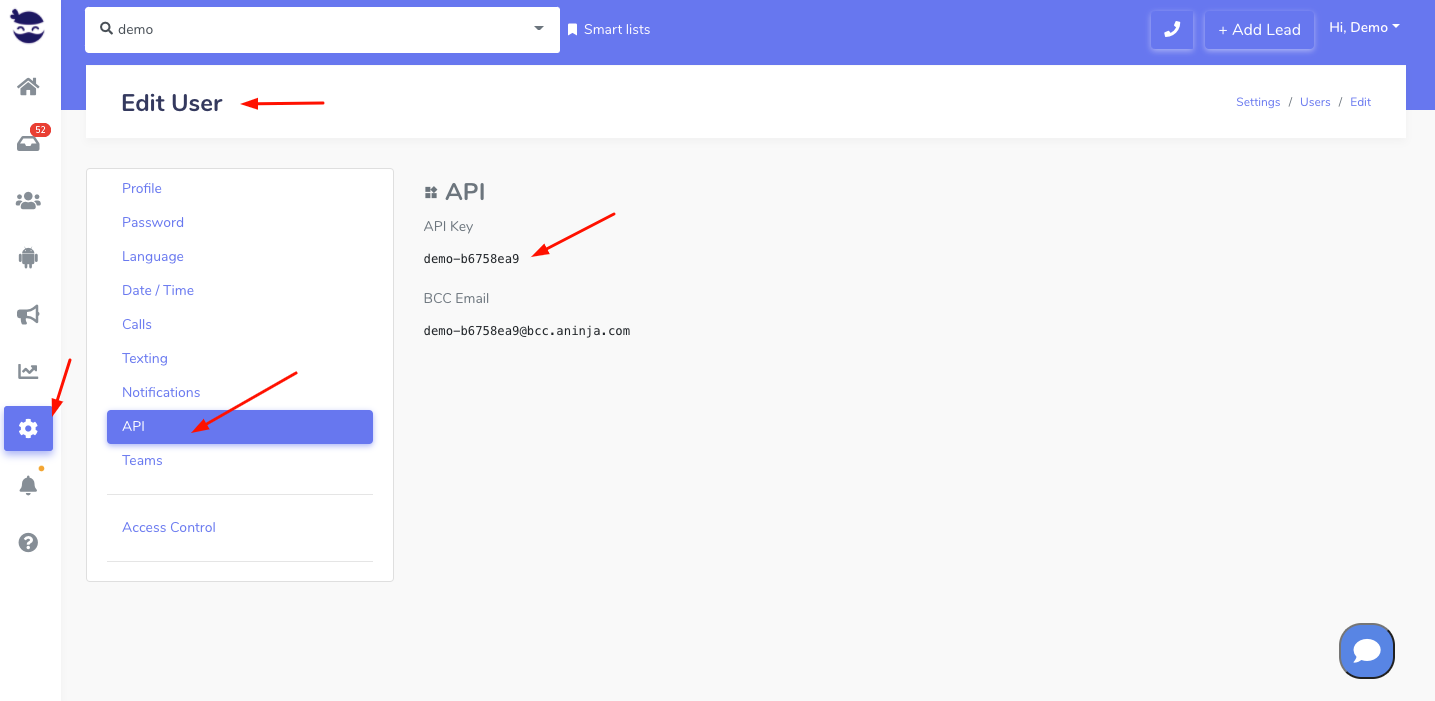
  • First, you need to find your API key
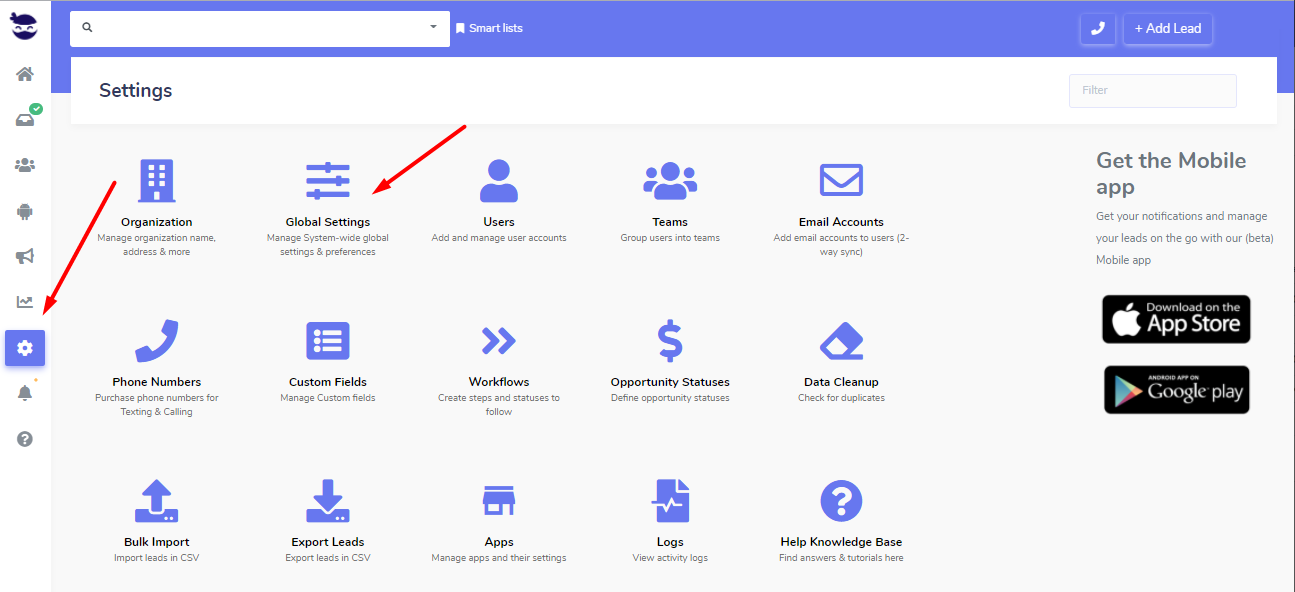
    • On the left sidebar, click on Settings > Users
    • Then, click the edit pen next to your name.
    • And, copy it to use it later in the integration
  • Now, login to your Vistaprint website editor
  • In the middle of the page, click on edit website
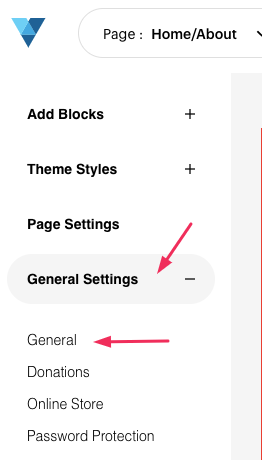
  • On the left side menu, click on General Settings > General
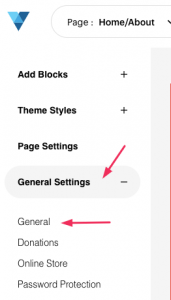
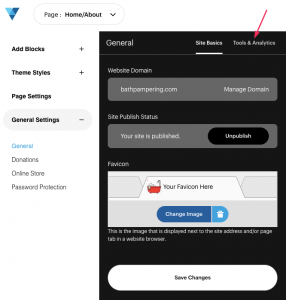
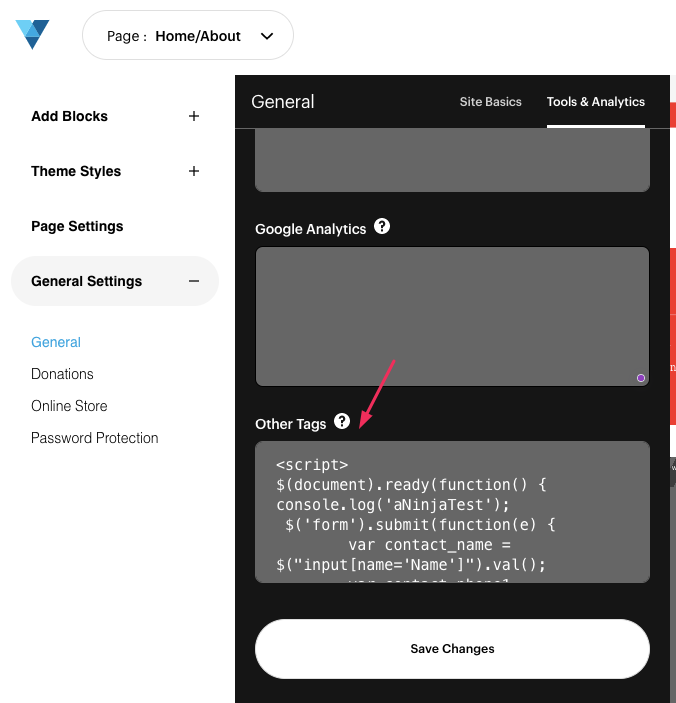
  • Then, choose Tools & Analytics
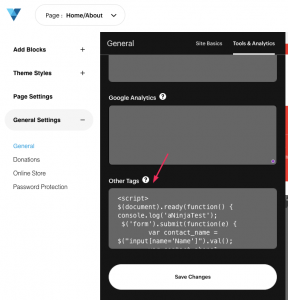
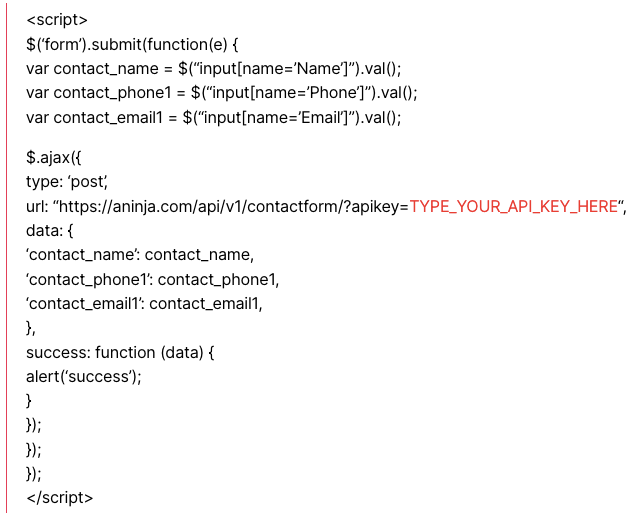
  • Under Other Tags add the Javascript code (see example below)Javascript aNinja Form Integration
  • Map the form fields to aNinja fields
  • Save and Publish
  • Go to your website, refresh and test submitting a form.
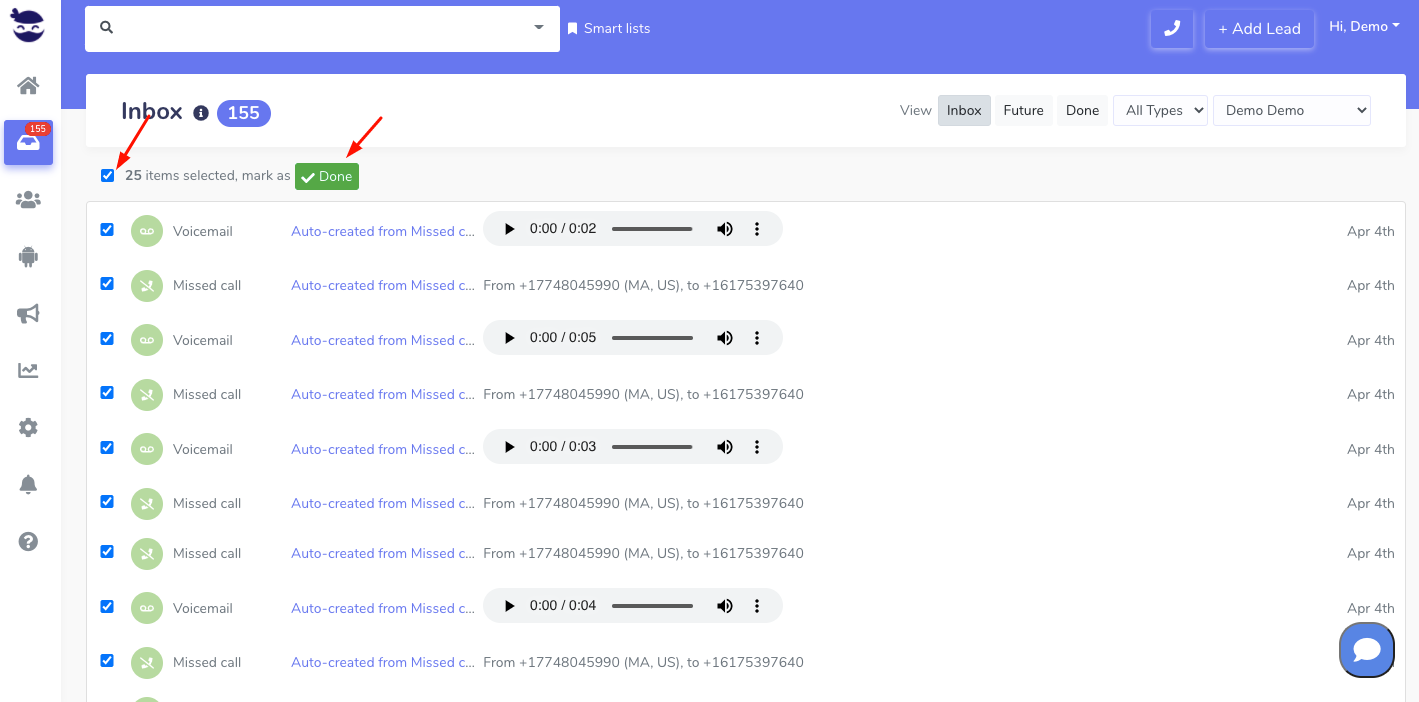
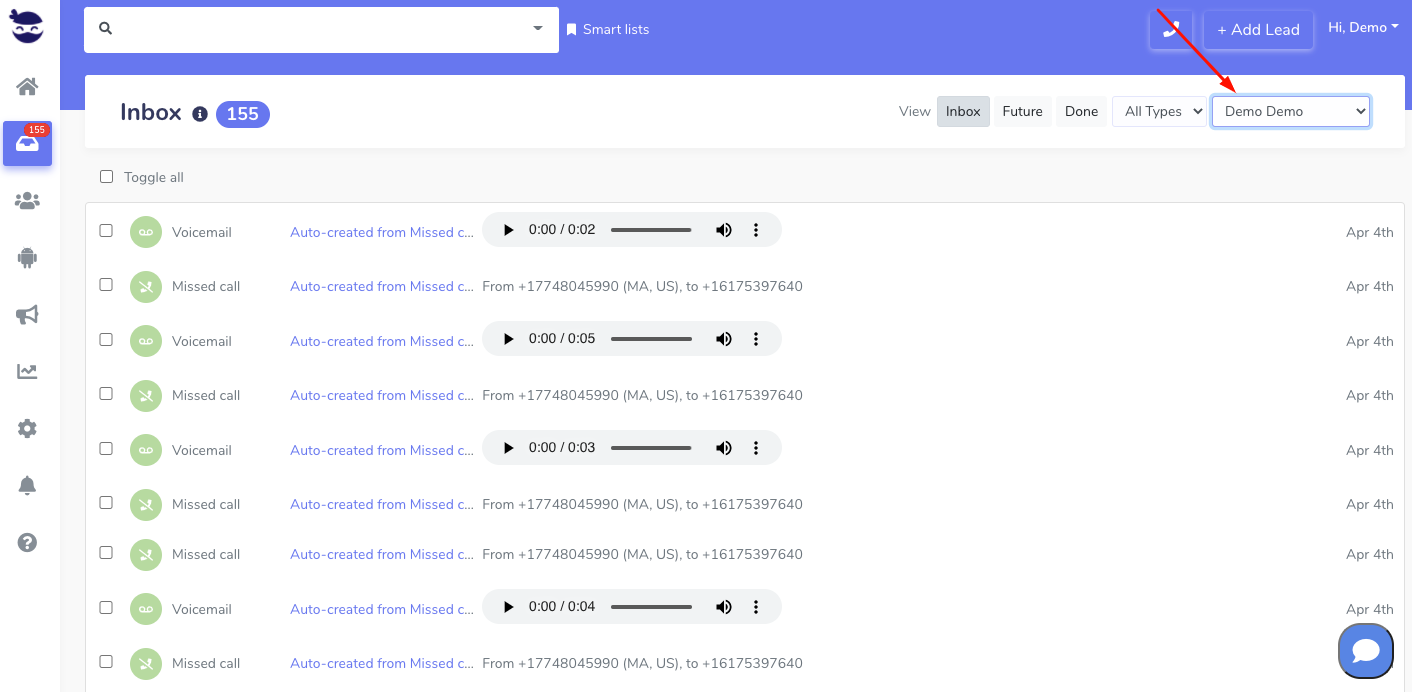
  • Then, check your aNinja account for the new lead automatically generated after the form submission.
You can use the below Javascript code

Where does the imported data appear?

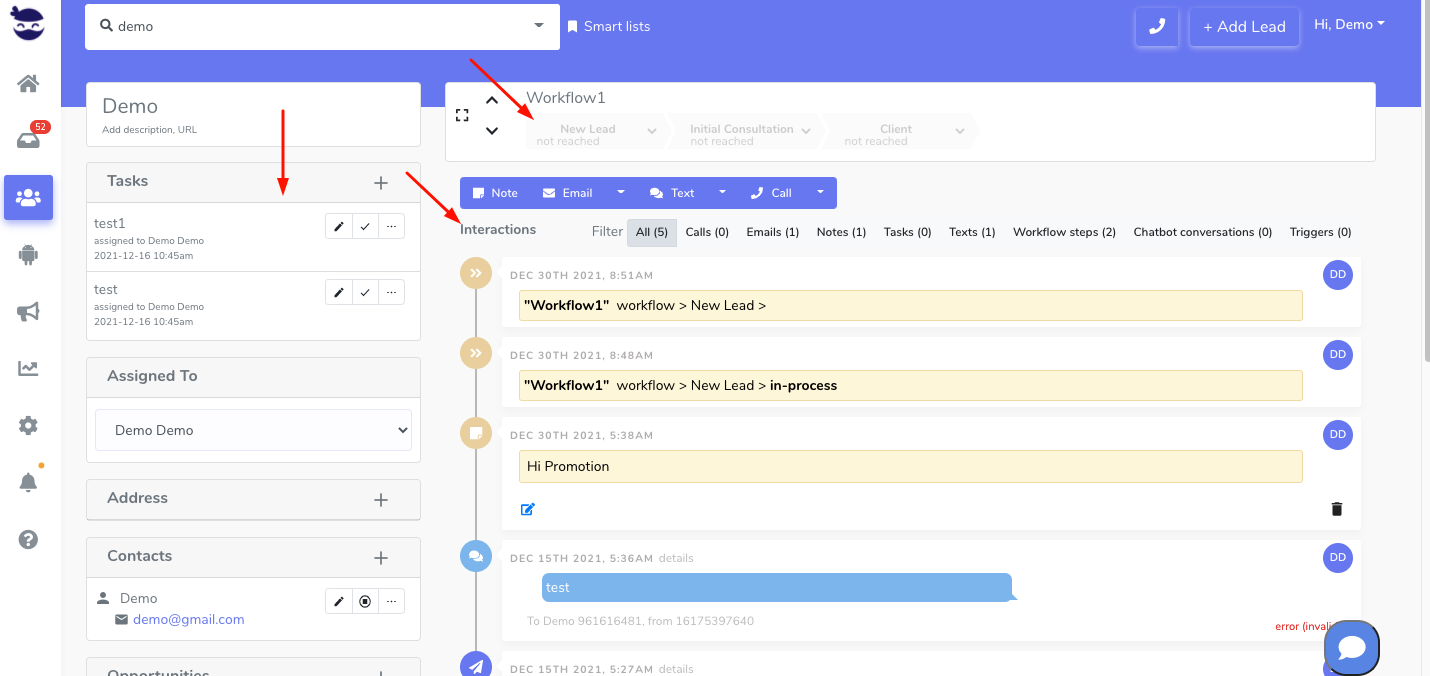
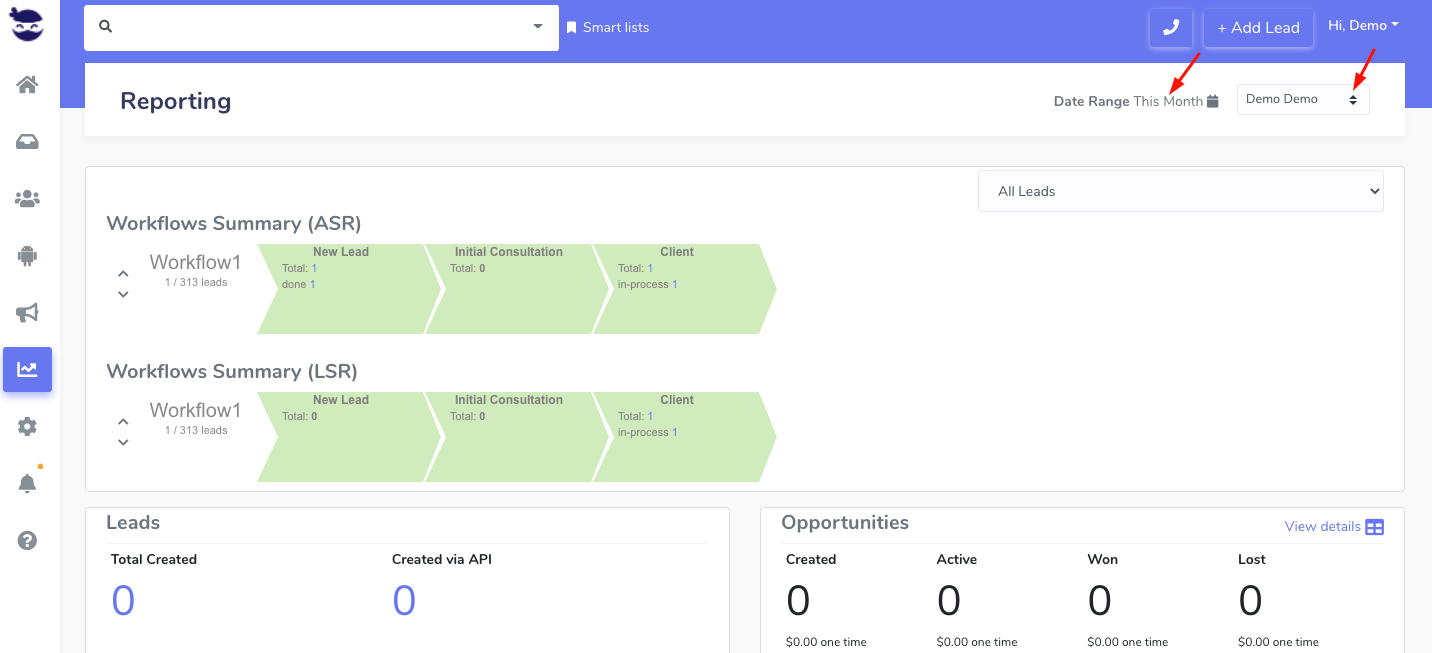
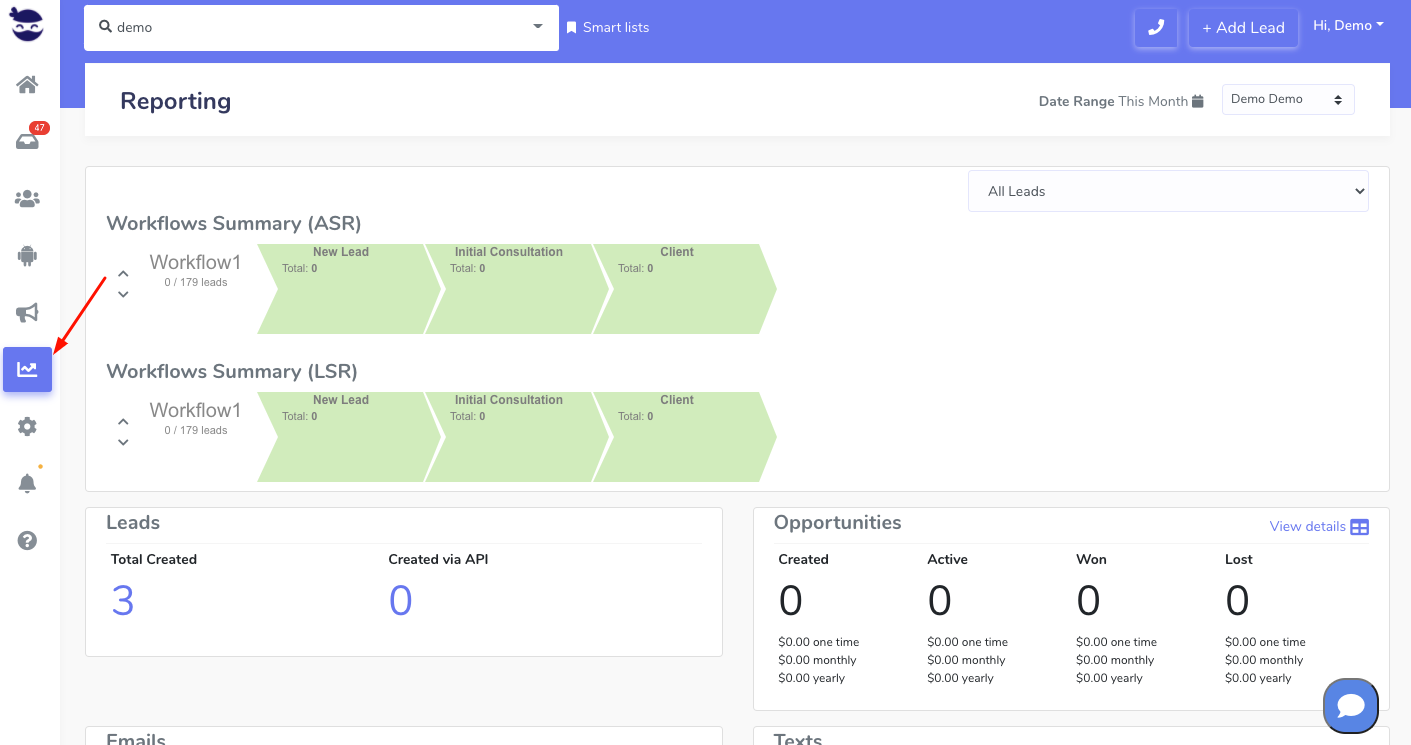
After the integration, you can search your aNinja CRM for the imported leads. You can also search for any custom field, opportunities, and any other info that you have imported.

  • Lead’s contacts appear in the leads contact section in the lead view
  • Opportunities also appear in the opportunity section in the lead view
  • The company’s info appears on the top left of the lead view, in the Company section.
  • Custom fields appear in the custom field section of the lead view.
  • Lead Search is a field that also appears in the bottom left of the lead view. Specifically, these are info/links on the lead or the organization found in Google search.

Need help with Vistaprint aNinja Form Integration? Leave us an email at support@aninja.com. And we will happily assist you.

Leads View v/s the Lead View

Leads View v/s the Lead View

In the leads view, you can see all or a group of leads that you have in your CRM. The lead view shows the info you have on a specific lead.

The Leads View

The Lead View

In the Lead View you will see the personal info of a specific lead with the history of interactions and activities you have made with this lead since his creation in your aNinja account and his status in the workflow.

Search for a lead to see his lead view info.

aNinja Automations

aNinja Automations are tools used to automate certain tasks and processes within your account. This includes automating tasks such as lead capture, lead scoring, lead nurturing, email campaigns, and more.

They help you to automatically follow up with leads, engage them, close them, and much more.

For example, an automation can be set up to automatically send a welcome email to new leads or customers, or trigger follow-up emails based on specific actions taken by the lead or customer.

Start by creating templates, use them in your sequences, to be launched when a condition is triggered on a special event.

Overview

Go ahead and click on the help (?) icon next to Automations in the header. It redirects you to a short youtube video to get an overview of automations.

  • Here, you see the building blocks that allow aNinja Automations to work:
  • Templates:
    • Here, you create and manage email, note, and text templates. You create your templates once. So you can use them later on.
  • Sequences
    • In this feature, you create and manage email and text sequences. You prepare sequences using the templates you have created.
  • Triggers
    • With triggers, you schedule templates and sequences. The system fires them when the set event, time, and date are due.


The Left Sidebar

The left sidebar is the control center for navigating your aNinja app. You can access any feature by clicking on its icon.

aNinja features on the left sidebarThe left sidebar

aNinja Centralized Inbox

The aNinja Inbox is a centralized view of all your incoming communication emails, textsvoicemails, missed calls, open tasks, and the chatbot conversations too.

Accessing the Inbox

On the left sidebar, click on Inbox icon.New Centralized Inbox

Inbox activities

You should be able to work exclusively from your aNinja Inbox.

From your Inbox items, you can:

Dynamic Inbox

The Inbox badge in the sidebar dynamically updates to show you how many Inbox items are available.

Concluded Tasks

  • Ultimately, all items of the aNinja centralized inbox should be completed on daily basis. However, if that was not possible, you can report them to the next day. Just toggle all the remaining items of the inbox and click on future in the toolbar.
  • The Inbox badge in the sidebar will show a green checkmark when all your Inbox items are done!

Task Management

  • You can also bulk mark inbox items as done / not done.

  • Answering a Lead from the Lead view (send/reply to an email, or send/reply to text) will automatically mark previous inbox items of the same type (e.g. email/text) as done.
  • Admin users can view inbox items for other team users, as well as filter them by type.

aNinja Reports

Get reports on the workflow of your latest activities and interactions that you’ve made in aNinja in a certain period of time. aNinja reports are simple, understandable, and provide you with a detailed view of your business performance.

When every user can see his reports, admin users can see all users reports and stats.

On the top right of the Reports page, you can select the period and the user.

Accessing Reports

On the left sidebar, click on Reports icon.aNinja reports

aNinja reports

Below are the reports provided by aNinja:

  • Workflow Summary (ASR)
    • See All Steps Reached across the workflow.
  • Workflow Summary (LSR)
    • See the Last Steps Reached across the workflow.
  • Leads
    • See stats of leads created and Via API.
  • Opportunities
    • See figures of the Opportunity statuses.
    • On the right corner of the Opportunity report, see details of leads’ opportunities. Inside the report, you can export stats into a CSV file.
  • Emails
    • See stats of all sent and opened emails, and the open rate.
  • Texts
    • See stats of incoming and outgoing texts.
  • Calls
    • See stats of outgoing calls and their total duration.

Automated Texts time window

With the automated Texts time window, you can schedule your texts so that they arrive at the most optimal time.

If your audience didn’t respond to a sequence previously, it’s likely because the timing wasn’t right. Experiment with different timings to see what works best. Consider sending texts during the weekend or early morning, when people are more likely to check their phones.

Specifying the time window for sending out text messages

  • Enable the “Only send automated texts within acceptable time window”
  • And set the start / end / timezone accordingly.

Benefits of sending messages within an acceptable time window

Sending text messages within an acceptable time window has numerous benefits, including:

  1. Increased Open Rates: If you send messages outside of business hours or during times when people are unlikely to be looking at their phones, your messages are more likely to go unopened or unnoticed.
  2. Improved Response Rates: You’re more likely to receive a response from your recipients.
  3. Enhanced Engagement: You’ll build stronger connections with your audience.
  4. Increased Conversions: You ensure that your messages are being received and acted upon. And you’re more likely to convert recipients into customers.
  5. Better Customer Experience: You’ll provide a better overall customer experience. People appreciate messages that are sent at times when they are more likely to be available and receptive

Creating a Chatbot in your aNinja account

aNinja Chatbot

Chatbot is a chatting widget that you embed on your website to answer your website visitors questions. Creating a Chatbot in your aNinja account and embedding it on your website also allows you to collect leads and inject them into your aNinja account.

What’s a Chatbot

A Chatbot is a live chat program that can be embedded in your website to answer the website visitor’s simple questions. The system injects a lead into your aNinja account with every chatbot conversation.

Creating aNinja Chatbot

  • Log in to your aNinja account
  • On the left sidebar, click on Marketing icon.
  • Click on Chat Bots
  • Then, choose Add Chat Bot
  • Click Add a Chatbot
  • Here, enter the business name and the virtual chatbot name.
  • If you choose to set your Chatbot off, it will indicate the message “Chatbot currently offline” to users.
  • Once you enable here the “Help Page Url”, it will expose the Knowledge base button in the chatbot for active users. This typically opens up in an iframe inside the chatbot the website of a knowledge base.

  • You can also type and enable an “Away message” and set the timeout to automatically send a message if no reply was sent back to the client.
  • Lastly, hit Save
  • Chatbot has now been added!
  • Then, you can see this info about your chatbot:
    • Name
    • Status (online/offline)
    • Total Conversations
    • Leads Generated
    • Conversations Rate
    • Created Date
    • Actions you can perform on this Chatbot:
      • Edit Playbook: This option allows you to create the steps of the Playbook.
      • Preview: This option allows you to see how your chatbot runs and test it before it goes live on the website.
      • View Conversations: You can view all the conversations initiated in this chatbot and join them too.

Editing a Chatbot

Now that you’ve created the Chatbot, you can still edit the information at any time.

  • Click on the edit pen next to the chatbot you want to edit.
  • Do the adjustments you want.
  • And click Save.

Cloning a Chatbot

You can create multiple scenarios of chatbots to run on different events on your website.

  • Click the clone icon next to the Chatbot name.
  • This creates a copy of the Chatbot and its playbook.
  • Go ahead and edit it and do the wished changes.

Deleting a Chatbot

Once you delete a chatbot, it’s no longer retrieved.

To delete a chatbot:

  • Click on the edit pen next to the chatbot you want to delete.
  • And hit the recycle bin icon.

  • Lastly, click OK on the pop-up message “Are you sure you want to delete this step?”.
  • Your chatbot and its playbook are now deleted.

Viewing the Chatbot Conversations

After every chatbot conversation, a new lead is created into your aNinja account with the info captured in the conversation.

If the lead closed the chatbot conversation before your reply, your message will appear in a bubble next to the chatbot on the website:

You can see these conversations:

  • In your Inbox. Just select “Chatbot” from the All types drop down.
  • And in your Dashboard widget “Chatbot Conversations”. If you can’t see this widget, just enable it from the little gear on the top right of the dashboard.
  • You also receive a notification by email.

Joining a Chatbot Conversation

You can join the chatbot conversation and directly engage with the user.

  • Joining the Chatbot conversation from the email:
    • Open the email and click on the link “View / Join the conversation“.
    • It opens your aNinja account > the lead view where you can join the conversation.
  • Joining the Chatbot conversation from the Dashboard Widget “Chatbot Conversations”:
    • Click on the lead name “chatbot xxxx“. And you’re redirected to the lead view where you can join the conversation.

Chatbot behavior

The chatbot pop-up gets triggered only for the first user visit to your site. It doesn’t automatically re-pop up on their subsequent visits, mainly because it gets annoying for repeat users. However, they can see that it’s in the bottom right section.

We can customize the following Chatbot behaviors:

  • Exposing the Chatbot initial greeting on every visit
  • Hiding the initial greeting message on page load
  • Delay showing the Chatbot widget for a number of seconds
  • Customizing widget container style to fit on the load page

Send us your request to support@aninja.com and we will implement the changes for you.

Adding a Phone Number to aNinja

In order to send SMS and make calls in aNinja, you need to have a phone number. You can either add a phone number to aNinja, or port your phone number.

Adding a phone number to aNinja

  • Log in to your account
  • On the left sidebar, click on Settings > Phone Numbers
  • Click Add Phone Number
  • Select any Available number or choose the State / ProvinceAdding a Phone Number to aNinja
  • Click on OK to confirm the purchase.

Note: If you didn’t find a phone number in the area code you want, you would want to consider “overlay area codes“.

aNinja Settings

Manage personal and system-wide settings to configure aNinja to work the way you want it to.


Overview 

  • You can access Settings by clicking on the gear icon in the left sidebar.
  • Also, you can directly access your personal account settings by clicking on the top-right drop-down next to your name when you are logged into aNinja.
  • Go ahead and click on the help (?) icon next to Settings. It will redirect you to a short youtube video to get an overview of the Settings.
  • Settings allow you to manage many aspects of aNinja. Feel free to explore the and reach out to us if you have any questions at support@aninja.com