Assigning a lead to a user

Assigning a lead to a user is the first task that you can do when a lead pops up into aNinja to turn them into a customer faster.

And in the sales/marketing process, multiple users may take charge of a lead, depending on their role.

Moreover, users with admin roles can manage the delegation of leads to different users.

When a lead is assigned to a user, if another user is sending them an email, it will pull out with the name of the user whom the lead is assigned to.

Assigning a lead to a user

Lead assignment can be done through:

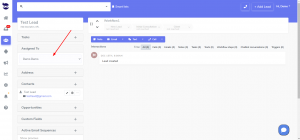
  • The lead view
    • This requires admin access if the option “Users can only see Leads assigned to them” is enabled in Settings > Global SettingsAssigning a lead to a user
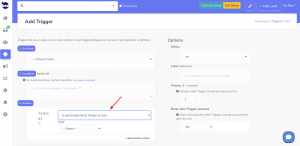
  • Triggers using [Lead assignment] actions

User ID

Each user is granted a private user-id as soon as they are invited to join aNinja, regardless of their role.

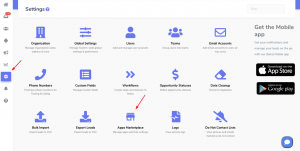
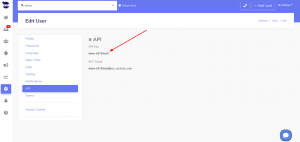
You can find the user-id in Settings > Users.

Using a Smartlist, you can utilize this user-id to filter leads assigned to specific users. You can also enable this Smartlist as a Dashboard Widget.

Similarly, you can narrow down your Opportunity report to see a snapshot of the users’ sales activities over a certain timeframe.
 

Squarespace API Integration

With Squarespace API Integration you can forward leads into your aNinja account simply using a programming code or an API. In this article, we show you how the Squarespace API Integration can be done.

Squarespace API Integration

The following example is specific to Squarespace (add in the “Page section Settings > Advanced tab > Page header code injection text area section for the page where you have the form you want to forward into aNinja).

// SQUARESPACE - example 1
// Add in javascript advanced:
<script src="https://ajax.googleapis.com/ajax/libs/jquery/3.2.1/jquery.min.js"></script>
<script>
$(document).ready(function() {
$('form').submit(function(e) {
var contact_name = $("input[name='fname']").val();
var contact_email1 = $( "input[name='email']").val();
var phone_areacode = $('*[data-title="Areacode"]').val();
var phone_prefix= $('*[data-title="Prefix"]').val();
var phone_line = $('*[data-title="Line"]').val();
var contact_phone1 = phone_areacode+phone_prefix+phone_line;
var subject = $($('select')[0]).val();
var pref_contact_method = $($('select')[1]).val();
var message = $('textarea#textarea-yui_3_17_2_1_1442700176413_134868-field').val();

$.ajax({
type: 'post',
url: "https://aninja.com/api/v1/contactform/?apikey=YOUR_API_KEY_HERE",
data: {
'contact_name': contact_name,
'contact_email1': contact_email1,
'contact_phone1': contact_phone1,
'your-comments': 'message: '+message+' subject:'+subject+' pref_contact_method: '+pref_contact_method
},
success: function (data) {
// alert('success');
}
});
});
});
</script>

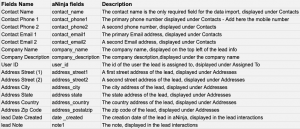
Fields mapping Table

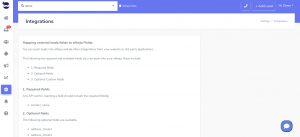
The following are standard fields you can map to, in addition to any custom fields created in your application that you can see under Settings > Custom fields.

Where does the imported data appear

After the integration, you can search your aNinja CRM for the imported leads. You can also search for any custom field, opportunities, and any other info that you have imported.

  • Lead’s contacts appear in the leads contact section in the lead view
  • Opportunities also appear in the opportunity section in the lead view
  • The company’s info appears on the top left of the lead view, in the Company section.
  • Custom fields appear in the custom field section of the lead view
  • Lead Search is a field that also appears in the bottom left of the lead view. Specifically, these are info/links on the lead or the organization found in Google search.

Need help with Squarespace API Integration? Leave us an email at support@aninja.com. And we will happily assist you.

Creating Leads in aNinja

In aNinja, creating leads can be done in several ways.

A growing database of leads means more potential engagement. So import your leads from different sources and keep them engaged with newsletters and product or service updates.

Creating leads in aNinja

In aNinja, you can create leads in multiple ways:

  1. Manually one at a time.
  2. Importing Leads in Bulk using CSV file.
  3. Third-party Integration using aNinja API (including Chatbot conversations, form submissions, and website integration).
  4. Importing leads from your Phone Contacts.
  5. Importing leads from your Gmail account.
  6. Creating leads using BCC email address.
  7. Generating a lead from incoming SMS.

1- Creating Leads manually

  • First, log in to your aNinja account.
  • Then, on the top right, click on + add lead

2- Importing leads from a CSV file

Another way to add leads to your aNinja account is importing contacts in a CSV or XLSX file directly to your aNinja account.

3- Third-party integration using aNinja API

In simple words, API is a set of functions that allow applications to interact with each other by exchanging data.

Basically, you can forward leads from your different marketplaces into your aNinja app using API.

  • Here, you need your aNinja API key for the integration.
  • After the integration, you start receiving leads in your aNinja account from the different integration channels, including Chatbot conversations, Form submissions, and website integration.

4- Importing contacts from your Gmail account

Importing contacts from your Gmail account is another way to expand your leads database.

5- Importing your Phone contacts

You can also get your phone contacts to your aNinja account.

6- Creating new leads using BCC email

By BCC’ing your private BCC email address, the system automatically creates new leads from the recipients.

After all, you want to get all your leads into one place to target them with your sales and marketing strategies.

7- Generating a lead from incoming SMS

This is a basic function in aNinja that generates a lead from an incoming SMS, if the phone number is not already saved in the system.

However, this practice is not available for incoming emails. So if the sender’s email is not saved in your system, you will not be able to see the email in aNinja. But it still shows in your email client (Gmail, Outlook, etc…).

Search for more help articles in aNinja Knowledge base.

Or reach us at support@aninja.com. Our support team will happily assist you.

Transactional vs Non-Transactional Emails

While transactional and non-transactional emails have different goals and strategies, you still need to integrate both types.

In this article, we show you the difference between the 2 types of emails and the risks involved.

We also recommend using Sendgrid to ensure the deliverability of your messages.

Transactional vs Non-Transactional Emails

Transactional email

It is an email triggered based on your lead’s action with your business, and it’s sent programmatically.

It can be Purchase confirmation or receipt, Request for feedback, Identity verification, Unsubscribe link, Password reset, Account notifications, Account creation, Welcome email, etc…

Transactional vs non-transactional emails

Non-Transactional email

It’s about sending an email to communicate a promotional message (i.g. Promotions and sales, Newsletters) to a group of leads; with the intention to drive them towards an action you want them to make. The purpose is typically commercial.

However, non-transactional emails tend to have a much lower engagement rate. Which can impact deliverability. You don’t want this to slow down transactional emails or risk them landing in the spam folder. Learn how to avoid your emails being marked as spam.

You can send non-transactional emails through your email client who uses an SMTP relay or web API. But it’s preferable to use a comprehensive email marketing solution like SendGrid. SendGrid can help deliver your messages, no matter what kind of content you’re sending.


aNinja Leads Forms Integration Channels

One of aNinja’s key features is its Leads Integration Channels which allow you to connect a variety of apps and tools to aNinja, enabling you to streamline your workflow and boost productivity.

By connecting your apps and tools to aNinja, you can streamline your workflow. Ultimately, the integration ensures that your customer data is up-to-date and consistent across all your platforms.

aNinja Leads Integration Channels

aNinja offers integration options with the following channels; but not limited to them. We are continuously extending our reach to connect with additional channels along the way.

Click on the links below to access the knowledge base articles. You’ll find step-by-step instructions on how to integrate the relevant components.

And before getting started with the integration, please make sure you have your aNinja aNinja API key.

Where does the imported data appear

After the integration, you can search your aNinja CRM for the imported leads. Also, you can search for any custom field, opportunities, and any other info that you have imported.

  • Lead’s contacts appears in the leads contact section in the lead view
  • Opportunities also appear in the opportunity section in the lead view
  • The company’s info appears on the top left of the lead view, in the Company section.
  • Custom fields appear in the custom field section of the lead view
  • Lastly, Lead Search is a field that also appears in the bottom left of the lead view. Specifically, these are info/links on the lead or the organization found in Google search.

Need any help? Please reach us at support@aninja.com and we will happily assist you!

Calendly API Integration

Calendly is an online Calendar that helps you schedule meetings without the back-and-forth emails. Moreover, Calendly appointments can now be automatically added to your aNinja account. You just need to activate the Calendly API integration.

The integration requires a “Professional” account with Calendly.

Activating the integration with Calendly

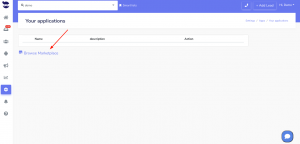
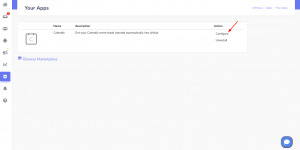
  • First, click on Browse Marketplace

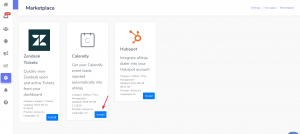
  • And, click on Install under Calendly

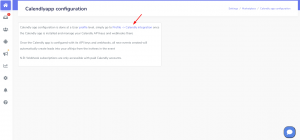
  • Then, hit Configure

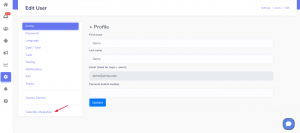
  • Click on Profile > Calendly Integration

  • You will be redirected to your user profile. Hit Calendly Integration

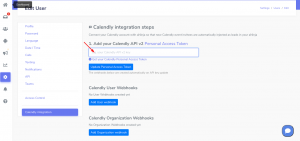
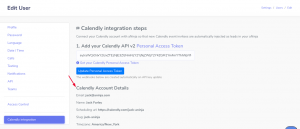
  • Under “Add your Calendly API v2“, add your Calendly Personal Access Token.
    • Click on “Get your Calendly Personal Access Token” to be redirected to your Calendly account.

  • Lastly, click on Update Personal Access Token.
  • You can see the Calendly account details:

  • To complete the integration, you want to activate ONE of the two webhooks:
    • Calendly User Webhooks
      • This triggers the webhooks for subscribed events that belong to the specific user.
    • OR Calendly Organization Webhooks:
      • This triggers the webhooks for ALL the subscribed events within the Organization.
  • If you can’t see the webhooks data under the User / Organization Webhooks, check your Calendly plan. The integration requires a “Professional” account.
  • Refresh Webhooks every time you make changes to the webhooks.

Now, any Calendly event automatically injects a lead into your aNinja account.

We’ve added a custom field ‘calendly_webhook_user_id‘ to the new leads created via Calendly. It represents the id of the user where the Calendly webhook is configured.

You can include the calendly_webhook_user_id in the trigger’s conditions, to e.g. assign the lead to the correspondent user.

Fields mapping

Ensure correct transfer of Calendly form fields to lead contacts and custom fields by using the provided naming conventions and mapping them to aNinja fields:

  • Name: map to contact_name (this is the only required field for the mapping).
  • Phone Number: map to contact_phone1
  • Email: map to contact_email1

My Calendly Integration Stopped Working

In this case, please check the following:

  • Firstly, if Calendly has regenerated or changed the Personal access token, then you should update it in aNinja for the integration to work.
  • Secondly, check if the Calendly App in aNinja is still active.
  • Thirdly, check if your Calendly account is still active and that it allows for API integrations (Professional plan).
  • Lastly, sometimes, Calendly automatically disables the webhooks if it receives error codes from our server. To re-enable it, you want to delete and recreate the webhook in your User profile > Calendly Integration.

After the integration, any Calendly appointment will automatically inject a lead into your aNinja account.

Where does the lead data appear

After the integration, you can search your aNinja CRM for new leads. You can also search for any custom field, opportunities, and any other captured info.

  • Lead’s contacts appear in the leads contact section in the lead view.
  • The company’s info appears on the top left of the lead view, in the Company section.
  • Custom fields appear in the custom field section of the lead view.
  • Lead Search is a field that also appears in the bottom left of the lead view. Specifically, these are info/links on the lead or the organization found in Google search.

Need help with the Calendly API integration? Leave us an email at support@aninja.com. And we will happily assist you!

Automate.io aNinja Integration

In this article, we show you how the Automate.io aNinja Integration can be easily done.

Getting Started

  • Log in to automate.io
  • Click on Create a Bot at the top of your dashboard. 
  • Give a name for your Bot. Let’s say ‘Facebook leads to aNinja‘, as we are using these two apps in this Bot.

Connecting the Trigger app

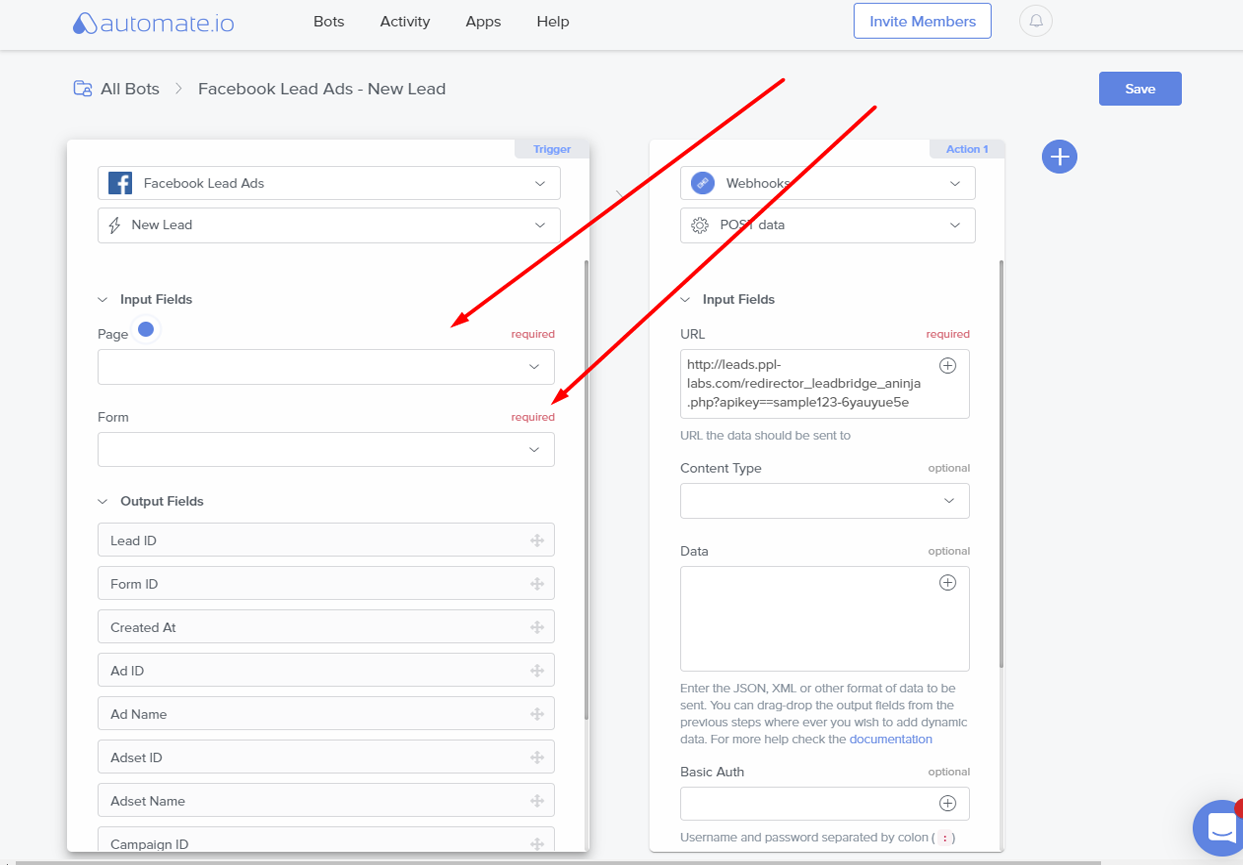
  • Select Facebook Lead Ads from the selection.

  • Under the Input Fields select the Page and Form.

Connecting the Action app

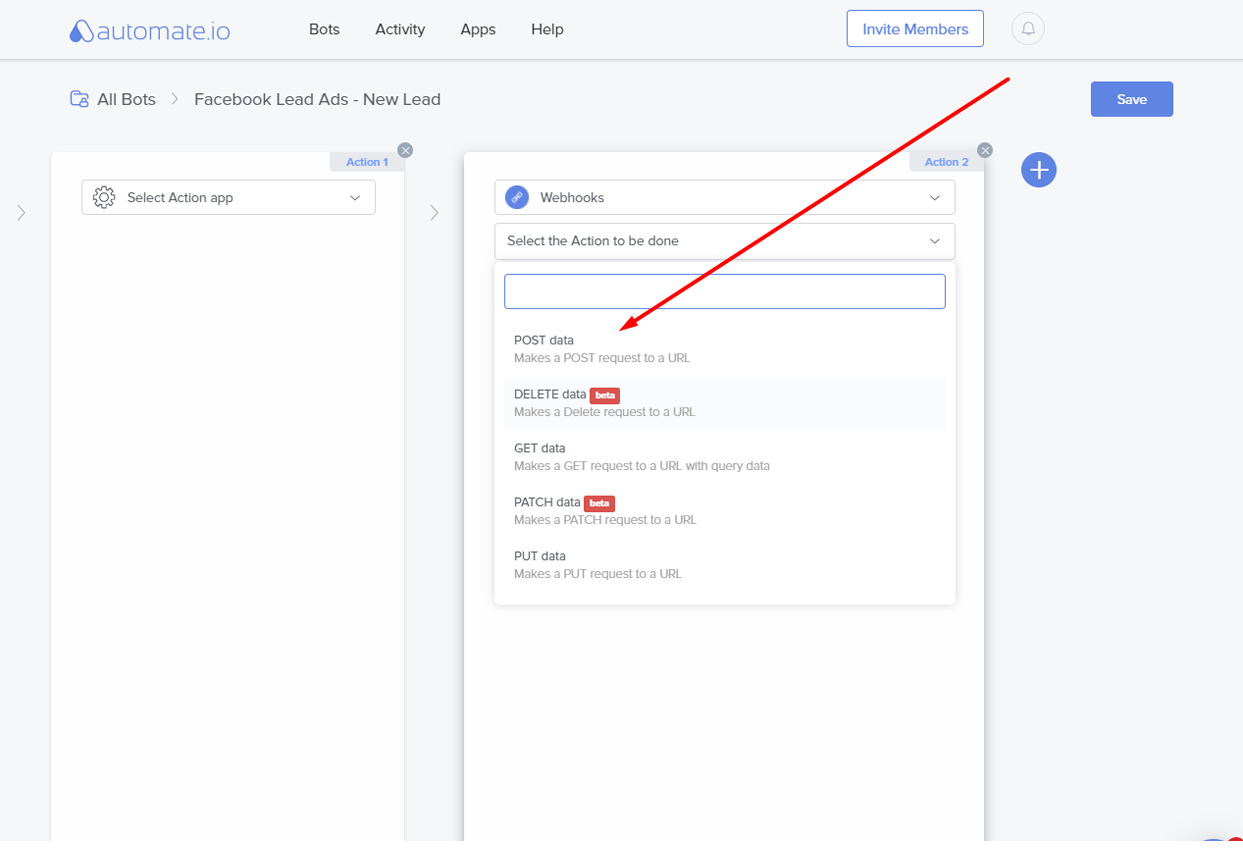
  • Select Webhooks under the action app.

Configuring the Action app

  • Select POST data under Webhooks.

  • Here, we need to find your aNinja API Key
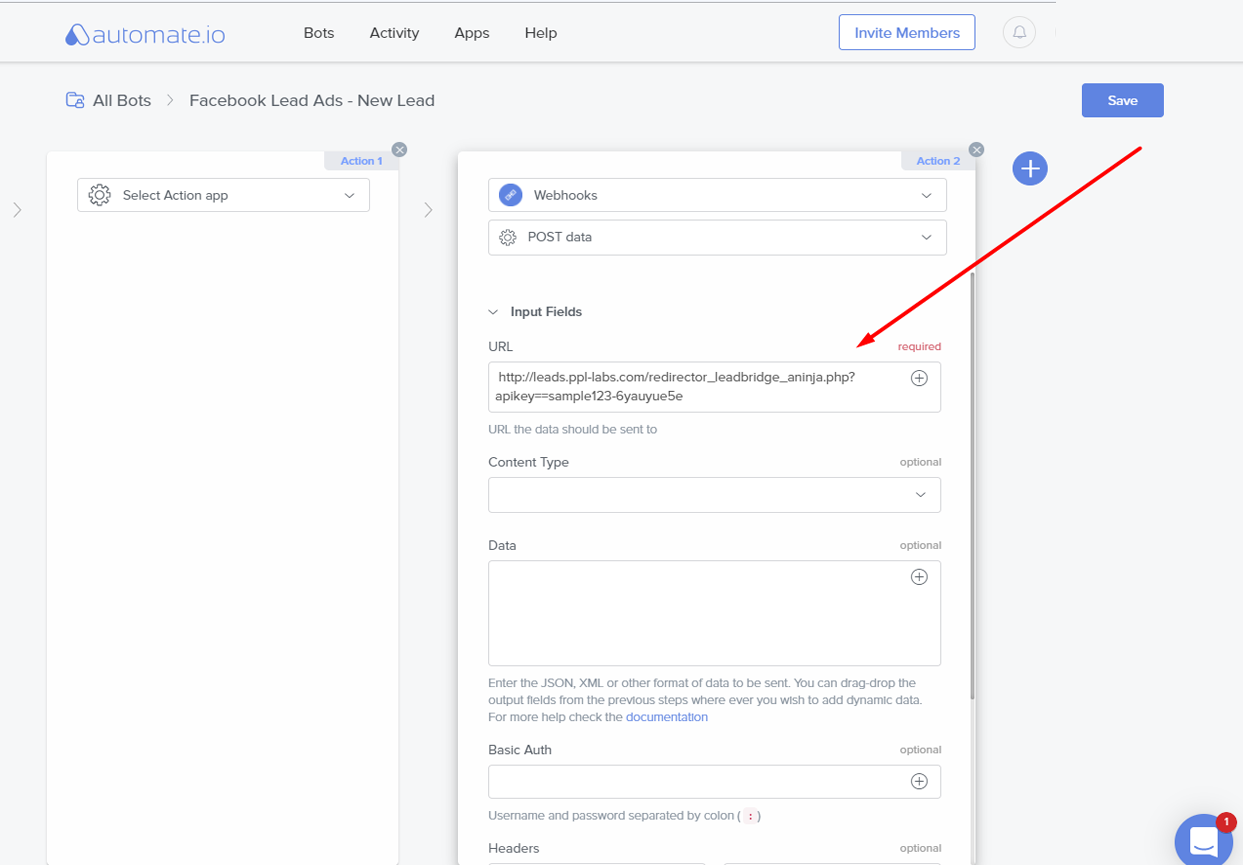
  • Under Submission URL field put:
    • https://aninja.com/api/v1/contactform/?apikey=YOUR_API_KEY
      • Example:  https://aninja.com/api/v1/contactform/?apikey=sample123-6yauyue5e

Enter the Posting URL

  • Copy & Paste in the Posting URL from above.

Saving and Turning ON the Bot

  • Lastly, after you are done with creating your Bot, save it by clicking on the Save button on the top-right.
  • You see that your Bot is in an OFF state. You can turn it ON using the toggle button.

Where does the imported data appear

After the integration, you can search your aNinja CRM for the imported leads. You can also search for any custom field, opportunities, and any other info that you have imported.

  • Lead contacts appear in the leads contact section in the lead view
  • Opportunities also appear in the opportunity section in the lead view
  • The company’s info appears on the top left of the lead view, in the Company section.
  • Custom fields appear in the custom field section of the lead view
  • Lead Search is a field that also appears in the bottom left of the lead view. Specifically, these are info/links on the lead or the organization found in Google search.

Need help with Automate.io aNinja Integration? Leave us an email at support@aninja.com. We will happily assist you.

Zillow aNinja Integration

In this article, we show you how the Zillow aNinja integration can be easily done.

With the Zillow integration, you can forward new leads from Zillow into your aNinja account. All you have to do is simply use a webhook from Zillow into aNinja.

Integrations allow you to centralize your leads in one place, augment the data you have on them, and target them with your automations.

Forwarding leads from Zillow

  • From your Zillow account, set up a webhook to push new leads in aNinja.
  • Basically, the aNinja webhook URL is
    https://aninja.com/api/v1/webhook_zillow?apikey=YOUR_ANINJA_API_KEY
  • So, you need to find your aNinja API key. In the left sidebar, Settings > Users
  • After that, you should then see your Zillow leads created in aNinja.

Where does the imported data appear?

After the integration, you can search your aNinja CRM for the imported leads. You can also search for any custom field, opportunities, and any other info that you have imported.

  • Lead’s contact appear in the leads contact section in the lead view
  • Opportunities also appear in the opportunity section in the lead view
  • The company’s info appears on the top left of the lead view, in the Company section.
  • Custom fields appear in the custom field section of the lead view
  • Lead Search is a field that also appears in the bottom left of the lead view. Specifically, these are info/links on the lead or the organization found in Google search.

Need help in your Zillow integration? Leave us an email at support@aninja.com. And, we will happily assist you!

WordPress Forms aNinja Integration

WordPress Forms aNinja integration is a way to integrate WordPress websites into your aNinja account.

After the integration, a lead is injected into your aNinja account after each form submission.

aNinja Integration

WordPress Sites Integration

You can integrate and augment the functionality of popular platforms with aNinja, including Shopify, Squarespace, WordPress, and Wix.

  • First, you need to find your API key
    • On the left sidebar, click on Settings > Users
    • Then, click the edit pen next to your name.
    • And, copy it to use it later in the integration

Fields mapping

Map the data on the aNinja fields and Form fields.

These are the default aNinja fields:

For the Custom Fields, just prefix the field name with “Custom.” e.g. Custom.Source

Where does the imported data appear

After the integration, you can search your aNinja CRM for your leads. You can also search for any custom field, opportunities, and any other info that was pushed from the form.

  • Lead’s contacts appear in the leads contact section in the lead view
  • Opportunities also appear in the opportunity section in the lead view
  • The company’s info appears on the top left of the lead view, in the Company section.
  • Custom fields appear in the custom field section of the lead view
  • Lead Search is afield that also appears in the bottom left of the lead view. Specifically, these are info/links on the lead or the organization found in Google search.

Need help in your aNinja integrations? Leave us an email at support@aninja.com. We will happily assist you!

aNinja API

aNinja API allows you to integrate your different marketplaces into your aNinja account using your private aNinja API key.

What is an API

An API (Application Programming Interface) is a set of functions that allows applications to access data and interact with external software components, operating systems, or microservices.
To simplify, an API delivers a user’s response to a system and eventually, sends the system’s response back to a user. For example:

  1. When you click “add to cart”;
  2. Then, an API tells the site you added a product to your cart;
  3. Afterward, the website puts the product in your cart
  4. As a result, your cart is updated.

Real-world examples of APIs

Looking for real-world examples of APIs? Every time you visit a page online, you’re interacting with API. Here are some real-world examples so you know how you can interact with aNinja API.

Conclusion

Think you might be ready to try APIs for yourself? Then you can explore APIs, send requests, see what data is returned, and much, much more.
http://developer.aninja.com/

Lastly, have any questions or clarifications on the aNinja API? Leave us a message at support@aninja.com. We will happily assist you.